
Search results for "Reduce damage" in Home Design Ideas
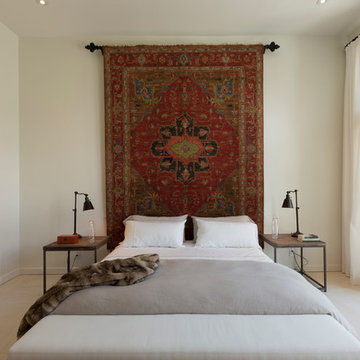
 Ashton Woods
Create a spacious and clean design withcentral track lighting in your master bedroom. Seen in Fiddler's Creek, a Naples community
Bedroom - mid-sized scandinavian master carpeted bedroom idea in Miami with white walls
Bedroom - mid-sized scandinavian master carpeted bedroom idea in Miami with white walls
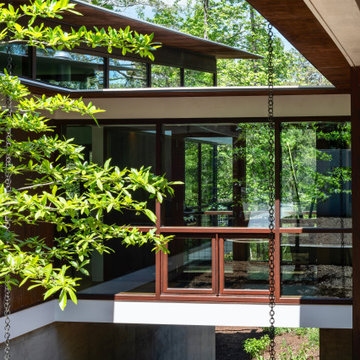
 Robert M. Cain, Architect
Holly Hill, a retirement home, whose owner's hobbies are gardening and restoration of classic cars, is nestled into the site contours to maximize views of the lake and minimize impact on the site.
Holly Hill is comprised of three wings joined by bridges: A wing facing a master garden to the east, another wing with workshop and a central activity, living, dining wing. Similar to a radiator the design increases the amount of exterior wall maximizing opportunities for natural ventilation during temperate months.
Other passive solar design features will include extensive eaves, sheltering porches and high-albedo roofs, as strategies for considerably reducing solar heat gain.
Daylighting with clerestories and solar tubes reduce daytime lighting requirements. Ground source geothermal heat pumps and superior to code insulation ensure minimal space conditioning costs. Corten steel siding and concrete foundation walls satisfy client requirements for low maintenance and durability. All light fixtures are LEDs.
Open and screened porches are strategically located to allow pleasant outdoor use at any time of day, particular season or, if necessary, insect challenge. Dramatic cantilevers allow the porches to project into the site’s beautiful mixed hardwood tree canopy without damaging root systems.
Guest arrive by vehicle with glimpses of the house and grounds through penetrations in the concrete wall enclosing the garden. One parked they are led through a garden composed of pavers, a fountain, benches, sculpture and plants. Views of the lake can be seen through and below the bridges.
Primary client goals were a sustainable low-maintenance house, primarily single floor living, orientation to views, natural light to interiors, maximization of individual privacy, creation of a formal outdoor space for gardening, incorporation of a full workshop for cars, generous indoor and outdoor social space for guests and parties.
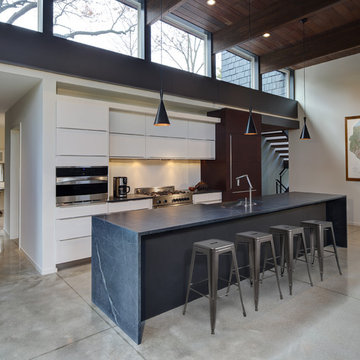
 Bruns Architecture
Tricia Shay Photography
Example of a trendy concrete floor and gray floor open concept kitchen design in Milwaukee with a farmhouse sink, flat-panel cabinets, white cabinets, soapstone countertops, stainless steel appliances and an island
Example of a trendy concrete floor and gray floor open concept kitchen design in Milwaukee with a farmhouse sink, flat-panel cabinets, white cabinets, soapstone countertops, stainless steel appliances and an island
Find the right local pro for your project
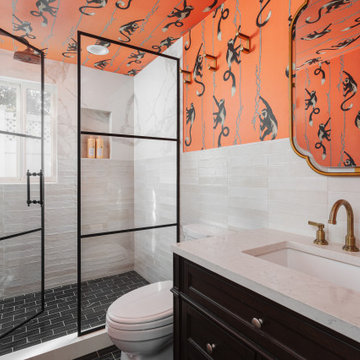
 Lulu Designs
Transitional white tile black floor, single-sink and wallpaper alcove shower photo in Orange County with shaker cabinets, black cabinets, orange walls, an undermount sink, a hinged shower door, white countertops, a niche and a freestanding vanity

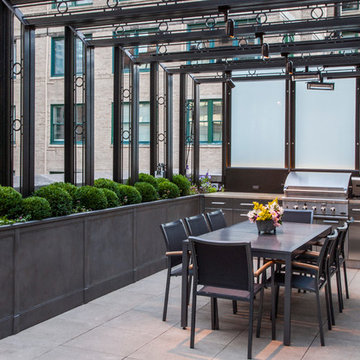
 Mariani Landscape
This space was completely empty, void of everything except the flooring tiles. All the containers and plantings, the patterned turf in the flooring, ornaments, and fixtures were part of the design. It spans three sides of the penthouse, extending the dining and living space out into the open.
Outdoor rooms are created with the alignment of fixtures and placement of furniture. The custom designed water feature is both a wall to separate the dining and living spaces and a work of art on its own. A shade system offers relief from the scorching sun without permanently blocking the view from the dining room. A frosted glass wall on the edge of the kitchen brings privacy and still allows light to filter into the space. The south wall is lined with planters to add some privacy and at night are lit as a focal point.

 Terri Brien Interiors
Complete bathroom remodel. this project was taken down to the studs. Custom design vanity with spa tower which incorporates a styling tools drawer, shallow makeup drawers and plenty of functional storage. To reduce waster space under the sink we made the cabinet below more shallow in order to have a drawer below which will optimize usable storage space.
 Patterson Custom Homes
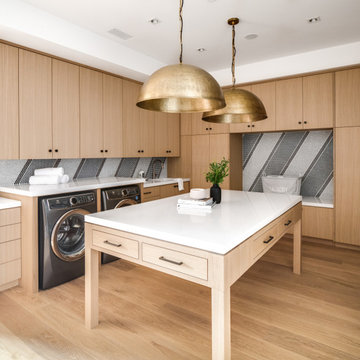
Inspiration for a 1960s light wood floor and beige floor utility room remodel in Los Angeles with a single-bowl sink, flat-panel cabinets, light wood cabinets, multicolored walls, a side-by-side washer/dryer and white countertops
 User
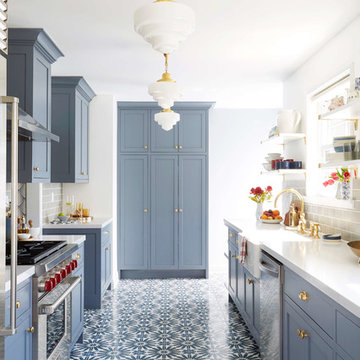
User"big al" cement encaustic tile in federal blue/nautical blue/ white make a fascinating focal point within the clean lines of this updated kitchen by emily henderson. inspired by the grand palace located in Granada Spain, big al, takes this classic arabesque motif and gives it the grandeur befitting of this palatial estate. shop here: https://www.cletile.com/products/big-al-8x8-stock?variant=52702594886
 NanDro Concrete & Sealants
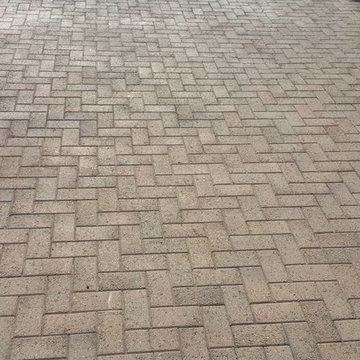
NanDro manufactures and installs environmentally-friendly protective shields, sealants and concrete materials. Our coatings, sealers and materials can be used to defend your surface from harmful environmental elements as well as everyday wear and tear! NanDro also is an applicator and can coat your products in house or out in the field.
NanDro Concrete Shield protects concrete and masonry surfaces from multiple destructive forces. Unprotected concrete surfaces can be damaged by water, salt spray, acid from food/beverages & waste, gum, graffiti, and chloride ion. When coated, the concrete surface will not only be protected from these damaging elements, but will also be aesthetically enhanced with a peel and flake resistant gloss or satin finish.
NanDro Wood Shield is the all in one solution for protecting your everyday wooden surfaces. It protects from UV damage, acid etching, water spots, moisture and other natural decay. These features make it ideal for use not only in the home, but also in industries such as restaurants, marinas, decks, furniture, and the rest of the great outdoors.
NanDro Metal Shield is ideal for protecting, and preserving metal surfaces under various conditions. It provides protection against all types of corrosion from water, salt spray, chemical exposure, as well as other damaging environmental elements. Due to its anti-corrosion properties, the Metal Coat also eliminates the need to polish easily tarnished metals, such as aluminum, copper, and brass. It also provides UV protection for the metal surface and reduces ice adhesion. Also available is the NanDro Stainless Steel Coating.
 Sun Control of Minnesota
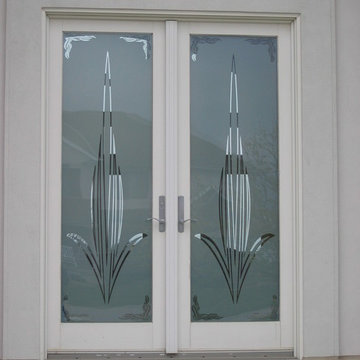
Custom frosted film on glass front door
Sun Control of Minnesota is a family owned and operated business that offers Professional Window Tinting Services. We first started out in one office with two part time installers, and we have now grown our business with over 15 employees badge-1980and four different locations in the metro area. We continue to expand our relationships with customers, as well as our service and quality of work.
We offer a complete line of Window Tinting services for Automotive, Commercial, Residential, & Marine applications. Our products include Decorative Frost Films, for glass enhancement; Safety/ Security Films, for Anti-Theft and Blast Protection; and 3M Paint Protection Film, for Automotive Rock Chip Prevention.
We focus on helping our customers reduce damaging UV rays, excessive solar heat gain, and glare from their interior spaces. UV rays, solar heat, and visible light are the main contributors to fading concerns in homes. Window Film reduces these elements to provide a beautiful view without having to close out the natural sunlight with a shade or blind. We provide the quality that competitors can’t even touch.
Our Mission is to Provide the Highest Quality Service, Products, and Installation in the Solar Energy Control Tint & Glass Film industry.
 Ellen Farber Strategic Design
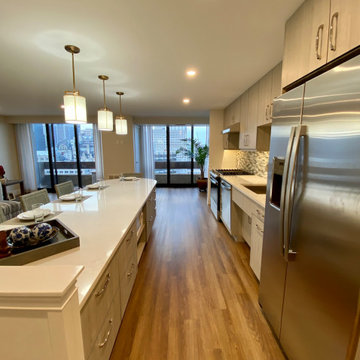
The kitchen was originally planned to mimic the location of appliances in her current kitchen to minimize re-learning of appliance locations. The only change was adding a trash cabinet between the fridge and the sink. A french door fridge allows someone in a wheelchair to easily access frozen and cold foods, while the water and ice dispenser on the outside of the door make it easy to stay hydrated rather than using the sink each time. She can roll up to the kitchen sink due to the recessed cabinetry under the sink or stand at counter height to put away dishes from the dishwasher. The dishwasher is ADA and very simple to use , and is raised off the floor so whether she is sitting or standing it's easier to reach. The gas cooktop has controls at the front making it easy to reach from the wheelchair and the exhaust fan above also has a control at the front. All cabinet door handles are D-shape, which makes them easy to grasp and there is plenty of electric outlets for charging phones, computers and small appliances. The kitchen island is table height at 30" so meal prep can be easily done in a wheelchair while guests and can be seated in a chair or wheelchair around the island. The dining chairs can also be turned around to add extra seating in the living room area. Pendant lights above the kitchen island light up the space, while recessed lighting in the kitchen and living room provide overall room lighting. There is also under cabinet lighting which makes the room glow at night! Wainscoting made of commercial grade material is strategically placed on sharp corners and exposed walls to reduce and minimize damage from the wheel chair, while creating a finished and complete look! We selected a free standing microwave to sit below the island, which is easy to use and is the same style as in her previous apartment. The island is 48" from the appliance wall, leaving ample space to open doors and maneuver around in the wheelchair and has easy access to the laundry area as well. We eliminated the pocket doors that had been in front of the laundry area for easy access, and since it was exposed, dressed it up with coordinating tile to the kitchen with additional cabinets above. There is a coordinating quartz counter on top of the washer and dryer for folding laundry or storing additional supplies.
 Barron Development Corp.
John Stillman Photography
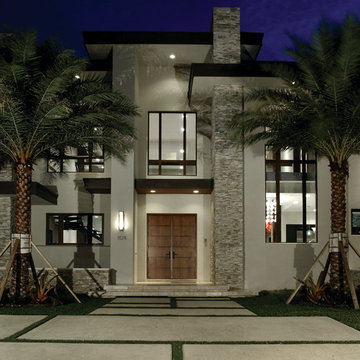
Contemporary white two-story exterior home idea in Miami
Contemporary white two-story exterior home idea in Miami

 Industrial Projects
Creating a comfortable outdoor living space is a priority for many homeowners and DIY enthusiasts. With rising summer temperatures, installing a shade tarp in your backyard offers an affordable and effective solution for sun protection. We’ve developed this detailed, step-by-step guide to help you confidently install a shade tarp that not only shields you from the sun but also adds aesthetic appeal to your outdoor area.
Benefits of Installing a Backyard Shade Tarp
Before diving into the installation process, let’s explore the key benefits of having a backyard shade tarp:
Provides UV Protection: Keeps your family and guests safe from harmful sun exposure.
Reduces Outdoor Temperatures: Creates a cooler, more enjoyable outdoor space.
Protects Outdoor Furniture: Extends the life of patio furniture by reducing sun damage.
Enhances Outdoor Aesthetics: Adds a modern, stylish look to your yard.
Budget-Friendly: More affordable compared to permanent structures like pergolas.
Materials and Tools You’ll Need
To begin your DIY backyard shade project, gather the following materials and tools:
Materials:
Shade tarp (UV-resistant and breathable)
Sturdy posts or existing structures (trees, fences, walls)
Mounting hardware (eye bolts, D-rings, turnbuckles, snap hooks)
Nylon or polyester rope, or stainless-steel wire
Concrete (if installing new posts)
Tools:
Power drill
Measuring tape
Level
Ladder
Wrench or adjustable spanner
Post hole digger (if installing new posts)
Step 1: Plan Your Shade Tarp Layout
The first step in installing your backyard shade tarp is careful planning. Take time to assess your outdoor area and answer these key questions:
Where is the sun’s path throughout the day?
What size and shape of tarp best suits your space?
Will you anchor the tarp to existing structures or install new posts?
What height do you want the tarp to sit at for maximum shade and airflow?
Pro Tip: Use string or garden hoses to visualize the tarp layout on the ground before making permanent decisions.
Step 2: Measure and Mark Anchor Points
Once you’ve determined the tarp’s location and orientation:
Measure the tarp dimensions.
Mark the exact points where each corner of the tarp will be anchored.
Ensure that the anchor points are at least 5–10% longer than the tarp size to allow for tensioning and slight adjustments.
Consider slope angles for water runoff. Aim for at least a 20-degree angle to prevent water pooling on the tarp.
Step 3: Install Support Posts (If Necessary)
If your backyard lacks existing anchor points like trees or fences, you’ll need to install sturdy support posts:
Dig post holes at least 24 inches deep and 8-12 inches wide for stability.
Set posts in concrete, making sure they remain plumb and level.
Allow the concrete to cure for at least 24–48 hours before applying tension from the tarp.
We recommend using pressure-treated wood, galvanized steel poles, or aluminum posts for longevity and strength.
Step 4: Install Mounting Hardware
With your anchor points ready, it’s time to install the necessary hardware:
Attach eye bolts or pad eyes securely into walls, posts, or other fixed structures.
For added flexibility and adjustability, install turnbuckles or tensioners to fine-tune the tarp’s tightness.
Connect snap hooks, D-rings, or carabiners to make assembly and disassembly easier.
Make sure all hardware is rated for outdoor use to prevent rust and corrosion.
Step 5: Attach and Tension the Shade Tarp
Now it’s time for the most satisfying part—mounting the shade tarp:
Begin by attaching one corner of the tarp to an anchor point.
Gradually attach the remaining corners, moving diagonally for even tension.
Adjust each connection point using your turnbuckles, ropes, or cables.
Pull the tarp tight enough to avoid sagging, but not so tight that it risks tearing.
Check that the tarp maintains the desired slope for rainwater runoff and adjust tension as needed.
Step 6: Final Adjustments and Safety Check
Before enjoying your new shaded area:
Inspect all anchor points and hardware for stability.
Test the tarp’s tension and make adjustments for even distribution.
Ensure that no sharp edges or loose connections remain that could damage the tarp or pose a safety hazard.
Confirm that the tarp is secure in windy conditions by giving it a gentle tug.
If you live in an area with frequent high winds, consider removing the tarp during storms to prevent damage.
Step 7: Enjoy Your Shaded Backyard Oasis
Once installed, your backyard shade tarp provides a comfortable and protective space for outdoor gatherings, relaxation, or family activities. You can decorate underneath with outdoor furniture, string lights, or potted plants to create a personalized outdoor retreat.
Maintenance Tips for Long-Lasting Shade Tarp Performance
To extend the life of your shade tarp, follow these maintenance guidelines:
Regularly check for wear and tear, especially around anchor points and seams.
Clean the tarp periodically with mild soap and water to prevent mildew buildup.
Store the tarp indoors during harsh weather seasons if it's not designed for year-round use.
Tighten hardware as needed to maintain proper tension and avoid sagging.
By following these simple care steps, your shade tarp will continue to deliver years of sun protection and outdoor comfort.
Conclusion: Upgrade Your Outdoor Space with a DIY Shade Tarp
Installing a shade tarp in your backyard is a cost-effective and rewarding DIY project. With careful planning, quality materials, and proper installation techniques, you’ll enjoy cool, shaded outdoor living all season long. This step-by-step guide ensures your project goes smoothly from start to finish.
 United Porte Inc
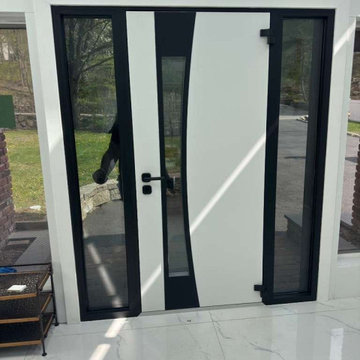
Your front door is your best defender. It protects you, your family, and your most valuable personal belongings from theft and damage.
Special feature is a durable aluminum profiles that enhance both aesthetics and security.
Furthermore, VDom Doors insulate your home from extreme weather conditions, as well as unwanted animals, insects, and dust from entering.
Our doors have several superior features:
- Single sheet of metal is used in construction. No welded seams are best as these can significantly weaken the structural integrity of the entranceway. Our doors are also more resilient to mechanic damage, such as sledgehammer strikes.
- The advantage of a single, non-welded door is that it reduces internal condensation. Over time, condensation can negatively affect the door mechanisms.
- Stiffening Ribs: These non-visible details add to our door's security.
- Quality insulation serves to reduce unwanted external noise, as well as protect against extreme heat, and severe cold.
Introducing our modern exterior entrance door, a stylish addition to any contemporary home or building. Crafted from a single sheet of metal, this door features a sturdy aluminum frame and threshold for added durability and security. The simple yet striking design is perfect for those who prefer a minimalist aesthetic. Upgrade your entrance with our modern exterior entrance door today.
Model - 6116 Cynex
Color - Natural Oak
Glass - safety triplex, with mirrored-clear effect
Door thickness - 3 1/4"
Frame thickness - 4"
Exterior design - modern curved black insert with oak-look coating.
Interior design - matching curved black steel with white enamel metal finish.
Hardware included:
- Aluminum frame 4" thick - dimensions of the door 36" x 80" with the frame is 38" x 82".
- Aluminum threshold.
- Plate-type, primary lock for armoured type of steel doors, locked by 3 key turns, doors are captured in 3 places. The lock has replaceable core and 5 keys.
- Cylinder.
- 3D Hinges.
- Turnknob for lock.
- Armor plate for the lock.
- Modern Handle
 Robert M. Cain, Architect
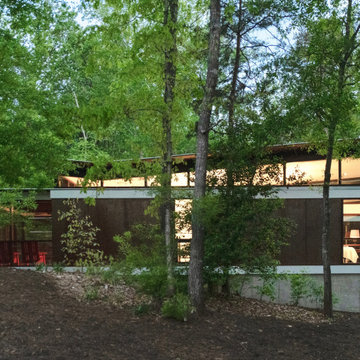
Holly Hill, a retirement home, whose owner's hobbies are gardening and restoration of classic cars, is nestled into the site contours to maximize views of the lake and minimize impact on the site.
Holly Hill is comprised of three wings joined by bridges: A wing facing a master garden to the east, another wing with workshop and a central activity, living, dining wing. Similar to a radiator the design increases the amount of exterior wall maximizing opportunities for natural ventilation during temperate months.
Other passive solar design features will include extensive eaves, sheltering porches and high-albedo roofs, as strategies for considerably reducing solar heat gain.
Daylighting with clerestories and solar tubes reduce daytime lighting requirements. Ground source geothermal heat pumps and superior to code insulation ensure minimal space conditioning costs. Corten steel siding and concrete foundation walls satisfy client requirements for low maintenance and durability. All light fixtures are LEDs.
Open and screened porches are strategically located to allow pleasant outdoor use at any time of day, particular season or, if necessary, insect challenge. Dramatic cantilevers allow the porches to project into the site’s beautiful mixed hardwood tree canopy without damaging root systems.
Guest arrive by vehicle with glimpses of the house and grounds through penetrations in the concrete wall enclosing the garden. One parked they are led through a garden composed of pavers, a fountain, benches, sculpture and plants. Views of the lake can be seen through and below the bridges.
Primary client goals were a sustainable low-maintenance house, primarily single floor living, orientation to views, natural light to interiors, maximization of individual privacy, creation of a formal outdoor space for gardening, incorporation of a full workshop for cars, generous indoor and outdoor social space for guests and parties.
 Robert M. Cain, Architect
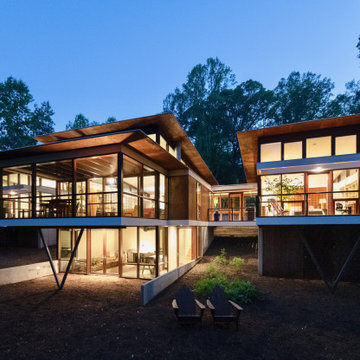
Holly Hill, a retirement home, whose owner's hobbies are gardening and restoration of classic cars, is nestled into the site contours to maximize views of the lake and minimize impact on the site.
Holly Hill is comprised of three wings joined by bridges: A wing facing a master garden to the east, another wing with workshop and a central activity, living, dining wing. Similar to a radiator the design increases the amount of exterior wall maximizing opportunities for natural ventilation during temperate months.
Other passive solar design features will include extensive eaves, sheltering porches and high-albedo roofs, as strategies for considerably reducing solar heat gain.
Daylighting with clerestories and solar tubes reduce daytime lighting requirements. Ground source geothermal heat pumps and superior to code insulation ensure minimal space conditioning costs. Corten steel siding and concrete foundation walls satisfy client requirements for low maintenance and durability. All light fixtures are LEDs.
Open and screened porches are strategically located to allow pleasant outdoor use at any time of day, particular season or, if necessary, insect challenge. Dramatic cantilevers allow the porches to project into the site’s beautiful mixed hardwood tree canopy without damaging root systems.
Guest arrive by vehicle with glimpses of the house and grounds through penetrations in the concrete wall enclosing the garden. One parked they are led through a garden composed of pavers, a fountain, benches, sculpture and plants. Views of the lake can be seen through and below the bridges.
Primary client goals were a sustainable low-maintenance house, primarily single floor living, orientation to views, natural light to interiors, maximization of individual privacy, creation of a formal outdoor space for gardening, incorporation of a full workshop for cars, generous indoor and outdoor social space for guests and parties.
 Linnaea Keane
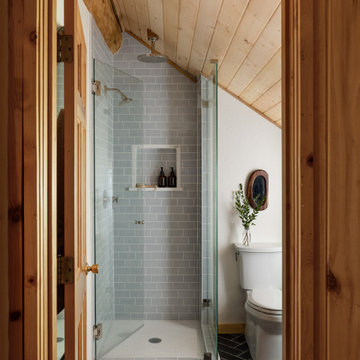
Inspiration for a rustic gray tile and subway tile black floor, vaulted ceiling and wood ceiling bathroom remodel in Seattle with a two-piece toilet and white walls
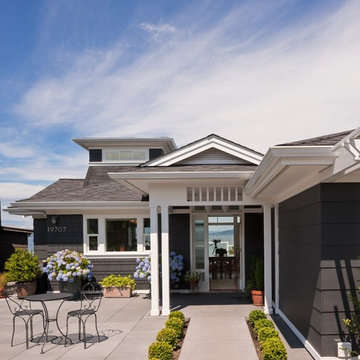
 Scott Becker | Architect
Main entry & courtyard: Sozinho Imagery
Example of a beach style gray one-story exterior home design in Seattle
Example of a beach style gray one-story exterior home design in Seattle
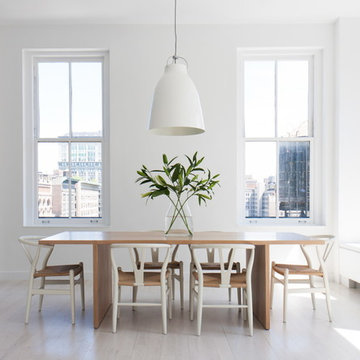
 Resolution: 4 Architecture
Resolution: 4 Architecture
Example of a danish light wood floor and white floor dining room design in New York with white walls
Example of a danish light wood floor and white floor dining room design in New York with white walls
1