
Search results for "Reduce room" in Home Design Ideas
 Ke Design Collective Inc.
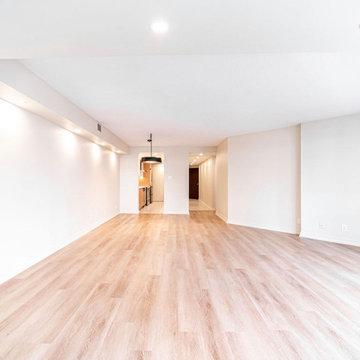
A complete two bath & kitchen renovation in a condo. Client wanted a larger kitchen area and better layout for bathrooms. We removed a wall near the entrance and extended the kitchen with additional cabinetry and storage area. Laundry room was reduced to accommodate the larger kitchen.
The shared and primary bathrooms were gutted and fully remodeled as well. Enlarged shower enclosure in shared bath for more space. Layout of primary bathroom was changed for better accessibility and flow in the area. Vanity and shower was relocated to create a more spacious and inviting environment.
Client didn’t like the current floors, we replaced it with luxury vinyl planks for durability.

 Regan Baker Design Inc.
Suzanna Scott Photography
Living room - rustic living room idea in San Francisco with a wood stove
Living room - rustic living room idea in San Francisco with a wood stove

 Mottram Architecture
Michael Eric Berube, Maine Virtual Home ToursTimber frame homes offer unique challenges during a remodel. What often makes them beautiful and attractive to most homeowners, also makes them challenging for space requirements.
Context: The lovely couple that owned this home were struggling with some interesting floor plan challenges that just didn't work for their family. The loved the beautiful timbers and woodwork of their home, but the dramatically sloping ceilings on the second floor, particularly in the bathroom, just didn't work for this 1 1/2 bath home. Needing to use the skylight to approach the toilet was a less then ideal scenario. Although the bathroom footprint was more then adequate, the sloped ceiling only made half of the space useable. Check out the Before/After post on our blog to see the photos of the house pre-renovation. As much as they loved all the wood features in their home, another challenge they had was light. The wood ceiling made everything inside the house darker, even with a fantastic array of south facing windows, there were spaces in the home that felt dark and small. When they contacted us they wanted to know how could they make their brighter and more inviting, were there solutions to the 2nd floor sloped ceiling issues, and if they were going to do all of this work, how could they make their home more comfortable and efficient. A nagging water leak in the upstairs bathroom spurred them into action and here is how we solved their dilemma.
Conclusion: First, we added a little dormer to the rear of the house so we could get full headroom in nearly all of the upstairs bathroom! Then we decided to extend that dormer one more timber bay over to create a walk in closet with natural light and plenty of space. Since we were contemplating energy efficiency, we resolved a nagging issue that is present in a lot of timber frame construction, air tightness. Commonly found in timber frame construction, fiberglass insulation is installed in the rafter bays and board ceilings are installed over top. Unfortunately, board ceilings are anything but air tight, and fiberglass insulation needs to be in an airtight cavity for maximum effectiveness. So we were able to solve two issues at the same time for this homeowner. We removed the board ceiling and fiberglass insulation, we dense packed the rafter bays with cellulose insulation, and installed sheetrock in place of the boards. The boards were salvaged for re-use by the homeowner, and the space and light quality was dramatically improved. Some may think that losing the board ceiling took something away from the space, but what you'll see in the pictures is that it highly accentuates the heavy timbers and really makes them stand out in a beautiful way. Now with this added airtightness, better insulation, and brighter space, the homeowner hardly runs their wood stove, and it's so quiet in the space, an added bonus from changing the insulation. It became necessary to also add a sheetrock ceiling to the living room to hide the plumbing from the new bathroom layout above. Changing this ceiling gave the homeowner some real quality lighting that was lacking in the living room before. The brighter ceiling and new lighting layout completely transforms the living room into a space you want to hang out, even though the layout didn't change at all. When the homeowner saw the finished spaces she said "I can't believe this is my house, I want to live in this house"
Energy Efficiency: I touched a little on the efficiency above, but like all projects done with Mottram Architecture, we always want to leave you with a little extra. Timber frame construction with board ceilings and fiberglass insulation are notoriously leaky! If you want to know what we think about fiberglass insulation, check our our blog post on Why Fiberglass Insulation Sucks. By installing cellulose insulation and covering it with sheetrock we were able to greatly reduce the heat flowing out of this home. It not only improves cashflow it improves the comfort level in the space. Who wants to sit in their living room and feel a draft? Let us remind you, we are not saying cellulose insulation is an air barrier, we use the sheetrock to help with that, but it does significantly reduce the air flow over fiberglass insulation. And when we reduce the airflow, we reduce the heat flow. And when we reduce the heat flow, we reduce the need to re-heat that drafty air from outside. When it comes to energy efficiency the first and best place to start is air infiltration. We greatly reduced the air infiltration with the new insulation, but we also added a hat and warm boots. What I mean by that is, we improved the insulation in the roof, and we installed insulation in the basement. Maybe it's a silly analogy, but when you think about keeping warm, we always start with the hat and boots! With sustainability in mind, the next project will be to add a deck to the front of this house with rain catchment barrels from the metal roof. They are planning to plant a garden in the spring and the rain catchment system will help to irrigate the new garden.
Builder: East Shore Builders
Photographer: Michael Eric Berube
Find the right local pro for your project

 EcoCraft Homes
Our homes are resilient, adaptable, and when combined with Solar can be built to zero energy standards. Designs come complete with Solar ready features, LED Lighting, structured wiring, and expandable building automation technology.
Ultra efficient mechanical equipment with small diameter ducts and variable speed blowers reduce energy use and ensure consistent temperatures between rooms, zones, and floors. Modular Prefabrication offers a smarter building system that leverages manufacturing efficiency, advanced engineering technology, and highly skilled labor to precisely produce high quality, durable, and efficient buildings in a fraction of the time needed in traditional construction.
This is not your standard prefab home! EcoCraft homes are designed and constructed to provide our home owners with a look and feel that is unlike anything you have ever experienced!

 Wine Cellar Innovations
This is a beauty! Allheart Redwood wood with a Dark Walnut stain. Includes archway over tabletop and diamond bin, curved corners with waterfall racks leading down. With a beautiful wine room chandelier.
"Eric Flores was very helpful with hints and videos. The racks assembled quite well as the components' quality was very consistent. The nail gun really reduced assembly time. A nail would occasionally go slightly to the side due to wood grain and would have to be redone. This was probably less than one percent. Overall, I would give the kits a 9.5 /10.0. The room is 8'-10" x 11'- 8" with 2x6 wall studs, sprayed foam insulation, and an exterior "speak-easy" door. We are using a WhisperKool through-the-wall unit with a bottle probe holding 60 degrees F and 50% humidity. The fun part was the trip to Healdsburg (Sonoma County) to stock up on their local award winning Cabs, Zinns, PNs, & Chards."

 User
Industrial style meets Mid-Century Modern in this contemporary two-storey home design, which features zones for multi-generational living, a cool room, library and a walkway that overlooks a private central garden. The design has incorporated passive solar design elements and a side entry to reduce wastage. Featured on contemporist.com, the go-to website for all things design, travel and art, It generated global attention with it’s bold, organic design and eclectic mix of furniture, fixtures and finishes, including Spotted Gum cladding, concrete and polished plaster.
 Mottram Architecture
Timber frame homes offer unique challenges during a remodel. What often makes them beautiful and attractive to most homeowners, also makes them challenging for space requirements.
Context: The lovely couple that owned this home were struggling with some interesting floor plan challenges that just didn't work for their family. The loved the beautiful timbers and woodwork of their home, but the dramatically sloping ceilings on the second floor, particularly in the bathroom, just didn't work for this 1 1/2 bath home. Needing to use the skylight to approach the toilet was a less then ideal scenario. Although the bathroom footprint was more then adequate, the sloped ceiling only made half of the space useable. Check out the Before/After post on our blog to see the photos of the house pre-renovation. As much as they loved all the wood features in their home, another challenge they had was light. The wood ceiling made everything inside the house darker, even with a fantastic array of south facing windows, there were spaces in the home that felt dark and small. When they contacted us they wanted to know how could they make their brighter and more inviting, were there solutions to the 2nd floor sloped ceiling issues, and if they were going to do all of this work, how could they make their home more comfortable and efficient. A nagging water leak in the upstairs bathroom spurred them into action and here is how we solved their dilemma.
Conclusion: First, we added a little dormer to the rear of the house so we could get full headroom in nearly all of the upstairs bathroom! Then we decided to extend that dormer one more timber bay over to create a walk in closet with natural light and plenty of space. Since we were contemplating energy efficiency, we resolved a nagging issue that is present in a lot of timber frame construction, air tightness. Commonly found in timber frame construction, fiberglass insulation is installed in the rafter bays and board ceilings are installed over top. Unfortunately, board ceilings are anything but air tight, and fiberglass insulation needs to be in an airtight cavity for maximum effectiveness. So we were able to solve two issues at the same time for this homeowner. We removed the board ceiling and fiberglass insulation, we dense packed the rafter bays with cellulose insulation, and installed sheetrock in place of the boards. The boards were salvaged for re-use by the homeowner, and the space and light quality was dramatically improved. Some may think that losing the board ceiling took something away from the space, but what you'll see in the pictures is that it highly accentuates the heavy timbers and really makes them stand out in a beautiful way. Now with this added airtightness, better insulation, and brighter space, the homeowner hardly runs their wood stove, and it's so quiet in the space, an added bonus from changing the insulation. It became necessary to also add a sheetrock ceiling to the living room to hide the plumbing from the new bathroom layout above. Changing this ceiling gave the homeowner some real quality lighting that was lacking in the living room before. The brighter ceiling and new lighting layout completely transforms the living room into a space you want to hang out, even though the layout didn't change at all. When the homeowner saw the finished spaces she said "I can't believe this is my house, I want to live in this house"
Energy Efficiency: I touched a little on the efficiency above, but like all projects done with Mottram Architecture, we always want to leave you with a little extra. Timber frame construction with board ceilings and fiberglass insulation are notoriously leaky! If you want to know what we think about fiberglass insulation, check our our blog post on Why Fiberglass Insulation Sucks. By installing cellulose insulation and covering it with sheetrock we were able to greatly reduce the heat flowing out of this home. It not only improves cashflow it improves the comfort level in the space. Who wants to sit in their living room and feel a draft? Let us remind you, we are not saying cellulose insulation is an air barrier, we use the sheetrock to help with that, but it does significantly reduce the air flow over fiberglass insulation. And when we reduce the airflow, we reduce the heat flow. And when we reduce the heat flow, we reduce the need to re-heat that drafty air from outside. When it comes to energy efficiency the first and best place to start is air infiltration. We greatly reduced the air infiltration with the new insulation, but we also added a hat and warm boots. What I mean by that is, we improved the insulation in the roof, and we installed insulation in the basement. Maybe it's a silly analogy, but when you think about keeping warm, we always start with the hat and boots! With sustainability in mind, the next project will be to add a deck to the front of this house with rain catchment barrels from the metal roof. They are planning to plant a garden in the spring and the rain catchment system will help to irrigate the new garden.
Builder: East Shore Builders
Photographer: Michael Eric Berube
Sponsored
Sunbury, OH

J.Holderby - Renovations
Franklin County's Leading General Contractors - 2X Best of Houzz!
 Lee Kimball
Our client is a cooking and gardening enthusiast so they wanted us to create a functional two zone working chef's kitchen while incorporating the exterior landscape into the room. We were faced with the challenge of working around the existing vacuum and water line chase located in the center of the room, low ceiling and structural rigidity of a 1970's 'deck home' and keep some of the existing quarry tile flooring to reduce waste.
We designed a center island with a diagonal countertop. This strengthened the distinctly separate work zones balancing professional cooking functionality with seating and entertaining. The 48" Wolf range top and induction cook top, warming drawer and 48" side by side refrigerator transformed this kitchen into a gourmet chef's dream and allows ample room for multiple cooks and massive food storage.
The diagonal island shape added a dynamic quality to a rectangular room. The previous brick encased water line chase became a hidden small closet and integrated flat screen television allowing for multiple viewing positions.
By adding floor to ceiling windows the beauty of their expansive exterior landscape acts as artwork in this beautiful showcase kitchen.

 Texas Sun & Shade
Block the sun and maintain your view!
Our large selection of interior solar screens is the ideal solution to your indoor natural lighting needs. Allow the proper amount of sunlight in while creating the perfect environment in your home. Utilize the interior solar screens to reduce the sun’s glare while saving money by blocking the heat from entering the room. Choose from a variety of fabrics that can blend with their surroundings or feature them as a design aspect in the room. Our interior solar screens are best for windows, glass doors, and sunrooms. Maintain your view while blocking harmful UV rays.

 Rawlings Design, Inc.
This extensive renovation designed by Eric Rawlings, AIA, LEED AP and built by Arlene Dean, completely transforms the look of the original structure. The main source of inspiration for the new design came from Greene & Greene’s Gamble House, which is considered by many as the pinnacle of the original turn of the century Craftsman Style Homes. Distinctive features from that style include the use of exposed timber framing, low pitched roof forms with large overhangs, gangs of windows, and extensive built-in furniture. The Master Bedroom has an exposed timber roof structure and well placed windows reducing the need for window treatments for a house built in an inner city neighborhood with close by neighbors, thus providing better daylighting. Photos by Eric Rawlings, AIA, LEEP AP.
 Mottram Architecture
This half bath was converted into a full bath by adding a shower and changing the location of the existing fixtures. Now these homeowners have a first floor bedroom/bath space.
Timber frame homes offer unique challenges during a remodel. What often makes them beautiful and attractive to most homeowners, also makes them challenging for space requirements.
Context: The lovely couple that owned this home were struggling with some interesting floor plan challenges that just didn't work for their family. The loved the beautiful timbers and woodwork of their home, but the dramatically sloping ceilings on the second floor, particularly in the bathroom, just didn't work for this 1 1/2 bath home. Needing to use the skylight to approach the toilet was a less then ideal scenario. Although the bathroom footprint was more then adequate, the sloped ceiling only made half of the space useable. Check out the Before/After post on our blog to see the photos of the house pre-renovation. As much as they loved all the wood features in their home, another challenge they had was light. The wood ceiling made everything inside the house darker, even with a fantastic array of south facing windows, there were spaces in the home that felt dark and small. When they contacted us they wanted to know how could they make their brighter and more inviting, were there solutions to the 2nd floor sloped ceiling issues, and if they were going to do all of this work, how could they make their home more comfortable and efficient. A nagging water leak in the upstairs bathroom spurred them into action and here is how we solved their dilemma.
Conclusion: First, we added a little dormer to the rear of the house so we could get full headroom in nearly all of the upstairs bathroom! Then we decided to extend that dormer one more timber bay over to create a walk in closet with natural light and plenty of space. Since we were contemplating energy efficiency, we resolved a nagging issue that is present in a lot of timber frame construction, air tightness. Commonly found in timber frame construction, fiberglass insulation is installed in the rafter bays and board ceilings are installed over top. Unfortunately, board ceilings are anything but air tight, and fiberglass insulation needs to be in an airtight cavity for maximum effectiveness. So we were able to solve two issues at the same time for this homeowner. We removed the board ceiling and fiberglass insulation, we dense packed the rafter bays with cellulose insulation, and installed sheetrock in place of the boards. The boards were salvaged for re-use by the homeowner, and the space and light quality was dramatically improved. Some may think that losing the board ceiling took something away from the space, but what you'll see in the pictures is that it highly accentuates the heavy timbers and really makes them stand out in a beautiful way. Now with this added airtightness, better insulation, and brighter space, the homeowner hardly runs their wood stove, and it's so quiet in the space, an added bonus from changing the insulation. It became necessary to also add a sheetrock ceiling to the living room to hide the plumbing from the new bathroom layout above. Changing this ceiling gave the homeowner some real quality lighting that was lacking in the living room before. The brighter ceiling and new lighting layout completely transforms the living room into a space you want to hang out, even though the layout didn't change at all. When the homeowner saw the finished spaces she said "I can't believe this is my house, I want to live in this house"
Energy Efficiency: I touched a little on the efficiency above, but like all projects done with Mottram Architecture, we always want to leave you with a little extra. Timber frame construction with board ceilings and fiberglass insulation are notoriously leaky! If you want to know what we think about fiberglass insulation, check our our blog post on Why Fiberglass Insulation Sucks. By installing cellulose insulation and covering it with sheetrock we were able to greatly reduce the heat flowing out of this home. It not only improves cashflow it improves the comfort level in the space. Who wants to sit in their living room and feel a draft? Let us remind you, we are not saying cellulose insulation is an air barrier, we use the sheetrock to help with that, but it does significantly reduce the air flow over fiberglass insulation. And when we reduce the airflow, we reduce the heat flow. And when we reduce the heat flow, we reduce the need to re-heat that drafty air from outside. When it comes to energy efficiency the first and best place to start is air infiltration. We greatly reduced the air infiltration with the new insulation, but we also added a hat and warm boots. What I mean by that is, we improved the insulation in the roof, and we installed insulation in the basement. Maybe it's a silly analogy, but when you think about keeping warm, we always start with the hat and boots! With sustainability in mind, the next project will be to add a deck to the front of this house with rain catchment barrels from the metal roof. They are planning to plant a garden in the spring and the rain catchment system will help to irrigate the new garden.
Builder: East Shore Builders
Photographer: Michael Eric Berube
Michael Eric Berube, Maine Virtual Home Tours

 Whistler Builder
Our client planned to spend more time in this home and wanted to increase its livability. The project was complicated by the strata-specified deadline for exterior work, the logistics of working in an occupied strata complex, and the need to minimize the impact on surrounding neighbours.
By reducing the deck space, removing the hot tub, and moving out the dining room wall, we were able to add important livable space inside. Our homeowners were thrilled to have a larger kitchen. The additional 500 square feet of living space integrated seamlessly into the existing architecture.
This award-winning home features reclaimed fir flooring (from the Stanley Park storm), and wood-cased sliding doors in the dining room, that allow full access to the outdoor balcony with its exquisite views.
Green building products and processes were used extensively throughout the renovation, which resulted in a modern, highly-efficient, and beautiful home.

 TATCOR DESIGN BUILD
The AV projectors were a great solution for providing an awesome entertainment area at reduced costs. HDMI cables and cat 6 wires were installed and run from the projector to a closet where the Yamaha AV receiver as placed giving the room a clean simple look along with the projection screen and speakers mounted on the walls.
Sponsored
Columbus, OH

Hope Restoration & General Contracting
Columbus Design-Build, Kitchen & Bath Remodeling, Historic Renovations

 Pasolumination
For privacy, reduced sun exposure and solar loading, these shades also add softness, color and texture to a room when used day or night. Views through to the sea are still visible keeping the connection to the outdoors too.

 The Jack + Mare | Portland Design & Build
Compost Drawer.
The Jack + Mare designed and built this custom kitchen and dining remodel for a family in Portland's Sellwood Westmoreland Neighborhood.
The wall between the kitchen and dining room was removed to create an inviting and flowing space with custom details in all directions. The custom maple dining table was locally milled and crafted from a tree that had previously fallen in Portland's Laurelhurst neighborhood; and the built-in L-shaped maple banquette provides unique comfortable seating with drawer storage beneath. The integrated kitchen and dining room has become the social hub of the house – the table can comfortably sit up to 10 people!
Being that the kitchen is visible from the dining room, the refrigerator and dishwasher are hidden behind cabinet door fronts that seamlessly tie-in with the surrounding cabinetry creating a warm and inviting space.
The end result is a highly functional kitchen for the chef and a comfortable and practical space for family and friends.
Details: custom cabinets (designed by The J+M) with shaker door fronts, a baker's pantry, built-in banquette with integrated storage, custom local silver maple table, solid oak flooring to match original 1925 flooring, white ceramic tile backsplash, new lighting plan featuring a Cedar + Moss pendant, all L.E.D. can lights, Carrara marble countertops, new larger windows to bring in more natural light and new trim.
The combined kitchen and dining room is 281 Square feet.
Photos by: Jason Quigley Photography
 User
Industrial style meets Mid-Century Modern in this contemporary two-storey home design, which features zones for multi-generational living, a cool room, library and a walkway that overlooks a private central garden. The design has incorporated passive solar design elements and a side entry to reduce wastage. Featured on contemporist.com, the go-to website for all things design, travel and art, It generated global attention with it’s bold, organic design and eclectic mix of furniture, fixtures and finishes, including Spotted Gum cladding, concrete and polished plaster.
 Mottram Architecture
Timber frame homes offer unique challenges during a remodel. What often makes them beautiful and attractive to most homeowners, also makes them challenging for space requirements.
Context: The lovely couple that owned this home were struggling with some interesting floor plan challenges that just didn't work for their family. The loved the beautiful timbers and woodwork of their home, but the dramatically sloping ceilings on the second floor, particularly in the bathroom, just didn't work for this 1 1/2 bath home. Needing to use the skylight to approach the toilet was a less then ideal scenario. Although the bathroom footprint was more then adequate, the sloped ceiling only made half of the space useable. Check out the Before/After post on our blog to see the photos of the house pre-renovation. As much as they loved all the wood features in their home, another challenge they had was light. The wood ceiling made everything inside the house darker, even with a fantastic array of south facing windows, there were spaces in the home that felt dark and small. When they contacted us they wanted to know how could they make their brighter and more inviting, were there solutions to the 2nd floor sloped ceiling issues, and if they were going to do all of this work, how could they make their home more comfortable and efficient. A nagging water leak in the upstairs bathroom spurred them into action and here is how we solved their dilemma.
Conclusion: First, we added a little dormer to the rear of the house so we could get full headroom in nearly all of the upstairs bathroom! Then we decided to extend that dormer one more timber bay over to create a walk in closet with natural light and plenty of space. Since we were contemplating energy efficiency, we resolved a nagging issue that is present in a lot of timber frame construction, air tightness. Commonly found in timber frame construction, fiberglass insulation is installed in the rafter bays and board ceilings are installed over top. Unfortunately, board ceilings are anything but air tight, and fiberglass insulation needs to be in an airtight cavity for maximum effectiveness. So we were able to solve two issues at the same time for this homeowner. We removed the board ceiling and fiberglass insulation, we dense packed the rafter bays with cellulose insulation, and installed sheetrock in place of the boards. The boards were salvaged for re-use by the homeowner, and the space and light quality was dramatically improved. Some may think that losing the board ceiling took something away from the space, but what you'll see in the pictures is that it highly accentuates the heavy timbers and really makes them stand out in a beautiful way. Now with this added airtightness, better insulation, and brighter space, the homeowner hardly runs their wood stove, and it's so quiet in the space, an added bonus from changing the insulation. It became necessary to also add a sheetrock ceiling to the living room to hide the plumbing from the new bathroom layout above. Changing this ceiling gave the homeowner some real quality lighting that was lacking in the living room before. The brighter ceiling and new lighting layout completely transforms the living room into a space you want to hang out, even though the layout didn't change at all. When the homeowner saw the finished spaces she said "I can't believe this is my house, I want to live in this house"
Energy Efficiency: I touched a little on the efficiency above, but like all projects done with Mottram Architecture, we always want to leave you with a little extra. Timber frame construction with board ceilings and fiberglass insulation are notoriously leaky! If you want to know what we think about fiberglass insulation, check our our blog post on Why Fiberglass Insulation Sucks. By installing cellulose insulation and covering it with sheetrock we were able to greatly reduce the heat flowing out of this home. It not only improves cashflow it improves the comfort level in the space. Who wants to sit in their living room and feel a draft? Let us remind you, we are not saying cellulose insulation is an air barrier, we use the sheetrock to help with that, but it does significantly reduce the air flow over fiberglass insulation. And when we reduce the airflow, we reduce the heat flow. And when we reduce the heat flow, we reduce the need to re-heat that drafty air from outside. When it comes to energy efficiency the first and best place to start is air infiltration. We greatly reduced the air infiltration with the new insulation, but we also added a hat and warm boots. What I mean by that is, we improved the insulation in the roof, and we installed insulation in the basement. Maybe it's a silly analogy, but when you think about keeping warm, we always start with the hat and boots! With sustainability in mind, the next project will be to add a deck to the front of this house with rain catchment barrels from the metal roof. They are planning to plant a garden in the spring and the rain catchment system will help to irrigate the new garden.
Builder: East Shore Builders
Photographer: Michael Eric Berube
Sponsored
Columbus, OH
Hope Restoration & General Contracting
Columbus Design-Build, Kitchen & Bath Remodeling, Historic Renovations

 Kohn Shnier architects
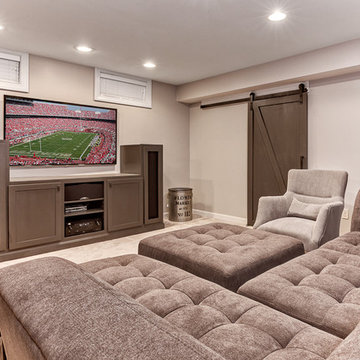
This single family home sits on a tight, sloped site. Within a modest budget, the goal was to provide direct access to grade at both the front and back of the house.
The solution is a multi-split-level home with unconventional relationships between floor levels. Between the entrance level and the lower level of the family room, the kitchen and dining room are located on an interstitial level. Within the stair space “floats” a small bathroom.
The generous stair is celebrated with a back-painted red glass wall which treats users to changing refractive ambient light throughout the house.
Black brick, grey-tinted glass and mirrors contribute to the reasonably compact massing of the home. A cantilevered upper volume shades south facing windows and the home’s limited material palette meant a more efficient construction process. Cautious landscaping retains water run-off on the sloping site and home offices reduce the client’s use of their vehicle.
The house achieves its vision within a modest footprint and with a design restraint that will ensure it becomes a long-lasting asset in the community.
Photo by Tom Arban
 Tom Bassett-Dilley Architect, Ltd.
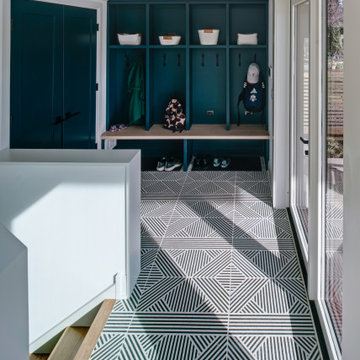
This historic home in Oak Park was in need of updating, with deferred maintenance inside and out requiring extensive work. This created an opportunity to rethink the house for a modern family in the 21st century, with an updated plan, a strong connection to the yard from the kitchen and new mudroom, covered patio, and flexible rooms for work-at-home, gym, or guest functions. The insulation and mechanical systems were upgraded to Phius levels, and a solar PV array added to meet annual net zero energy performance. With minimal upfront energy expenditure, the home’s operational carbon was reduced by 100%, and the house is a delightful place for the young family to grow into.

 ODS Architecture
A relatively new existing home on a steep downsloping lot where you park and enter at the upper floor needed to have a dramatic stairway entry. By refining and reducing structure and scale, introducing new glass railing and a combination of wood and white cabinetry, the space now expresses a clean, crisp aesthetic reflecting how the owners want to live.
Working with German cabinets by Leicht the kitchen area was sculpted to create more usable cabinet pantry and counter area in a combination of white oak and gloss white lacquer paint. Final touches include a new porcelain tiled fireplace surround and hearth with gas insert and powder room with figured wall and floating walnut vanity. Previously partially blocked by cabinetry, now the new kitchen, dining and living rooms now all share equal access to dramatic views of the bay.
Photo Credits: Treve Johnson.
136