
Search results for "Reduce watching" in Home Design Ideas

 Twelve Oaks Landscape Co.
Closeup of permeable pavers
Example of a classic concrete paver patio design
Example of a classic concrete paver patio design
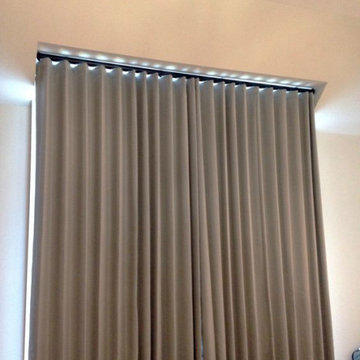
 Trendy Blinds & Closets
Modern Wave Drapery on ceiling box
Inspiration for a contemporary home design remodel in Toronto
Inspiration for a contemporary home design remodel in Toronto

Find the right local pro for your project
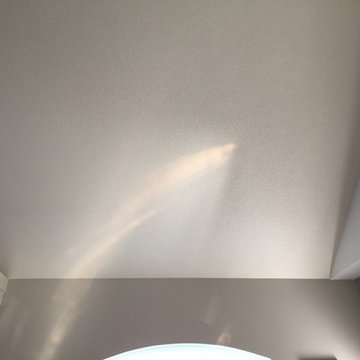
 Coastal Trim and Design LLC
Popcorn ceiling before Shiplap added
Inspiration for a coastal home design remodel in DC Metro
Inspiration for a coastal home design remodel in DC Metro

 User
Inspiration for a mid-sized contemporary formal and enclosed living room remodel in Phoenix with a wall-mounted tv

 Trespa North America
Naturals NM04 Sintered Alloy (left), NM03 Corroded Green (right)
Example of a minimalist exterior home design in New York
Example of a minimalist exterior home design in New York



 Flavor Paper
If you’re on the prowl for some seriously salacious wallpaper that celebrates eroticism, masculinity and sexual liberation, then Tom of Finland is for you! A collaboration two years in the works, this carnal creation comprises two designs—TAME and XXX—both conceived by Michael Reynolds, Hoffman Creative and the Tom of Finland Foundation. A bold and ballsy tribute to the dynamic graphite and pencil drawings of Touko Laaksonen (aka Tom of Finland), the famed renegade Finnish artist known for his stylized homoerotic art and its profound effect on late twentieth century gay culture and fetish lifestyle. From cops, cowboys and bikers, to sailors, lumberjacks and leather men — there’s a little something (and then some) for everyone. That-a-boy!
Michael Reynolds is a New York-based creative director, curator, editorial stylist, book editor and design consultant. He is the US Editor of Wallpaper* Magazine and Editor at Large for Architectural Digest USA. His first book, TOM HOUSE – Tom of Finland in Los Angeles, is available through Rizzoli Publications.
Eric Hoffman founded Hoffman Creative a decade ago in New York, a firm creating brand identities for a range of clients with an ethos rooted in psychology and emotional intelligence.
Tom of Finland Foundation maintains the archive and former Los Angeles home of the 20th-century artist, known for his graphic, highly stylized illustrations. Dedicated to protecting and preserving erotic art and erotic arts education, the foundation continues to advocate the artist’s significant influence on gay and LGBT culture.

 Industrial Projects
Creating a comfortable outdoor living space is a priority for many homeowners and DIY enthusiasts. With rising summer temperatures, installing a shade tarp in your backyard offers an affordable and effective solution for sun protection. We’ve developed this detailed, step-by-step guide to help you confidently install a shade tarp that not only shields you from the sun but also adds aesthetic appeal to your outdoor area.
Benefits of Installing a Backyard Shade Tarp
Before diving into the installation process, let’s explore the key benefits of having a backyard shade tarp:
Provides UV Protection: Keeps your family and guests safe from harmful sun exposure.
Reduces Outdoor Temperatures: Creates a cooler, more enjoyable outdoor space.
Protects Outdoor Furniture: Extends the life of patio furniture by reducing sun damage.
Enhances Outdoor Aesthetics: Adds a modern, stylish look to your yard.
Budget-Friendly: More affordable compared to permanent structures like pergolas.
Materials and Tools You’ll Need
To begin your DIY backyard shade project, gather the following materials and tools:
Materials:
Shade tarp (UV-resistant and breathable)
Sturdy posts or existing structures (trees, fences, walls)
Mounting hardware (eye bolts, D-rings, turnbuckles, snap hooks)
Nylon or polyester rope, or stainless-steel wire
Concrete (if installing new posts)
Tools:
Power drill
Measuring tape
Level
Ladder
Wrench or adjustable spanner
Post hole digger (if installing new posts)
Step 1: Plan Your Shade Tarp Layout
The first step in installing your backyard shade tarp is careful planning. Take time to assess your outdoor area and answer these key questions:
Where is the sun’s path throughout the day?
What size and shape of tarp best suits your space?
Will you anchor the tarp to existing structures or install new posts?
What height do you want the tarp to sit at for maximum shade and airflow?
Pro Tip: Use string or garden hoses to visualize the tarp layout on the ground before making permanent decisions.
Step 2: Measure and Mark Anchor Points
Once you’ve determined the tarp’s location and orientation:
Measure the tarp dimensions.
Mark the exact points where each corner of the tarp will be anchored.
Ensure that the anchor points are at least 5–10% longer than the tarp size to allow for tensioning and slight adjustments.
Consider slope angles for water runoff. Aim for at least a 20-degree angle to prevent water pooling on the tarp.
Step 3: Install Support Posts (If Necessary)
If your backyard lacks existing anchor points like trees or fences, you’ll need to install sturdy support posts:
Dig post holes at least 24 inches deep and 8-12 inches wide for stability.
Set posts in concrete, making sure they remain plumb and level.
Allow the concrete to cure for at least 24–48 hours before applying tension from the tarp.
We recommend using pressure-treated wood, galvanized steel poles, or aluminum posts for longevity and strength.
Step 4: Install Mounting Hardware
With your anchor points ready, it’s time to install the necessary hardware:
Attach eye bolts or pad eyes securely into walls, posts, or other fixed structures.
For added flexibility and adjustability, install turnbuckles or tensioners to fine-tune the tarp’s tightness.
Connect snap hooks, D-rings, or carabiners to make assembly and disassembly easier.
Make sure all hardware is rated for outdoor use to prevent rust and corrosion.
Step 5: Attach and Tension the Shade Tarp
Now it’s time for the most satisfying part—mounting the shade tarp:
Begin by attaching one corner of the tarp to an anchor point.
Gradually attach the remaining corners, moving diagonally for even tension.
Adjust each connection point using your turnbuckles, ropes, or cables.
Pull the tarp tight enough to avoid sagging, but not so tight that it risks tearing.
Check that the tarp maintains the desired slope for rainwater runoff and adjust tension as needed.
Step 6: Final Adjustments and Safety Check
Before enjoying your new shaded area:
Inspect all anchor points and hardware for stability.
Test the tarp’s tension and make adjustments for even distribution.
Ensure that no sharp edges or loose connections remain that could damage the tarp or pose a safety hazard.
Confirm that the tarp is secure in windy conditions by giving it a gentle tug.
If you live in an area with frequent high winds, consider removing the tarp during storms to prevent damage.
Step 7: Enjoy Your Shaded Backyard Oasis
Once installed, your backyard shade tarp provides a comfortable and protective space for outdoor gatherings, relaxation, or family activities. You can decorate underneath with outdoor furniture, string lights, or potted plants to create a personalized outdoor retreat.
Maintenance Tips for Long-Lasting Shade Tarp Performance
To extend the life of your shade tarp, follow these maintenance guidelines:
Regularly check for wear and tear, especially around anchor points and seams.
Clean the tarp periodically with mild soap and water to prevent mildew buildup.
Store the tarp indoors during harsh weather seasons if it's not designed for year-round use.
Tighten hardware as needed to maintain proper tension and avoid sagging.
By following these simple care steps, your shade tarp will continue to deliver years of sun protection and outdoor comfort.
Conclusion: Upgrade Your Outdoor Space with a DIY Shade Tarp
Installing a shade tarp in your backyard is a cost-effective and rewarding DIY project. With careful planning, quality materials, and proper installation techniques, you’ll enjoy cool, shaded outdoor living all season long. This step-by-step guide ensures your project goes smoothly from start to finish.


 Dulce Feito-Daly Interior Design, LLC
Tile, Stone & Countertop materials
Small elegant galley vinyl floor and gray floor utility room photo in New York with an undermount sink, raised-panel cabinets, beige cabinets, quartz countertops, beige walls, a stacked washer/dryer and white countertops
Small elegant galley vinyl floor and gray floor utility room photo in New York with an undermount sink, raised-panel cabinets, beige cabinets, quartz countertops, beige walls, a stacked washer/dryer and white countertops


 Archadeck of Northeast Dallas
Here at Archadeck, all great covered patios feature a stunning patio surface. We replaced the original patio with one considerably larger and finished it with an attractive stain-and-stamp surface. For this project we used a wooden deck stamp pattern with maple wood stain color and a charcoal release for definition. The effect is that of an old wooden floor that has been beautifully restored and preserved.
 Designer Group USA Inc
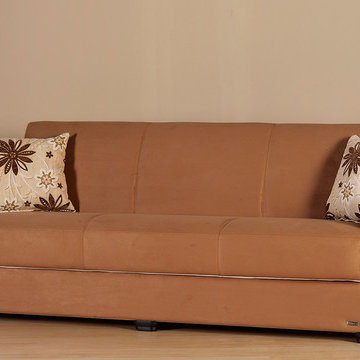
The sofa can be used in 3 positions including sofa, relax and bed, and features storage compartments underneath the seat for bedding or pillows. The frame is made of hardwood and covered with Bonnell Coil System Mattress to provide an orthopedic-type sleeping surface with 1/2" synthetic fiber pad, and Rainbow Brown microfiber.
from thefurnituretoday.com





 Bostonian Woodworking Inc.
Mid-sized transitional single-wall dark wood floor and brown floor enclosed kitchen photo in Boston with an undermount sink, shaker cabinets, white cabinets, quartz countertops, white backsplash, subway tile backsplash, stainless steel appliances and an island



32