
Search results for "Regular cures" in Home Design Ideas
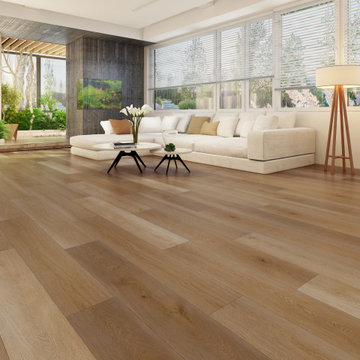
 Gaia Flooring Inc
GAIA ENGINEERED SOLID POLYMER CORE
COMPOSITE (eSPC) - BLACK SERIES
Multi-ply eSPC features the best quality of embossing with depth and definition that is state of the art. The level of definition and quality in the texture and laser aligned film makes this the most realistic luxury synthetic floor to date and it's proprietary composition is industry leading. Gaia Engineered Multi-ply Solid Polymer Core Composite (eSPC) combines advantages of both SPC and new engineered Multi-ply luxury With IXPE cushioned backing, Gaia eSPC provides: a quieter, warmer vinyl flooring and, surpasses luxury standards for multilevel estates. Waterproof and guaranteed in all rooms in your home and all regular commercial environments.
UV Cured Ceramic Bead Finish With Stain Resistance
This protective finish is a UV cured ceramic bead finish that is scratch resistant and stain resistant.
Wear Layer at 0.5mm/20mil Thickness
This wear layer is 20 mil to ensure longevity and residential and commercial environments.
Laser-Aligned High Definition Film With Realistic Texture
The decorative film has multi-layer depth in color to provide a similar realism to real wood.
Stabilizing eSPC Layer
This SPC component layer is a proprietary composition to maintain the benefits of an SPC but provide stability necessary on a thick plank.
High Density Skeleton Core
This core provides luxury thermal and luxury sound insulation with a high tensile strength. The bone structure keeps insulating pockets strong and light.
Balancing Solid Polymer Layer
This is a proprietary composition layer that combined with the SPC component layer provides leading waterproof stability for a 10mm product.
High Density IXPE Antimicrobial Underlayment
The underlayment is a high density antimicrobial virgin vinyl padding to provide warmth and a luxury feel.

 Leanne Michael L U X E lifestyle design
Young urban chic, semi-custom kitchen design with an eclectic mix of boho, farmhouse and industrial features and accents! All prefab cabinets mindfully designed to look custom, custom plaster range hood, reclaimed wood floating shelves and accent trim on hood, hammered brass hardware and sconces, Moravian star pendant light, beveled subway tile, Fireclay farm sink, custom drop leaf service cart that doubles as an island table with industrial bar stools, custom wine bar and iron mirror, custom bifold iron and glass French doors and a Turkish rug.
 Jonathan Raith Inc.
Nantucket Architectural Photography
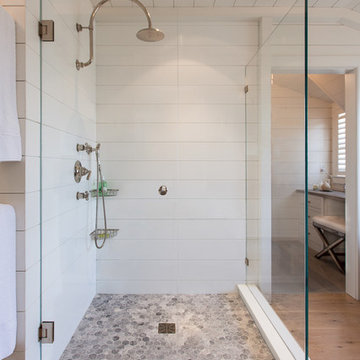
Bathroom - large coastal master white tile and ceramic tile light wood floor bathroom idea in Boston with white walls
Bathroom - large coastal master white tile and ceramic tile light wood floor bathroom idea in Boston with white walls
Find the right local pro for your project
 Equiterra Regenerative Design
Patrick Coulie
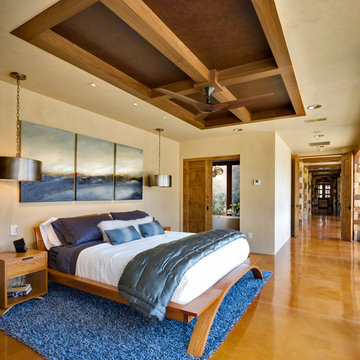
Example of a large trendy master concrete floor and yellow floor bedroom design in Albuquerque with beige walls and no fireplace
Example of a large trendy master concrete floor and yellow floor bedroom design in Albuquerque with beige walls and no fireplace
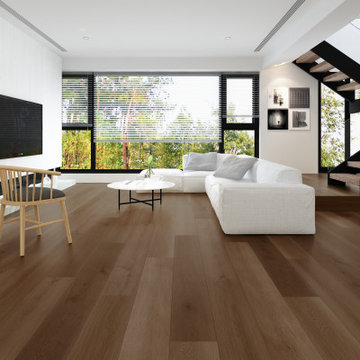 Gaia Flooring Inc
GAIA ENGINEERED SOLID POLYMER CORE
COMPOSITE (eSPC) - BLACK SERIES
Multi-ply eSPC features the best quality of embossing with depth and definition that is state of the art. The level of definition and quality in the texture and laser aligned film makes this the most realistic luxury synthetic floor to date and it's proprietary composition is industry leading. Gaia Engineered Multi-ply Solid Polymer Core Composite (eSPC) combines advantages of both SPC and new engineered Multi-ply luxury With IXPE cushioned backing, Gaia eSPC provides: a quieter, warmer vinyl flooring and, surpasses luxury standards for multilevel estates. Waterproof and guaranteed in all rooms in your home and all regular commercial environments.
UV Cured Ceramic Bead Finish With Stain Resistance
This protective finish is a UV cured ceramic bead finish that is scratch resistant and stain resistant.
Wear Layer at 0.5mm/20mil Thickness
This wear layer is 20 mil to ensure longevity and residential and commercial environments.
Laser-Aligned High Definition Film With Realistic Texture
The decorative film has multi-layer depth in color to provide a similar realism to real wood.
Stabilizing eSPC Layer
This SPC component layer is a proprietary composition to maintain the benefits of an SPC but provide stability necessary on a thick plank.
High Density Skeleton Core
This core provides luxury thermal and luxury sound insulation with a high tensile strength. The bone structure keeps insulating pockets strong and light.
Balancing Solid Polymer Layer
This is a proprietary composition layer that combined with the SPC component layer provides leading waterproof stability for a 10mm product.
High Density IXPE Antimicrobial Underlayment
The underlayment is a high density antimicrobial virgin vinyl padding to provide warmth and a luxury feel.
 Josh Partee | Architectural Photographer
© Josh Partee 2013
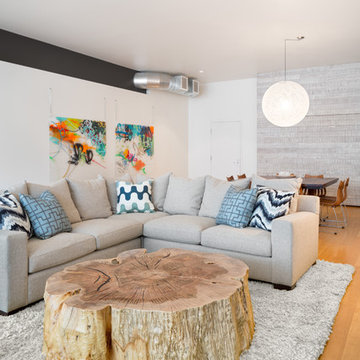
Living room - contemporary open concept living room idea in Portland with white walls
Living room - contemporary open concept living room idea in Portland with white walls


 Pine Hall Brick Company
photo by Pine Hall Brick Company
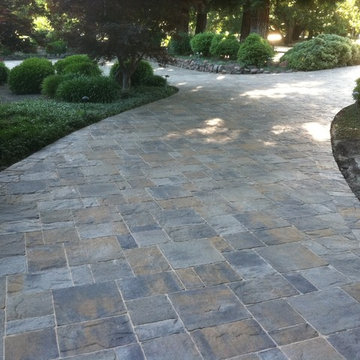
Inspiration for a transitional brick exterior home remodel in Other
Inspiration for a transitional brick exterior home remodel in Other

 Lore Patterson
The Edible Garden
Photo: Lore Patterson
This is an example of a mid-sized traditional backyard landscaping in Seattle for fall.
This is an example of a mid-sized traditional backyard landscaping in Seattle for fall.
 Lauren Smyth
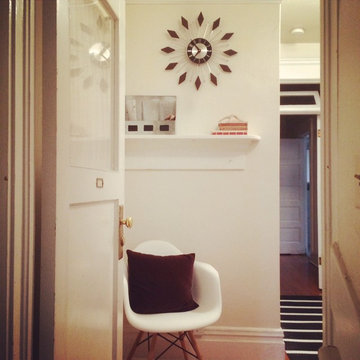
Small trendy medium tone wood floor entryway photo in Boise with white walls and a white front door

 Kelsey's Collection, Inc.
Antique yet modern designed Wine barrel shaped wine cabinet which hold 18 bottles. Made out of white pine with beeswax infused stain, which is hand applied and rubbed, then allowed to dry and cure overnight or maybe two nights, depending on the weather, humidity, and temperature, then apply another coat. After drying, we stretch a bronzed hoop around each perimeter, just like a regular barrel has hoops, only in our case, we also decorate the hoop with several antique hammered and dimpled round escutcheons on each side and top. Measures 22 "wide, by 13" deep, and 38" high. Pre-assembled and ready to use.
Solid white pine with a hand rubbed bees wax stain, that is first applied, then dries for two days, and then re-applied to give a lustrous olde world look and smell. Pre-assembled - no assembly required. This is Kelsey's Collections first product which requires no assembly. Made in a factory in a remote village in Michoacán province called Nuevo San Juan Pangacaritiro. The village owns the logging mill and next door to the mill are our furniture factory and also a molding factory. The village also owns the forest where the white pine is selectively logged. In the forest they also harvest pine pitch and manage the forest for long term yields and sustainable growth. The area in the summer season is frequented by almost daily thunderstorms with a huge downpour of water and then it dries out and the evenings are warm but not unpleasant and avocados are the main fruit.
Measures 38" high, by 22" Wide and 13" deep
Holds 15 bottles
Weighs 22 pounds
 Gaia Flooring Inc
GAIA ENGINEERED SOLID POLYMER CORE
COMPOSITE (eSPC) - BLACK SERIES
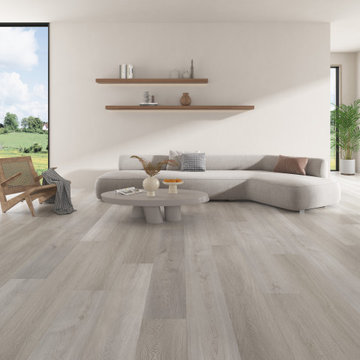
Multi-ply eSPC features the best quality of embossing with depth and definition that is state of the art. The level of definition and quality in the texture and laser aligned film makes this the most realistic luxury synthetic floor to date and it's proprietary composition is industry leading. Gaia Engineered Multi-ply Solid Polymer Core Composite (eSPC) combines advantages of both SPC and new engineered Multi-ply luxury With IXPE cushioned backing, Gaia eSPC provides: a quieter, warmer vinyl flooring and, surpasses luxury standards for multilevel estates. Waterproof and guaranteed in all rooms in your home and all regular commercial environments.
UV Cured Ceramic Bead Finish With Stain Resistance
This protective finish is a UV cured ceramic bead finish that is scratch resistant and stain resistant.
Wear Layer at 0.5mm/20mil Thickness
This wear layer is 20 mil to ensure longevity and residential and commercial environments.
Laser-Aligned High Definition Film With Realistic Texture
The decorative film has multi-layer depth in color to provide a similar realism to real wood.
Stabilizing eSPC Layer
This SPC component layer is a proprietary composition to maintain the benefits of an SPC but provide stability necessary on a thick plank.
High Density Skeleton Core
This core provides luxury thermal and luxury sound insulation with a high tensile strength. The bone structure keeps insulating pockets strong and light.
Balancing Solid Polymer Layer
This is a proprietary composition layer that combined with the SPC component layer provides leading waterproof stability for a 10mm product.
High Density IXPE Antimicrobial Underlayment
The underlayment is a high density antimicrobial virgin vinyl padding to provide warmth and a luxury feel.
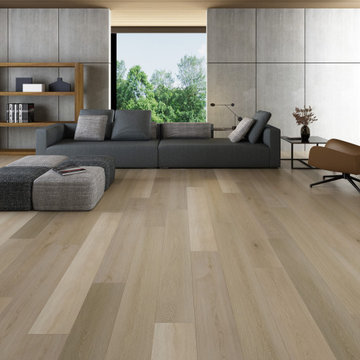 Gaia Flooring Inc
GAIA ENGINEERED SOLID POLYMER CORE
COMPOSITE (eSPC) - BLACK SERIES
Multi-ply eSPC features the best quality of embossing with depth and definition that is state of the art. The level of definition and quality in the texture and laser aligned film makes this the most realistic luxury synthetic floor to date and it's proprietary composition is industry leading. Gaia Engineered Multi-ply Solid Polymer Core Composite (eSPC) combines advantages of both SPC and new engineered Multi-ply luxury With IXPE cushioned backing, Gaia eSPC provides: a quieter, warmer vinyl flooring and, surpasses luxury standards for multilevel estates. Waterproof and guaranteed in all rooms in your home and all regular commercial environments.
UV Cured Ceramic Bead Finish With Stain Resistance
This protective finish is a UV cured ceramic bead finish that is scratch resistant and stain resistant.
Wear Layer at 0.5mm/20mil Thickness
This wear layer is 20 mil to ensure longevity and residential and commercial environments.
Laser-Aligned High Definition Film With Realistic Texture
The decorative film has multi-layer depth in color to provide a similar realism to real wood.
Stabilizing eSPC Layer
This SPC component layer is a proprietary composition to maintain the benefits of an SPC but provide stability necessary on a thick plank.
High Density Skeleton Core
This core provides luxury thermal and luxury sound insulation with a high tensile strength. The bone structure keeps insulating pockets strong and light.
Balancing Solid Polymer Layer
This is a proprietary composition layer that combined with the SPC component layer provides leading waterproof stability for a 10mm product.
High Density IXPE Antimicrobial Underlayment
The underlayment is a high density antimicrobial virgin vinyl padding to provide warmth and a luxury feel.
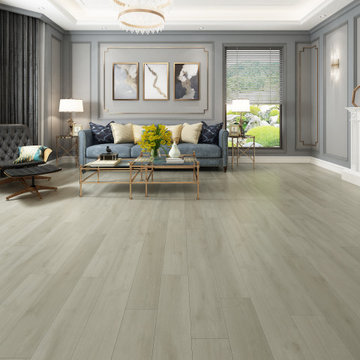 Gaia Flooring Inc
GAIA WHITE SERIES | SOLID POLYMER CORE (SPC)
Gaia White Series SPC represents wood’s natural beauty. With a wood grain embossing directly over the 20 mil with ceramic wear layer, Gaia Flooring White Series is industry leading for durability. The SPC stone based core with luxury sound and heat insulation underlayment, surpasses luxury standards for multilevel estates. Waterproof and guaranteed in all rooms in your home and all regular commercial.
* Ceramic Bead Finish UV Coating With Stain Resistance
The top layer is protected by a UV cured ceramic bead finish, true ceramic bead finish has the ability to prevent scratches more than most other mineral finishes.
* Wear Layer at 0.5mm 20mil Thickness
The top layer is a 20 mil wear layer that ensures longevity from wear and tear.
* Hight Definiton Decor Film
The decorative film has multi-layer depth in color to provide a similar realism to real wood.
* Solid Polymer Core Board
The core is made out of a proprietary composition of SPC and the composition is designed to provide luxury sound and heat ratings without compromising on the stability.
* IXPE Antimicrobial Underlayment
The underlayment is a high density antimicrobial virgin vinyl padding to provide warmth and luxury feel.
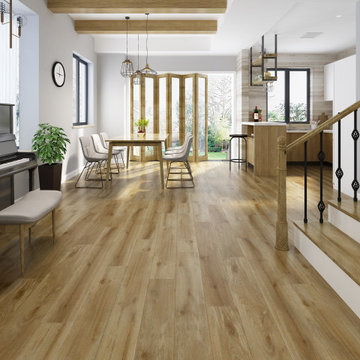 Gaia Flooring Inc
GAIA WHITE SERIES | SOLID POLYMER CORE (SPC)ShareSettingsMore
Gaia White Series SPC represents wood’s natural beauty. With a wood grain embossing directly over the 20 mil with ceramic wear layer, Gaia Flooring White Series is industry leading for durability. The SPC stone based core with luxury sound and heat insulation underlayment, surpasses luxury standards for multilevel estates. Waterproof and guaranteed in all rooms in your home and all regular commercial.
* Ceramic Bead Finish UV Coating With Stain Resistance
The top layer is protected by a UV cured ceramic bead finish, true ceramic bead finish has the ability to prevent scratches more than most other mineral finishes.
* Wear Layer at 0.5mm 20mil Thickness
The top layer is a 20 mil wear layer that ensures longevity from wear and tear.
* Hight Definiton Decor Film
The decorative film has multi-layer depth in color to provide a similar realism to real wood.
* Solid Polymer Core Board
The core is made out of a proprietary composition of SPC and the composition is designed to provide luxury sound and heat ratings without compromising on the stability.
* IXPE Antimicrobial Underlayment
The underlayment is a high density antimicrobial virgin vinyl padding to provide warmth and luxury feel.

 Industrial Projects
Creating a comfortable outdoor living space is a priority for many homeowners and DIY enthusiasts. With rising summer temperatures, installing a shade tarp in your backyard offers an affordable and effective solution for sun protection. We’ve developed this detailed, step-by-step guide to help you confidently install a shade tarp that not only shields you from the sun but also adds aesthetic appeal to your outdoor area.
Benefits of Installing a Backyard Shade Tarp
Before diving into the installation process, let’s explore the key benefits of having a backyard shade tarp:
Provides UV Protection: Keeps your family and guests safe from harmful sun exposure.
Reduces Outdoor Temperatures: Creates a cooler, more enjoyable outdoor space.
Protects Outdoor Furniture: Extends the life of patio furniture by reducing sun damage.
Enhances Outdoor Aesthetics: Adds a modern, stylish look to your yard.
Budget-Friendly: More affordable compared to permanent structures like pergolas.
Materials and Tools You’ll Need
To begin your DIY backyard shade project, gather the following materials and tools:
Materials:
Shade tarp (UV-resistant and breathable)
Sturdy posts or existing structures (trees, fences, walls)
Mounting hardware (eye bolts, D-rings, turnbuckles, snap hooks)
Nylon or polyester rope, or stainless-steel wire
Concrete (if installing new posts)
Tools:
Power drill
Measuring tape
Level
Ladder
Wrench or adjustable spanner
Post hole digger (if installing new posts)
Step 1: Plan Your Shade Tarp Layout
The first step in installing your backyard shade tarp is careful planning. Take time to assess your outdoor area and answer these key questions:
Where is the sun’s path throughout the day?
What size and shape of tarp best suits your space?
Will you anchor the tarp to existing structures or install new posts?
What height do you want the tarp to sit at for maximum shade and airflow?
Pro Tip: Use string or garden hoses to visualize the tarp layout on the ground before making permanent decisions.
Step 2: Measure and Mark Anchor Points
Once you’ve determined the tarp’s location and orientation:
Measure the tarp dimensions.
Mark the exact points where each corner of the tarp will be anchored.
Ensure that the anchor points are at least 5–10% longer than the tarp size to allow for tensioning and slight adjustments.
Consider slope angles for water runoff. Aim for at least a 20-degree angle to prevent water pooling on the tarp.
Step 3: Install Support Posts (If Necessary)
If your backyard lacks existing anchor points like trees or fences, you’ll need to install sturdy support posts:
Dig post holes at least 24 inches deep and 8-12 inches wide for stability.
Set posts in concrete, making sure they remain plumb and level.
Allow the concrete to cure for at least 24–48 hours before applying tension from the tarp.
We recommend using pressure-treated wood, galvanized steel poles, or aluminum posts for longevity and strength.
Step 4: Install Mounting Hardware
With your anchor points ready, it’s time to install the necessary hardware:
Attach eye bolts or pad eyes securely into walls, posts, or other fixed structures.
For added flexibility and adjustability, install turnbuckles or tensioners to fine-tune the tarp’s tightness.
Connect snap hooks, D-rings, or carabiners to make assembly and disassembly easier.
Make sure all hardware is rated for outdoor use to prevent rust and corrosion.
Step 5: Attach and Tension the Shade Tarp
Now it’s time for the most satisfying part—mounting the shade tarp:
Begin by attaching one corner of the tarp to an anchor point.
Gradually attach the remaining corners, moving diagonally for even tension.
Adjust each connection point using your turnbuckles, ropes, or cables.
Pull the tarp tight enough to avoid sagging, but not so tight that it risks tearing.
Check that the tarp maintains the desired slope for rainwater runoff and adjust tension as needed.
Step 6: Final Adjustments and Safety Check
Before enjoying your new shaded area:
Inspect all anchor points and hardware for stability.
Test the tarp’s tension and make adjustments for even distribution.
Ensure that no sharp edges or loose connections remain that could damage the tarp or pose a safety hazard.
Confirm that the tarp is secure in windy conditions by giving it a gentle tug.
If you live in an area with frequent high winds, consider removing the tarp during storms to prevent damage.
Step 7: Enjoy Your Shaded Backyard Oasis
Once installed, your backyard shade tarp provides a comfortable and protective space for outdoor gatherings, relaxation, or family activities. You can decorate underneath with outdoor furniture, string lights, or potted plants to create a personalized outdoor retreat.
Maintenance Tips for Long-Lasting Shade Tarp Performance
To extend the life of your shade tarp, follow these maintenance guidelines:
Regularly check for wear and tear, especially around anchor points and seams.
Clean the tarp periodically with mild soap and water to prevent mildew buildup.
Store the tarp indoors during harsh weather seasons if it's not designed for year-round use.
Tighten hardware as needed to maintain proper tension and avoid sagging.
By following these simple care steps, your shade tarp will continue to deliver years of sun protection and outdoor comfort.
Conclusion: Upgrade Your Outdoor Space with a DIY Shade Tarp
Installing a shade tarp in your backyard is a cost-effective and rewarding DIY project. With careful planning, quality materials, and proper installation techniques, you’ll enjoy cool, shaded outdoor living all season long. This step-by-step guide ensures your project goes smoothly from start to finish.

 Windy City Painters
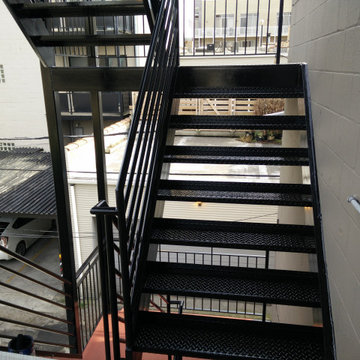
Iron Fence Painting Lincoln Park Chicago - Professional Metal Refinishing
Windy City Painters completed this comprehensive iron fence painting project for a beautiful Lincoln Park greystone property. Lincoln Park's historic architecture demands careful attention to detail, and furthermore, Chicago's harsh weather conditions require professional-grade materials and techniques for lasting protection.
We utilized premium Sherwin-Williams rust inhibiting primer and Benjamin Moore exterior metal paint for maximum durability. Additionally, our team employed specialized rust removal tools and surface preparation equipment to ensure optimal adhesion and longevity.
Our four-step process included complete rust removal and surface cleaning, minor repairs to damaged sections, premium primer application with proper curing time, and final topcoat application using spray and brush techniques for even coverage.
Chicago's unique challenges include extreme temperature fluctuations, salt exposure from winter treatments, and moisture from Lake Michigan. Moreover, older properties often have multiple paint layers requiring careful removal. Therefore, professional expertise ensures proper preparation and material selection.
The results exceeded client expectations with a smooth, durable finish that enhances the property's curb appeal. Subsequently, the fence now provides years of protection while complementing the neighborhood's architectural character perfectly.
Before starting similar projects, homeowners should understand that proper surface preparation accounts for 80% of project success. Additionally, weather conditions significantly impact application timing and results.
See more work and request free estimate at windypainters.com.
Frequently Asked Questions:
Q: How much does iron fence painting cost in Lincoln Park Chicago?
A: Iron fence painting costs vary based on fence size, existing condition, rust damage extent, and preparation requirements needed.
Q: What preparation is required for successful iron fence painting projects?
A: Iron fence painting requires thorough rust removal, surface cleaning, minor repairs, primer application, and proper weather conditions.
Q: How long does professional iron fence painting last in Chicago weather?
A: Professional iron fence painting typically lasts 8-12 years with quality materials, proper preparation, and regular maintenance.
Q: When is the best season for iron fence painting in Chicago?
A: Spring through early fall provides optimal conditions for iron fence painting with appropriate temperature and humidity levels.
Q: Can you match existing colors for iron fence painting restoration projects?
A: Yes, we provide custom color matching services for iron fence painting to complement existing architectural elements perfectly.
Q: Do you warranty iron fence painting work in Lincoln Park?
A: Windy City Painters provides comprehensive warranties on all iron fence painting projects ensuring quality and customer satisfaction.
Q: What makes professional iron fence painting worth the investment cost?
A: Professional iron fence painting ensures proper preparation, quality materials, expert application techniques, and significantly extended fence lifespan.
Q: How do you prevent rust from returning after iron fence painting?
A: Our iron fence painting process includes rust inhibiting primer, quality topcoats, and proper surface preparation for maximum protection.
Q: Can iron fence painting increase Lincoln Park property values significantly?
A: Professional iron fence painting enhances curb appeal, property aesthetics, and market value in desirable Lincoln Park neighborhood.
Q: What safety precautions are necessary during iron fence painting projects?
A: Iron fence painting requires proper ventilation, protective equipment, lead paint testing, and professional safety protocols throughout.
 Tile Doctor Ltd
A family living in Guildford were in touch recently about restoring the appearance of their Ceramic tiled shower and bathroom. They were about to put the property up for sale and were concerned the grubby grout might put off potential buyers. First impressions do count so renovating a bathroom or kitchen before selling is a really good idea and will help you achieve a better price.
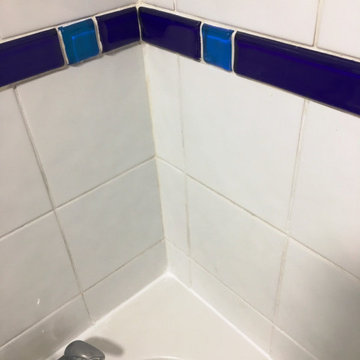
In this case the Ceramic tiles were dirty and black with mould in places which looked unhygienic and uninviting. Additionally, the mastic sealant between the tile and bath was tired and worn to the extent that water could end up leaking behind the seal. After visiting the property, they were pleased to hear I could help and happily accepted our quote which was based around a days work and some materials.
Firstly, I cleaned the grout using a Tile Doctor product called Duo Clean which is designed to tackle dirty grout and mould. I sprayed the product along all the grout lines and left it to soak in for about fifteen minutes. Once ready I brushed them with a firm wire brush then rinsed off with water. Next, I cleaned the tiles using a strong dilution of Tile Doctor Pro-Clean which was decanted into a spray bottle and sprayed onto the wall tiles. After ten minutes I then used a handheld buffing machine fitted with a small white buffing pad to shift the dirt and buff up the white tiles. After rinsing the slurry off with water you could see a marked improvement.
I hand dried the tile and grout with a cloth and then set about stripping out the old white mastic sealer with a sharp knife. This took some time, as you have to be careful not to scratch the bath or the tile.
By this time the grout had dried off fully and I was able to see if more work was required. To achieve a uniform colour throughout. Mould and some cleaning products can discolour grout permanently and, in this case, there was some grout staining I was unable to remove. We had discussed this possibility earlier and how it would be best resolved using a white grout colourant. So, I carefully applied Tile Doctor Grout Colour which is painted on with a small brush with any excess wiped off the tile before it can set. This resulted in a uniform white grout throughout and really gave the whole bathroom a lift.
With the cleaning process completed I applied a new white mastic between the bath and tile and along the verticals. This is done with the bath filled with water and then left for 24 hours to allow the silicone to fully cure.
After the grout colour had dried, I applied an aerosol Tile and Grout sealer over the whole surface and then lightly polished off any excess with a clean cloth. This does two things; one it adds a further layer of protection to the new grout colour and to the surface of the tiles. Secondly Ceramic tiles are non-porous, but bacterial dirt can still get a grip on the surface, with the sealer in place you will find water quickly runs off without getting a chance to get a hold.
Sealers do wear off, so I recommended re-applying it every year. I had plenty left over and gave it to the customer when I finished using it. For regular cleaning of tiled shower areas, I recommend they use Tile Doctor Aqua-Pro this will neutralise any acid build-up caused by acidic shampoos etc.
West Surrey Tile Doctor
Rupert Mcleod
 Tile Doctor Ltd
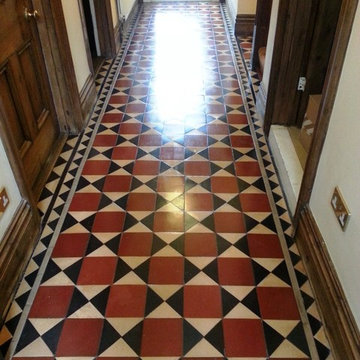
Recently I was contacted by a man in the town of Bedford who was worried that he had damaged his Victorian tiled hallway as a result of dragging a piano across the floor. I went round to the property to get a better look at the problem and, on closer inspection, realised that the tiles were actually fine; however, the piano had torn through the old surface seal.
The 150-year old tiles, dating back – as the name suggests – to the reign of Queen Victoria, had been poorly sealed and additionally had not been maintained correctly with the appropriate cleaning products. I was commissioned to remove the old sealer, clean and re-seal in order to restore this fantastic floor to its former glory.
My first task was to mix a solution of Tile Doctor Pro-Clean and water, which was then spread across the floor. Pro-Clean is a high alkaline cleaner which also contains stripping properties and this helped to break down the old, damaged sealer. The solution was left to dwell for approximately 20 minutes, giving it time to seep into the stone to get underneath, and lift out, any ingrained dirt. Pro-Clean was worked into the tiles using a heavy low speed rotary machine fitted with a black pad.
Once cleaned and stripped, we rinsed the floor using plain, clean water to neutralise the high alkaline Pro-Clean and the removed the resulting slurry using a wet-vac machine.
At this point I noticed that the white/magnolia tiles were particularly well worn and still very dirty and in need of further cleaning. Around this time Tile Doctor had also been discussing the successful use of Burnishing Pads (normally used on polished stone) on Victorian Tiles so I hand burnished the most stained tiles with a small 6 inch diamond encrusted burnishing pad with a little water to help lubricate the process. Following this, I rinsed the entire floor once again.
After leaving the floor to dry for four days, I returned to the house to seal the tiles opting to apply a single coat of Tile Doctor Colour Grow impregnating sealer first followed up with four coats of Tile Doctor Seal & Go. This combination of sealers provides a durable internal and surface stain protection whilst lifting the colours and adding a nice subtle sheen finish.
Once dried and cured, the floor was buffed using micro-fibre clothes to further enhance the appearance of the tiles further. My client was very pleased with the results, and couldn’t believe it was possible to get a floor that was so old appear brand new! The floor will dull with wear so I advised my client on the benefits of a regular maintenance plan going forward to ensure this great flooring feature remains in top condition.
Andrew Evans
Bedfordshire Tile Doctor
1