
Search results for "Remove excess" in Home Design Ideas

 Carter Fox Design Build
Carter Fox Renovations was hired to do a complete renovation of this semi-detached home in the Gerrard-Coxwell neighbourhood of Toronto. The main floor was completely gutted and transformed - most of the interior walls and ceilings were removed, a large sliding door installed across the back, and a small powder room added. All the electrical and plumbing was updated and new herringbone hardwood installed throughout.
Upstairs, the bathroom was expanded by taking space from the adjoining bedroom. We added a second floor laundry and new hardwood throughout. The walls and ceiling were plaster repaired and painted, avoiding the time, expense and excessive creation of landfill involved in a total demolition.
The clients had a very clear picture of what they wanted, and the finished space is very liveable and beautifully showcases their style.
Photo: Julie Carter

 MARGARITA BRAVO
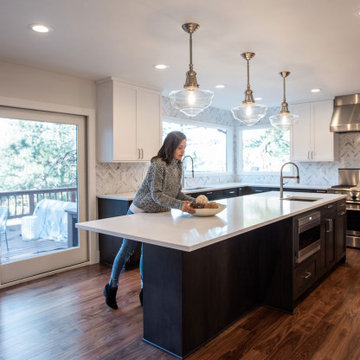
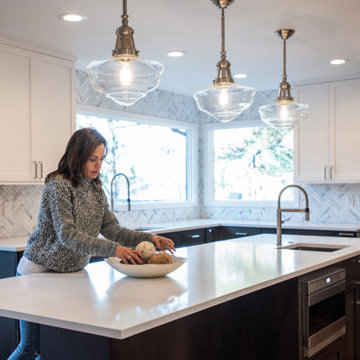
Our clients wanted a modern mountain getaway that would combine their gorgeous mountain surroundings with contemporary finishes. To highlight the stunning cathedral ceilings, we decided to take the natural stone on the fireplace from floor to ceiling. The dark wood mantle adds a break for the eye, and ties in the views of surrounding trees. Our clients wanted a complete facelift for their kitchen, and this started with removing the excess of dark wood on the ceiling, walls, and cabinets. Opening a larger picture window helps in bringing the outdoors in, and contrasting white and black cabinets create a fresh and modern feel.
---
Project designed by Montecito interior designer Margarita Bravo. She serves Montecito as well as surrounding areas such as Hope Ranch, Summerland, Santa Barbara, Isla Vista, Mission Canyon, Carpinteria, Goleta, Ojai, Los Olivos, and Solvang.
For more about MARGARITA BRAVO, click here: https://www.margaritabravo.com/
To learn more about this project, click here: https://www.margaritabravo.com/portfolio/colorado-nature-inspired-getaway/
 MARGARITA BRAVO
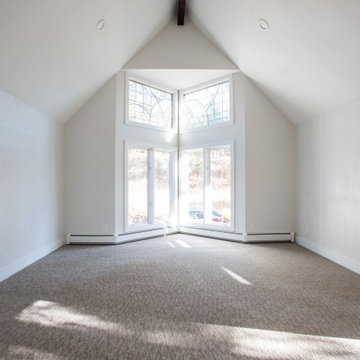
Our clients wanted a modern mountain getaway that would combine their gorgeous mountain surroundings with contemporary finishes. To highlight the stunning cathedral ceilings, we decided to take the natural stone on the fireplace from floor to ceiling. The dark wood mantle adds a break for the eye, and ties in the views of surrounding trees. Our clients wanted a complete facelift for their kitchen, and this started with removing the excess of dark wood on the ceiling, walls, and cabinets. Opening a larger picture window helps in bringing the outdoors in, and contrasting white and black cabinets create a fresh and modern feel.
---
Project designed by Montecito interior designer Margarita Bravo. She serves Montecito as well as surrounding areas such as Hope Ranch, Summerland, Santa Barbara, Isla Vista, Mission Canyon, Carpinteria, Goleta, Ojai, Los Olivos, and Solvang.
For more about MARGARITA BRAVO, click here: https://www.margaritabravo.com/
To learn more about this project, click here: https://www.margaritabravo.com/portfolio/colorado-nature-inspired-getaway/
Find the right local pro for your project
 MARGARITA BRAVO
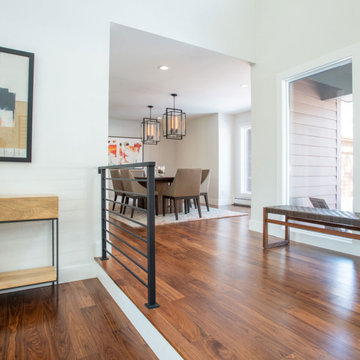
Our clients wanted a modern mountain getaway that would combine their gorgeous mountain surroundings with contemporary finishes. To highlight the stunning cathedral ceilings, we decided to take the natural stone on the fireplace from floor to ceiling. The dark wood mantle adds a break for the eye, and ties in the views of surrounding trees. Our clients wanted a complete facelift for their kitchen, and this started with removing the excess of dark wood on the ceiling, walls, and cabinets. Opening a larger picture window helps in bringing the outdoors in, and contrasting white and black cabinets create a fresh and modern feel.
---
Project designed by Montecito interior designer Margarita Bravo. She serves Montecito as well as surrounding areas such as Hope Ranch, Summerland, Santa Barbara, Isla Vista, Mission Canyon, Carpinteria, Goleta, Ojai, Los Olivos, and Solvang.
For more about MARGARITA BRAVO, click here: https://www.margaritabravo.com/
To learn more about this project, click here: https://www.margaritabravo.com/portfolio/colorado-nature-inspired-getaway/
 MARGARITA BRAVO
Our clients wanted a modern mountain getaway that would combine their gorgeous mountain surroundings with contemporary finishes. To highlight the stunning cathedral ceilings, we decided to take the natural stone on the fireplace from floor to ceiling. The dark wood mantle adds a break for the eye, and ties in the views of surrounding trees. Our clients wanted a complete facelift for their kitchen, and this started with removing the excess of dark wood on the ceiling, walls, and cabinets. Opening a larger picture window helps in bringing the outdoors in, and contrasting white and black cabinets create a fresh and modern feel.
---
Project designed by Montecito interior designer Margarita Bravo. She serves Montecito as well as surrounding areas such as Hope Ranch, Summerland, Santa Barbara, Isla Vista, Mission Canyon, Carpinteria, Goleta, Ojai, Los Olivos, and Solvang.
For more about MARGARITA BRAVO, click here: https://www.margaritabravo.com/
To learn more about this project, click here: https://www.margaritabravo.com/portfolio/colorado-nature-inspired-getaway/
 MARGARITA BRAVO
Our clients wanted a modern mountain getaway that would combine their gorgeous mountain surroundings with contemporary finishes. To highlight the stunning cathedral ceilings, we decided to take the natural stone on the fireplace from floor to ceiling. The dark wood mantle adds a break for the eye, and ties in the views of surrounding trees. Our clients wanted a complete facelift for their kitchen, and this started with removing the excess of dark wood on the ceiling, walls, and cabinets. Opening a larger picture window helps in bringing the outdoors in, and contrasting white and black cabinets create a fresh and modern feel.
---
Project designed by Montecito interior designer Margarita Bravo. She serves Montecito as well as surrounding areas such as Hope Ranch, Summerland, Santa Barbara, Isla Vista, Mission Canyon, Carpinteria, Goleta, Ojai, Los Olivos, and Solvang.
For more about MARGARITA BRAVO, click here: https://www.margaritabravo.com/
To learn more about this project, click here: https://www.margaritabravo.com/portfolio/colorado-nature-inspired-getaway/
 MARGARITA BRAVO
Our clients wanted a modern mountain getaway that would combine their gorgeous mountain surroundings with contemporary finishes. To highlight the stunning cathedral ceilings, we decided to take the natural stone on the fireplace from floor to ceiling. The dark wood mantle adds a break for the eye, and ties in the views of surrounding trees. Our clients wanted a complete facelift for their kitchen, and this started with removing the excess of dark wood on the ceiling, walls, and cabinets. Opening a larger picture window helps in bringing the outdoors in, and contrasting white and black cabinets create a fresh and modern feel.
---
Project designed by Montecito interior designer Margarita Bravo. She serves Montecito as well as surrounding areas such as Hope Ranch, Summerland, Santa Barbara, Isla Vista, Mission Canyon, Carpinteria, Goleta, Ojai, Los Olivos, and Solvang.
For more about MARGARITA BRAVO, click here: https://www.margaritabravo.com/
To learn more about this project, click here: https://www.margaritabravo.com/portfolio/colorado-nature-inspired-getaway/


 MARGARITA BRAVO
Our clients wanted a modern mountain getaway that would combine their gorgeous mountain surroundings with contemporary finishes. To highlight the stunning cathedral ceilings, we decided to take the natural stone on the fireplace from floor to ceiling. The dark wood mantle adds a break for the eye, and ties in the views of surrounding trees. Our clients wanted a complete facelift for their kitchen, and this started with removing the excess of dark wood on the ceiling, walls, and cabinets. Opening a larger picture window helps in bringing the outdoors in, and contrasting white and black cabinets create a fresh and modern feel.
---
Project designed by Montecito interior designer Margarita Bravo. She serves Montecito as well as surrounding areas such as Hope Ranch, Summerland, Santa Barbara, Isla Vista, Mission Canyon, Carpinteria, Goleta, Ojai, Los Olivos, and Solvang.
For more about MARGARITA BRAVO, click here: https://www.margaritabravo.com/
To learn more about this project, click here: https://www.margaritabravo.com/portfolio/colorado-nature-inspired-getaway/

 Joy Street Design
A gorgeous kitchen showcasing a brand new color palette of gray and bold blue! As this was the client’s childhood home, we wanted to preserve her memories while still refreshing the interior and bringing it up-to-date. We started with a new spatial layout and increased the size of wall openings to create the sense of an open plan without removing all the walls. By adding a more functional layout and pops of color throughout the space, we were able to achieve a youthful update to a cherished space without losing all the character and memories that the homeowner loved.
Designed by Joy Street Design serving Oakland, Berkeley, San Francisco, and the whole of the East Bay.
For more about Joy Street Design, click here: https://www.joystreetdesign.com/
To learn more about this project, click here: https://www.joystreetdesign.com/portfolio/randolph-street

 Design Vision Studio
Louis G. Weiner Photography -
My clients recently purchased this vacation home and quickly developed a design wish-list which included a full remodel of the master bathroom. This builder's-choice master bathroom might have been stylish and in when built in 1985, but 30 years later it has not stood the test of time.
First, we opened up the room by removing the heavy soffits and the excessive corner cabinetry. We designed a more streamline, floating vanity with beautiful quartz countertops and a waterfall edge. We expanded the footprint of the shower and created a seamless beach entry by removing the shower dam. Then we choose to wrap the room and adjacent commode with white subway tile and a custom marble border.
The most dramatic renovation was replacing the outdated jacuzzi tub with an elegant free-standing soaking tub. This was a must on the wish-list for the clients - not for the wife as you might expect - but for the husband. He is a motorcycle enthusiast and after long trips on his bike, he likes to take a soak.
Inspired to use art that tells a personal story about the clients, I recommended creating a photo canvas from a treasured picture of the husband standing with his motorcycle helmet on a beautiful desert road. This final touch connects my clients to their space and makes them smile every time they see it.
 Tile Doctor Ltd
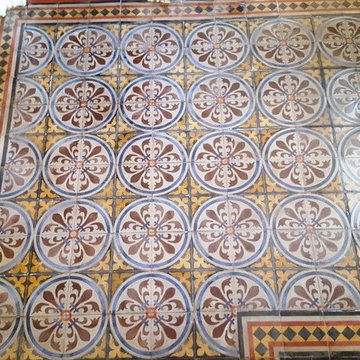
This very old Encaustic tiled flooring was uncovered at a property in Chester when the present owners started to undertake renovation. They removed the carpets and vinyl tiles from the hallway, revealing the Encaustic tiles to find that they were in truly horrific condition. This included being covered by heavy dirt, dust and, in some parts, by a sticky black bitumen.
Encaustic tiles are made out of compressed cement, and were commonly used in properties built during the Edwardian and Victorian period. This gives us a good idea of just how old these tiles are – but the owners were keen to see what Tile Doctor could do to restore their condition.
The black bitumen was my main concern when it came to cleaning the tiles. To remove this, along with all the other dirt and dust, our powerful cleaner for heavy soil buildup, known as Tile Doctor Remove and Go, was applied.
The product, which is also effective for removing adhesive and paint stains, was worked into the tiles then left to dwell for thirty minutes, before being scrubbed with a black pad fitted to a rotary machine. The resulting cleaning residue was soaked up with a wet vac machine. This cleaning process was repeated once more over to get the tiles as clean as possible, before leaving them to dry overnight.
The next day, damp readings were taken to make sure the floor was dry enough to seal. It’s essential to take damp readings before sealing – especially with old tiled floors that may not have a damp proof membrane installed – as even the slightest amount of excess moisture can damage the performance of the sealer.
Two types of sealer were used in this situation. First to be applied was a single coat of Tile Doctor Colour Grow, an impregnating, colour intensifying sealer which enhances the best shades in the tiles. Following this, four coats of Tile Doctor Seal and Go were applied. This is a topical sealer, which means it builds a layer of protection on the surface of the floor, while also providing an aesthetically pleasing low-sheen finish.
The customer was over the moon at the end result. At first the floor looked to be with a lost cause, but with the right cleaning methods and products it has been a restored to a standard where it almost appears new. Another satisfied customer!
Alastair Robb
West Cheshire Tile Doctor
 Design Vision Studio
Louis G. Weiner Photography -
My clients recently purchased this vacation home and quickly developed a design wish-list which included a full remodel of the master bathroom. This builder's-choice master bathroom might have been stylish and in when built in 1985, but 30 years later it has not stood the test of time.
First, we opened up the room by removing the heavy soffits and the excessive corner cabinetry. We designed a more streamline, floating vanity with beautiful quartz countertops and a waterfall edge. We expanded the footprint of the shower and created a seamless beach entry by removing the shower dam. Then we choose to wrap the room and adjacent commode with white subway tile and a custom marble border.
The most dramatic renovation was replacing the outdated jacuzzi tub with an elegant free-standing soaking tub. This was a must on the wish-list for the clients - not for the wife as you might expect - but for the husband. He is a motorcycle enthusiast and after long trips on his bike, he likes to take a soak.
Inspired to use art that tells a personal story about the clients, I recommended creating a photo canvas from a treasured picture of the husband standing with his motorcycle helmet on a beautiful desert road. This final touch connects my clients to their space and makes them smile every time they see it.
 Design Vision Studio
Louis G. Weiner Photography -
My clients recently purchased this vacation home and quickly developed a design wish-list which included a full remodel of the master bathroom. This builder's-choice master bathroom might have been stylish and in when built in 1985, but 30 years later it has not stood the test of time.
First, we opened up the room by removing the heavy soffits and the excessive corner cabinetry. We designed a more streamline, floating vanity with beautiful quartz countertops and a waterfall edge. We expanded the footprint of the shower and created a seamless beach entry by removing the shower dam. Then we choose to wrap the room and adjacent commode with white subway tile and a custom marble border.
The most dramatic renovation was replacing the outdated jacuzzi tub with an elegant free-standing soaking tub. This was a must on the wish-list for the clients - not for the wife as you might expect - but for the husband. He is a motorcycle enthusiast and after long trips on his bike, he likes to take a soak.
Inspired to use art that tells a personal story about the clients, I recommended creating a photo canvas from a treasured picture of the husband standing with his motorcycle helmet on a beautiful desert road. This final touch connects my clients to their space and makes them smile every time they see it.


 Appliance Technician
Efficient Freezer Repair in Ottawa - ApplianceTechnician.ca
Project Overview:
Experience the peace of mind that comes with reliable freezer repair services in Ottawa. Our expert technicians at ApplianceTechnician.ca specialize in diagnosing and fixing common freezer issues such as frost build-up, temperature inconsistencies, and electrical malfunctions, restoring your appliance's efficiency and extending its lifespan.
Services Provided:
Fast Freezer Repair: Quick and efficient repair services for malfunctioning freezers, ensuring minimal downtime and food waste.
Frost Build-Up Removal: Professional solutions to prevent and eliminate excessive frost, optimizing your freezer's performance.
Electrical Fault Repair: Skilled in addressing Ottawa's common home electrical issues, we ensure your freezer operates safely and reliably.
Why Us:
Certified Technicians: Trust your freezer repairs to our certified professionals, equipped with the latest tools and expertise.
Quality and Efficiency: We provide high-quality repairs that focus on efficiency, saving you energy and money.
Emergency Services: Ready for your call 24/7, we offer emergency repairs to address urgent appliance issues promptly.
SEO Keywords:
Freezer Repair Ottawa, Frost Removal, Efficient Freezer Performance, Certified Appliance Technicians, Emergency Freezer Services, Electrical Faults Freezer, ApplianceTechnician.ca
Contact:
Get your freezer fixed right the first time with ApplianceTechnician.ca. Contact us for a reliable repair service that's both effective and energy-conscious.
 Tile Doctor Ltd
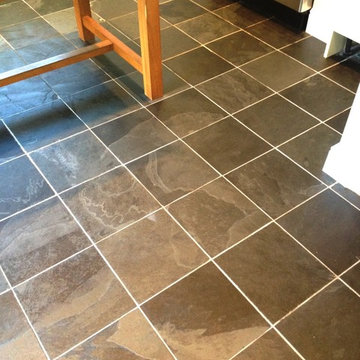
Slate is a popular choice for tiled kitchen floors and when properly maintained looks fantastic, however like all natural stone products without an effective cleaning plan dirt will become ingrained in the stone and will start to lose its appearance.
This was the case with this fantastic Slate tiled kitchen floor in Twickenham which had the potential to look really nice, but hadn’t received the proper maintenance for a long while, leaving it looking very tired. It now needed what was left of its old surface sealer stripped off, followed by a deep cleaning of the tile and grout before having a fresh seal applied.
To begin the restoration, I mixed a 50:50 solution of Tile Doctor Remove and Go and Tile Doctor Pro Clean. This was applied to the floor and allowed to dwell. Remove and Go functions as a stripper that breaks down the old sealer, while Pro Clean is a versatile, high alkaline cleaner that is safe to use on all types of natural stone flooring.
To use it to full effect, I machine scrubbed this solution into the floor to completely remove all dirt, stains, and old sealer. I also ran a stiff brush along the grout lines to remove the particularly stubborn dirt ingrained in the grout. The resulting cleaning slurry was then rinsed with water and extracted using a wet vacuum and the floor checked for stubborn marks which were retreated using the same process.
The floor was left to dry overnight and I came back the next day to apply a new seal. It’s important to leave a tiled floor to dry completely before sealing and at this time of year 24 hours is usually enough. This is necessary to ensures there is no excess moisture in the tile as this has the potential to cloud the sealer and affect its effectiveness.
The customer required a low sheen finish and a floor that was easy to maintain. I opted to use Seal & Go, which provides exactly that. It is a water-based with a high sheen blend of acrylic polymers that offers a both a stain resistant surface seal and a durable low sheen finish, also being water based it doesn’t leave a smell as it dries. Seal and Go is also a breathable sealer that will allow moisture to rise up through the tile and allow the floor to breathe.
As you can see from the pictures, the lustre has been completely restored to the Slate tiles and the sealer will allow for easy maintenance for the customer in the future.
Jonathan Oldham
South Middlesex Tile Doctor
 Tile Doctor Ltd
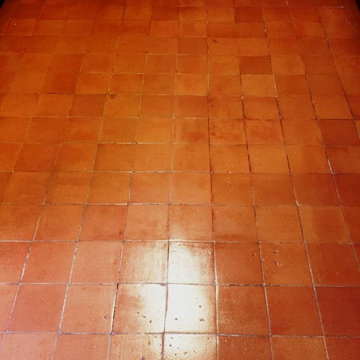
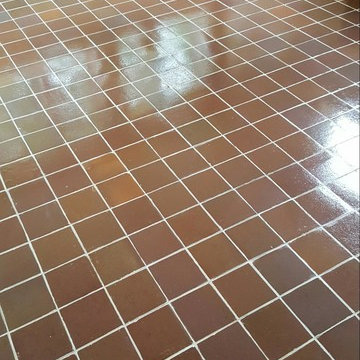
Not too long ago I visited a client who had just moved into a lovely old cottage in Milton, Oxfordshire. She wanted to restore many of the antique features of the building, including a fantastic Quarry tiled floor in the kitchen.
Quarry is typically a robust, hard wearing stone, but in a high traffic area like a kitchen, the tiles will need regular maintenance. These tiles clearly hadn’t seen a thorough clean and fresh seal in a long time, and so I was called in to provide just that.
On the first day of work, I gave the Quarry tiles a deep clean using a strong solution of Tile Doctor Pro-Clean and water. Pro-Clean is a versatile alkaline cleaner that also helps to break down any old and no longer effectual sealer remaining on the tiles.
The solution was applied evenly to the floor and left to dwell for half an hour, allowing time for it to seep into the stone to get underneath and lift out the ingrained dirt. I then removed the dirt by agitating the solution with a scrubbing pad fitted to a rotary floor scrubber. I worked in small sections at first, and gradually finished the entire floor.
After completing the initial clean, I rinsed away the soiled solution and vacuumed up the excess moisture using a wet-vac machine. I then scrubbed the floor an acid wash using a dilution of Tile Doctor Grout Clean-Up to remove grout smears and other mineral type deposits. The resulting solution was then removed in a similar fashion using a wet-vac.
The final step in the cleaning process was to rinse the floor with Tile Doctor pH Neutral Cleaner to remove any trace of product helps to tackle any remaining dirt and reset the pH balance of the tiles before sealing.
After leaving the floor to dry overnight, I returned the next day to the house to seal the floor with Tile Doctor Seal & Go, a water-based topical sealer which gives the floor an aesthetically pleasing sheen and a robust surface seal.
The photos demonstrate the results better than this short account can, needless to say the floor is now transformed.
Barry Woodward
Oxfordshire Tile Doctor
 Tile Doctor Ltd
It’s always a good idea to double-check any tile cleaning advice you receive with a professional. Sometimes advice can be inaccurate and cause more problems than good. Such was the case with this customer, who lives in the small town of Appleton near Warrington. He had been advised by his builder to use brick acid to remove carpet glue from a newly discovered Quarry tiled floor. Taking the advice, he had washed the floor several times with a solution of brick acid diluted with water. But while this seemed to successfully remove the carpet glue, it also severely discoloured the grout lines, leaving the entire floor looking grubby and unappealing.
The customer was just about to go on holiday, and asked me to see what could be done to restore the floor’s appearance while he was gone. With the house to myself, I got to work.
My first job was to strip the floor property to remove old sealers present on the tile using a strong dilution of our high alkaline cleaner, Tile Doctor Pro Clean. We use this cleaner on all types of tile and natural stone due to its versatility and consistency.
I spread the solution onto the floor and left to dwell for twenty minutes before scrubbing with a black pad fitted to a floor rotary machine. This process also removed the years of dirt and dust that had penetrated through the recently removed carpet. I also paid attention to the grout lines giving them a good scrub with a stiff grout brush, but the acid staining proved to be impossible to remove completely.
While I’m not sure exactly how long the floor had been covered by carpet, it’s safe to say a deep clean had been long, long overdue. Once I had cleaned the floor to a high standard, I used a wet-vac to remove the now dirty cleaning solution from the floor, before leaving it to dry off completely overnight.
Upon my return to the property the next day, I tested to make sure the floor was dry enough to seal, which is important as excess moisture can cloud the sealer and damage its performance.
Once satisfied, I applied one coat of Tile Doctor Colour Grow, which is our impregnating sealer designed to really bring out the natural colours in the tile, followed by two coats of Tile Doctor Seal and Go to give the tiles a stain resistant, low-sheen finish.
After this was dry I coloured the grout lines with a matching Tile Doctor Grout Colourant to cover and hide the damage the acid had caused to the grout lines. Finally, I gave the floor three more coats of Seal and Go to add the finishing touches.
My customer returned from holiday to find a completely transformed floor. Looking at the before and after photos, it is easy to see why he was more than happy with the result! Another satisfied customer.
Alastair Robb
West Cheshire Tile Doctor

 Tile Doctor Ltd
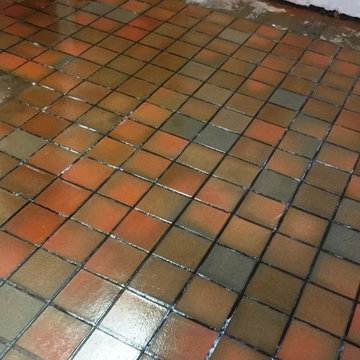
Recently I was called to a house in the very small town of Marton in Warwickshire which is known for its proximity to the medieval “Marton Bridge”, which lies just to the north, crossing the River Leam.
The entire downstairs flooring of my client’s house consisted of Quarry tiles apart from one room where the tiles had been covered by screed and then linoleum. Quarry tiles are a classic hard wearing tile used for both internal and external commercial and residential flooring due to its ability to withstand heavy usage. Reception areas, outdoor patios and porches, for example, are commonly tiled using Quarry.
My client wanted to restore the covered floor back to its original state so that it would match the rest of the downstairs. Realising that this would be a complex and physically demanding task, my client decided to call in Tile Doctor to carry out the restoration.
Removing the Linoleum covering was a relatively straightforward process, so I was able to do this relatively quickly. The main issue concerned removing the screed, which is far more difficult to remove, requiring a lot of physical scraping. Thus I opted to call in some extra manpower in the form of the Nottinghamshire Tile Doctor, Steve Carpenter. With the two of us armed with scrapers we set about removing the screed, taking extra care not to damage the Quarry tile underneath.
Once Steve and I had scraped off as much of the screed as physically possible, I applied a strong dilution of Tile Doctor Remove & Go, a stripper with cleaning properties that is particularly effective at breaking down coatings such as adhesives, plasters and sealers. The product was left to dwell for ten minutes before I worked it into the stone with a scrubbing pad.
After cleaning the tiles, I noticed a layer of grout haze on the surface of the exposed Quarry tiles, so I applied Tile Doctor Grout Clean-Up to remove it. Once the cleaning process was complete I gave the floor a thorough rinse with clean water, before soaking up the resulting residue with a wet-vac machine. The first day of work was a gruelling 12 hours long, but I was very pleased with the results and left the floor to dry overnight.
On day two I returned to finish the job by sealing the newly uncovered Quarry tiles, but not before using a damp meter to check that they were completely dry. Any excess moisture left on unsealed tiles can potentially effect the performance of any sealers that are applied. I sealed the tiles using Tile Doctor Colour Grow, an impregnating, colour-enhancing sealer which gave the surface an aesthetically pleasing shine, as well as durable protection against dirt and wear for the future.
After two long days of work the job was done and the transformation was fantastic and highly rewarding to see, the house now has a fantastic looking Quarry tiled floor running throughout the entirety of the lower level.
Mick Gayton
Warwickshire Tile Doctor
 Tile Doctor Ltd
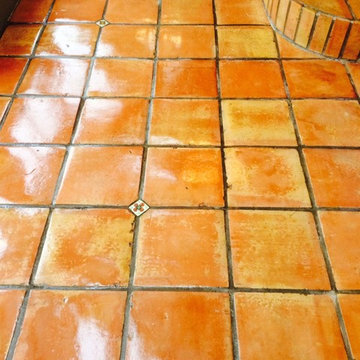
This Terracotta tiled floor was installed in the conservatory of a house in the old market town of Garstang, Lancashire, famous for being the world’s first ever ‘Fairtrade Town’.
There were quite a few problems with this floor; for one, my client had not re-sealed the tiles in many years and had therefore allowed the existing seal to become very worn and almost completely ineffectual. This had subsequently allowed the floor to become very dirty and marked with white blotches. These white blotches had occurred where the fertilizer held in decorative plant pots had started to eat away at the sealer.
The tiles were cleaned with a strong solution of Tile Doctor Pro-Clean, which is a strong alkaline cleaner. The solution was liberally applied to the floor and left to dwell for a short period, allowing time for the cleaner to seep into the pores of the Terracotta and lift the ingrained dirt to the surface. The solution was then agitated using a black scrubbing pad fitted to a heavy rotary machine, making a marked difference to the appearance of the tiles within a matter of minutes.
Tile Doctor Acid Gel was then used to spot treat the white marks, the acid content in the product breaks down the alkaline salts that had developed, left behind by the leaked plant fertilizer.
The entire floor was then rinsed several times to remove the soiled cleaning residue and the excess moisture was extracted using a wet-vac machine.
The Terracotta tiles were left to dry for an entire week as there was no evident damp proof membrane in place at the property. I used damp testers to approximate when the tiles would be dry enough to seal, which was very important as any excess moisture can upset the performance of the sealer.
My first choice of sealer was Tile Doctor Colour Grow, an impregnating sealer that also intensifies the natural colours in the stone. A single coat of Colour Grow was applied, before I opted to follow this up with six coats of Tile Doctor Seal & Go, which provides a very robust surface seal and also helped to give the Terracotta the aesthetically pleasing my client had requested.
Before leaving the property with its newly restored Terracotta tiled conservatory, I made sure to give my client some tile maintenance advice. Needless to say, she was very pleased with the results.
Russell Taylor
Lancashire Tile Doctor
15