
Search results for "Remove unwanted" in Home Design Ideas

 Sunshine Flooring
Example of a large classic wooden l-shaped wood railing staircase design in San Francisco with wooden risers

 Turf Supply USA
We were invited into the great project by David Morello and he was amazing to work with! This modern home and landscape was finished off with a beautiful Real Turf grass. The clean lines of this home and landscape were complimented with perfectly level and manicured artificial grass.

 Mako Renovation
by Tile Doctor
Example of a mid-sized trendy tile staircase design in Chicago with tile risers
Example of a mid-sized trendy tile staircase design in Chicago with tile risers
Find the right local pro for your project
 BLDG Workshop Inc.
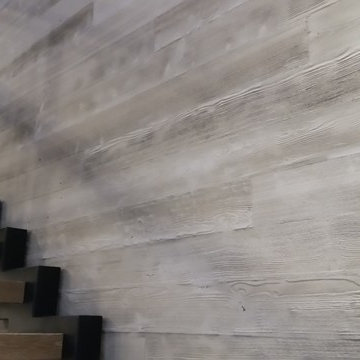
a board formed concrete wall sets a backdrop behind a steel cut stringer carrying open wood treads with skylights above
Staircase - large modern wooden straight open staircase idea in Vancouver
Staircase - large modern wooden straight open staircase idea in Vancouver





 Boerne Kitchens and Baths
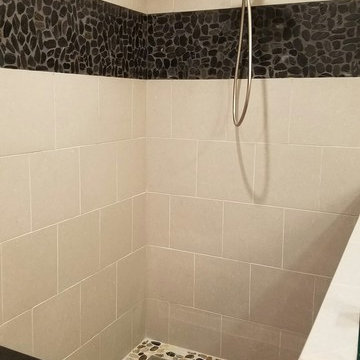
The Owner of this residence had damage from a plumbing leak and took advantage of the disruption to remodel the Master Bath. An unused whirlpool tub was removed and the master shower expanded to make a elegant walk in shower with a granite topped bench. The wall were tiled in a 13X13 light gray tile offset in a broken joint pattern. The floor was a cut river rock sloping to the front of the shower and a linear drain. The wall also has a accent stripe in a black cut river rock. A half wall was topped with a frameless piece of glass to give the room a clean transitional appearance.

 User
UserSleek gun metal Honed Granite sink
Outer Dimensions: 33" x 20 X 10"
Single basin
Honed finish
Standard 3.5" drain hole size
Example of a minimalist kitchen design in Phoenix with a double-bowl sink
Example of a minimalist kitchen design in Phoenix with a double-bowl sink

 Tile Doctor Ltd
These pictures of a Victorian Tiled Hallway are from a property in Canterbury that was once a nursing home and was now being renovated to become a children’s home. The building was being gutted and extended at the same time and when the carpet was pulled up in the hallway, they were surprised to find a relatively intact Victorian tiled floor underneath.
Whilst they thought it bizarre that anyone would want to cover up such an attractive floor the carpet had protected it over the years. They realized it would make a marvellous feature at the entrance to the property, but professional restoration would be needed to do it justice. After a bit of research, they came across Tile Doctor and got in touch.
Canterbury comes under my North Kent designation, so I went to visit the property and survey the floor and quote for doing the restoration. There were a few missing and loose tiles that would need replacing and refixing also there was a lot of ingrained dirt so a deep clean and application of a new sealer would be required. I gave them a price for the work which they readily accepted, and we arranged a suitable time to carry out the work. Subject to the building schedule I had calculated the floor would take three days to restore.
On the first day I set about replacing and re-fixing the missing, broken, and loose tiles. This is delicate work as you need to extract the old tile without disturbing its neighbours and then clean up the area ready for its replacement. Being a Tile Doctor I keep a selection of stock tiles for repairs, some are reclaimed, and some are replica. Also, there are several companies still making Victorian style tiles so I can usually source what I need.
After the individual missing and broken tiles had been replaced and the adhesive had set, it was then a matter of renovating the floor as a whole. The tiles were covered in a thick layer of carpet adhesive which needed a combination of specialist tools and products to remove. First, a liberal layer of Tile Doctor Remove and Go was applied and left to dwell for thirty minutes. Next, Tile Doctor Pro-Clean was added and scrubbed in with a black pad.
This process softened the adhesive sufficiently in readiness for the next stage which involves using a set of diamond burnishing pads on a weighted buffing machine. Several applications were needed, each time with a successively finer grade of diamond pad and rinsing off the slurry in between. The tiles were first milled using a very coarse 50-grit pad, followed by 100, 200 and finally burnished with a 400-grit burnishing pads. This removed all the adhesive and dirt in the tiles, which was cleaned up using the wet vacuum.
Old Victorian floors like this do not have a damp proof membrane installed under the floor, and with a lot of water being used in the cleaning process I was concerned White efflorescence salts could appear later as the floor dried. To counter this, I gave the floor an acid wash using Tile Doctor Acid Gel to counter and dissolve the salts, it also gives the tiles another clean and will remove any old grout smears further improving the appearance of the tiles. Once done the floor was left to dry overnight.
On my return I tested the floor was dry by taking several moisture readings around the floor with a damp meter. Applying sealer to a damp floor is never advised and can lead to clouding and an unwanted finish.
Happy that the tiles were dry, a single coat of Tile Doctor Colour Grow sealer was applied. This is an impregnating sealer with a colour enhancing component to ‘lift’ the stronger colours of the floor. Colour Grow however does leave a matt appearance and as the client had asked for a shiny finish it was topped up with five coats of Tile Doctor Seal and Go. This is a compatible topical sealer which added a mid to high sheen.
By the end of the third day the Victorian floor looked brand new, and I received the following feedback from the client. Its rare to receive feedback from commercial customers so they were clearly overwhelmed with the transformation.
Did not think this glued covered bad old floor could look sooooo good Fabulous Fantastic job Looks Amazing Thank you
For aftercare I recommend the use of Tile Doctor Neutral Cleaner which isn’t as harsh as many of the products you find in supermarket. Stronger products can actually strip off the sealer over time leaving it vulnerable to dirt and detracting from its appearance.
Graham Davis
North Kent Tile Doctor

 The Artists Hands - Faux Finishes
The purpose of this room is for adult lounging, relaxing and enjoying music and beverages. Our client wanted a unique abstract style canvas to be the focal point of this room. We were happy to complete this stunning abstract wall finish. Copyright © 2016 The Artists Hands

 Claudia Clark
Craftsman cherry medicine cabinet, recycled glass backsplash, and quartz counter
Large arts and crafts master blue tile and glass tile porcelain tile double shower photo in San Francisco with an undermount sink, shaker cabinets, medium tone wood cabinets, quartz countertops and blue walls
Large arts and crafts master blue tile and glass tile porcelain tile double shower photo in San Francisco with an undermount sink, shaker cabinets, medium tone wood cabinets, quartz countertops and blue walls

 Todd Whittaker Drywall Inc.
This gorgeous remodeled home in Scottsdale AZ has all of the right touches of elegance to create a lasting wow factor. Photo by Ed Russell Photography.


 Savvy Interiors
Mid-sized transitional 3/4 white tile and subway tile dark wood floor and brown floor alcove shower photo in San Diego with shaker cabinets, blue cabinets, a two-piece toilet, white walls, an undermount sink, solid surface countertops and white countertops

 NOMADIC COLLECTION
Hooray for color. A high end line of Tibetan weave rugs using 100% Silkette Pile and high low carving to imopart a unique effect with dimensions and colors.
Available sizes:
2x3, 3x5, 4x6, 6x9, 8x10, 9x12, 10x14, 12x15
Runner : 2'6" x 10'
CUSTOM SIZES AVAILABLE BY SPECIAL ORDER IN SHORT LEAD TIMES
PLEASE CALL FOR AVAILABILITY
970-926-3401 — at Nomadic Collection.


 Shannon Adamson Interior Design
This ski-in, ski-out condo features a strong Arts and Crafts influence. The interiors feature reclaimed oak floors, mortise-and-tenon carpentry, stone, and custom period details.

 Thomas Roszak Architecture, LLC
Photo credit: Scott McDonald @ Hedrich Blessing
7RR-Ecohome:
The design objective was to build a house for a couple recently married who both had kids from previous marriages. How to bridge two families together?
The design looks forward in terms of how people live today. The home is an experiment in transparency and solid form; removing borders and edges from outside to inside the house, and to really depict “flowing and endless space”. The house floor plan is derived by pushing and pulling the house’s form to maximize the backyard and minimize the public front yard while welcoming the sun in key rooms by rotating the house 45-degrees to true north. The angular form of the house is a result of the family’s program, the zoning rules, the lot’s attributes, and the sun’s path. We wanted to construct a house that is smart and efficient in terms of construction and energy, both in terms of the building and the user. We could tell a story of how the house is built in terms of the constructability, structure and enclosure, with a nod to Japanese wood construction in the method in which the siding is installed and the exposed interior beams are placed in the double height space. We engineered the house to be smart which not only looks modern but acts modern; every aspect of user control is simplified to a digital touch button, whether lights, shades, blinds, HVAC, communication, audio, video, or security. We developed a planning module based on a 6-foot square room size and a 6-foot wide connector called an interstitial space for hallways, bathrooms, stairs and mechanical, which keeps the rooms pure and uncluttered. The house is 6,200 SF of livable space, plus garage and basement gallery for a total of 9,200 SF. A large formal foyer celebrates the entry and opens up to the living, dining, kitchen and family rooms all focused on the rear garden. The east side of the second floor is the Master wing and a center bridge connects it to the kid’s wing on the west. Second floor terraces and sunscreens provide views and shade in this suburban setting. The playful mathematical grid of the house in the x, y and z axis also extends into the layout of the trees and hard-scapes, all centered on a suburban one-acre lot.
Many green attributes were designed into the home; Ipe wood sunscreens and window shades block out unwanted solar gain in summer, but allow winter sun in. Patio door and operable windows provide ample opportunity for natural ventilation throughout the open floor plan. Minimal windows on east and west sides to reduce heat loss in winter and unwanted gains in summer. Open floor plan and large window expanse reduces lighting demands and maximizes available daylight. Skylights provide natural light to the basement rooms. Durable, low-maintenance exterior materials include stone, ipe wood siding and decking, and concrete roof pavers. Design is based on a 2' planning grid to minimize construction waste. Basement foundation walls and slab are highly insulated. FSC-certified walnut wood flooring was used. Light colored concrete roof pavers to reduce cooling loads by as much as 15%. 2x6 framing allows for more insulation and energy savings. Super efficient windows have low-E argon gas filled units, and thermally insulated aluminum frames. Permeable brick and stone pavers reduce the site’s storm-water runoff. Countertops use recycled composite materials. Energy-Star rated furnaces and smart thermostats are located throughout the house to minimize duct runs and avoid energy loss. Energy-Star rated boiler that heats up both radiant floors and domestic hot water. Low-flow toilets and plumbing fixtures are used to conserve water usage. No VOC finish options and direct venting fireplaces maintain a high interior air quality. Smart home system controls lighting, HVAC, and shades to better manage energy use. Plumbing runs through interior walls reducing possibilities of heat loss and freezing problems. A large food pantry was placed next to kitchen to reduce trips to the grocery store. Home office reduces need for automobile transit and associated CO2 footprint. Plan allows for aging in place, with guest suite than can become the master suite, with no need to move as family members mature.



18