
Search results for "Removed" in Home Design Ideas




Find the right local pro for your project
 Tracstar Tree Experts
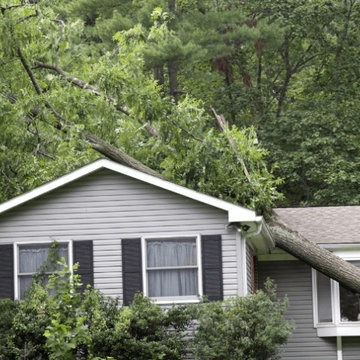
24/7 EMERGENCY STORM DAMAGE VIRGINIA BEACH
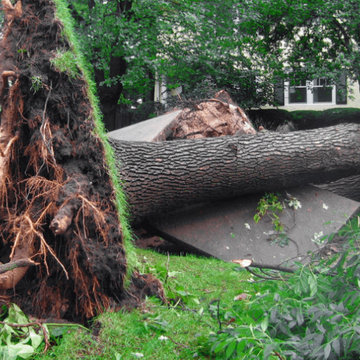
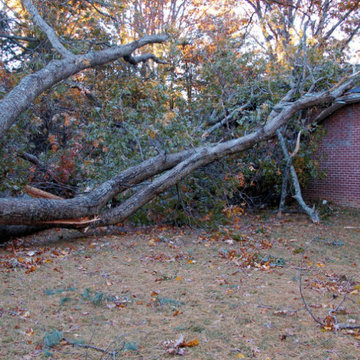
When you do you’ll be connected with the most highly skilled and promptly responsive arborists on the market today who are available 24/7 to provide emergency tree services in Virginia Beach, such as emergency tree removal in Virginia Beach. Experts quickly, affordably, and safely for all the people and property in the affected area.
Here at Tracstar Tree Experts, our tree service Virginia Beach professionals are serious about making your trees and your home safe no matter what emergency situations arise. It’s why our professionals are trained in quick responses and quick solutions to reduce the damage which can be inflicted by a diseased, fallen, or otherwise severely compromised tree and get you back to a state of safety and satisfaction with your home. If you find yourself with a sudden need for emergency tree services in Virginia Beach then you should absolutely not hesitate to contact the reliable and knowledgeable tree care Virginia Beach specialists at Tracstar Tree Experts. Call (757) 515-6933 as soon as you have a need for emergency tree services in Virginia Beach to receive a free estimate and the Virginia Beach tree care solutions you need to return to your life.
 LA Home Contractor
FULL HOUSE REMODEL – COMPLETE SCOPE OF WORK
1. Pre-Construction Phase
• Initial site inspection and measurements
• Architectural design and layout planning (if required)
• Structural engineering (if load-bearing walls are modified)
• Preparation of plans for city approval
• Permit application and plan check
• Obtain required building permits
• Scheduling of inspections
• Homeowner responsible for permit fees unless otherwise stated.
2. Site Preparation & Protection
• Protect flooring and non-work areas
• Install plastic dust barriers with zipper access
• Cover windows and furniture as needed
• Temporary utility setup if required
• Daily job site cleanup
• Final professional cleaning upon completion
3. Demolition
• Remove existing flooring (tile, wood, carpet, etc.)
• Remove cabinets, countertops, vanities
• Remove interior walls per plans
• Remove drywall where required
• Remove plumbing fixtures
• Remove electrical fixtures
• Haul away all debris
4. Structural & Framing
• Install structural beams if required
• Reframe modified walls
• Install new partitions per approved plans
• Repair or replace damaged framing
• Subfloor repair or replacement as needed
• Install blocking for cabinets and accessories
5. Plumbing (Up to Code)
• Replace old water supply lines (Copper Type L or PEX)
• Replace or modify drain lines (ABS)
• Relocate plumbing fixtures as needed
• Install new shut-off valves and cleanouts
• Water heater replacement if included
• Call for rough and final plumbing inspections
6. Electrical (Up to Code)
• Upgrade electrical panel if required
• Rewire entire house as needed
• Install new outlets and switches
• Install GFCI/AFCI protection per code
• Install recessed lighting and fixtures
• Install smoke and carbon monoxide detectors
• Dedicated circuits for appliances
• Call for rough and final electrical inspections
7. HVAC
• Replace or upgrade HVAC system if included
• Install new ducting and registers
• Install thermostat or mini-split system if applicable
8. Insulation
• Install wall insulation per code requirements
• Install ceiling insulation per code requirements
9. Drywall & Plaster
• Install new drywall
• Tape and mud (Level 4 or 5 finish)
• Texture to match existing or smooth finish
• Patch all affected areas
10. Flooring
• Install tile flooring
• Install engineered wood / hardwood / laminate / vinyl
• Install baseboards
• Floor leveling if required
11. Kitchen Remodel
• Install new cabinets
• Install countertops
• Install backsplash
• Install sink and faucet
• Install appliances (owner supplied unless specified)
12. Bathroom Remodel(s)
• Install new tub or shower system
• Waterproofing system installation
• Install tile on floors and walls
• Install vanity and toilet
• Install shower valve and fixtures
• Install shower glass if included
13. Doors & Windows
• Replace interior and entry doors
• Replace windows if included
• Install hardware
14. Interior & Exterior Paint
• Surface preparation
• Prime and paint walls, ceilings, and trim
• Exterior painting if included
15. Exterior Work (If Included)
• Stucco repair
• Roofing repair or replacement
• Concrete work or pavers
• Drainage improvements
16. Final Phase
• Final inspections
• Punch list completion
• Final cleaning
• Final walk-through with homeowner
Standard California Contract Terms (Summary)
• All work performed in compliance with California Building Code.
• Change orders must be approved in writing.
• Unforeseen conditions may require additional cost.
• One-year labor warranty unless otherwise stated.
• Progress payments per agreed payment schedule.
• Contractor is licensed and insured.
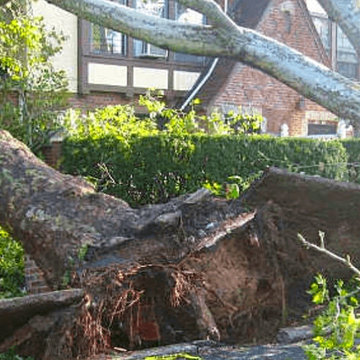 Tracstar Tree Experts
24/7 EMERGENCY STORM DAMAGE VIRGINIA BEACH
When you do you’ll be connected with the most highly skilled and promptly responsive arborists on the market today who are available 24/7 to provide emergency tree services in Virginia Beach, such as emergency tree removal in Virginia Beach. Experts quickly, affordably, and safely for all the people and property in the affected area.
Here at Tracstar Tree Experts, our tree service Virginia Beach professionals are serious about making your trees and your home safe no matter what emergency situations arise. It’s why our professionals are trained in quick responses and quick solutions to reduce the damage which can be inflicted by a diseased, fallen, or otherwise severely compromised tree and get you back to a state of safety and satisfaction with your home. If you find yourself with a sudden need for emergency tree services in Virginia Beach then you should absolutely not hesitate to contact the reliable and knowledgeable tree care Virginia Beach specialists at Tracstar Tree Experts. Call (757) 515-6933 as soon as you have a need for emergency tree services in Virginia Beach to receive a free estimate and the Virginia Beach tree care solutions you need to return to your life.
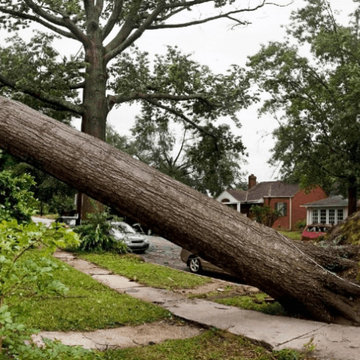 Tracstar Tree Experts
24/7 EMERGENCY STORM DAMAGE VIRGINIA BEACH
When you do you’ll be connected with the most highly skilled and promptly responsive arborists on the market today who are available 24/7 to provide emergency tree services in Virginia Beach, such as emergency tree removal in Virginia Beach. Experts quickly, affordably, and safely for all the people and property in the affected area.
Here at Tracstar Tree Experts, our tree service Virginia Beach professionals are serious about making your trees and your home safe no matter what emergency situations arise. It’s why our professionals are trained in quick responses and quick solutions to reduce the damage which can be inflicted by a diseased, fallen, or otherwise severely compromised tree and get you back to a state of safety and satisfaction with your home. If you find yourself with a sudden need for emergency tree services in Virginia Beach then you should absolutely not hesitate to contact the reliable and knowledgeable tree care Virginia Beach specialists at Tracstar Tree Experts. Call (757) 515-6933 as soon as you have a need for emergency tree services in Virginia Beach to receive a free estimate and the Virginia Beach tree care solutions you need to return to your life.


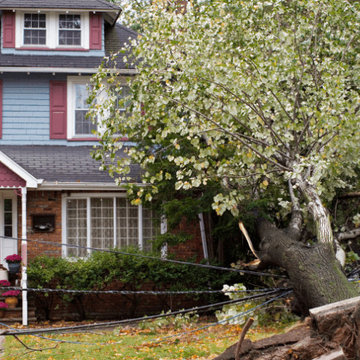 Tracstar Tree Experts
24/7 EMERGENCY STORM DAMAGE VIRGINIA BEACH
When you do you’ll be connected with the most highly skilled and promptly responsive arborists on the market today who are available 24/7 to provide emergency tree services in Virginia Beach, such as emergency tree removal in Virginia Beach. Experts quickly, affordably, and safely for all the people and property in the affected area.
Here at Tracstar Tree Experts, our tree service Virginia Beach professionals are serious about making your trees and your home safe no matter what emergency situations arise. It’s why our professionals are trained in quick responses and quick solutions to reduce the damage which can be inflicted by a diseased, fallen, or otherwise severely compromised tree and get you back to a state of safety and satisfaction with your home. If you find yourself with a sudden need for emergency tree services in Virginia Beach then you should absolutely not hesitate to contact the reliable and knowledgeable tree care Virginia Beach specialists at Tracstar Tree Experts. Call (757) 515-6933 as soon as you have a need for emergency tree services in Virginia Beach to receive a free estimate and the Virginia Beach tree care solutions you need to return to your life.
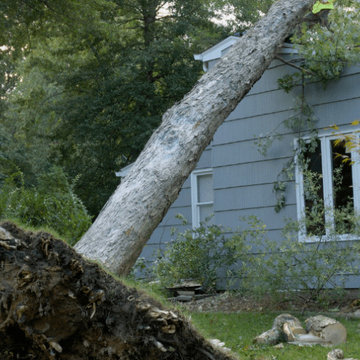 Tracstar Tree Experts
24/7 EMERGENCY STORM DAMAGE VIRGINIA BEACH
When you do you’ll be connected with the most highly skilled and promptly responsive arborists on the market today who are available 24/7 to provide emergency tree services in Virginia Beach, such as emergency tree removal in Virginia Beach. Experts quickly, affordably, and safely for all the people and property in the affected area.
Here at Tracstar Tree Experts, our tree service Virginia Beach professionals are serious about making your trees and your home safe no matter what emergency situations arise. It’s why our professionals are trained in quick responses and quick solutions to reduce the damage which can be inflicted by a diseased, fallen, or otherwise severely compromised tree and get you back to a state of safety and satisfaction with your home. If you find yourself with a sudden need for emergency tree services in Virginia Beach then you should absolutely not hesitate to contact the reliable and knowledgeable tree care Virginia Beach specialists at Tracstar Tree Experts. Call (757) 515-6933 as soon as you have a need for emergency tree services in Virginia Beach to receive a free estimate and the Virginia Beach tree care solutions you need to return to your life.
 Tracstar Tree Experts
24/7 EMERGENCY STORM DAMAGE VIRGINIA BEACH
When you do you’ll be connected with the most highly skilled and promptly responsive arborists on the market today who are available 24/7 to provide emergency tree services in Virginia Beach, such as emergency tree removal in Virginia Beach. Experts quickly, affordably, and safely for all the people and property in the affected area.
Here at Tracstar Tree Experts, our tree service Virginia Beach professionals are serious about making your trees and your home safe no matter what emergency situations arise. It’s why our professionals are trained in quick responses and quick solutions to reduce the damage which can be inflicted by a diseased, fallen, or otherwise severely compromised tree and get you back to a state of safety and satisfaction with your home. If you find yourself with a sudden need for emergency tree services in Virginia Beach then you should absolutely not hesitate to contact the reliable and knowledgeable tree care Virginia Beach specialists at Tracstar Tree Experts. Call (757) 515-6933 as soon as you have a need for emergency tree services in Virginia Beach to receive a free estimate and the Virginia Beach tree care solutions you need to return to your life.
 Tracstar Tree Experts
24/7 EMERGENCY STORM DAMAGE VIRGINIA BEACH
When you do you’ll be connected with the most highly skilled and promptly responsive arborists on the market today who are available 24/7 to provide emergency tree services in Virginia Beach, such as emergency tree removal in Virginia Beach. Experts quickly, affordably, and safely for all the people and property in the affected area.
Here at Tracstar Tree Experts, our tree service Virginia Beach professionals are serious about making your trees and your home safe no matter what emergency situations arise. It’s why our professionals are trained in quick responses and quick solutions to reduce the damage which can be inflicted by a diseased, fallen, or otherwise severely compromised tree and get you back to a state of safety and satisfaction with your home. If you find yourself with a sudden need for emergency tree services in Virginia Beach then you should absolutely not hesitate to contact the reliable and knowledgeable tree care Virginia Beach specialists at Tracstar Tree Experts. Call (757) 515-6933 as soon as you have a need for emergency tree services in Virginia Beach to receive a free estimate and the Virginia Beach tree care solutions you need to return to your life.
 MD Flooring Solutions, LLC
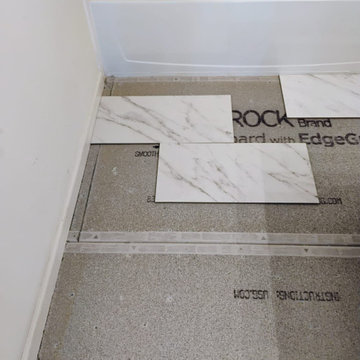
- To remove 2x current toilets.
- Take Up, Remove & Haul Away Vinyl from 2x bathrooms
- Take Up, Remove & Haul Away Lauan 1/8" plywood sheets from 2x bathrooms
- To install USG Durock Cement Board
- To apply thinset mortar
- To install 12"x24" Ceramic Tile
- To apply grout
- To install spacers
- To install 2x marble threshold pieces
- To install 2x new toilets
 Tile Doctor Ltd
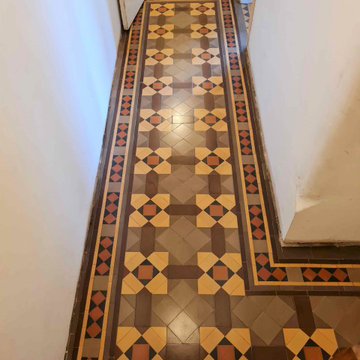
We were contacted by a customer in West Kirby who needed help renovating a Victorian tiled hallway in a house they had just purchased. Kirby is a desirable seaside location North of Heswall that expanded with the arrival of the railway in 1848. The railway brought a demand for property and so it’s not unusual to find housing stock in this area dating back to the Victorian era.
The Victorian tiles at this property appear to have been neglected by the previous owner and were now looking very dull and marked by paint from decorating; all the colours looked washed out and the floor was now looking very unappealing.
The good news however is that this problem is not uncommon and with a deep clean and a fresh sealer applied it can be transformed. I gave the owner a quote which was accepted a date agreed for my return to do the work.
On the first day the floor was sprayed with a neat solution of Tile Doctor Remove and Go which is a powerful alkaline cleaning and stripping agent used to remove old seals and paint. The solution was left to dwell for about twenty minutes so it could soak in and get to work. It was then scrubbed into the tiles using a coarse 200-grit pad fitted to a heavy buffing machine. Water was then added to the floor for lubrication and the soils released from the pores of the tile during scrubbing was removed by with a wet vacuum.
To treat the stubborn paint stains and remains of what I suspect was carpet adhesive a hand scraper and wire brush was used, this was made easier by the Remove and Go which had softened the paint etc.
The next stage was to give the Victorian tiles a mild acid wash using Acid Gel which is applied to the floor, scrubbed in, and rinsed off with a little water then extracted using the wet vacuum. We always recommend an acid wash for old floors like these as it will counter any efflorescent salts resident in the tiles and helps to remove other mineral contaminates and old grout that can mask the true beauty of the tiles.
I left the tiles to dry out for two days before returning to apply the sealer, first checking it was dry by testing for moisture in various places with an electronic damp tester. It’s not a good idea to apply a sealer to a damp floor so we always check first.
Satisfied the floor was dry, I started applying a coat of Tile Doctor Colour Grow which is a colour enhancing impregnating sealer that helps to bring out the true colours in the tile. This was allowed to dry for thirty minutes and then followed up five coats of Tile Doctor Seal and Go Extra which is a breathable sealer that leaves a lovely satin finish and builds on the protection.
Once done the Victorian hallway tiles looked so much cleaner and healthier. It was quite a transformation and the new sealer had given the floor a nice low sheen shine which the customer was very happy with.
For aftercare cleaning I left them with a bottle of Tile Doctor Neutral Cleaner which is specially formulated for cleaning sealed tiles. We don’t recommend tile cleaning products you find on supermarket shelves as the are usually too strong and can strip a sealer off the floor prematurely. If your choosing another product to clean your floor always read the label to make sure its compatible.
Andrew Robb
Merseyside Tile Doctor

 Tile Doctor Ltd
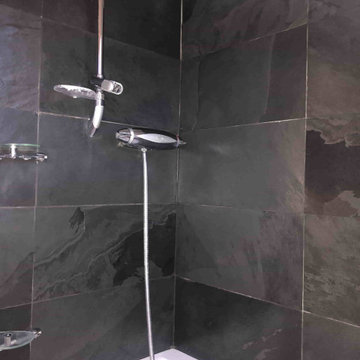
The photographs below are from a bathroom in Maida Vale W9 which had a lovely Slate tiled wall over a bath with shower. Unfortunately, the Slate tiles had been ruined by the use of harsh cleaning chemicals in an attempt to remove the limescale caused by hard water. The slate had now lost all its natural colour and looked completely washed out. The property had recently changed hands and the new owner was keen to have it renovated.
I went over to take a look and work out a solution, this in itself is a lot trickier these days with all the COVID precautions we need to take when working in someone’s house. It was clear that a strong acidic limescale remover had been used on the slate and this had etched the stone, leached all the natural oils away and generally ruined its appearance.
Fortunately, we have a solution for this (see below) and after conducting a small test I was able to confirm the problem could be resolved and gave them a quote which included a day’s labour, abrasive pads, stone oil and sealer. Our quote was gratefully accepted, and we booked a time in to carry out the work.
I returned to the property and I set about burnishing the slate wall tiles using a very coarse 200-grit six-inch burnishing pad fitted to a handheld buffing machine. This process resurfaces the stone slightly to remove the etching caused by the limescale remover. I used a medium dilution of Tile Doctor Grout Clean-up to lubricate the process and to remove the remaining limescale. Once done the slurry that is generated is rinsed off with more water. In a bathroom, it is easy the slurry can just be drained away. In other areas we would use a wet vacuum.
After the 200-grit pad the surface of the Slate was further refined using a 400-grit pad and then an 800-grit pad, this time only using water and giving the stone a thorough rinse after each pad to remove the soil.
The slate was then left to dry off over lunch and given more encouragement with a heat gun afterwards so I could move onto the next step. This involved applying a coat of Tile Doctor Stone Oil which puts back the natural oils back into the stone improving its appearance.
Once the Stone Oil had fully dried, I moved onto sealing for which I applied two coats of Tile Doctor Ultra-Seal; this is penetrating sealer that soaks into the stone to provide maximum stain protection without changing the colour of the stone. It is also an excellent grout sealer which is a bonus.
Before leaving I talked the client about how best to maintain the Slate and left them a complimentary bottle of Tile Doctor Aqua Pro tile cleaner which will help keep the limescale at bay. It is gentle enough to use every day but will help prevent the previous build-up and unlike the previous products used will not damage the newly applied sealer.
Jackson Davis
Central London Tile Cleaning
 Tile Doctor Ltd
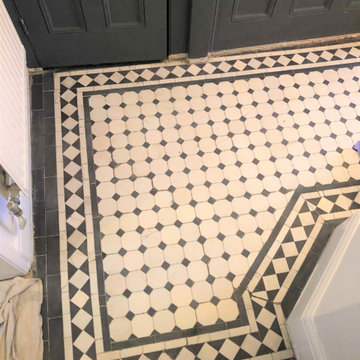
The owners of this Edwardian property in Finchley had purchased it a couple of years prior and since then had slowly been renovating it to restore its original character. The project was almost complete and now attention had turned to the tiled floor. The tiles were in quite a state and I was asked to work our Tile Doctor magic and bring it back to its original condition.
When they moved in the hallway had been covered with carpet which gave the tiles underneath some protection. Unfortunately, however the carpet has been secured with carpet grippers that had been glued to the tiles around the edges. There were also paint splashes on the surface that would need dealing with. On top of that the floor had a few missing tiles that had been back filled by cement to provide a level base for the carpet, the client wanted like them replaced if possible.
After surveying the floor, I explained what could be done and ever completed a small test clean to demonstrate how the tiles would look once deep cleaned. I was confident on being able to source very similar reclaimed tiles so replacing the missing should not be a problem. The client was very happy with the initial test result and my quotation so booked me in to restore the floor.
On my return I started by applying Tile Doctor Remove and Go to soften up the glue which allowed it to be carefully peeled off the tiles with scrappers. Once all the carpet adhesive was gone, I worked a strong dilution of Tile Doctor Remove and Go into the tiles using a black pad to work the cleaning solution deeper into the tiles. A wet vacuum was used to remove the slurry created, and I followed this by giving the tiles an extra clean using a 200-grit diamond burnishing pad lubricated with water.
The last step in the cleaning process was to give the floor an acid rinse using Tile Doctor Grout Clean-up, I did this for several reasons, first it removes old grout smears from the surface of the tile and second it neutralised any efflorescent salts lying dormant in the floor. This can be quite a problem for old floors which don’t have the benefit of a protective damp proof membrane under the floor. The floor was given a final rinse with water which was again extracted with a wet vacuum.
I then set about lifting all the loose tiles (approximately ten) and carefully removing the concrete infills. I had previously managed to source replacements for these holes from original features. Unfortunately, they didn’t sell the correct sized octagon tiles, so I had bought 150mm square tiles and then needed to cut them on site to get the right size.
After cutting and fixing the tiles I fixed them in place and regrouted the rest of the floor.
I then left the floor to dry out overnight and returned in the morning. Before applying a sealer, I took several moisture readings with the damp meter to make sure the tiles were dry enough to take the sealer.
I was able to confirm the floor was dry, so went ahead and applied three coats of Tile Doctor Colour Grow sealant. Colour Grow is an impregnating sealer that is fully breathable sealer which is important when it comes to old floors like these that don’t have a damp proof membrane installed.
My client was very happy with the renovated floor and for aftercare I left them with a bottle of Tile Doctor Neutral Tile Cleaner and gave advice on how best to clean the floor going forward.
Andrew Newstead
North London Tile Doctor
 Tile Doctor Ltd
This is a large 17.2 m2 Sandstone Floor installed throughout the living and kitchen areas of a property in the beautiful village of Disley close to Lyme Park which is run by the National Trust. The floor had been installed four years ago and my client was unhappy with the original sealer which hadn’t lasted very long. Without the protection of a sealer dirt had become ingrained in the pores of the stone which was now difficult to clean. Another issue was the rough nature of the Sandstone meant it was impossible to mop as it shreds the mop! As a result, the floor was mainly cleaned with a hoover which was not ideal, especially in a kitchen.
I went over to survey the floor and before quoting I ran a small test clean in the kitchen which took the floor back to its natural pale colour and really showed how dirty the floor had become. Test cleans are great as it helps me to formulate an effective cleaning plan and provide an accurate quote. My client was impressed with the result and so I was booked to come back and deep clean and then reseal the whole floor. Due to its size I estimated the floor would take two days to deep clean and a further day to apply a new sealer, so three days in total.
Working in large sections I started by cleaning the floor and stripping off the old sealer with a strong dilution of Tile Doctor Remove and Go which is a coatings remover that is safe to use on stone. The solution was left to soak into the pores of the Sandstone for ten minutes before being worked in with a 200-grit diamond pad fitted to a rotary floor machine. This action not only removed the old sealer and cleaned the floor but the 200-grit pad being vey coarse removed a lot of the roughness from the surface of the Sandstone so it shouldn’t shred any more mops.
After rinsing the floor with water and removing the slurry with a wet vacuum I set about cleaning the grout with Tile Doctor Pro-Clean worked into the grout line with a stiff brush and assisted with steam from a professional steam cleaner with a grout attachment. Once done the floor was rinsed and extracted again to remove the soil from the grouting. There was also an area near one of the doors where the grout had become loose and needed replacing so I made up a batch of matching grout and filled this in. The floor was then left overnight to dry with assistance from a couple of air movers.
I returned the next day to finish the floor by applying a sealer. First, I double checked the floor was dry with the damp meter. The readings confirmed the air movers had done a good job and that the floor was within the accepted parameters, so I was ready to seal. The sealer I chose was Tile Doctor Seal and Go which being water based doesn’t leave a smell as it dries, it really works well on Sandstone and adds a nice subtle sheen to the stone.
Once finished the floor looked much cleaner, lighter in colour overall more inviting, you could even see the fossils in some of the tiles.
The surface was also smoother so the customer should find cleaning with a mop much easier in future. On that subject its worth pointing out that owners of sealed floors should always use a neutral pH tile cleaner on their floors as most supermarket products are simply too strong and will prematurely strip the sealer off a tile if used repeatedly. Tile Doctor sell a product called Tile Doctor Neutral Cleaner which is ideal for cleaning sealed Sandstone floors like this one.
My client was really happy with the results and sent me a message later saying: “the floor looks amazing!”
Kamila Logonzy
East Cheshire Tile Doctor
 Tile Doctor Ltd
Not too long ago, I was called up to the harbour town and seaside resort of Ilfracombe, situated on the North Devon coast. Ilfracombe is a historic area within Devon, with the Celts having first settled on its hilly plains during the Iron Age.
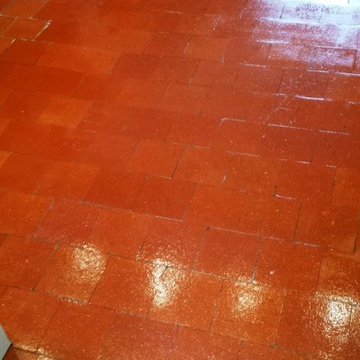
My client asked me to take a look at a Quarry tiled floor which was in need of a serious amount of cleaning. This largely due to the fact that there were dozens of layers of old sealer on the floor which had been left untouched from many years previously, as well as a significant build-up of general dirt and muck.
In order to give this floor a thorough cleaning, I needed to use a strong combination of products, namely NanoTech HBU Remover mixed with Tile Doctor Remove & Go. Nanotech HBU is a heavy build-up remover which uses nano-sized particles to penetrate below tough stains, and lift them out of the stone, whilst Remove & Go is a multi-purpose stripper that provided additional help in removing the many layers of sealer left on the floor. I applied the solution to the floor and left it to dwell for 40 minutes, before using a Polybrush to work it into the Quarry tiles.
Since the floor really was in dire need of a deep clean after years of neglect, I also used a black buffing pad attached to a buffing machine, as well as a steam machine to make sure I removed as much of the old sealer and dirt as possible. This was slow and painstaking work, but it was worth it to get the Quarry tiles back to looking their best again. Once this was complete, I rinsed the floor several times before leaving it for a few days to dry before sealing.
On my return visit, the floor was dry enough to commence sealing. It was important that the floor was dry and any excess moisture had evaporated because it has the potential to compromise the sealer as it cures leading to unexpected results. My sealer of choice was Tile Doctor Seal & Go, a sealer which is suitable for use on internal unsealed, porous surfaces including textured Quarry, Slate, Victorian tile and several others. I carefully applied several coats allowing each coat to dry before applying the next to provide a subtle low-sheen finish that will help protect the surface from stains in the future.
The results were excellent, especially considering that the floor had evidently not been treated to a proper clean for many years.
 Tile Doctor Ltd
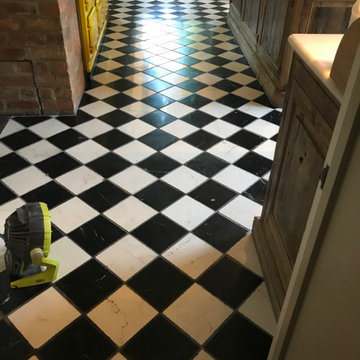
The tiles shown in the photographs below are classic distressed Black and White Italian Marble installed in the kitchen of a property in Bamber Bridge which is South of Preston. Some of the tiles had an issue with loose grout which I suspect was due to the suspended wooden floor and a small amount of movement had resulted in the grout cracking.
Ideally more support would be needed under the floor to prevent this, in the meantime however I recommended removing the grout and replacing with a flexible grout product that could cope with the movement. The tiles also needed a clean, polish and reseal so it made sense to address the issue with the grout as part of the work.
Working as a two-man team we started by cleaning the floor with a set of diamond burnishing pads starting with a coarse 400-grit, followed by 800 and 1500 grit. Water was used to lubricate the process and the floor was rinsed with water between pads with the fine slurry generated by the process extracted using a wet vacuum. These pads remove ingrained dirt and then slowly refine the appearance of the Marble building up its polished appearance in the process.
The next step was to rake out all the grout which as discussed was compromised and needed replacing. We had to be very careful when removing the grout due to the electric heating mat under the floor, any damage to that would require ripping the floor up. With the old grout removed and the floor cleaned the floor was then grouted using Mapei Ultra-colour which is a flexible and fully waterproof grout more than suitable for this situation.
Between us we managed to pack a lot into day one which was tough, however with the hardest tasks out of the way day two should be a lot easier.
Day two started with an initial clean making sure to remove any excess grout smeared on the surface that can affect the look of the tile if not removed. This was followed by the application of the last of the set of burnishing pads which is a 3,000-grit pad that really brings up the polish on the marble. You only need a small amount of water sprayed onto the floor when applying this last pad so by late morning the floor was dry and ready for sealing. The customer wanted a better sheen appearance than they previously had, fortunately we find the Diamond burnishing pads do this well, they also tighten up the pores of the stone as well which means less sealer is needed.
The floor was then sealed with Tile Doctor Colour Grow which is an impregnating sealer that improves colour and soaks into the stone occupying the pores and thereby preventing dirt from becoming ingrained. Once complete the floor looked great and the client was very happy.
Sealers and Polish do wear down with use over time so before leaving I discussed our annual maintenance plan option which will ensure the appearance of the Marble floor always looks good. The plan involves returning once a year to further polish the floor with a high-grade burnishing pad and to add more sealer if required. We also discussed the use of Tile Doctor Stone Soap for regular cleaning, it is a pH neutral cleaner which is ideal for stone floors like Marble which are acid sensitive.
Russell Taylor
Lancashire Tile Doctor
 Tile Doctor Ltd
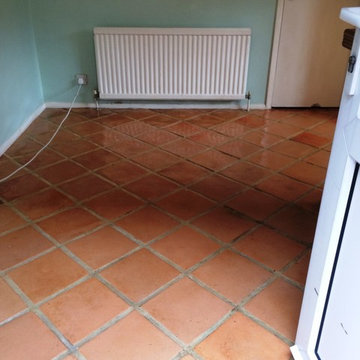
This was a rather dirty Terracotta kitchen floor located at a house in Winchmore Hill in Buckinghamshire, not to be confused with the Winchmore Hill in London. The sealer on the tiles had worn off some time ago and now the dirt was becoming trapped in the pores of the Terracotta making it impossible to clean.
Deep Cleaning Terracotta Tile
To deep clean into the pores of the Terracotta a diluted solution of Tile Doctor Pro Clean, which is a strong tile cleaner sage to use on tiled floors, was applied to kitchen floor and left to soak in for around ten minutes. Then with the aid of a commercial rotary machine the solution was scrubbed into the tiles to release the many years of accumulated ingrained soiling which was removed from the floor using a wet vacuum.
Although this deep cleaned the tile the grout lines needed further attention and were treated with Tile Doctor Grout Clean-up solution and then washed down with fresh water which was removed with a wet vacuum.
There was still evidence of sealer remaining on the floor in some areas so the next step in the process was to apply Tile Doctor Remove and Go again working it into the tile using a scrubbing pad fitted to a rotary machine. Remove and Go as its name suggests is used to remove waxes and sealants from tile and stone. It certainly did the job and once the resultant slurry was vacuumed up and the floor given a final rinse to remove any chemicals used in the process the floor was looking much cleaner and left to dry overnight ready for our return
Sealing Terracotta Tile
The next day came back to do the sealing and checked the floor first for any spots we might had missed and also to ensure it had dried sufficiently. Tile Doctor Seal and Go was then applied in coats to fully seal the floor. As well as adding protection Seal and Go adds a nice subtle satin finish to Terracotta and being water based it doesn’t give off an odour when it’s drying.
 Tile Doctor Ltd
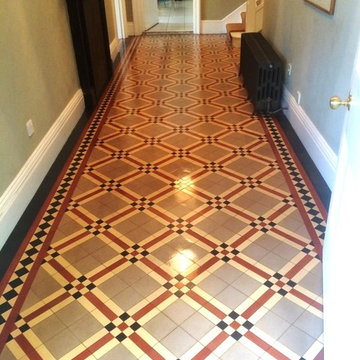
A client from the village of Heytesbury contacted me to see whether we could improve the look of her Victorian tiled hallway floor. It turns out that a competitor had previously cleaned and sealed it two years prior but she was disappointed with the result once she realised that the floor still had dirt ingrained in the tile. As per our normal practice we ran a test clean and she booked us in immediately.
We started by wetting the floor using a strong solution of Tile Doctor Pro-Clean and left it dwell for ten minutes. We then attached a black stripping pad to a rotary machine and slowly covered the whole area to remove ingrained dirt and any existing seals that may be evident. The dirty slurry was then removed with a wet vacuum and then floor rinsed with the aid of a deck brush and a wet vacuum.
Next we used a heavy duty scraper to remove paint splashes around the edges from years of decorating. Once we were satisfied we’d removed all evident dirt, seal and paint we rinsed the floor thoroughly several times to make sure all contaminants are removed again using the wet vacuum to remove the water.
We returned five days later to let the floor dry out thoroughly. Upon our return we tested with a damp meter which tested fine so we proceeded to seal the floor using six coats of Tile Doctor Seal & Go to provide protection and add a nice sheen to the floor which I think you will agree now looks amazing.
Stuart Ford
Wiltshire Tile Doctor
48