
Search results for "Removed" in Home Design Ideas
 Kitchen Magic
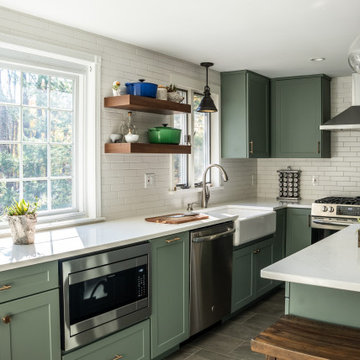
Celadon Green and Walnut kitchen combination. Quartz countertop and farmhouse sink complete the Transitional style.
Kitchen - huge transitional galley vinyl floor and brown floor kitchen idea in Boston with a farmhouse sink, flat-panel cabinets, green cabinets, quartzite countertops, white backsplash, ceramic backsplash, stainless steel appliances, an island and white countertops
Kitchen - huge transitional galley vinyl floor and brown floor kitchen idea in Boston with a farmhouse sink, flat-panel cabinets, green cabinets, quartzite countertops, white backsplash, ceramic backsplash, stainless steel appliances, an island and white countertops

 Clark Richardson Architects
Photos: Paul Finkel, Piston Design
GC: Hudson Design Development, Inc.
Large farmhouse white two-story wood gable roof idea in Austin with a mixed material roof
Large farmhouse white two-story wood gable roof idea in Austin with a mixed material roof

Find the right local pro for your project

 Dorman Associates, Inc.
The Squaw Valley Retreat is a rebuild of one of the original Olympic cabins from 1960. Our client is an incredibly fun person who enjoys the outdoors and wanted to take full advantage of the view and the indoor / outdoor possibilities of the property. As it happens, this property has one of the best views towards the Resort with the Master Suite taking full advantage with large picture windows in each space. The house is full of nooks to enjoy during the winter and broad vistas to enjoy while cooking a gourmet meal in the summer.
 Heather Banks
Photo: Heather Banks © 2015 Houzz
Design: Brandi Hines
Minimalist entryway photo in Austin
Minimalist entryway photo in Austin


 Sunday Morning Kitchen and Bath
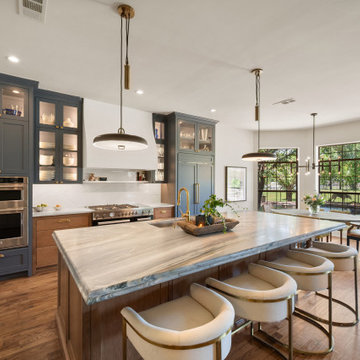
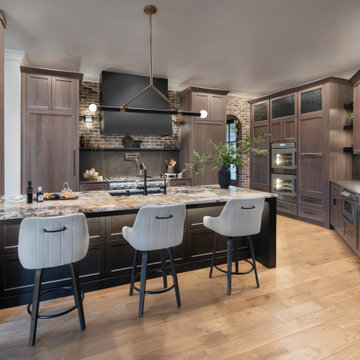
A complete open-concept transformation achieved by removing kitchen walls. The design centers on a furniture-grade wood island and floor-to-ceiling blue cabinetry that seamlessly integrates the refrigerator and ovens.


 Edmond Kitchen & Bath LLC
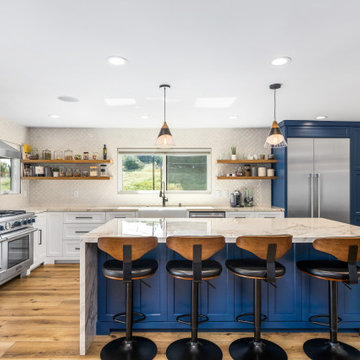
Our client wanted an open space between the Living and Kitchen, and did not like the cramped pantry tucked in the corner. To redesign the space, we started by removing the “Edmond Swing” angled bar top seating. Next, we opened the space by removing the majority of the wall between the kitchen and living room. In order to improve the flow in and out of the kitchen, we created a new pantry in some poorly used space in the laundry room, allowing us to remove the old large and blocky pantry and create a doorway to the exit. Closing up the other doorway allowed us to add separate, full-size refrigerator and freezer for improved access to stored food items. All new lighting, including in-cabinet, under-cabinet, under island, pendant, sconces, and ceiling lighting were placed according to plan. After we installed our custom Walnut cabinetry and Cambria and Cristallo tops, we completed the project by refinishing the wood floors to a fresher tone. As is often the case, our client also asked us to remodel the front and rear Powder Baths, the Wine Room, and Dining Room. We are in love with the new space!

 Decorating Den Interiors - Bromberek Design Team
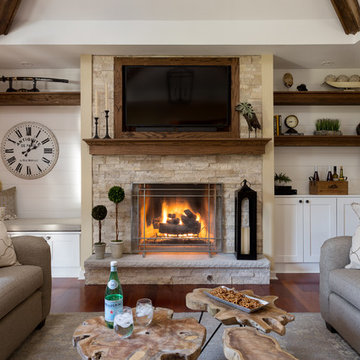
We replaced the brick with a Tuscan-colored stacked stone and added a wood mantel; the television was built-in to the stacked stone and framed out for a custom look. This created an updated design scheme for the room and a focal point. We also removed an entry wall on the east side of the home, and a wet bar near the back of the living area. This had an immediate impact on the brightness of the room and allowed for more natural light and a more open, airy feel, as well as increased square footage of the space. We followed up by updating the paint color to lighten the room, while also creating a natural flow into the remaining rooms of this first-floor, open floor plan.
After removing the brick underneath the shelving units, we added a bench storage unit and closed cabinetry for storage. The back walls were finalized with a white shiplap wall treatment to brighten the space and wood shelving for accessories. On the left side of the fireplace, we added a single floating wood shelf to highlight and display the sword.
The popcorn ceiling was scraped and replaced with a cleaner look, and the wood beams were stained to match the new mantle and floating shelves. The updated ceiling and beams created another dramatic focal point in the room, drawing the eye upward, and creating an open, spacious feel to the room. The room was finalized by removing the existing ceiling fan and replacing it with a rustic, two-toned, four-light chandelier in a distressed weathered oak finish on an iron metal frame.
Photo Credit: Nina Leone Photography

 Tracstar Tree Experts
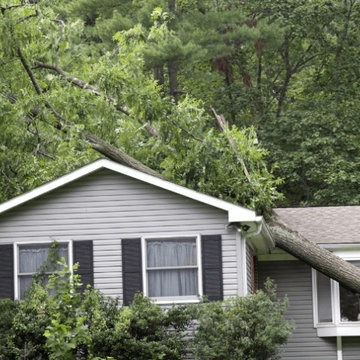
24/7 EMERGENCY STORM DAMAGE VIRGINIA BEACH
When you do you’ll be connected with the most highly skilled and promptly responsive arborists on the market today who are available 24/7 to provide emergency tree services in Virginia Beach, such as emergency tree removal in Virginia Beach. Experts quickly, affordably, and safely for all the people and property in the affected area.
Here at Tracstar Tree Experts, our tree service Virginia Beach professionals are serious about making your trees and your home safe no matter what emergency situations arise. It’s why our professionals are trained in quick responses and quick solutions to reduce the damage which can be inflicted by a diseased, fallen, or otherwise severely compromised tree and get you back to a state of safety and satisfaction with your home. If you find yourself with a sudden need for emergency tree services in Virginia Beach then you should absolutely not hesitate to contact the reliable and knowledgeable tree care Virginia Beach specialists at Tracstar Tree Experts. Call (757) 515-6933 as soon as you have a need for emergency tree services in Virginia Beach to receive a free estimate and the Virginia Beach tree care solutions you need to return to your life.

 Tracstar Tree Experts
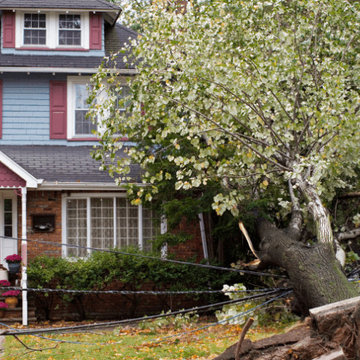
24/7 EMERGENCY STORM DAMAGE VIRGINIA BEACH
When you do you’ll be connected with the most highly skilled and promptly responsive arborists on the market today who are available 24/7 to provide emergency tree services in Virginia Beach, such as emergency tree removal in Virginia Beach. Experts quickly, affordably, and safely for all the people and property in the affected area.
Here at Tracstar Tree Experts, our tree service Virginia Beach professionals are serious about making your trees and your home safe no matter what emergency situations arise. It’s why our professionals are trained in quick responses and quick solutions to reduce the damage which can be inflicted by a diseased, fallen, or otherwise severely compromised tree and get you back to a state of safety and satisfaction with your home. If you find yourself with a sudden need for emergency tree services in Virginia Beach then you should absolutely not hesitate to contact the reliable and knowledgeable tree care Virginia Beach specialists at Tracstar Tree Experts. Call (757) 515-6933 as soon as you have a need for emergency tree services in Virginia Beach to receive a free estimate and the Virginia Beach tree care solutions you need to return to your life.
 Tracstar Tree Experts
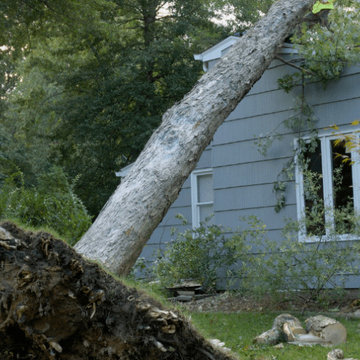
24/7 EMERGENCY STORM DAMAGE VIRGINIA BEACH
When you do you’ll be connected with the most highly skilled and promptly responsive arborists on the market today who are available 24/7 to provide emergency tree services in Virginia Beach, such as emergency tree removal in Virginia Beach. Experts quickly, affordably, and safely for all the people and property in the affected area.
Here at Tracstar Tree Experts, our tree service Virginia Beach professionals are serious about making your trees and your home safe no matter what emergency situations arise. It’s why our professionals are trained in quick responses and quick solutions to reduce the damage which can be inflicted by a diseased, fallen, or otherwise severely compromised tree and get you back to a state of safety and satisfaction with your home. If you find yourself with a sudden need for emergency tree services in Virginia Beach then you should absolutely not hesitate to contact the reliable and knowledgeable tree care Virginia Beach specialists at Tracstar Tree Experts. Call (757) 515-6933 as soon as you have a need for emergency tree services in Virginia Beach to receive a free estimate and the Virginia Beach tree care solutions you need to return to your life.
 Clark Richardson Architects
Photos: Paul Finkel, Piston Design
GC: Hudson Design Development, Inc.
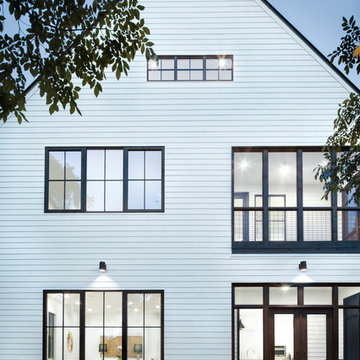
Large cottage white two-story wood gable roof idea in Austin with a mixed material roof and a black roof
Large cottage white two-story wood gable roof idea in Austin with a mixed material roof and a black roof
 MD Flooring Solutions, LLC
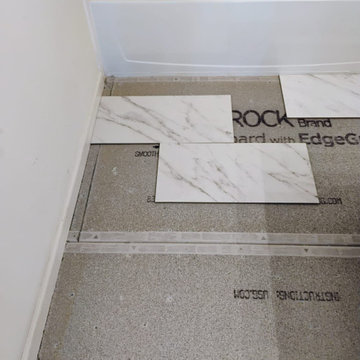
- To remove 2x current toilets.
- Take Up, Remove & Haul Away Vinyl from 2x bathrooms
- Take Up, Remove & Haul Away Lauan 1/8" plywood sheets from 2x bathrooms
- To install USG Durock Cement Board
- To apply thinset mortar
- To install 12"x24" Ceramic Tile
- To apply grout
- To install spacers
- To install 2x marble threshold pieces
- To install 2x new toilets
 Tile Doctor Ltd
Not too long ago, I was called up to the harbour town and seaside resort of Ilfracombe, situated on the North Devon coast. Ilfracombe is a historic area within Devon, with the Celts having first settled on its hilly plains during the Iron Age.
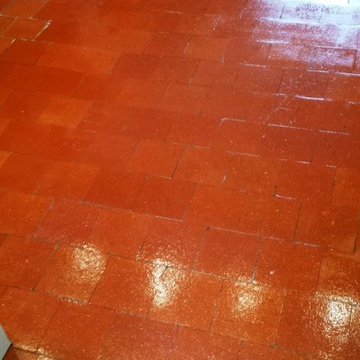
My client asked me to take a look at a Quarry tiled floor which was in need of a serious amount of cleaning. This largely due to the fact that there were dozens of layers of old sealer on the floor which had been left untouched from many years previously, as well as a significant build-up of general dirt and muck.
In order to give this floor a thorough cleaning, I needed to use a strong combination of products, namely NanoTech HBU Remover mixed with Tile Doctor Remove & Go. Nanotech HBU is a heavy build-up remover which uses nano-sized particles to penetrate below tough stains, and lift them out of the stone, whilst Remove & Go is a multi-purpose stripper that provided additional help in removing the many layers of sealer left on the floor. I applied the solution to the floor and left it to dwell for 40 minutes, before using a Polybrush to work it into the Quarry tiles.
Since the floor really was in dire need of a deep clean after years of neglect, I also used a black buffing pad attached to a buffing machine, as well as a steam machine to make sure I removed as much of the old sealer and dirt as possible. This was slow and painstaking work, but it was worth it to get the Quarry tiles back to looking their best again. Once this was complete, I rinsed the floor several times before leaving it for a few days to dry before sealing.
On my return visit, the floor was dry enough to commence sealing. It was important that the floor was dry and any excess moisture had evaporated because it has the potential to compromise the sealer as it cures leading to unexpected results. My sealer of choice was Tile Doctor Seal & Go, a sealer which is suitable for use on internal unsealed, porous surfaces including textured Quarry, Slate, Victorian tile and several others. I carefully applied several coats allowing each coat to dry before applying the next to provide a subtle low-sheen finish that will help protect the surface from stains in the future.
The results were excellent, especially considering that the floor had evidently not been treated to a proper clean for many years.
 Tile Doctor Ltd
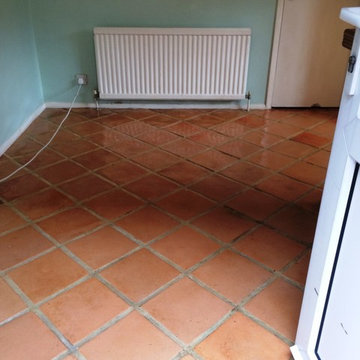
This was a rather dirty Terracotta kitchen floor located at a house in Winchmore Hill in Buckinghamshire, not to be confused with the Winchmore Hill in London. The sealer on the tiles had worn off some time ago and now the dirt was becoming trapped in the pores of the Terracotta making it impossible to clean.
Deep Cleaning Terracotta Tile
To deep clean into the pores of the Terracotta a diluted solution of Tile Doctor Pro Clean, which is a strong tile cleaner sage to use on tiled floors, was applied to kitchen floor and left to soak in for around ten minutes. Then with the aid of a commercial rotary machine the solution was scrubbed into the tiles to release the many years of accumulated ingrained soiling which was removed from the floor using a wet vacuum.
Although this deep cleaned the tile the grout lines needed further attention and were treated with Tile Doctor Grout Clean-up solution and then washed down with fresh water which was removed with a wet vacuum.
There was still evidence of sealer remaining on the floor in some areas so the next step in the process was to apply Tile Doctor Remove and Go again working it into the tile using a scrubbing pad fitted to a rotary machine. Remove and Go as its name suggests is used to remove waxes and sealants from tile and stone. It certainly did the job and once the resultant slurry was vacuumed up and the floor given a final rinse to remove any chemicals used in the process the floor was looking much cleaner and left to dry overnight ready for our return
Sealing Terracotta Tile
The next day came back to do the sealing and checked the floor first for any spots we might had missed and also to ensure it had dried sufficiently. Tile Doctor Seal and Go was then applied in coats to fully seal the floor. As well as adding protection Seal and Go adds a nice subtle satin finish to Terracotta and being water based it doesn’t give off an odour when it’s drying.
 Tile Doctor Ltd
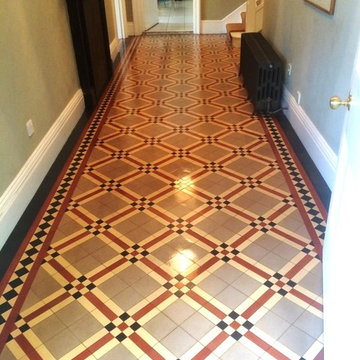
A client from the village of Heytesbury contacted me to see whether we could improve the look of her Victorian tiled hallway floor. It turns out that a competitor had previously cleaned and sealed it two years prior but she was disappointed with the result once she realised that the floor still had dirt ingrained in the tile. As per our normal practice we ran a test clean and she booked us in immediately.
We started by wetting the floor using a strong solution of Tile Doctor Pro-Clean and left it dwell for ten minutes. We then attached a black stripping pad to a rotary machine and slowly covered the whole area to remove ingrained dirt and any existing seals that may be evident. The dirty slurry was then removed with a wet vacuum and then floor rinsed with the aid of a deck brush and a wet vacuum.
Next we used a heavy duty scraper to remove paint splashes around the edges from years of decorating. Once we were satisfied we’d removed all evident dirt, seal and paint we rinsed the floor thoroughly several times to make sure all contaminants are removed again using the wet vacuum to remove the water.
We returned five days later to let the floor dry out thoroughly. Upon our return we tested with a damp meter which tested fine so we proceeded to seal the floor using six coats of Tile Doctor Seal & Go to provide protection and add a nice sheen to the floor which I think you will agree now looks amazing.
Stuart Ford
Wiltshire Tile Doctor
49