
Search results for "Require additional" in Home Design Ideas
 THE Remodel Group
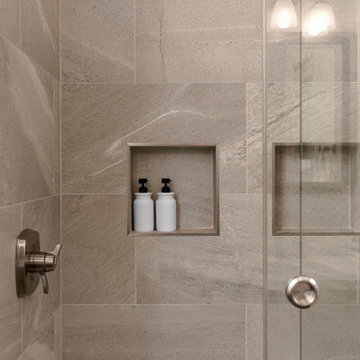
Creating a home that supports your future doesn't always require leaving the neighborhood you love. Through thoughtful design-build planning, this nearly 1,000-square-foot addition transformed a traditional suburban home into a more adaptable retreat, adding a luxurious primary suite on the main level and a flexible lower-level space designed to evolve alongside the homeowners' needs.
What began as a primary suite addition grew into a two-story expansion that balances comfort, privacy, and long-term versatility. The new suite offers the convenience of main-level living while taking advantage of the property's treetop views, creating a peaceful retreat connected to the surrounding landscape. Below, a dedicated ceramics studio supports the homeowners' creative pursuits today while being equipped with the infrastructure necessary for a future ADU conversion.
Natural light and privacy were central design priorities throughout the project. Large windows and carefully positioned transoms capture views of surrounding greenery while limiting sightlines from neighboring homes. Even the placement of the fireplace and outdoor living spaces was thoughtfully adjusted to preserve these connections to nature.
The success of this addition required extensive coordination behind the scenes. The steeply sloped property demanded retaining walls, significant foundation work, and careful site preparation before construction could begin. The team also integrated the addition with an existing deck, creating a seamless connection between new and existing outdoor spaces despite challenging grade changes and tight setback requirements.
Adding another layer of complexity, HOA requirements and city regulations often conflicted, leading to multiple design revisions throughout the approval process. Through close collaboration between the homeowners, architect, and design-build team, the project successfully navigated these challenges while preserving the vision for the home.
Inside, thoughtful finishes and carefully blended flooring transitions help the addition feel original to the house rather than an afterthought. Despite pandemic-era supply chain disruptions and several unexpected material substitutions, the project remained true to its design intent through flexible decision-making and close client collaboration.
The result is a home designed for enjoyment today while thoughtfully preparing for the future. By combining a main-level primary suite, a hobby-focused studio space, and infrastructure for future adaptability, this addition creates flexibility for whatever chapter comes next.
 THE Remodel Group
Creating a home that supports your future doesn't always require leaving the neighborhood you love. Through thoughtful design-build planning, this nearly 1,000-square-foot addition transformed a traditional suburban home into a more adaptable retreat, adding a luxurious primary suite on the main level and a flexible lower-level space designed to evolve alongside the homeowners' needs.
What began as a primary suite addition grew into a two-story expansion that balances comfort, privacy, and long-term versatility. The new suite offers the convenience of main-level living while taking advantage of the property's treetop views, creating a peaceful retreat connected to the surrounding landscape. Below, a dedicated ceramics studio supports the homeowners' creative pursuits today while being equipped with the infrastructure necessary for a future ADU conversion.
Natural light and privacy were central design priorities throughout the project. Large windows and carefully positioned transoms capture views of surrounding greenery while limiting sightlines from neighboring homes. Even the placement of the fireplace and outdoor living spaces was thoughtfully adjusted to preserve these connections to nature.
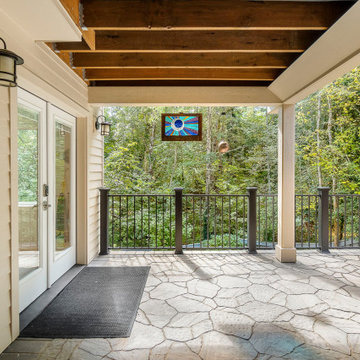
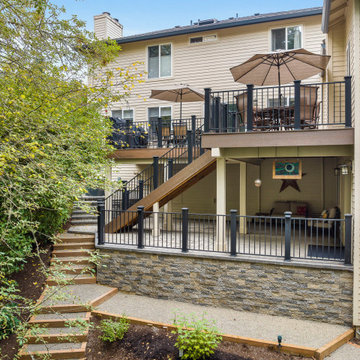
The success of this addition required extensive coordination behind the scenes. The steeply sloped property demanded retaining walls, significant foundation work, and careful site preparation before construction could begin. The team also integrated the addition with an existing deck, creating a seamless connection between new and existing outdoor spaces despite challenging grade changes and tight setback requirements.
Adding another layer of complexity, HOA requirements and city regulations often conflicted, leading to multiple design revisions throughout the approval process. Through close collaboration between the homeowners, architect, and design-build team, the project successfully navigated these challenges while preserving the vision for the home.
Inside, thoughtful finishes and carefully blended flooring transitions help the addition feel original to the house rather than an afterthought. Despite pandemic-era supply chain disruptions and several unexpected material substitutions, the project remained true to its design intent through flexible decision-making and close client collaboration.
The result is a home designed for enjoyment today while thoughtfully preparing for the future. By combining a main-level primary suite, a hobby-focused studio space, and infrastructure for future adaptability, this addition creates flexibility for whatever chapter comes next.
 THE Remodel Group
Creating a home that supports your future doesn't always require leaving the neighborhood you love. Through thoughtful design-build planning, this nearly 1,000-square-foot addition transformed a traditional suburban home into a more adaptable retreat, adding a luxurious primary suite on the main level and a flexible lower-level space designed to evolve alongside the homeowners' needs.
What began as a primary suite addition grew into a two-story expansion that balances comfort, privacy, and long-term versatility. The new suite offers the convenience of main-level living while taking advantage of the property's treetop views, creating a peaceful retreat connected to the surrounding landscape. Below, a dedicated ceramics studio supports the homeowners' creative pursuits today while being equipped with the infrastructure necessary for a future ADU conversion.
Natural light and privacy were central design priorities throughout the project. Large windows and carefully positioned transoms capture views of surrounding greenery while limiting sightlines from neighboring homes. Even the placement of the fireplace and outdoor living spaces was thoughtfully adjusted to preserve these connections to nature.
The success of this addition required extensive coordination behind the scenes. The steeply sloped property demanded retaining walls, significant foundation work, and careful site preparation before construction could begin. The team also integrated the addition with an existing deck, creating a seamless connection between new and existing outdoor spaces despite challenging grade changes and tight setback requirements.
Adding another layer of complexity, HOA requirements and city regulations often conflicted, leading to multiple design revisions throughout the approval process. Through close collaboration between the homeowners, architect, and design-build team, the project successfully navigated these challenges while preserving the vision for the home.
Inside, thoughtful finishes and carefully blended flooring transitions help the addition feel original to the house rather than an afterthought. Despite pandemic-era supply chain disruptions and several unexpected material substitutions, the project remained true to its design intent through flexible decision-making and close client collaboration.
The result is a home designed for enjoyment today while thoughtfully preparing for the future. By combining a main-level primary suite, a hobby-focused studio space, and infrastructure for future adaptability, this addition creates flexibility for whatever chapter comes next.
Find the right local pro for your project

 Talon Construction Inc.
Designing and building a kitchen addition is a complex process that involves multiple steps and considerations. Here is a general outline to help you get started on your kitchen addition project:
Define Your Goals and Budget:
• Determine the purpose of the kitchen addition. Is it for more cooking space, a dining area, or a combination of both?
• Establish a realistic budget for your project. Consider all costs, including construction, permits, materials, and furnishings.
Hire a Design Professional:
• Seek the services of a design build company who specializes in kitchen additions.
• Discuss your vision, needs, and budget with the design professional to create a design concept.
Site Evaluation:
• Assess the existing space and structural condition of your home to ensure it can support the addition.
• Consider factors like zoning regulations, setbacks, and building codes.
Design Development:
• Collaborate with your design professional to refine the concept, including the layout, size, and architectural style.
• Choose materials, finishes, and fixtures that fit your design and budget.
Obtain Permits:
• Consult with your local design build contractor to determine the necessary permits and approvals.
• Prepare and submit all required documents, including architectural drawings and engineering plans.
Create Construction Documents:
• Work with your design build professional to develop detailed construction drawings and specifications.
• These documents will serve as a guide for contractors during construction.
Hire a design build contractor:
• Check references, credentials, and licenses before selecting a contractor.
• Sign a detailed contract that outlines the scope of work, timeline, and payment schedule.
Construction Phase:
• Demolition: If needed, remove any existing structures or walls.
• Foundation: Construct the foundation for the addition.
• Framing: Build the structural framework of the addition.
• Plumbing, Electrical, and HVAC: Install or update utilities as required.
• Insulation: Ensure proper insulation for energy efficiency.
• Drywall and Finish Work: Complete the walls and ceilings.
• Flooring and Cabinetry: Install flooring and kitchen cabinets.
• Appliances and Fixtures: Add appliances, plumbing fixtures, and lighting.
• Paint and Finish: Apply paint and finishes to achieve the desired look.
• Final Inspection: Schedule inspections to ensure compliance with building codes.
Final Inspections and Approvals:
• Arrange for final inspections to ensure the addition meets all safety and code requirements.
• Obtain any necessary certificates of occupancy or compliance.
Move In and Enjoy:
• Once all inspections and approvals are received, you can move into your new kitchen addition and start enjoying it.
Remember that every kitchen addition project is unique, so adapt this outline to your specific needs and circumstances. Consulting with professionals and obtaining the required permits and inspections is crucial to a successful and safe project.
 Talon Construction Inc.
Designing and building a kitchen addition is a complex process that involves multiple steps and considerations. Here is a general outline to help you get started on your kitchen addition project:
Define Your Goals and Budget:
• Determine the purpose of the kitchen addition. Is it for more cooking space, a dining area, or a combination of both?
• Establish a realistic budget for your project. Consider all costs, including construction, permits, materials, and furnishings.
Hire a Design Professional:
• Seek the services of a design build company who specializes in kitchen additions.
• Discuss your vision, needs, and budget with the design professional to create a design concept.
Site Evaluation:
• Assess the existing space and structural condition of your home to ensure it can support the addition.
• Consider factors like zoning regulations, setbacks, and building codes.
Design Development:
• Collaborate with your design professional to refine the concept, including the layout, size, and architectural style.
• Choose materials, finishes, and fixtures that fit your design and budget.
Obtain Permits:
• Consult with your local design build contractor to determine the necessary permits and approvals.
• Prepare and submit all required documents, including architectural drawings and engineering plans.
Create Construction Documents:
• Work with your design build professional to develop detailed construction drawings and specifications.
• These documents will serve as a guide for contractors during construction.
Hire a design build contractor:
• Check references, credentials, and licenses before selecting a contractor.
• Sign a detailed contract that outlines the scope of work, timeline, and payment schedule.
Construction Phase:
• Demolition: If needed, remove any existing structures or walls.
• Foundation: Construct the foundation for the addition.
• Framing: Build the structural framework of the addition.
• Plumbing, Electrical, and HVAC: Install or update utilities as required.
• Insulation: Ensure proper insulation for energy efficiency.
• Drywall and Finish Work: Complete the walls and ceilings.
• Flooring and Cabinetry: Install flooring and kitchen cabinets.
• Appliances and Fixtures: Add appliances, plumbing fixtures, and lighting.
• Paint and Finish: Apply paint and finishes to achieve the desired look.
• Final Inspection: Schedule inspections to ensure compliance with building codes.
Final Inspections and Approvals:
• Arrange for final inspections to ensure the addition meets all safety and code requirements.
• Obtain any necessary certificates of occupancy or compliance.
Move In and Enjoy:
• Once all inspections and approvals are received, you can move into your new kitchen addition and start enjoying it.
Remember that every kitchen addition project is unique, so adapt this outline to your specific needs and circumstances. Consulting with professionals and obtaining the required permits and inspections is crucial to a successful and safe project.

 Boerne Kitchens and Baths
This Kitchen had a 30 inch downdraft cooktop. The owner asked us to install a Vent-A-Hood and the latest Wolf 36 in gas cooktop. This new cooktop has the controls coming through the cabinets rather than the traditional stainless steel drop front. The installation required modifications to the cabinets, additional backsplash, modifying the crown moldings, recutting the granite In place and running the new gas line. We capped off the old downdraft and touch up painted the cabinets where required.

 Shadytree Construction
Full kitchen remodel and renovation requiring demolition of a wall and addition of window above featured farm sink. This custom kitchen also features a custom island with quartz countertops, classic white skater cabinets with soft close drawers and doors, and pendant lights.
Sponsored
Columbus, OH

Structural Remodeling
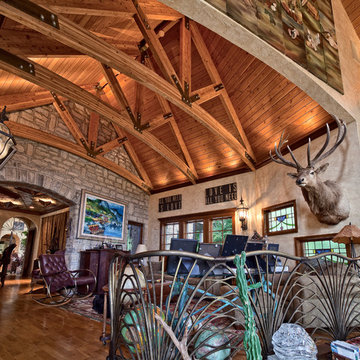
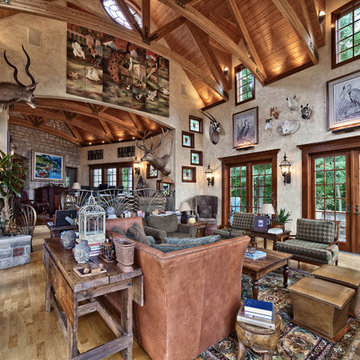
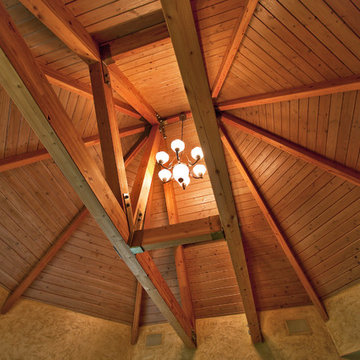
Franklin County's Heavy Timber Specialists | Best of Houzz 2020!

 Randy Angell Designs
Inspiration for a large modern backyard concrete and rectangular infinity pool remodel in Dallas

 Newschool Builders LLC
This was one of those special projects in which we were able to build not only a incredibly insulated and efficient home, but were also able to incorporate a bunch of custom woodworking, metal work, stone work and historical details into the project. We adhered to “Efficiency Vermont’s’ rigorous High Performance Home standards in the construction of this project. In addition, this was a Duplex and as a result required extra attention to special code requirements surrounding multi-family construction. We also tried to recreate the exterior details to match with the historical period of early Vermont.
 Newschool Builders LLC
This was one of those special projects in which we were able to build not only a incredibly insulated and efficient home, but were also able to incorporate a bunch of custom woodworking, metal work, stone work and historical details into the project. We adhered to “Efficiency Vermont’s’ rigorous High Performance Home standards in the construction of this project. In addition, this was a Duplex and as a result required extra attention to special code requirements surrounding multi-family construction. We also tried to recreate the exterior details to match with the historical period of early Vermont.

 Halcyon Contracting
This project in Barboursville required extensive renovation, remodeling and the construction and design of an addition. We built a large garage extension with a studio over the top, which included a new bathroom and wraparound porch. We also reconfigured and finished the basement and built a new patio out of the basement exit.

 Riviera Pools & Spas
Mediterranean style pool and spa with custom-colored McIntyre Brand tile and a Terra-Cotta blend plaster color. The swimming pool had a massive crack across the shallow end transition and required a deepened footing to secure the shell from further damage. A spa was added at the crack location to provide additional reinforcement.
Photos by RIVIERA

 Nar Design Group
Our carpenters labored every detail from chainsaws to the finest of chisels and brad nails to achieve this eclectic industrial design. This project was not about just putting two things together, it was about coming up with the best solutions to accomplish the overall vision. A true meeting of the minds was required around every turn to achieve "rough" in its most luxurious state.
Featuring multiple Columbia Cabinet finishes; contrasting backsplashes, wall textures and flooring are all part of what makes this project so unique! Features include: Sharp microwave drawer, glass front wine fridge, fully integrated dishwasher, Blanco compost bin recessed into the counter, Walnut floating shelves, and barn house lighting.
PhotographerLink
Sponsored
Columbus, OH
Structural Remodeling
Franklin County's Heavy Timber Specialists | Best of Houzz 2020!

 Betty Wasserman Art & Interiors
We gave this modern New York City loft a customized interior design. We wanted the space to be eye-catching yet elegant and uncluttered, so we focused on the unique walls and lighting. The walls are dressed in a custom plaster from Serpentine Studio, which so perfectly matches the Stone Source countertops. Glistening white flat panel cabinets and a glazed backsplash contrast beautifully with the matte gray color palette. Finally, we added in subtle metallic accents through the pendant lighting and Suite NY bar stools.
 Halcyon Contracting
This project in Barboursville required extensive renovation, remodeling and the construction and design of an addition. We built a large garage extension with a studio over the top, which included a new bathroom and wraparound porch. We also reconfigured and finished the basement and built a new patio out of the basement exit.

 Wall Control
 Pegboard features formed flanges on the sides of each panel to space the pegboard panel face off of the wall so hooks can pass through. These formed flanges make installation easy because they eliminate the need to build a frame work like old, traditional pegboard sheets require. Additionally, these formed flanges create a small space for access to the backside of the panels where things like extension cords and, in this case, LED lights can be threaded through to create a cool effect behind the face of the Wall Control Pegboard. Thanks for the great customer submission William! Your new shop looks awesome and we love the LED lights behind your Wall Control Pegboard!
 Muzata
This system is relatively simple and quick to install, and can be flexibly adapted to a variety of design needs and spatial layouts to meet the requirements of personalized residential design. In addition to its outstanding functionality and safety, it also offers significant aesthetic and maintenance advantages, making it an ideal choice for modern residential design.
Sponsored
Columbus, OH
Structural Remodeling
Franklin County's Heavy Timber Specialists | Best of Houzz 2020!

 Morse Constructions
This corner of the house that once was a prefab greenhouse posed some challenges that required additional engineering. By thoughtfully looking at the roofline we were able to create a roof structure that worked with the existing roof. The exterior redesign included a new front porch with all new railings, decking and stairs with the added bonus of a new second floor porch off the bedroom.

 One Room at a Time, Inc.
The attic space was transformed from a cold storage area of 700 SF to usable space with closed mechanical room and 'stage' area for kids. Structural collar ties were wrapped and stained to match the rustic hand-scraped hardwood floors. LED uplighting on beams adds great daylight effects. Short hallways lead to the dormer windows, required to meet the daylight code for the space. An additional steel metal 'hatch' ships ladder in the floor as a second code-required egress is a fun alternate exit for the kids, dropping into a closet below. The main staircase entrance is concealed with a secret bookcase door. The door hardware is a concealed pivoting hinge that can withstand 700 pounds, and opens weightlessly.
One Room at a Time, Inc.

 Neil L. Warne, Architect
Originally a small two story, shingled bungalow set amidst an urban forest, this project involved major remodeling and enlargement of the interior spaces, and addition of two wings in order to clarify the interior layout and to add needed space, especially in the main living spaces. The small site and desire to not over-build the footprint, required a heroic effort to install a full basement under the existing house.
Photos by David Simone.
42