
Search results for "Safe replacement" in Home Design Ideas

 Thinkterior LLC
Oasis in the Desert
You can find a whole lot of fun ready for the kids in this fun contemporary play-yard in the dessert.
Theme:
The overall theme of the play-yard is a blend of creative and active outdoor play that blends with the contemporary styling of this beautiful home.
Focus:
The overall focus for the design of this amazing play-yard was to provide this family with an outdoor space that would foster an active and creative playtime for their children of various ages. The visual focus of this space is the 15-foot tree placed in the middle of the turf yard. This fantastic structure beacons the children to climb the mini stumps and enjoy the slide or swing happily from the branches all the while creating a touch of whimsical nature not typically found in the desert.
Surrounding the tree the play-yard offers an array of activities for these lucky children from the chalkboard walls to create amazing pictures to the custom ball wall to practice their skills, the custom myWall system provides endless options for the kids and parents to keep the space exciting and new. Rock holds easily clip into the wall offering ever changing climbing routes, custom water toys and games can also be adapted to the wall to fit the fun of the day.
Storage:
The myWall system offers various storage options including shelving, closed cases or hanging baskets all of which can be moved to alternate locations on the wall as the homeowners want to customize the play-yard.
Growth:
The myWall system is built to grow with the users whether it is with changing taste, updating design or growing children, all the accessories can be moved or replaced while leaving the main frame in place. The materials used throughout the space were chosen for their durability and ability to withstand the harsh conditions for many years. The tree also includes 3 levels of swings offering children of varied ages the chance to swing from the branches.
Safety:
Safety is of critical concern with any play-yard and a space in the harsh conditions of the desert presented specific concerns which were addressed with light colored materials to reflect the sun and reduce heat buildup and stainless steel hardware was used to avoid rusting. The myWall accessories all use a locking mechanism which allows for easy adjustments but also securely locks the pieces into place once set. The flooring in the treehouse was also textured to eliminate skidding.

 SabaRehman Abdulrehman
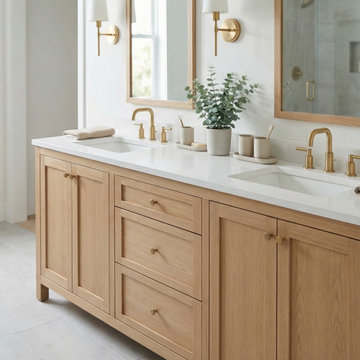
Morning routines shouldn’t involve a traffic jam at the sink. The 2025 Houzz Bathroom Trends Study found that 65 percent of U.S. renovators now choose a double-sink vanity to skip the wait. Designers agree: Titan Builders dubbed 2025 “the year of bigger, storage-packed double vanities,” forecasting dual-basin setups in family, guest, and even powder baths. As KBIS 2025 launches land, prototypes for 2026 layer in spa-grade wood, built-in outlets, and planet-friendly finishes. In this guide, we rank six standout models and show you how to size, install, and enjoy a clutter-free, two-sink future.
Methodology and selection criteria
A well-planned double-sink vanity keeps busy morning routines calm and clutter-free.
Before we crowned any winners, we mapped the entire 2024–2026 double-sink (dual-basin) market. That meant parsing KBIS exhibitor releases, scraping bestseller lists from Home Depot, Lowe’s, and Wayfair, and reviewing designer short lists in trade magazines. The sweep produced 110 candidate vanities, giving us visibility into every style, price tier, and material in play.
We then scored each model against six weighted factors that continue to matter long after installers leave:
- Build quality – 25 percent.Solid hardwood frames, dovetail drawers, and furniture-grade plywood backs, never particleboard in disguise.
- Design versatility – 20 percent.Lines and finishes that suit modern, classic, or farmhouse baths without dating quickly.
- Sustainability – 15 percent.FSC-certified wood, CARB 2 compliance, and low-VOC finishes for healthier air.
- Storage efficiency – 15 percent.Deep drawers, tilt-outs, or power cubbies that corral countertop clutter.
- Value for money – 15 percent.Fair street price for the materials, stone tops, sinks, and soft-close hardware included.
- Brand reputation and warranty – 10 percent.Manufacturers with responsive support and at least a one-year parts guarantee.
- Footprint: 72 W × 22 D × 36 H in. (183 × 56 × 91 cm)
- Crated weight: 506 lb / 230 kg
- Street price: about $2,575 with marble top and basins, Q4 2025
- Footprint: 48 W × 22 D in. (122 × 56 cm)
- Height: 34.8 in. (88 cm) with backsplash
- Sliding barn door plus 3 drawers
- Pre-drilled 8-in. faucet spacing, sinks included
- Footprint: 60 W × 21 D × 34 H in. (152 × 53 × 86 cm)
- Integrated power: 4 AC + 2 USB, UL-listed
- Crated weight: 300 lb / 136 kg
- Street price: about $2,349 at Home Depot, Q4 2025
- Footprint: 72 W × 22 D in. (183 × 56 cm)
- Height: 34 in. (86 cm) plus 4 in. backsplash
- Counter: 1 in. Carrara marble, apron-front sinks included
- Hardware: oil-rubbed bronze, soft-close doors and drawers
- Footprint: 60 W × 22 D × 34 H in. (152 × 56 × 86 cm)
- Construction: solid poplar and plywood, waterfall quartz top
- Integrated slim power bank, soft-close doors and drawers
- Target price: just under $2,300 with top and basins
Find the right local pro for your project
 N C R
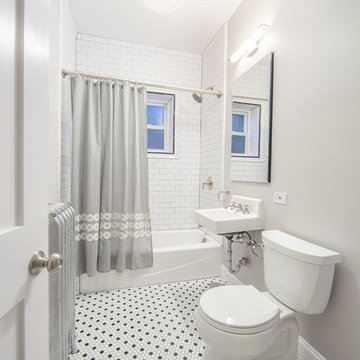
N C RThis bathroom renovation kept the vintage ambiance while incorporating a few contemporary finishes. We replaced the pedestal sink with a contemporary square, wall mounted sink & faucet, repainted the radiator in a glamorous silver color, installed octagon-designed floor tiles, new subway tile, designed a sleek medicine cabinet, and installed two shower shelves that were safe and out of reach from the client’s children.
Designed by Chi Renovation & Design who serve Chicago and it's surrounding suburbs, with an emphasis on the North Side and North Shore. You'll find their work from the Loop through Lincoln Park, Skokie, Wilmette, and all of the way up to Lake Forest.
 Jackson Design & Remodeling
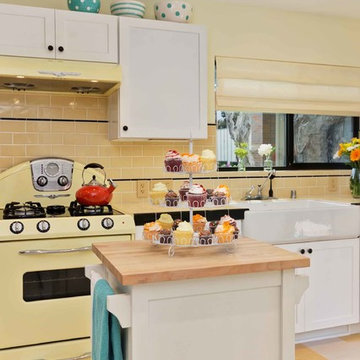
The center island is a piece of furniture that can be moved during food preparation to make a shorter transition from the refrigerator to the stove. The new floor extends across the kitchen to the backyard and to the garage entry, replacing existing carpeting. Safe and easy navigation was a priority in the design.
 Everything Home
In this gorgeous Carmel residence, the primary objective for the great room was to achieve a more luminous and airy ambiance by eliminating the prevalent brown tones and refinishing the floors to a natural shade.
The kitchen underwent a stunning transformation, featuring white cabinets with stylish navy accents. The overly intricate hood was replaced with a striking two-tone metal hood, complemented by a marble backsplash that created an enchanting focal point. The two islands were redesigned to incorporate a new shape, offering ample seating to accommodate their large family.
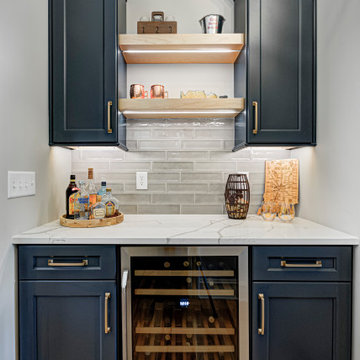
In the butler's pantry, floating wood shelves were installed to add visual interest, along with a beverage refrigerator. The kitchen nook was transformed into a cozy booth-like atmosphere, with an upholstered bench set against beautiful wainscoting as a backdrop. An oval table was introduced to add a touch of softness.
To maintain a cohesive design throughout the home, the living room carried the blue and wood accents, incorporating them into the choice of fabrics, tiles, and shelving. The hall bath, foyer, and dining room were all refreshed to create a seamless flow and harmonious transition between each space.
---Project completed by Wendy Langston's Everything Home interior design firm, which serves Carmel, Zionsville, Fishers, Westfield, Noblesville, and Indianapolis.
For more about Everything Home, see here: https://everythinghomedesigns.com/
To learn more about this project, see here:
https://everythinghomedesigns.com/portfolio/carmel-indiana-home-redesign-remodeling
 Chi Renovation & Design
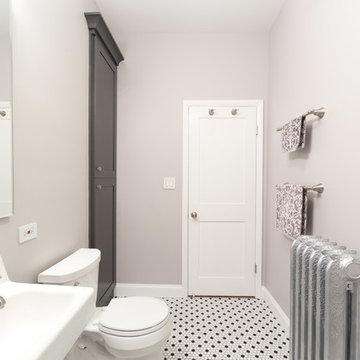
This bathroom renovation kept the vintage ambiance while incorporating a few contemporary finishes. We replaced the pedestal sink with a contemporary square, wall mounted sink & faucet, repainted the radiator in a glamorous silver color, installed octagon-designed floor tiles, new subway tile, designed a sleek medicine cabinet, and installed two shower shelves that were safe and out of reach from the client’s children.
Home located in Edgewater, Chicago. Designed by Chi Renovation & Design who serve Chicago and it's surrounding suburbs, with an emphasis on the North Side and North Shore. You'll find their work from the Loop through Lincoln Park, Skokie, Wilmette, and all of the way up to Lake Forest.
For more about Chi Renovation & Design, click here: https://www.chirenovation.com/
To learn more about this project, click here: https://www.chirenovation.com/portfolio/vintage-bathrooms-renovation/

 Aquatica Plumbing Group
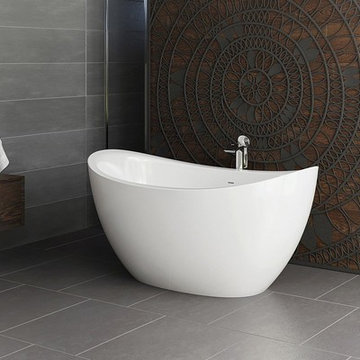
A wide, rounded rim - conceived by Aquatica's industrial design team for bather safety and convenience. The Purescape 171 Mini stone slipper bathtub features a wide, rounded rim which bathers can sit or lean on safely while getting in and out of the bathtub.
 Thinkterior LLC
THEME Doors are a visual frame to the
entrance of a great room. This highquality,
personalized element adds
fun and interest to the room before it
is even entered, and provides a great
introduction for any theme.
FOCUS The half-door offers unique
access to the room, providing a true
feeling of ownership for the child and
peace of mind for parents. The top half
of the door swings separate from the
bottom, maintaining great ventilation
and a clear view into the room.
GROWTH The doors look beautiful and
function normally for many years.
SAFETY The doors easily replace
unsightly baby gates and provide
the same level of restraint, without
the footholds or slats often used by
children to manipulate or climb gates.
Solid wood core birch construction
keeps sound out (or sound in) when
the door is closed, while a sliding
gate lock safely secures the bottom
half, and makes opening the top half
simple.
 Pacific Garden Design
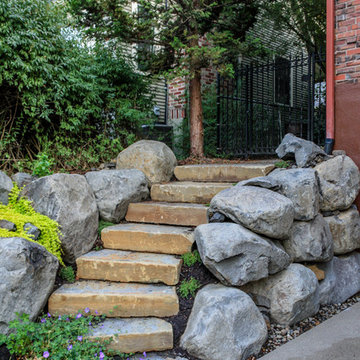
With a narrow driveway and leaning concrete retaining walls, parking was a major challenge at this 1938 brick Tudor on Spokane's South Hill. Crumbling concrete stairs added another layer of difficulty, and after a particularly rough winter, the homeowners were ready for a change. The failing concrete walls were replaced with stacked boulders, which created space for a new, wider driveway. Natural stone steps offer access to the backyard, while the new front stairs and sidewalk provide a safe route to the front door. The original iron railings were preserved and modified to be reused with the new stairs.
 Kari P
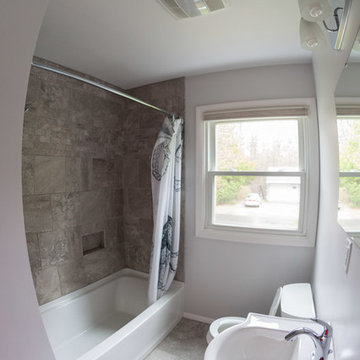
When I bought my house in May 2014, there was one thing I really didn’t like about it – the 1950s bathroom complete with pink tile and mismatched gaudy fixtures was absolutely hideous. I knew redoing the bathroom would be a big, expensive project, so I vowed to just live with it while I fixed up parts of the house that were easier to update, such as putting a fresh coat of paint on the walls and updating the curtains (which I still haven’t done, by the way). Well my first winter in the new house turned out to be a bad one, and in February 2015, I noticed water stains on the walls and ceiling of the second bedroom that only got worse and worse each day. The water damage quickly spread to other rooms, and when contractors came to the house to access and fix the damage, they discovered moisture behind the pink tiled walls of my bathroom. And so started the bathroom remodel.
Start to finish, this project took close to six months, due to going back and forth with insurance and difficulty finding a contractor I liked. I lived without a shower for at least four of those months, showering at the gym where I worked or in a pop-up tent in my backyard once it was warm enough out. My friend Eric and I demoed the bathroom and for the remodel, I picked out all of the design components and had a local contractor, Fred Haas do the work. I kept the original layout – as my bathroom was small to begin with and it was both impractical and expensive to start moving things around – but just about everything else about the bathroom is new, except for maybe the window and door. New tub, sink, and toilet, new tile floor and shower surround, new walls and ceiling, fresh paint, new fixtures and mirror, updated lighting, and a better ventilation system were all added.
Tub – Sterling Vikrell
Toilet – Kohler Wellworth® two-piece round-front dual-flush toilet
Sink – Kohler Veer™ 21" pedestal bathroom sink
Fixtures – Kohler Alteo® line
Tile floor and shower surround – American Olean Laurel Heights ceramic tile in Summit Gray
Lighting – I don't remember... will have to see if I can find it
Ventilation system – NuTone
Mirror – Ikea
Paint – Behr
Shower Curtain – eBay
Here are photos of my project from start to finish. As you can see, I probably still need a thing or two (a toilet paper holder, mini storage shelf, and some art wouldn’t hurt, nor would replacing the door or painting it white), but overall I’m really happy with how my new bathroom came out. I LOVE it, which is the exact opposite of how I felt about the original bathroom.
Photos © Kari Post
 CuttingEdge Built LLC
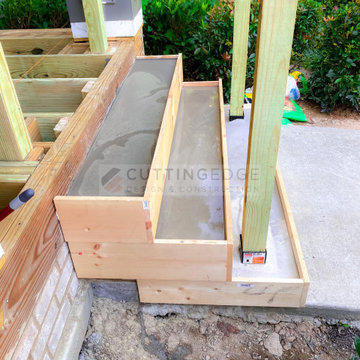
This beautiful new construction craftsman-style home had the typical builder's grade front porch with wood deck board flooring and painted wood steps. Also, there was a large unpainted wood board across the bottom front, and an opening remained that was large enough to be used as a crawl space underneath the porch which quickly became home to unwanted critters.
In order to beautify this space, we removed the wood deck boards and installed the proper floor joists. Atop the joists, we also added a permeable paver system. This is very important as this system not only serves as necessary support for the natural stone pavers but would also firmly hold the sand being used as grout between the pavers.
In addition, we installed matching brick across the bottom front of the porch to fill in the crawl space and painted the wood board to match hand rails and columns.
Next, we replaced the original wood steps by building new concrete steps faced with matching brick and topped with natural stone pavers.
Finally, we added new hand rails and cemented the posts on top of the steps for added stability.
WOW...not only was the outcome a gorgeous transformation but the front porch overall is now much more sturdy and safe!
 Pacific Garden Design
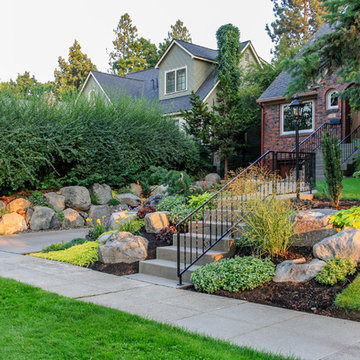
With a narrow driveway and leaning concrete retaining walls, parking was a major challenge at this 1938 brick Tudor on Spokane's South Hill. Crumbling concrete stairs added another layer of difficulty, and after a particularly rough winter, the homeowners were ready for a change. The failing concrete walls were replaced with stacked boulders, which created space for a new, wider driveway. Natural stone steps offer access to the backyard, while the new front stairs and sidewalk provide a safe route to the front door. The original iron railings were preserved and modified to be reused with the new stairs.
Sponsored
Plain City, OH

Kuhns Contracting, Inc.
Central Ohio's Trusted Home Remodeler Specializing in Kitchens & Baths



 Best Electrical Company
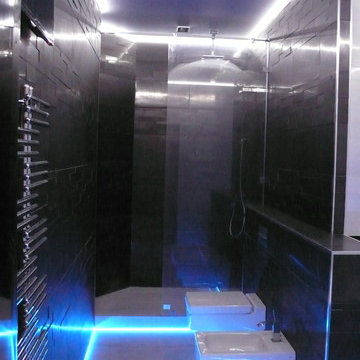
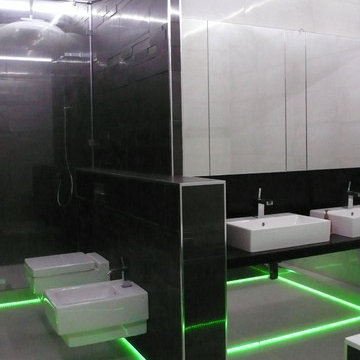
For home renovations and remodeling projects, Best Electrical Company is the Orange County electrical contractor you can count on to help you with your interior lighting project. Whether you are looking for modern light fixtures, recessed lighting, track lighting, or ceiling fan installation, our expert Orange County lighting contractors will provide you with Service At Its Best.
Our team of expert Anaheim lighting technicians will help integrate a beautiful and functional lighting design that will bring light and life to your home. We are available for electrical safety inspections, electrical wiring installation and lighting installation for new houses and home additions as well, ensuring the whole project comes together smoothly. Contact BEC today to discuss your interior lighting design, and allow us to install your lights and ceiling fans with precision and ease.
Sponsored
Plain City, OH
Kuhns Contracting, Inc.
Central Ohio's Trusted Home Remodeler Specializing in Kitchens & Baths

 Bill Fry Construction - Wm. H. Fry Const. Co.
Covid During Construction and Making Face Masks
Dear Houzz Folks,
We've started getting back to work and are educating everyone at our projects on how to be safe during COVID, posting signage, and we've been making masks for our employees, colleagues, friends, family etc... Here's some information on what I've learned so far in sewing the best fitting face mask for COVID.
1. Put in a wire at the nose bridge (about 3.5 inches) - it helps with fit and if you wear glasses, it keeps them from fogging up. I found that doorbell wire, available at the hardware store, seems to work well. It isn't too thin or too fat, bends easily and holds its shape. I attach it by using a zigzag stitch on the interior seam of the outside of the mask (so there's a bit more cushion on the inside).
2. For the shaped masks, I make a pocket in case my friends, family, colleagues, want to insert a filter - it also allows for three layers of fabric in the breathing area and less bulk where the ties go. For patterns that don't offer pockets, I just make my own pattern pocket. I also first baste the two inside pieces first and then sew the front on. This way, there's no worries about slipping. No pins are needed and no pins minimizes the number of extra air holes in the fabric.
3. So that the ties/loops can be replaced or modified, I make a channel for rather than sewing it in permanently. Many videos show using a safety pin to pull the elastic through. If you sew much, you might have a bodkin in your sewing box, but it might be a bit too wide. Instead, I use a long hairpin (you could probably make a long loop with a paper clip). I run the hairpin through the channel, loop the elastic through the end of the pin and pull through. That takes much less time than piercing it with a safety-pin.
4. For the inside of the masks, it is nice to have softer fabric inside, so high-thread-count sheets purchased on sale work great. Then you can easily tell what is inside as well.
5. For surgical-style masks, there's a pattern with a pocket on the inside and a wire. I like the ideas in this video but use 2 fabrics and make them bigger. About a 9x9 inch for the outside and 9x8 inch for the inside. 5/8 seam on the nose and 1/4 seam on the bottom.
6. For the fitted masks, there are two patterns that I like. For this one, https://moinliz.de/mundschutz-naehen-mit-schnittmuster it expects you to print on European-sized paper, so if you want to get the size right, print at 100%
I also really like this pattern and I added a pocket and lengthened the ends to make channels https://intermountainhealthcare.org/covid19-coronavirus/homemade-cloth-face-coverings/ (scroll down to a link to download the pdf) Lots of folks sew craftpassion, but I like the fit of these patterns better. There are still some other patterns I have left to try!
6. After breaking lots of needles, I realized that I really didn't need to topstich the fitted masks over the bridge, so I just started skipping the bridge.
7. If you're going to wear a face-covering for a really long time, you might want to skip the ear hangers and go for ties behind the head. Instead of two ties, I'll use one long one so that the bottom one is a loop and the top one ties. Bungee cord works nice.
Happy Sewing!
: ) Rhoda Fry, Bill Fry Construction
 Pacific Garden Design
With a narrow driveway and leaning concrete retaining walls, parking was a major challenge at this 1938 brick Tudor on Spokane's South Hill. Crumbling concrete stairs added another layer of difficulty, and after a particularly rough winter, the homeowners were ready for a change. The failing concrete walls were replaced with stacked boulders, which created space for a new, wider driveway. Natural stone steps offer access to the backyard, while the new front stairs and sidewalk provide a safe route to the front door. The original iron railings were preserved and modified to be reused with the new stairs.
 Pacific Garden Design
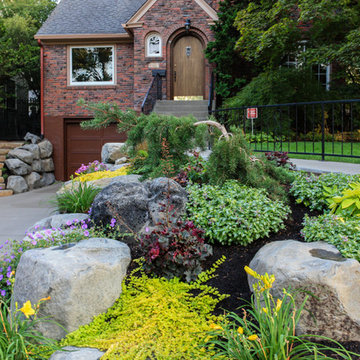
With a narrow driveway and leaning concrete retaining walls, parking was a major challenge at this 1938 brick Tudor on Spokane's South Hill. Crumbling concrete stairs added another layer of difficulty, and after a particularly rough winter, the homeowners were ready for a change. The failing concrete walls were replaced with stacked boulders, which created space for a new, wider driveway. Natural stone steps offer access to the backyard, while the new front stairs and sidewalk provide a safe route to the front door. The original iron railings were preserved and modified to be reused with the new stairs.
18