
Search results for "Selections obtainable" in Home Design Ideas
 Michael Nash Design, Build & Homes
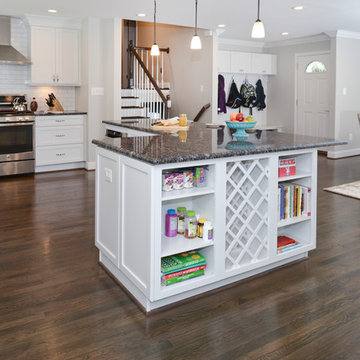
For this recently moved in military family, their old rambler home offered plenty of area for potential improvement. An entire new kitchen space was designed to create a greater feeling of family warmth.
It all started with gutting the old rundown kitchen. The kitchen space was cramped and disconnected from the rest of the main level. There was a large bearing wall separating the living room from the kitchen and the dining room.
A structure recessed beam was inserted into the attic space that enabled opening up of the entire main level. A large L-shaped island took over the wall placement giving a big work and storage space for the kitchen.
Installed wood flooring matched up with the remaining living space created a continuous seam-less main level.
By eliminating a side door and cutting through brick and block back wall, a large picture window was inserted to allow plenty of natural light into the kitchen.
Recessed and pendent lights also improved interior lighting.
By using offset cabinetry and a carefully selected granite slab to complement each other, a more soothing space was obtained to inspire cooking and entertaining. The fabulous new kitchen was completed with a new French door leading to the sun room.
This family is now very happy with the massive transformation, and are happy to join their new community.
 Michael Nash Design, Build & Homes
For this recently moved in military family, their old rambler home offered plenty of area for potential improvement. An entire new kitchen space was designed to create a greater feeling of family warmth.
It all started with gutting the old rundown kitchen. The kitchen space was cramped and disconnected from the rest of the main level. There was a large bearing wall separating the living room from the kitchen and the dining room.
A structure recessed beam was inserted into the attic space that enabled opening up of the entire main level. A large L-shaped island took over the wall placement giving a big work and storage space for the kitchen.
Installed wood flooring matched up with the remaining living space created a continuous seam-less main level.
By eliminating a side door and cutting through brick and block back wall, a large picture window was inserted to allow plenty of natural light into the kitchen.
Recessed and pendent lights also improved interior lighting.
By using offset cabinetry and a carefully selected granite slab to complement each other, a more soothing space was obtained to inspire cooking and entertaining. The fabulous new kitchen was completed with a new French door leading to the sun room.
This family is now very happy with the massive transformation, and are happy to join their new community.
 Michael Nash Design, Build & Homes
For this recently moved in military family, their old rambler home offered plenty of area for potential improvement. An entire new kitchen space was designed to create a greater feeling of family warmth.
It all started with gutting the old rundown kitchen. The kitchen space was cramped and disconnected from the rest of the main level. There was a large bearing wall separating the living room from the kitchen and the dining room.
A structure recessed beam was inserted into the attic space that enabled opening up of the entire main level. A large L-shaped island took over the wall placement giving a big work and storage space for the kitchen.
Installed wood flooring matched up with the remaining living space created a continuous seam-less main level.
By eliminating a side door and cutting through brick and block back wall, a large picture window was inserted to allow plenty of natural light into the kitchen.
Recessed and pendent lights also improved interior lighting.
By using offset cabinetry and a carefully selected granite slab to complement each other, a more soothing space was obtained to inspire cooking and entertaining. The fabulous new kitchen was completed with a new French door leading to the sun room.
This family is now very happy with the massive transformation, and are happy to join their new community.
Find the right local pro for your project
 Vintage Cellars & Saunas
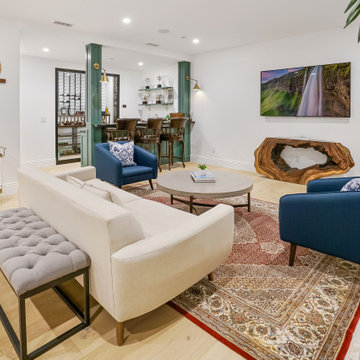
Vintage Cellars, Wine cellar design and build firm out of San Diego, California, worked with this celebrity client closely to create a gorgeous wine storage design to add depth and point of interest to this at home bar. This hybrid style wine cellar / wine room / custom wine cellar / custom wine room utilizes multiple styles of wine racks / wine racking to keep a modern and contemporary, yet refined and traditional feel in this home in Beverly Hills, Los Angeles, California.
On the back wall upper section, simple triple deep metal wine racks are used to showcase wine bottles horizontally, so that high providence wine labels can be displayed and celebrated. Clean black metal wine racking looks great against the white walls behind. In the center row of the back wall, a high reveal display is featured, again for more ability and capacity to show off those prized vintages and bottles. This high reveal wine display / angled wine display style section of wood wine racking / wooden wine racking / wood wine racks / wooden wine racks has been carefully thought about by our team to ensure that the angles at which the bottles sit still maintain a wet cork. Below sits room for OWC Original Wood Cases, where the client can store special wine selections often obtained directly from the wineries themselves. Case storage is great for wines which you plan to store for long periods of time, or for those special vintages you might be saving for a special occasion. Diamond Bins finish out this section in the back right corner. Diamond Bin / Diamond Storage / Diamond Wine Storage Bins are interesting design features and utilitarian, leaving you the option to store bottles neck out for easy access.
On the right side of this traditional modern hybrid custom wine cellar / custom wine room / custom wine display, individual bottle storage above, wine glass storage, and a small countertop are the highlights. Cabinetry below finishes the side which butts up to a dividing wall and into the floor to ceiling glass doors in front.
Dark stained Alder wood was chosen as the material for the wine racks / wine racking / wine rack. The custom finishing and staining, completed by Wine Cellar Design and Builders Vintage Cellars, perfectly accentuates the remaining features of the home bar, bar chairs / bar stools, and other wood features throughout the room.
The small / mid-sized custom wine storage space attached to this custom bar makes a great addition to this living room. Hosting get togethers in this space feels so easy.
This fantastic example of a hybrid modern / contemporary and traditional style of custom wine cellar / custom wine room / custom wine wall / custom wine display is extremely popular in this area in Beverly Hills, Los Angeles - as well as in other areas nearby such as Bel Air, Hollywood, Santa Monica, Hollywood Hills, Hancock Park, Thousand Oaks, Tarzana, Pasadena, Calabasas, Pacific Palisades, Venice, and Malibu. They are even showing up more and more in Orange County, Newport Beach, Newport Coast, Coto De Caza, Crystal Cove, Huntington Beach, Manhattan Beach, Seal Beach, Laguna Beach, Irvine, San Clemente, and Dana Point.
Vintage Cellars has built gorgeous custom wine cellars and wine storage rooms across the United States and World for over 25 years. We are your go-to business for anything wine cellar and wine storage related! Whether you're interested in a wine closet, wine racking, custom wine racks, a custom wine cellar door, or a cooling system for your existing space, Vintage Cellars has you covered!
We carry all kinds of wine cellar cooling and refrigeration systems, incuding: Breezaire, CellarCool, WhisperKool, Wine Guardian, CellarPro and Commercial systems.
We also carry many types of Wine Refrigerators, Wine Cabinets, and wine racking types, including La Cache, Marvel, N'Finity, Transtherm, Vinotheque, Vintage Series, Credenza, Walk in wine rooms, Climadiff, Riedel, Fontenay, and VintageView.
Vintage Cellars also does work in many styles, including Contemporary and Modern, Rustic, Farmhouse, Traditional, Craftsman, Industrial, Mediterranean, Mid-Century, Industrial and Eclectic.
Some locations we cover often include: Agora Hills, Alameda, Albany, Alhambra, Aliso Viejo, Altadena, Anaheim, Angwin, Arcadia, Aromas, Arroyo Grande, Atascadero, Atherton, Avila Beach, Balboa Terrace, Bel Air, Belmont, Belvedere, Benton, Berkeley, Bermuda Dunes, Beverly Hills, Big Sur, Bolinas, Boyle Heights, Bradbury, Bradley, Brea, Brentwood, Bridgeport, Brisbane, Buellton, Buena Park, Burbank, Burlingame, Calabasas, Calistoga, Cambria, Canoga Park, Cardiff, Carlsbad, Carmel, Carmel By The Sea, Carmel Valley, Carnelian Bay, Carpinteria, Casmalia, Castroville, Cathedral City, Cayucos, Chatsworth, Chualar, City of LA, City of SF, Coachella, Coleville, Colma, Corona Del Mar, Coronado, Coronado Island, Corte Madera, Costa Mesa, Coto De Caza, Creston, Crystal Cove, Cupertino, Cypress, Danville, Deer Park, Del Mar, Diablo, Duarte, Eagle Rock, East Palo Alto, East Pasadena, Echo Park, El Granada, El Monte, Emeryville, Encinitas, Encino, Fairfax, Foster City, Fountain Valley, Fremont, Fullerton, Garden Grove, Glendale, Golden Gate Park, Goleta, Gonzales, Granada Hills, Granite Bay, Greenbrae, Greenfield, Grover Beach, Guadalupe, Half Moon Bay, Hancock Park, Harmony, Hidden Hills, Hillsborough, Hollywood, Hollywood Hills, Huntington Beach, Indian Wells, Indio, Industry, Inner Richmond, Inverness, Irvine, Jolon, June Lake, Kentfield, King City, La Canada Flintridge, La Habra, La Honda, La Jolla, La Palma, La Quinta, Ladera Heights, Laguna Beach, Laguna Hills, Laguna Niguel, Laguna Woods, Lake Balboa, Lake Forest, Lake Tahoe, Lake View Terrace, Larkspur, Laurel Canyon, Lee Vining, Lockwood, Lompoc, Long Beach, Los Alamitos, Los Alamos, Los Altos, Los Altos Hills, Los Angeles, Los Gatos, Los Olivos, Los Osos, Malibu, Mammoth Lakes, Manhattan Beach, Marin, Marina, Marshall, Mayflower Village, Menlo Park, Mill Valley, Millbrae, Mission Hills, Mission Viejo, Mono, Monrovia, Montara, Montebello, Monterey, Monterey Park, Morro Bay, Moss Beach, Moss Landing, Mountain View, Napa, New Cuyama, Newark, Newport Beach, Newport Coast, Nicasio, Nipomo, North Hills, Northridge, Novato, Oakland, Oakville, Ocean Beach, Oceano, Orange, Orange County, Pacific Grove, Pacific Palisades, Pacoima, Palm Desert, Palm Springs, Palo Alto, Palos Verdes, Panorama City, Pasadena, Paso Robles, Pebble Beach, Pescadero, Piedmont, Pismo Beach, Placentia, Point Reyes Station, Pope Valley, Portola Valley, Presidio, Presidio Heights, Rancho Mirage, Rancho Santa Fe, Rancho Santa Margarita, Redondo Beach, Redwood City, Reseda, Rosemead, Russian Cliff, Rutherford, Saint Helena, Salinas, San Anselmo, San Ardo, San Bruno, San Carlos, San Clemente, San Diego, San Fernando, San Francisco, San Gabriel, San Gregorio, San Jose, San Juan Capistrano, San Leandro, San Lorenzo, San Lucas, San Luis Obispo, San Marino, San Mateo, San Miguel, San Rafael, San Simeon, Santa Ana, Santa Barbara, Santa Clara, Santa Clarita, Santa Margarita, Santa Maria, Santa Monica, Santa Ynez, Saratoga, Sausalito, Sea Cliff, Seal Beach, Seaside, Shadow Hills, Shandon, Sherman Oaks, Sierra Madre, Silver Lake, Solana Beach, Soledad, Solvang, Sonoma, South El Monte, South Pasadena, South San Gabriel, Spreckels, Squaw Valley, St Helena, Stanford, Stanton, Stinson Beach, Stough Park, Studio City, Summerland, Sun Valley, Sunland, Sunnyvale, Sylmar, Tahoe City, Tahoe Vista, Tarzana, Temple City, Templeton, Thousand Oaks, Thousand Palms, Tiburon, Toluca Lake, Topanga, Topaz, Torrey Pines, Tujanga, Tustin, Union City, Valencia, Verdugo Mountains, Vernon, Villa Park, Walnut, Walnut Creek, West Puente Valley, Westminster, Westwood, Whittier, Woodside, Yorba Linda, Yountville
San Diego Wine Cellars, Rancho Santa Fe Wine Cellars, Beverly Hills Wine Cellars, Bel Air Wine Cellars, Orange County Wine Cellars, Newport Beach Wine Cellars, San Francisco Wine Cellars, Napa Wine Cellars, Sonoma Wine Cellars, Los Angeles Wine Cellars, Santa Barbara Wine Cellars, Palm Desert Wine Cellars, La Jolla Wine Cellars, Del Mar Wine Cellars, Coronado Wine Cellars, Pacific Palisades Wine Cellars, Malibu Wine Cellars, Santa Monica Wine Cellars, Brentwood Wine Cellars, Laguna Wine Cellars, Crystal Cove Wine Cellars, Hollywood Wine Cellars, Bay Area Wine Cellars, South Bay Wine Cellars, LA Wine Cellars, SD Wine Cellars, OC Wine Cellars, SF Wine Cellars, Huntington Beach Wine Cellars, Carlsbad Wine Cellars, Palos Verdes Wine Cellars, Paso Robles Wine Cellars, Encinitas Wine Cellars, Manhattan Beach Wine Cellars, Marin Wine Cellars, Tiburon Wine Cellars, Coto De Caza Wine Cellars, Thousand Oaks Wine Cellars, Cardiff Wine Cellars, RSF Wine Cellars, San Marino Wine Cellars, Ladera Heights Wine Cellars, Westwood Wine Cellars, Hillsborough Wine Cellars, Luxury Wine Cellars, Custom Wine Cellars, High End Wine Cellars, Estate Wine Cellars, Modern Wine Cellars, Contemporary Wine Cellars, Rustic Wine Cellars, Traditional Wine Cellars
Contact Vintage Cellars today with any of your Wine Cellar needs!
(800) 876-8789
Vintage Cellars
904 Rancheros Drive
San Marcos, California 92069
(800) 876-8789
 Michael Nash Design, Build & Homes
For this recently moved in military family, their old rambler home offered plenty of area for potential improvement. An entire new kitchen space was designed to create a greater feeling of family warmth.
It all started with gutting the old rundown kitchen. The kitchen space was cramped and disconnected from the rest of the main level. There was a large bearing wall separating the living room from the kitchen and the dining room.
A structure recessed beam was inserted into the attic space that enabled opening up of the entire main level. A large L-shaped island took over the wall placement giving a big work and storage space for the kitchen.
Installed wood flooring matched up with the remaining living space created a continuous seam-less main level.
By eliminating a side door and cutting through brick and block back wall, a large picture window was inserted to allow plenty of natural light into the kitchen.
Recessed and pendent lights also improved interior lighting.
By using offset cabinetry and a carefully selected granite slab to complement each other, a more soothing space was obtained to inspire cooking and entertaining. The fabulous new kitchen was completed with a new French door leading to the sun room.
This family is now very happy with the massive transformation, and are happy to join their new community.
 Michael Nash Design, Build & Homes
For this recently moved in military family, their old rambler home offered plenty of area for potential improvement. An entire new kitchen space was designed to create a greater feeling of family warmth.
It all started with gutting the old rundown kitchen. The kitchen space was cramped and disconnected from the rest of the main level. There was a large bearing wall separating the living room from the kitchen and the dining room.
A structure recessed beam was inserted into the attic space that enabled opening up of the entire main level. A large L-shaped island took over the wall placement giving a big work and storage space for the kitchen.
Installed wood flooring matched up with the remaining living space created a continuous seam-less main level.
By eliminating a side door and cutting through brick and block back wall, a large picture window was inserted to allow plenty of natural light into the kitchen.
Recessed and pendent lights also improved interior lighting.
By using offset cabinetry and a carefully selected granite slab to complement each other, a more soothing space was obtained to inspire cooking and entertaining. The fabulous new kitchen was completed with a new French door leading to the sun room.
This family is now very happy with the massive transformation, and are happy to join their new community.
 Michael Nash Design, Build & Homes
For this recently moved in military family, their old rambler home offered plenty of area for potential improvement. An entire new kitchen space was designed to create a greater feeling of family warmth.
It all started with gutting the old rundown kitchen. The kitchen space was cramped and disconnected from the rest of the main level. There was a large bearing wall separating the living room from the kitchen and the dining room.
A structure recessed beam was inserted into the attic space that enabled opening up of the entire main level. A large L-shaped island took over the wall placement giving a big work and storage space for the kitchen.
Installed wood flooring matched up with the remaining living space created a continuous seam-less main level.
By eliminating a side door and cutting through brick and block back wall, a large picture window was inserted to allow plenty of natural light into the kitchen.
Recessed and pendent lights also improved interior lighting.
By using offset cabinetry and a carefully selected granite slab to complement each other, a more soothing space was obtained to inspire cooking and entertaining. The fabulous new kitchen was completed with a new French door leading to the sun room.
This family is now very happy with the massive transformation, and are happy to join their new community.



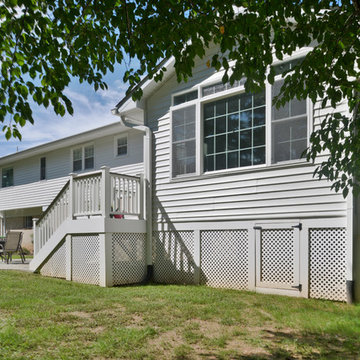 Michael Nash Design, Build & Homes
For this recently moved in military family, their old rambler home offered plenty of area for potential improvement. An entire new kitchen space was designed to create a greater feeling of family warmth.
It all started with gutting the old rundown kitchen. The kitchen space was cramped and disconnected from the rest of the main level. There was a large bearing wall separating the living room from the kitchen and the dining room.
A structure recessed beam was inserted into the attic space that enabled opening up of the entire main level. A large L-shaped island took over the wall placement giving a big work and storage space for the kitchen.
Installed wood flooring matched up with the remaining living space created a continuous seam-less main level.
By eliminating a side door and cutting through brick and block back wall, a large picture window was inserted to allow plenty of natural light into the kitchen.
Recessed and pendent lights also improved interior lighting.
By using offset cabinetry and a carefully selected granite slab to complement each other, a more soothing space was obtained to inspire cooking and entertaining. The fabulous new kitchen was completed with a new French door leading to the sun room.
This family is now very happy with the massive transformation, and are happy to join their new community.
 Lemon Remodeling & Services
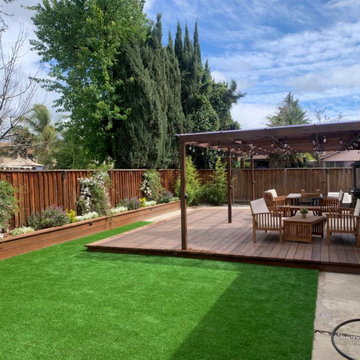
At Lemon Remodeling, we pride ourselves on being your trusted partner throughout the entire journey, whether it's a full home remodeling project, outdoor renovation, or the construction of your dream pergola and deck. Call us now or book a call back on our convenient booking platform : https://calendly.com/lemonremodeling
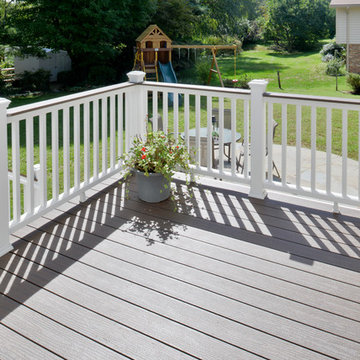
Lemon Remodeling specializes in the construction of beautiful pergolas and decks, perfect for enhancing your outdoor living spaces. Pergolas, in particular, have gained immense popularity for their ability to create a tranquil and shaded environment, ideal for unwinding and socializing.
Our expert team manages every aspect of the construction process, from the initial design phase to obtaining the required permits and selecting the finest materials.

 Talon Construction Inc.
Designing and building a kitchen addition is a complex process that involves multiple steps and considerations. Here is a general outline to help you get started on your kitchen addition project:
Define Your Goals and Budget:
• Determine the purpose of the kitchen addition. Is it for more cooking space, a dining area, or a combination of both?
• Establish a realistic budget for your project. Consider all costs, including construction, permits, materials, and furnishings.
Hire a Design Professional:
• Seek the services of a design build company who specializes in kitchen additions.
• Discuss your vision, needs, and budget with the design professional to create a design concept.
Site Evaluation:
• Assess the existing space and structural condition of your home to ensure it can support the addition.
• Consider factors like zoning regulations, setbacks, and building codes.
Design Development:
• Collaborate with your design professional to refine the concept, including the layout, size, and architectural style.
• Choose materials, finishes, and fixtures that fit your design and budget.
Obtain Permits:
• Consult with your local design build contractor to determine the necessary permits and approvals.
• Prepare and submit all required documents, including architectural drawings and engineering plans.
Create Construction Documents:
• Work with your design build professional to develop detailed construction drawings and specifications.
• These documents will serve as a guide for contractors during construction.
Hire a design build contractor:
• Check references, credentials, and licenses before selecting a contractor.
• Sign a detailed contract that outlines the scope of work, timeline, and payment schedule.
Construction Phase:
• Demolition: If needed, remove any existing structures or walls.
• Foundation: Construct the foundation for the addition.
• Framing: Build the structural framework of the addition.
• Plumbing, Electrical, and HVAC: Install or update utilities as required.
• Insulation: Ensure proper insulation for energy efficiency.
• Drywall and Finish Work: Complete the walls and ceilings.
• Flooring and Cabinetry: Install flooring and kitchen cabinets.
• Appliances and Fixtures: Add appliances, plumbing fixtures, and lighting.
• Paint and Finish: Apply paint and finishes to achieve the desired look.
• Final Inspection: Schedule inspections to ensure compliance with building codes.
Final Inspections and Approvals:
• Arrange for final inspections to ensure the addition meets all safety and code requirements.
• Obtain any necessary certificates of occupancy or compliance.
Move In and Enjoy:
• Once all inspections and approvals are received, you can move into your new kitchen addition and start enjoying it.
Remember that every kitchen addition project is unique, so adapt this outline to your specific needs and circumstances. Consulting with professionals and obtaining the required permits and inspections is crucial to a successful and safe project.
 Sweatman-Young, Inc.
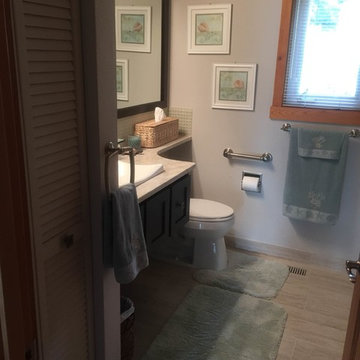
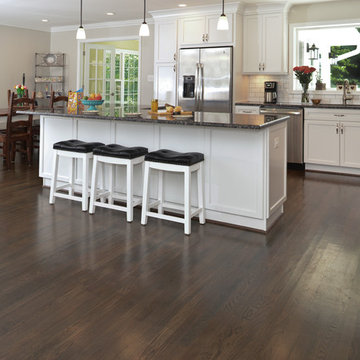
Sweatman-Young was contracted to remodel the main floor in this home to include the living room, kitchen and bathroom. We obtained permits in July and completed the project in October. We provided remodeling services from the drawings to the final jobsite clean up and everything in between. This client selected custom cabinetry, slab countertops, hardwood flooring, upgraded plumbing fixtures, appliances and light fixtures.

 Michael Nash Design, Build & Homes
For this recently moved in military family, their old rambler home offered plenty of area for potential improvement. An entire new kitchen space was designed to create a greater feeling of family warmth.
It all started with gutting the old rundown kitchen. The kitchen space was cramped and disconnected from the rest of the main level. There was a large bearing wall separating the living room from the kitchen and the dining room.
A structure recessed beam was inserted into the attic space that enabled opening up of the entire main level. A large L-shaped island took over the wall placement giving a big work and storage space for the kitchen.
Installed wood flooring matched up with the remaining living space created a continuous seam-less main level.
By eliminating a side door and cutting through brick and block back wall, a large picture window was inserted to allow plenty of natural light into the kitchen.
Recessed and pendent lights also improved interior lighting.
By using offset cabinetry and a carefully selected granite slab to complement each other, a more soothing space was obtained to inspire cooking and entertaining. The fabulous new kitchen was completed with a new French door leading to the sun room.
This family is now very happy with the massive transformation, and are happy to join their new community.
 Talon Construction Inc.
Designing and building a kitchen addition is a complex process that involves multiple steps and considerations. Here is a general outline to help you get started on your kitchen addition project:
Define Your Goals and Budget:
• Determine the purpose of the kitchen addition. Is it for more cooking space, a dining area, or a combination of both?
• Establish a realistic budget for your project. Consider all costs, including construction, permits, materials, and furnishings.
Hire a Design Professional:
• Seek the services of a design build company who specializes in kitchen additions.
• Discuss your vision, needs, and budget with the design professional to create a design concept.
Site Evaluation:
• Assess the existing space and structural condition of your home to ensure it can support the addition.
• Consider factors like zoning regulations, setbacks, and building codes.
Design Development:
• Collaborate with your design professional to refine the concept, including the layout, size, and architectural style.
• Choose materials, finishes, and fixtures that fit your design and budget.
Obtain Permits:
• Consult with your local design build contractor to determine the necessary permits and approvals.
• Prepare and submit all required documents, including architectural drawings and engineering plans.
Create Construction Documents:
• Work with your design build professional to develop detailed construction drawings and specifications.
• These documents will serve as a guide for contractors during construction.
Hire a design build contractor:
• Check references, credentials, and licenses before selecting a contractor.
• Sign a detailed contract that outlines the scope of work, timeline, and payment schedule.
Construction Phase:
• Demolition: If needed, remove any existing structures or walls.
• Foundation: Construct the foundation for the addition.
• Framing: Build the structural framework of the addition.
• Plumbing, Electrical, and HVAC: Install or update utilities as required.
• Insulation: Ensure proper insulation for energy efficiency.
• Drywall and Finish Work: Complete the walls and ceilings.
• Flooring and Cabinetry: Install flooring and kitchen cabinets.
• Appliances and Fixtures: Add appliances, plumbing fixtures, and lighting.
• Paint and Finish: Apply paint and finishes to achieve the desired look.
• Final Inspection: Schedule inspections to ensure compliance with building codes.
Final Inspections and Approvals:
• Arrange for final inspections to ensure the addition meets all safety and code requirements.
• Obtain any necessary certificates of occupancy or compliance.
Move In and Enjoy:
• Once all inspections and approvals are received, you can move into your new kitchen addition and start enjoying it.
Remember that every kitchen addition project is unique, so adapt this outline to your specific needs and circumstances. Consulting with professionals and obtaining the required permits and inspections is crucial to a successful and safe project.
 Talon Construction Inc.
Designing and building a kitchen addition is a complex process that involves multiple steps and considerations. Here is a general outline to help you get started on your kitchen addition project:
Define Your Goals and Budget:
• Determine the purpose of the kitchen addition. Is it for more cooking space, a dining area, or a combination of both?
• Establish a realistic budget for your project. Consider all costs, including construction, permits, materials, and furnishings.
Hire a Design Professional:
• Seek the services of a design build company who specializes in kitchen additions.
• Discuss your vision, needs, and budget with the design professional to create a design concept.
Site Evaluation:
• Assess the existing space and structural condition of your home to ensure it can support the addition.
• Consider factors like zoning regulations, setbacks, and building codes.
Design Development:
• Collaborate with your design professional to refine the concept, including the layout, size, and architectural style.
• Choose materials, finishes, and fixtures that fit your design and budget.
Obtain Permits:
• Consult with your local design build contractor to determine the necessary permits and approvals.
• Prepare and submit all required documents, including architectural drawings and engineering plans.
Create Construction Documents:
• Work with your design build professional to develop detailed construction drawings and specifications.
• These documents will serve as a guide for contractors during construction.
Hire a design build contractor:
• Check references, credentials, and licenses before selecting a contractor.
• Sign a detailed contract that outlines the scope of work, timeline, and payment schedule.
Construction Phase:
• Demolition: If needed, remove any existing structures or walls.
• Foundation: Construct the foundation for the addition.
• Framing: Build the structural framework of the addition.
• Plumbing, Electrical, and HVAC: Install or update utilities as required.
• Insulation: Ensure proper insulation for energy efficiency.
• Drywall and Finish Work: Complete the walls and ceilings.
• Flooring and Cabinetry: Install flooring and kitchen cabinets.
• Appliances and Fixtures: Add appliances, plumbing fixtures, and lighting.
• Paint and Finish: Apply paint and finishes to achieve the desired look.
• Final Inspection: Schedule inspections to ensure compliance with building codes.
Final Inspections and Approvals:
• Arrange for final inspections to ensure the addition meets all safety and code requirements.
• Obtain any necessary certificates of occupancy or compliance.
Move In and Enjoy:
• Once all inspections and approvals are received, you can move into your new kitchen addition and start enjoying it.
Remember that every kitchen addition project is unique, so adapt this outline to your specific needs and circumstances. Consulting with professionals and obtaining the required permits and inspections is crucial to a successful and safe project.
 Talon Construction Inc.
Renovating an open kitchen can be an exciting project that can improve the functionality, aesthetics, and value of your home. Here are some steps to guide you through the process:
Planning and Design:
Define your goals and budget for the renovation.
Determine the layout of your open kitchen. Consider factors like the work triangle (the relationship between the stove, sink, and refrigerator) and the flow of traffic.
Choose a design style and color scheme that suits your preferences and complements the rest of your home.
Research and Inspiration:
Collect inspiration from magazines, websites, and social media platforms to get ideas for your open kitchen design.
Create a mood board or vision board to help you visualize the final look.
Hiring Professionals:
Depending on the scale of your renovation, you may need to hire professionals, such as architects, interior designers, contractors, and electricians. Make sure to check references and get multiple quotes.
Demolition and Structural Work:
If your renovation involves structural changes, like removing walls, this is the time to do it. Ensure that the necessary permits are obtained.
Plumbing and Electrical Work:
Update or reconfigure plumbing and electrical systems as needed. This may include adding or moving outlets, switches, and lighting fixtures.
Cabinetry and Countertops:
Choose and install new kitchen cabinets and countertops. This is a significant part of your renovation and will greatly influence the kitchen's appearance and functionality.
Appliances:
Update or install new kitchen appliances, including the refrigerator, stove, oven, microwave, and dishwasher.
Flooring:
Select and install flooring that is suitable for a kitchen, such as hardwood, tile, laminate, or vinyl. Ensure it complements the overall design.
Backsplash and Wall Finishes:
Install a backsplash that matches your design and protects your walls. Consider materials like tile, glass, or stainless steel.
Lighting:
Choose and install various types of lighting, including ambient, task, and accent lighting. Pendant lights above an island or breakfast bar can add style and functionality.
Paint and Finishing Touches:
Paint the walls and ceiling in the colors you've selected. Add finishing touches like hardware, window treatments, and decorative elements.
Furniture and Accessories:
Bring in furniture, such as a dining table and chairs, barstools, and any other pieces you need to complete the space. Decorate with accessories like artwork, plants, and decorative items.
Final Inspection and Cleanup:
Ensure that all work meets safety and building code requirements. Clean the entire area thoroughly.
Enjoy Your New Kitchen:
Once the renovation is complete and everything is in its place, enjoy your beautiful, functional open kitchen.
Remember that open kitchen renovations can be complex and may require careful planning. It's essential to stay within your budget, communicate with your contractors and designers, and be flexible as unexpected issues may arise during the process. Ultimately, a well-executed open kitchen renovation can enhance the heart of your home and improve your overall living space.
 Designer's Atelier
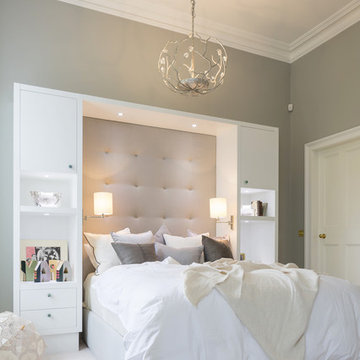
The key to creating a desirable bedroom which inspires a blissful night’s sleep was not just down to the bed and giant custom designed headboard, it came with all the added extras. The over bed storage, all in white was created to reflect our client’s taste and to suit her individual requirement for additional space. We incorporated spotlights and adjustable lamps within the storage space to provide her with greater flexibility. A druzy quartz knobs with gem-like shine were handpicked by our client for a natural finishing touch.
 Michael Nash Design, Build & Homes
For this recently moved in military family, their old rambler home offered plenty of area for potential improvement. An entire new kitchen space was designed to create a greater feeling of family warmth.
It all started with gutting the old rundown kitchen. The kitchen space was cramped and disconnected from the rest of the main level. There was a large bearing wall separating the living room from the kitchen and the dining room.
A structure recessed beam was inserted into the attic space that enabled opening up of the entire main level. A large L-shaped island took over the wall placement giving a big work and storage space for the kitchen.
Installed wood flooring matched up with the remaining living space created a continuous seam-less main level.
By eliminating a side door and cutting through brick and block back wall, a large picture window was inserted to allow plenty of natural light into the kitchen.
Recessed and pendent lights also improved interior lighting.
By using offset cabinetry and a carefully selected granite slab to complement each other, a more soothing space was obtained to inspire cooking and entertaining. The fabulous new kitchen was completed with a new French door leading to the sun room.
This family is now very happy with the massive transformation, and are happy to join their new community.
 Home Improvements
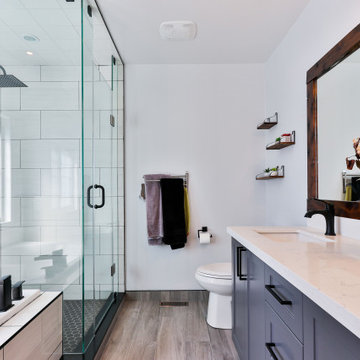
Embarking on a bathroom remodeling project is an exciting endeavor that can greatly enhance the functionality, aesthetics, and value of your home. However, finding a reliable and skilled contractor in a bustling city like Los Angeles can be a daunting task. To simplify the process and ensure a successful bathroom renovation, we have compiled a comprehensive guide on how to find a reputable bathroom remodeling contractor in Los Angeles, California.
Start with Online Research:
The first step in your quest for a reliable contractor is to conduct thorough online research. Utilize search engines like Google to find bathroom remodeling contractors in Los Angeles. Be sure to include specific keywords such as "bathroom remodeling," "contractor," and "Los Angeles" to refine your search results.
Check Online Directories and Review Platforms:
Explore online directories and review platforms like Yelp, Angie's List, and Houzz to find a curated list of bathroom remodeling contractors in Los Angeles. These platforms often provide detailed information about contractors, including customer reviews, ratings, project photos, and contact details. Assess the overall rating and read through multiple reviews to gauge the contractor's reputation and reliability.
Seek Recommendations:
Ask friends, family, neighbors, and colleagues who have recently undergone a bathroom remodeling project in Los Angeles for recommendations. Personal referrals can provide valuable insights and firsthand experiences that online research may not uncover. Inquire about the contractor's professionalism, craftsmanship, adherence to timelines, and overall satisfaction with the project.
Verify Credentials and Licensing:
Once you have shortlisted potential contractors, it is crucial to verify their credentials and licensing. Check if they are licensed by the Contractors State License Board (CSLB) in California. A valid license ensures that the contractor meets the state's requirements and regulations. Additionally, inquire about their insurance coverage to protect against any potential liabilities during the remodeling process.
Evaluate Experience and Expertise:
Assess the experience and expertise of the contractors on your list. Look for contractors who specialize in bathroom remodeling and have a proven track record of successful projects. Review their portfolios or ask for references to see examples of their previous work. A skilled contractor should be able to handle a variety of bathroom designs and styles, and provide creative solutions to meet your specific needs.
Schedule In-Person Consultations:
Arrange in-person consultations with the shortlisted contractors. Use this opportunity to discuss your remodeling goals, budget, timeline, and any specific requirements you may have. A reputable contractor will listen attentively, provide insights, and offer suggestions based on their expertise. Pay attention to their communication style, professionalism, and responsiveness, as these qualities are crucial for a smooth working relationship.
Request Detailed Quotes and Contracts:
Ask the contractors for detailed written quotes that outline the project's scope, materials, labor costs, and any additional expenses. A comprehensive quote will help you compare the estimates provided by different contractors effectively. Once you have selected a contractor, ensure that you have a detailed contract in place that covers all aspects of the project, including timelines, payment schedules, warranties, and dispute resolution processes.
Seek Permits and Building Code Compliance:
Bathroom remodeling projects often require permits and adherence to building codes. A reputable contractor will be familiar with the local building regulations in Los Angeles and should handle the permit application process on your behalf. Verify that the contractor will obtain the necessary permits and ensure that all work is compliant with local codes and regulations.
Conclusion:
Finding a bathroom remodeling contractor in Los Angeles, California, may seem overwhelming, but by following these guidelines, you can streamline the process and select a contractor who meets your expectations. Conduct thorough online research, seek recommendations, verify credentials, evaluate experience, and schedule in-person consultations to make an informed decision.
8