
Search results for "Setting process" in Home Design Ideas
 DCS Built LLC
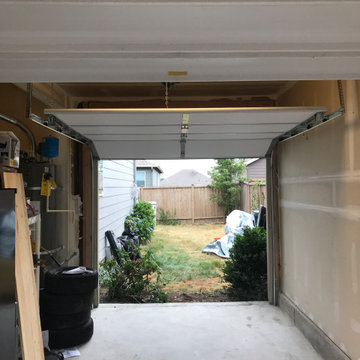
PUYALLUP NEW GARAGE DOOR OPENING
Are you ready to start your project?
We look forward to working with you on your next remodel or new custom built home, from the design process through construction and delivery.
Book a service with us!
Consultations, Property Research and Project Consultations, Permit Set, Pierce County Site Visit, Washington State Project Design Review.
Indoor, outdoor, and all general construction contracting services!
All other services, we have got you covered!
DCS BUILT: Contact Us
https://dcsbuilt.com/contact-us
Permit Plan, Elevations, Floor Plans, Site Plan, Interior Elevations, Interior Design, Structural Plan, Mechanical, Electrical, Engineering, Architecture, Modern, Traditional, contemporary, remodel, addition, design, Exterior, Residential, Structural, house plan, blueprint, carport, parking, garage
 DCS Built LLC
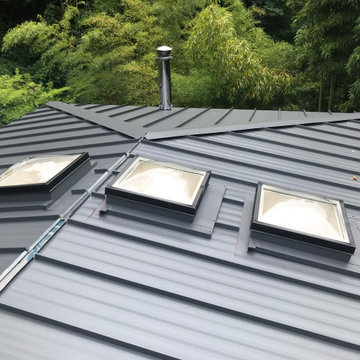
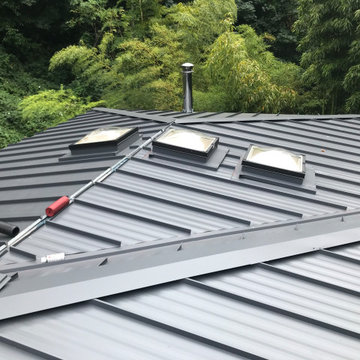
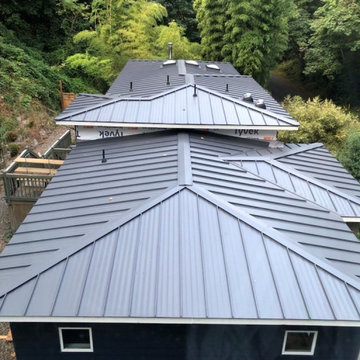
WEST SEATTLE ROOF REFRAME
Are you ready to start your project?
We look forward to working with you on your next remodel or new custom built home, from the design process through construction and delivery.
Book a service with us!
Consultations, Property Research and Project Consultations, Permit Set, Pierce County Site Visit, Washington State Project Design Review.
Indoor, outdoor, and all general construction contracting services!
All other services, we have got you covered!
DCS BUILT: Contact Us
https://dcsbuilt.com/contact-us
Residential, exterior, installation, install, Development, Permits, Exterior, custom, deck, rafters, shingles, siding, ledger, double plate, soffit, fascia, new, existing, rafter, beam, brace, post, anchor, building code, existing structure, carpentry, framing, load, truss, purlin, tie down, joist, hanger, support, sub frame, rooftop, roof
 Jorge Rosso Architecture & Interior Design
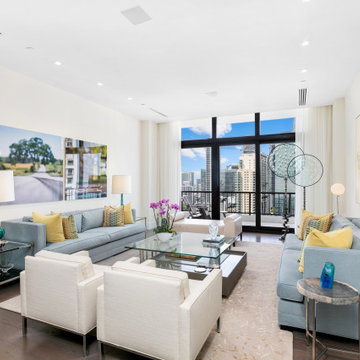
Initially reminiscent of a film set from the 1980s, this penthouse in Brickell was a maze of red marble, dropped ceilings, and dark, choppy rooms that blocked the stunning views. Despite its flaws, the space boasted incredible city and bay vistas, paired with hidden 12-foot ceilings that promised untapped potential. Partway through the planning process, the neighboring apartment became available, allowing two units to merge into a sprawling, light-filled home.
The transformation focused on opening the space to create a sense of flow and connection to the breathtaking views. By reconfiguring the old, formal layout, we crafted a contemporary, expansive living area suited for a modern family. Gone were the outdated features, replaced with airy, connected rooms that celebrate the spectacular light and panoramic scenery.
The result is a serene and versatile home in the sky, perfectly tailored for a couple beginning the empty nest phase, but spacious enough to accommodate family gatherings. This penthouse now functions as beautifully for two as it does for six, offering a peaceful retreat high above the bustling city below.
Find the right local pro for your project

 Middleton Inc.
Project Type: Full House Remodel
Client Type: Builder
Overview: We were commissioned by our clients over at Housekick to create a set of design plans and provide our standard visualization package. The crew over at Housekick builds/renovates and sells over forty houses a year in the Raleigh Triangle area, so having an efficient construction process and the ability to pre-sell their properties is crucial to their business model. Because of our extensive experience with interior design, real estate, and construction projects, they rely on us to come up with complete design plans from start to finish and then use these to build and pre-sell their projects.
Original Conditions: This typical 1970’s choppy split-level house was e “functionally obsolete,” had three bedrooms, two baths, and no real master suite before we got our hands on it.
Changes: Upon completion, the home had four bedrooms, three full baths, a full master suite, and an open floorplan with modern architectural details.
The Result: Because of our design plans and visualizations, our clients were able to create a stunning property that was functionally current, appealed to the correct demographic, and wowed potential buyers resulting in the home selling before it ever hit the market!
 Jorge Rosso Architecture & Interior Design
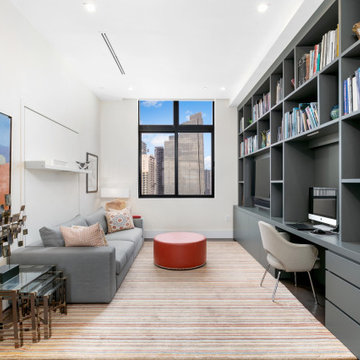
Initially reminiscent of a film set from the 1980s, this penthouse in Brickell was a maze of red marble, dropped ceilings, and dark, choppy rooms that blocked the stunning views. Despite its flaws, the space boasted incredible city and bay vistas, paired with hidden 12-foot ceilings that promised untapped potential. Partway through the planning process, the neighboring apartment became available, allowing two units to merge into a sprawling, light-filled home.
The transformation focused on opening the space to create a sense of flow and connection to the breathtaking views. By reconfiguring the old, formal layout, we crafted a contemporary, expansive living area suited for a modern family. Gone were the outdated features, replaced with airy, connected rooms that celebrate the spectacular light and panoramic scenery.
The result is a serene and versatile home in the sky, perfectly tailored for a couple beginning the empty nest phase, but spacious enough to accommodate family gatherings. This penthouse now functions as beautifully for two as it does for six, offering a peaceful retreat high above the bustling city below.
 DCS Built LLC
WEST SEATTLE ROOF REFRAME
Are you ready to start your project?
We look forward to working with you on your next remodel or new custom built home, from the design process through construction and delivery.
Book a service with us!
Consultations, Property Research and Project Consultations, Permit Set, Pierce County Site Visit, Washington State Project Design Review.
Indoor, outdoor, and all general construction contracting services!
All other services, we have got you covered!
DCS BUILT: Contact Us
https://dcsbuilt.com/contact-us
Residential, exterior, installation, install, Development, Permits, Exterior, custom, deck, rafters, shingles, siding, ledger, double plate, soffit, fascia, new, existing, rafter, beam, brace, post, anchor, building code, existing structure, carpentry, framing, load, truss, purlin, tie down, joist, hanger, support, sub frame, rooftop, roof
 ING Construction
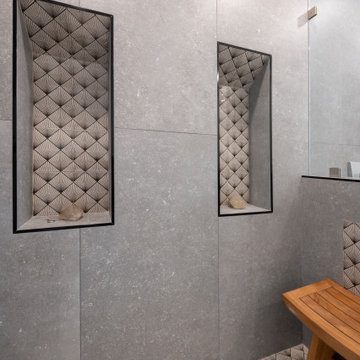
This is the second Bathroom which we have remodeled within this particular residence.
When beginning the remodeling process, we took the Bathroom down to the studs and started there.
Once the demolition was completed, we began working on the rough plumbing section of the project which includes all the piping and sewer connections, began the rough electrical (lighting, and general electrical), and once completed, we then sealed up the exposed walls with drywall and began the prep work for the arrival of the tile by installing the Fixtures and Faucets.
Once the Fixtures and Faucets were in place, the installation of the Art Deco styled tile began within the shower area, followed by the Backsplash and Small Wall, and finished up with the Flooring throughout the Bathroom area.
In finishing up the Bathroom, we installed the wood Vanity, Shower Door enclosure, and oversized circular mirrors.
And once completed, we present a handsome Art Deco styled Bathroom worthy of a decent noting!
Sponsored
Columbus, OH

Hope Restoration & General Contracting
Columbus Design-Build, Kitchen & Bath Remodeling, Historic Renovations
 DCS Built LLC
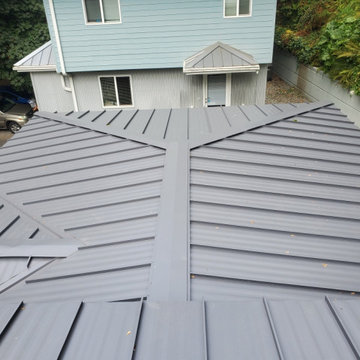
WEST SEATTLE ROOF REFRAME
Are you ready to start your project?
We look forward to working with you on your next remodel or new custom built home, from the design process through construction and delivery.
Book a service with us!
Consultations, Property Research and Project Consultations, Permit Set, Pierce County Site Visit, Washington State Project Design Review.
Indoor, outdoor, and all general construction contracting services!
All other services, we have got you covered!
DCS BUILT: Contact Us
https://dcsbuilt.com/contact-us
Residential, exterior, installation, install, Development, Permits, Exterior, custom, deck, rafters, shingles, siding, ledger, double plate, soffit, fascia, new, existing, rafter, beam, brace, post, anchor, building code, existing structure, carpentry, framing, load, truss, purlin, tie down, joist, hanger, support, sub frame, rooftop, roof
 DCS Built LLC
WEST SEATTLE ROOF REFRAME
Are you ready to start your project?
We look forward to working with you on your next remodel or new custom built home, from the design process through construction and delivery.
Book a service with us!
Consultations, Property Research and Project Consultations, Permit Set, Pierce County Site Visit, Washington State Project Design Review.
Indoor, outdoor, and all general construction contracting services!
All other services, we have got you covered!
DCS BUILT: Contact Us
https://dcsbuilt.com/contact-us
Residential, exterior, installation, install, Development, Permits, Exterior, custom, deck, rafters, shingles, siding, ledger, double plate, soffit, fascia, new, existing, rafter, beam, brace, post, anchor, building code, existing structure, carpentry, framing, load, truss, purlin, tie down, joist, hanger, support, sub frame, rooftop, roof
 Middleton Inc.
Oakridge
Project Title: Oakridge
Project Type: Full House Remodel
Client Type: Builder
Overview: We were commissioned by our clients over at Housekick to create a set of design plans and provide our standard visualization package. The crew over at Housekick builds/renovates and sells over forty houses a year in the Raleigh Triangle area, so having an efficient construction process and the ability to pre-sell their properties is crucial to their business model. Because of our extensive experience with interior design, real estate, and construction projects, they rely on us to come up with complete design plans from start to finish and then use these to build and pre-sell their projects.
Original Conditions: This typical 1970’s choppy split-level house was e “functionally obsolete,” had three bedrooms, two baths, and no real master suite before we got our hands on it.
Changes: Upon completion, the home had four bedrooms, three full baths, a full master suite, and an open floorplan with modern architectural details.
The Result: Because of our design plans and visualizations, our clients were able to create a stunning property that was functionally current, appealed to the correct demographic, and wowed potential buyers resulting in the home selling before it ever hit the market!
 Tile Doctor Ltd
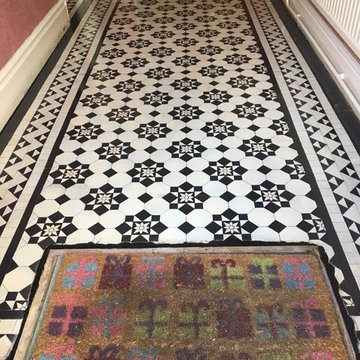
I was contacted by a professional couple who were despairing over the state of their Victorian tiled hallway floor which was dull and uninviting. The property was in Newport which is on the south east side of Wales around twelve miles east of the bustling city of Cardiff.
I went over to visit the property which was a beautiful Victorian period terrace house nestled amongst other properties of a similar age properties. The couple wanted their Victorian hallway floor to be brought back to life, so I demonstrated the cleaning process I intended to use on a small part of the floor. Immediately it had the desired effect and the floor looked much cleaner. I could see that there were no structural issues with the floor and the test clean proved it was just ingrained dirt that was the problem. The clients were happy with the result of the demonstration and subsequent quote, so we arranged a suitable date to come back and complete the work.
When I arrived, I started by protecting the skirting boards with tape and then set about giving the Victorian tiles a deep clean. I applied a combination of Tile Doctor Pro-Clean and Remove and Go leaving it to dwell for a short time to allow the products to soak into the pores of the tiles and start breaking down the ingrained dirt. After about ten minutes I scrubbed the floor with black scrubbing pad attached to a rotary floor buffer which released the years of grime and dirt. The floor was then rinsed with water and the soil removed using a wet vacuum. I repeated the process to ensure the floor was as clean as possible.
A further inspection of the Victorian tiles revealed a few stubborn marks which were dealt with using handheld diamond burnishing blocks. These are also handy for getting into the corners of the floor which were difficult to reach with the rotary machine. The floor was then left overnight to dry out.
The following day I returned, and I checked the floor was dry using a moisture meter to ensure it was dry. Once I was happy, I started to seal the floor with Tile Doctor Seal & Go which is a water-based sealer that works well on Victorian tiles. Several coats were applied building up layers to produce a stunning satin finish.
Once I had finished the floor was looking so much cleaner and brighter and the addition of the sealer will protect the floor from dirt and keep it looking good for some time to come. My clients were over the moon with the floor!
For aftercare I recommend Tile Doctor Neutral Tile Cleaner, which unlike the stronger products you find in supermarkets is ideal for cleaning sealed floors and will ensure the sealer stays in good condition.
Paul Wales
Monmouthshire Tile Doctor
 Middleton Inc.
Project Type: Full House Remodel
Client Type: Builder
Overview: We were commissioned by our clients over at Housekick to create a set of design plans and provide our standard visualization package. The crew over at Housekick builds/renovates and sells over forty houses a year in the Raleigh Triangle area, so having an efficient construction process and the ability to pre-sell their properties is crucial to their business model. Because of our extensive experience with interior design, real estate, and construction projects, they rely on us to come up with complete design plans from start to finish and then use these to build and pre-sell their projects.
Original Conditions: This typical 1970’s choppy split-level house was e “functionally obsolete,” had three bedrooms, two baths, and no real master suite before we got our hands on it.
Changes: Upon completion, the home had four bedrooms, three full baths, a full master suite, and an open floorplan with modern architectural details.
The Result: Because of our design plans and visualizations, our clients were able to create a stunning property that was functionally current, appealed to the correct demographic, and wowed potential buyers resulting in the home selling before it ever hit the market!
 Tile Doctor Ltd
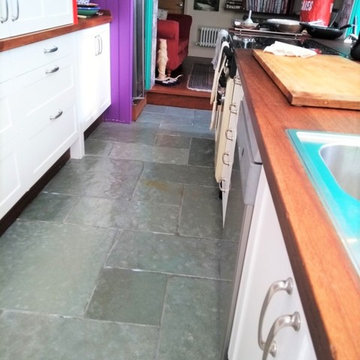
I recently helped a homeowner from my home town of Dursley who got in touch about her kitchen Flagstone floor. The problem revolved around an accident she had with raspberries which had stained the flagstones and the problem became compounded when a house hold clearing product was applied neat to clean up the mess. If you follow any of our Tile Doctor blogs, you will know that using strong household cleaning products can damage the sealer and, in this case, it had left white marks on the floor.
I called round to the property to survey the floor as was surprised to find out that the floor had been cleaned and sealed only four months prior by another company. I don’t like to comment on other people’s work, but I found the grout lines and flagstones were still badly ingrained with dirt, so it wasn’t a through job.
I completed by survey and demonstrated the process I would follow to resolve the issues on one of the flagstone tiles. She could not believe the difference I was able to make and booked me in straight away to restore the entire floor.
My first task was to protect the wooden kitchen units from splashing that can happen when cleaning the floor. Once that was done, I set about stripping the sealer from the floor and deep cleaning the tile and grout with a strong dilution of Tile Doctor Pro-Clean. Pro-Clean is a concentrated, multi-purpose high-alkaline cleaner, stripper and degreaser which is safe to use on all types of tile, stone and grout including natural stone.
Working in sections across the Kitchen and adjacent dining room I diluted one part Pro-Clean to two parts water and mopped it onto the flagstones and grout where I left it to soak in for roughly fifteen minutes. Then using a rotary floor buffer fitted with a black scrubbing pad I scrubbed the solution into the floor into the old sealer and trapped dirt came away turning the cleaning fluid black in the process. The soil was then rinsed off with water and then extracted with a powerful 3,000 watt wet and dry vacuum. This process was repeated until I was satisfied the floor was clean and I ran a stiff grout brush along the grout lines to ensure they also received a good scrub. After I was satisfied the section was clean it was rinsed thoroughly with water to neutralise the floor and remove any trace of product and then dried with the wet and dry vacuum.
The cleaning process took up the whole day, but the flagstones would need to be dry before sealing so after giving the owner an update I left the floor for two days, so it could dry out thoroughly.
On my return I tested the floor was dry in multiple places with a damp meter to ensure it was ready to be sealed. The readings showed that the wet and dry vacuum had done a good job in removing the moisture, so all was well. To seal I applied several coats of Tile Doctor Seal and Go allowing each coat to dry before applying the next however with such a large area to cover I was able to work in sections around the floor.
Seal and Go works really well on Flagstones and leaves a very appealing sheen finish, also being water based it doesn’t leave a smell as it dries.
The results were amazing, and the customer thanked me for making such a massive improvement on her floor. Before leaving I made sure to discuss after-care and to avoid the use of hash cleaning products.
Malcolm Crowther
Gloucester Tile Doctor
Sponsored
Delaware, OH

Buckeye Basements, Inc.
Central Ohio's Basement Finishing ExpertsBest Of Houzz '13-'21
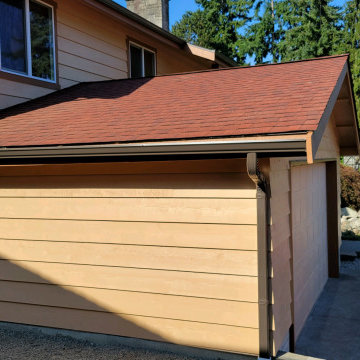 DCS Built LLC
FEDERAL WAY GARAGE ADDITION
Are you ready to start your project?
We look forward to working with you on your next remodel or new custom built home, from the design process through construction and delivery.
Book a service with us!
Consultations, Property Research and Project Consultations, Permit Set, Pierce County Site Visit, Washington State Project Design Review.
Indoor, outdoor, and all general construction contracting services!
All other services, we have got you covered!
DCS BUILT: Contact Us
https://dcsbuilt.com/contact-us
Permit Plan, Elevations, Floor Plans, Site Plan, Interior Elevations, Interior Design, Structural Plan, Mechanical, Electrical, Engineering, Architecture, Modern, Traditional, contemporary, mid-century, custom home, remodel, addition, design, Exterior, Residential, Structural, house plan, blueprint, garage
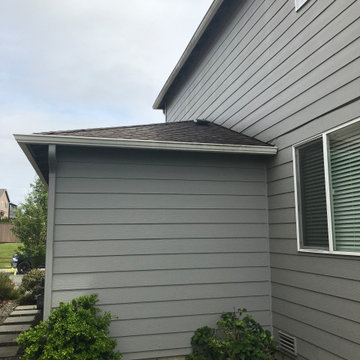 DCS Built LLC
PUYALLUP NEW GARAGE DOOR OPENING
Are you ready to start your project?
We look forward to working with you on your next remodel or new custom built home, from the design process through construction and delivery.
Book a service with us!
Consultations, Property Research and Project Consultations, Permit Set, Pierce County Site Visit, Washington State Project Design Review.
Indoor, outdoor, and all general construction contracting services!
All other services, we have got you covered!
DCS BUILT: Contact Us
https://dcsbuilt.com/contact-us
Permit Plan, Elevations, Floor Plans, Site Plan, Interior Elevations, Interior Design, Structural Plan, Mechanical, Electrical, Engineering, Architecture, Modern, Traditional, contemporary, remodel, addition, design, Exterior, Residential, Structural, house plan, blueprint, carport, parking, garage

 Valentini Kids Furniture Brooklyn NY
Contact our office concerning price or customization of this Kids Bedroom Set. 347-492-55-55
This modern kids platform bed is made in Italy from the fines materials available on market. The platform bed is entirely made of thick melamine available in a variety of wood finishes or matt lacquered colors that can be mixed and matched to make your kid`s bedroom vivid and colorful. The bed is available in US standard Twin and Full sizes, and requires just a a mattress without a box spring.
MATERIAL/CONSTRUCTION:
E1-Class ecological panels, which are produced exclusively through a wood recycling production process
Bases 0.7" thick melamine
Please Note: The mattress and mattress cover are not included in the price.
The starting price is for the Twin Size Bed VV 1021.
Dimensions:
Twin Size bed frame with internal dimensions: W39" x D75"
Full Size bed frame with internal dimensions: W54" x D75"
Headboard Height: H33.5"

 Hearthstone Inc
Richard Herman is in the hospitality business and owns several upscale hotels in Florida and in other states as well as cattle ranches in both Florida and Missouri. Their farm in Ocala is by farm their most unique. The property serves as a 4-H demonstration project for the purpose of children’s education. They have been working with the Academy Prep of St. Pete which is dedicated to inner-city youths that are selected on the basis of need and achievement. Wife Diane spends her time on the farm raising Gypsy Vanners, a diminutive draft horse named after the job they did in Eastern Europe, pulling the wagons (vans) for gypsies that wandered across the continent. On the Ocala farm, there are several mules with a unique profession.
Richard had visited the Hearthstone display at a Log & Timber Home Shows at the Orlando Convention Center many years ago. He was impressed that Hearthstone had stayed in touch with him over the years by mailings, invitations to shows, and periodic phone calls. When the time came to start serious consideration of the design of barn, Hearthstone responded promptly and professionally to Richard and Diane’s requests for information and a review of their ideas for their barn, which would serve as the centerpiece for their new farm.
They wanted a multipurpose facility that could accommodate an educational environment and a large hall suitable for the fundraising events for his charities. Richard wanted a barn that reflected the look and feel of barns built at the dawn of the 20th century. Besides the rustic chicken houses and vegetable gardens, they have completely renovated a 1020’s era farmhouse to be as historically correct as possible and serves as the entry to the farm.
“They very careful to feel us out, get comfortable with our capabilities, and be convinced that we could perform as promised,” said Project Manager John Ricketson of Hearthstone.
Design Process
There were some initial drawings that gave us a start on the basic shape and size of the barn. From there, it was a process of narrowing down the uses of each area and the spans that could be achieved. The barn was going to have the traditional “board & batten” exterior siding and a metal roof. There is a cantilevered ‘hay hood” on the north gable end above the large sliding barn doors that open into the foyer and horse stalls. The wings house a combination of areas, beginning with the large restrooms to accommodate crowds for events. Other parts of the wings have garage areas for the farm vehicles, feed room, tack room, wash rack, storage, offices, and smaller restrooms.
Keeping with the look and feel of the turn of the century, Hearthstone developed a process for giving the timbers a surface texture that mimicked the circular cuts of timbers that had just come out of an old sawmill. This was easier said than done. Randy Giles guided his millwright (Wolfgang) in designing a machine that would do this effectively.
The barn was delivered in October of 2014 and was erected over the course of two weeks, thanks to a hardworking crew (Eric Foster) and near-perfect weather. After the Hearthstone crew completed the erection and roof dry-in, it was time for the local carpenters to step up and install some light conventional framing on the gable ends before applying the roof fascia and exterior board & batten siding. Next came the big sliding barn doors, plumbing, electrical, heating, and cooling. Large rustic fixtures were hung from the great hall roof timbers.
Exterior
The board & batten siding was cypress and allowed to turn color naturally as rain hit it and the sun started working on it with UV rays. This method causes a much grayer look closer to the ground and less so where the roof overhang provides protection. The North end has some large limestone boulders and planters arranged around the pad with tall pampas grass. The planters provide casual seating before events and during outside receptions. The entire area was sodded with lush St. Augustine grass and split rail fences were added to enclose the barn area. The corrugated metal roof was a special order material that immediately rusted after being exposed to moisture. The layer of rust protects the metal from the elements.
Interior
The board & batten theme was carried throughout most of the interior with the timbers left natural to show off the circular saw texture. All of the tongue & groove decking was shipped in advance to allow the local painter to pre-stain it with a dark brown transparent stain that is a beautiful background to the light color Eastern White Pine timbers.
“Everything was unique in this project” said Project Manager John Ricketson. “The setting on a small demonstration farm close to Ocala, the multipurpose design, the circular saw texture on the timbers.”
The Hermans are very proud of their farm’s outcome. Richard sent a note to Randy Giles, owner of Hearthstone: “The Barn is fantastic, not a single problem, period. Next month, we have Jo Dee Messina coming in to help with a fundraiser for a local center for abused kids. Folks love the farm, ...... but that barn gets all of the attention. I would encourage you to use me as a reference for your sales team, feel free to extend my cell phone to any prospective purchasers.”
Sponsored
Columbus, OH
Free consultation for landscape design!

Peabody Landscape Group
Columbus' Reliable Landscape Design & Contracting

 Vanguard Development
The best interior designers & architects in NYC!
Residential interior design, Common area design, Hospitality design, Exterior design, Commercial design - any interior or architectural design basically from a unique design team :)
Our goal is to provide clients in Manhattan, New York, New Jersey & beyond with outstanding architectural & interior design services and installation management through a unique approach and unparalleled work quality.
Our mission is to create Dream Homes that change people's lives!
Working with us is a simple two step process - Design & Installation. The core is that all our design ideas (interior design of an apartment, restaurant, hotel design or architectural design of a building) are presented through exceptionally realistic images, delivering the exact look of your future interior/exterior, before you commit to investing. The Installation then abides to the paradigm of 'What I See Is What I Get', replicating the approved design. All together it gives you full control and eliminates the risk of having an unsatisfactory end product - no other interior designer or architect can offer.
Our team's passion, talent & professionalism brings you the best possible result, while our client-oriented philosophy & determination to make the process easy & convenient, saves you great deal of time and concern.
In short, this is Design as it Should be...
Other services: Lobby design, Store & storefront design, Hotel design, Restaurant design, House design
www.vanguard-development.com

 River Valley Landscapes
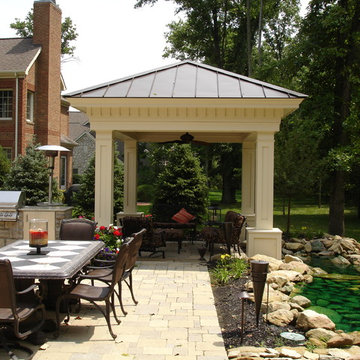
Blending contemporary forms and lush plantings, this Garden maximizes the sensory experience of the materials and planting from inside and outside the home. The garden occupies an interior courtyard framed by four interior walls. The home, designed by Architect Cliff May was built in 1948 and the following year was featured in House Beautiful Magazine. The clients list of needs and desires was brief. They wanted a space that would complement the mid century modern home and provide visual interest from inside the home. Some form of water was also requested. They had a budget of $30,000. In order to stay within their budget the clients performed the demolition of the old garden. The designer’s intent was to create a garden that would possess a clear sculptural quality and would be as visually striking from inside the home as it would be from inside the courtyard. The strategy behind the design was to use hardscape materials characterized by simple geometric forms and a planting palette that would emphasize form over color, and then to arrange the materials to achieve an interpretation of modern aesthetic.
The views from inside the homes three main living rooms present the garden as a graphic composition of space, hardscape materials and planting. Inside the courtyard the edges are defined by stone and planting. The floor is composed of rectangular slabs of Teakwood flagstone with a counterpoint of Mexican beach pebbles set within the joints and around the edges. Concrete along the edges of the Teakwood pads reduces migration of the modified stone and sand base. The contrast of the Mexican beach pebbles accentuates the pattern of the flagstone. The outside perimeter of the pebbles is contained with low profile edging. An existing catch drain was utilized for storm water runoff. A concrete block pier set on a concrete footing is covered with black stucco and provides a perch for a custom made copper bowl that circulates water into the L shaped water feature. The water features subterranean basin is constructed of pressure treated wood with a custom box liner insert. Since the Teakwood flagstone was unavailable as coping for the water feature, the designer chose Shawnee Buff stone to complement the Teakwood flagstone. The subtle sound of water spilling from the copper bowl and the reflective qualities of the water help to create an atmosphere of relaxation. The planting is composed of shades of green with white flowers in order to accentuate the graphic design. ‘Justin Brouwer’ Boxwood, ‘Sum and Substance’ Hosta, white Anemones, black bamboo and ornamental grasses contrast dramatically with the clean lines of the hardscape elements. The black bamboo is set in 30” diameter concrete containers to control the vigorous plant from spreading.
The construction of the interior courtyard space challenged the building team. They set up baffles between the front door and the door to the courtyard as well as temporary protection over the floor to allow the process to move forward without too much disturbance to the client’s lives. All of the materials were shuffled through the temporary portal.
The clients love the space and recently said that “the design is so well thought out and simple that they would never get tired of it.” The designs sculptural quality compliments the modern feel of the home and creates a sublime yet dramatic view from within the house or within the courtyard. The clients plan to purchase two black Bertoia Diamond chairs with red cushions which should perfectly integrate with the space.
 Tile Doctor Ltd
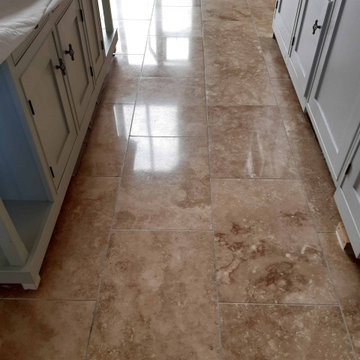
Located in Burgh Castle West of Great Yarmouth, this Travertine stone floor was a classic example of an incomplete installation. By incomplete I mean the tiler had done a fine job of laying and grouting the tiles but had left it at that and not sealed the stone. Natural stone like Travertine is porous and needs a sealer to stop dirt becoming ingrained in its pores, a sealer will also improve its appearance.
Without a sealer this floor now looked very dull, pale, rather damaged with pitting and heavily soiled with ingrained dirt. Pitting in stone like this is a natural feature of Travertine however it can be exacerbated with the use of acid cleaning products. This was a floor in urgent need of a face lift, and I was confident it could be transformed into a very beautiful floor.
I think it is true to say that most tilers will skilfully lay a floor for you but usually don’t have the knowledge, experience or equipment to finish the surface properly and when it comes to sealing many will recommend a product and suggest you take care of it yourself. Naturally if your find yourself in that position don’t insist the tiler does it, better to give us a call and have it done properly.
Our first job was to backfill the larger pits in the stone which as I mentioned are a natural feature of travertine material, but they can trap dirt and so its best if they are plugged with a suitably rigid filler. Also, if left alone the larger holes can quickly become larger as their edges crumble and break up leading to the entire tile becoming unstable. Replacing a tile in a floor like this is possible however its an extremely awkward job to do and it can be difficult to find an exact match for replacement.
Filling was done using a two-part, neutral cream-coloured polyester compound which gels in about fifteen minutes after addition of the catalyst. After this initial period, the excess product is trimmed off level with the surface of the tile before it sets harder than the stone itself in around sixty minutes. The fully cured compound can then be cut and machined as though it were part of the stone structure.
Our second job was to remove deep scratches caused by the unprotected feet of workmen’s ladders. This was done using Tile Doctor 50-grit and 100-grit diamond hand burnishing pads with a little water as a cutting medium. Shallower scratching present across the rest of the floor was removed using a Tile Doctor 200-grit soft milling pad driven by our Klindex 17″ rotary machine.
This abrasive action produces a fine slurry which was then rinsed with water and extracted using our 400psi Ninja machine in preparation for the next stage of the refinishing process. These machines were an expensive investment for our business however they are very robust and effective producing a good result that saves time.
Next task was to restore the polished appearance of the Travertine which was done using the application of a set of Tile Doctor burnishing pads. The process starts by applying a coarse 400-grit diamond pad, again fitted to the Klindex rotary machine. This cleans the tile and improves the matt finish left by the milling pad; again, the slurry was rinse-extracted before moving on to the next pad in the set. Next came the finer diamond polishing stages of 800 grit and 1500 grit, slurry being removed as before between the grades. By this time, all the scratches had been removed and the Travertine floor had visually pleasing even sheen across the whole surface. The last pad in the set is applied dry with a little water sprayed onto the tile so we left the area to dry out thoroughly overnight with the assistance of our large capacity dehumidifier.
Returning the following morning, we found that the floor had dried out perfectly and was ready to be vacuumed and spray burnished with the last pad in the set which is a 3000-grit very fine pad applied using a small amount of water sprayed from a trigger bottle resulting in a deep, rich shine across the floor surface.
Last step in the face lift was to seal the floor with a generous coat of Tile Doctor Ultra-Seal, a premium grade penetrating sealer recommended for use in Kitchens and food preparation areas. Having left the floor to soak up as much of the Tile Doctor Ultra-Seal as it could, the excess product was removed and the whole area allowed to dry completely with the assistance of our industrial air moving fan. Finally, the floor was spray buffed to a deep shine using a white maintenance pad.
The client was extremely pleased with our results and was amazed at the variation of colours within the stone which had never been visible previously.
Nick White
Norfolk Tile Doctor
84