
Search results for "Shining pores" in Home Design Ideas
 Tile Doctor Ltd
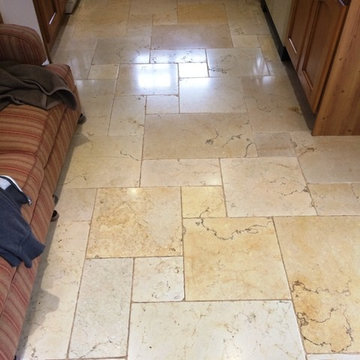
Polished stone floors will lose their shine over time depending on the amount of wear and cleaning products used and this Travertine Tiled Floor in Lower Woodrow had basically experienced this problem. The solution is to burnish the floor with diamond encrusted pads, a process that will remove any dirt and bring back the polish.
We started by smothering the floor is a mild dilution of Tile Doctor Pro-Clean and left it to dwell for ten minutes. We then scrubbed the grout lines using a stiff grout brush to get the grout clean. Next we fitted a course diamond burnishing pad to a rotary machine and slowly burnished each and every tile. We then extracted the slurry using a wet vacuum and rinsed. We continued this procedure with the medium, fine and very fine pads rinsing in-between until the shine had been restored. We then left the floor overnight to dry.
Upon our return we sealed the floor using Tile Doctor Colour Grow which is an impregnating sealer that soaks into he pores of the stone protecting it from within and enhancing the natural colours in the stone. Once the seal had dried I used a white buffing pad attached to the rotary machine and buffed the travertine to a nice shine.
Stuart Ford
Wiltshire Tile Doctor
 Tile Doctor Ltd
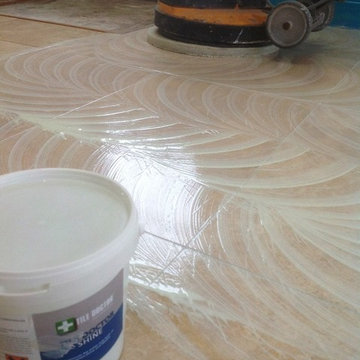
If you want a polished stone floor to keep its appearance, then it will need a regular maintenance plan in place, without it the stone will lose its polish and start to look dull and un-inviting which was the story with this Travertine tiled floor installed throughout much of the grout floor of this house in the village of Great Wilbraham near Cambridge.
I was able to find out from the owner that the floor was last treated six years ago with Lithofin Stain Stop which is a solvent based impregnating sealer which like all sealers will wear off after a few years. Naturally this depends on the amount of wear the floor receives and what tends to happen is this process occurs more rapidly in the high traffic areas leading to an uneven appearance.
The best course of action now would be to remove what was left of the sealer and re-polish and seal the floor.
During my inspection of the floor I had noticed a number of irregular holes in one of the Travertine tiles which needed filling with a colour matching filler; this worked out quite well and as you can see from the photographs below the result looked entirely natural.
After protecting the clients skirting boards with protective film we proceeded to burnish the floor through with a set of Tile Doctor Diamond encrusted honing pads.
During the application of the first coarse pad we also added a strong dilution of Tile Doctor Pro-Clean combined with NanoTech Ultra-Clean to aid the removal of sealer residues from the pores of the Travertine. The floor was then rinsed and the soiled solution extracted using a wet vacuum.
With the sealer remove we were now able to concentrate on building up the polish on the stone by applying the remaining pads from Medium, Fine through to Very Fine, each lubricated with a little water and ensuring to rinse in-between the application of each pad.
With the floor now clean and the polish restored the last step was to protect it so it would keep its appearance for as long as possible. There are a number of solutions for this but for a long durable shine I opted to work Tile Doctor Shine Powder into the Travertine.
The powder is applied liberally to the floor and then ground in using a slow speed floor rotary machine fitted with a white or tan buffing pad lubricated with water.
The shine on the floor has now been restored and the client has a beautiful and durable finish to their Travertine tiles.
Mick Conlon
Cambridge Tile Doctor
 Moderne Builders
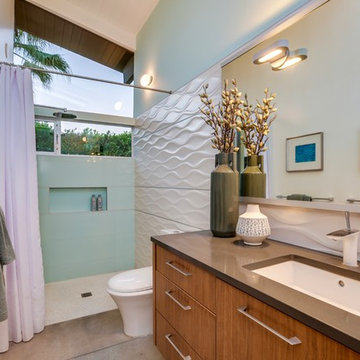
Gorgeous master bath with dramatic retro "wave" tile. Peak Photography
Example of a 1950s bathroom design in Los Angeles
Example of a 1950s bathroom design in Los Angeles
Find the right local pro for your project

 Barcelona Designs
A symbol of eternity, the Arco Floor Lamp by Barcelona Designs is a replica of Achille Castiglioni’s brainchild.
A timeless masterpiece, the Arco Floor Lamp by Barcelona Designs is a replica of Achille Castiglioni’s brainchild. At the pediment, is the exquisite and credible Carrara Marble stone. Using the marble stone as the sublime base, Barcelona Designs Arco Floor Lamp has a long, curved stainless steel arch which has three individual adjusting points, that looms through it. The whole structure culminates into an alluring dome shaped head, implemented with pores that allow light to shine through creating a beauteous pattern.
Alongside, this Arco Lamp reproduction, has 2 Circumference hole bored through the marble base for alleviation. As a result of a very well thought of design, Arco Floor Lamp Replica is embedded with eight 45 degree swerves have been provided for in the marble base, four on top and four at the bottom, to avoid collision.
 Tile Doctor Ltd
This Tumbled Travertine tiled floor at a beautiful house in Horley had been poorly maintained through the years using the wrong type of sealer which quickly wore down allowing dirt to become ingrained in the stone. The owner had become concerned about the state of the tiles and decided it was time to call in an expert that could restore the tiles to a condition that complimented the environment in which it was situated.
Travertine is known for being very distinctive in character and very durable, making it a very popular choice for tiled flooring in properties worldwide. However, the stone does require regular professional maintenance and polishing to keep it looking it top shape and home owners rarely realise this when they decide to have it installed. Fortunately, in the UK at least you can rely on your local tile doctor to maintain it for you.
The first part of the job involved giving the floor a thorough clean to remove what was left of old sealers and any polishing compounds that remained on the floor. Before beginning that however I brought in all my equipment and products into the house and then prepped the area by taping up the woodwork to protect it during the renovation process.
To remove what was left of the old sealers and other coatings still present on the floor a strong solution of Tile Doctor Remove and Go was applied to the floor and left to soak in for about ten minutes before being actively worked in with a rotary machine fitted with a black scrubbing pad. The solution turned black with the soil as it was lifted out of the pores of the stone and it was then rinsed off with water and extracted with a wet vacuum.
Following this, we moved on to a process we know as burnishing that hones the stone and brings up the polished appearance. Working in sections due to the size of the floor It involves the application of a series of diamond encrusted burnishing pads from coarse through to very fine.
The coarse 400-grit pad fitted to the rotary floor buffer and run over the floor using only water for lubrication. The water turns into a slurry as the pad does its job removing dirt and this has to be rinsed off the floor and extracted with the wet vacuum before applying the next pad. The process was then repeated with medium 800 grit pad for an initial polish followed by the Fine 1500 grit pad for the second polish using water for lubrication and rinsing and extracting in between each pad.
The last pad is a very fine 3000 grit pad for the final polish and is applied with only a little water sprayed onto the floor using a technique we call a Spray Burnish. This last pad really brings up the polished appearance of the stone.
To bring up the appearance of the stone even further and add a really durable polish Tile Doctor Shine Powder was applied. This is a crystallising powder sealer that ensures a very high shine and a tough, durable finish. This powder is applied directly to the tiles in combination with approximately ½ a litre of water and a soft white buffing pad.
Last step was to add to the protection provided by the Shine Powder with two coats of Tile Doctor Ultra-Seal which is a natural look sealer that doesn’t change the look of the stone and is applied to the stone and grout. This sealer works by seeping into the stone, occupying the pores and preventing dirt from becoming ingrained.
The customer was ecstatic with the results, being particularly pleased that she got the floor looking the way she originally wanted without significant expense, not to mention stress.
Michael Conlon
East Surrey Tile Doctor
 Barcelona Designs
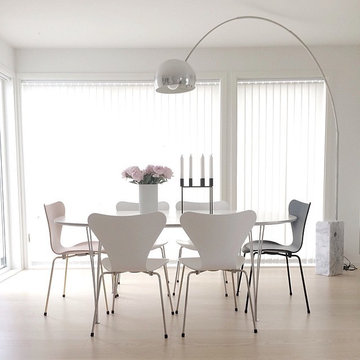
A symbol of eternity, the Arco Floor Lamp by Barcelona Designs is a replica of Achille Castiglioni’s brainchild.
A timeless masterpiece, the Arco Floor Lamp by Barcelona Designs is a replica of Achille Castiglioni’s brainchild. At the pediment, is the exquisite and credible Carrara Marble stone. Using the marble stone as the sublime base, Barcelona Designs Arco Floor Lamp has a long, curved stainless steel arch which has three individual adjusting points, that looms through it. The whole structure culminates into an alluring dome shaped head, implemented with pores that allow light to shine through creating a beauteous pattern.
Alongside, this Arco Lamp reproduction, has 2 Circumference hole bored through the marble base for alleviation. As a result of a very well thought of design, Arco Floor Lamp Replica is embedded with eight 45 degree swerves have been provided for in the marble base, four on top and four at the bottom, to avoid collision.
 Barcelona Designs
A symbol of eternity, the Arco Floor Lamp by Barcelona Designs is a replica of Achille Castiglioni’s brainchild.
A timeless masterpiece, the Arco Floor Lamp by Barcelona Designs is a replica of Achille Castiglioni’s brainchild. At the pediment, is the exquisite and credible Carrara Marble stone. Using the marble stone as the sublime base, Barcelona Designs Arco Floor Lamp has a long, curved stainless steel arch which has three individual adjusting points, that looms through it. The whole structure culminates into an alluring dome shaped head, implemented with pores that allow light to shine through creating a beauteous pattern.
Alongside, this Arco Lamp reproduction, has 2 Circumference hole bored through the marble base for alleviation. As a result of a very well thought of design, Arco Floor Lamp Replica is embedded with eight 45 degree swerves have been provided for in the marble base, four on top and four at the bottom, to avoid collision.
 Barcelona Designs
A symbol of eternity, the Arco Floor Lamp by Barcelona Designs is a replica of Achille Castiglioni’s brainchild.
A timeless masterpiece, the Arco Floor Lamp by Barcelona Designs is a replica of Achille Castiglioni’s brainchild. At the pediment, is the exquisite and credible Carrara Marble stone. Using the marble stone as the sublime base, Barcelona Designs Arco Floor Lamp has a long, curved stainless steel arch which has three individual adjusting points, that looms through it. The whole structure culminates into an alluring dome shaped head, implemented with pores that allow light to shine through creating a beauteous pattern.
Alongside, this Arco Lamp reproduction, has 2 Circumference hole bored through the marble base for alleviation. As a result of a very well thought of design, Arco Floor Lamp Replica is embedded with eight 45 degree swerves have been provided for in the marble base, four on top and four at the bottom, to avoid collision.
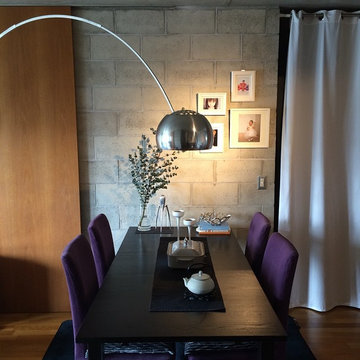 Barcelona Designs
A symbol of eternity, the Arco Floor Lamp by Barcelona Designs is a replica of Achille Castiglioni’s brainchild.
A timeless masterpiece, the Arco Floor Lamp by Barcelona Designs is a replica of Achille Castiglioni’s brainchild. At the pediment, is the exquisite and credible Carrara Marble stone. Using the marble stone as the sublime base, Barcelona Designs Arco Floor Lamp has a long, curved stainless steel arch which has three individual adjusting points, that looms through it. The whole structure culminates into an alluring dome shaped head, implemented with pores that allow light to shine through creating a beauteous pattern.
Alongside, this Arco Lamp reproduction, has 2 Circumference hole bored through the marble base for alleviation. As a result of a very well thought of design, Arco Floor Lamp Replica is embedded with eight 45 degree swerves have been provided for in the marble base, four on top and four at the bottom, to avoid collision.
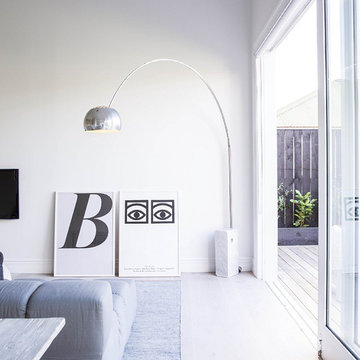 Barcelona Designs
A symbol of eternity, the Arco Floor Lamp by Barcelona Designs is a replica of Achille Castiglioni’s brainchild.
A timeless masterpiece, the Arco Floor Lamp by Barcelona Designs is a replica of Achille Castiglioni’s brainchild. At the pediment, is the exquisite and credible Carrara Marble stone. Using the marble stone as the sublime base, Barcelona Designs Arco Floor Lamp has a long, curved stainless steel arch which has three individual adjusting points, that looms through it. The whole structure culminates into an alluring dome shaped head, implemented with pores that allow light to shine through creating a beauteous pattern.
Alongside, this Arco Lamp reproduction, has 2 Circumference hole bored through the marble base for alleviation. As a result of a very well thought of design, Arco Floor Lamp Replica is embedded with eight 45 degree swerves have been provided for in the marble base, four on top and four at the bottom, to avoid collision.
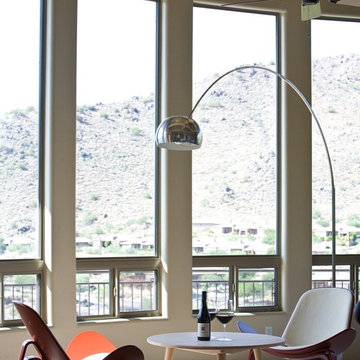 Barcelona Designs
A symbol of eternity, the Arco Floor Lamp by Barcelona Designs is a replica of Achille Castiglioni’s brainchild.
A timeless masterpiece, the Arco Floor Lamp by Barcelona Designs is a replica of Achille Castiglioni’s brainchild. At the pediment, is the exquisite and credible Carrara Marble stone. Using the marble stone as the sublime base, Barcelona Designs Arco Floor Lamp has a long, curved stainless steel arch which has three individual adjusting points, that looms through it. The whole structure culminates into an alluring dome shaped head, implemented with pores that allow light to shine through creating a beauteous pattern.
Alongside, this Arco Lamp reproduction, has 2 Circumference hole bored through the marble base for alleviation. As a result of a very well thought of design, Arco Floor Lamp Replica is embedded with eight 45 degree swerves have been provided for in the marble base, four on top and four at the bottom, to avoid collision.
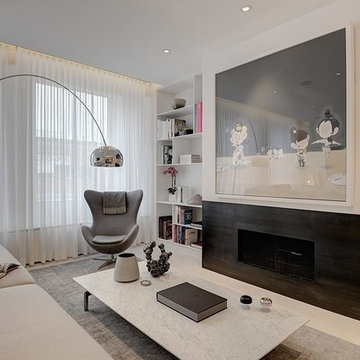 Barcelona Designs
A symbol of eternity, the Arco Floor Lamp by Barcelona Designs is a replica of Achille Castiglioni’s brainchild.
A timeless masterpiece, the Arco Floor Lamp by Barcelona Designs is a replica of Achille Castiglioni’s brainchild. At the pediment, is the exquisite and credible Carrara Marble stone. Using the marble stone as the sublime base, Barcelona Designs Arco Floor Lamp has a long, curved stainless steel arch which has three individual adjusting points, that looms through it. The whole structure culminates into an alluring dome shaped head, implemented with pores that allow light to shine through creating a beauteous pattern.
Alongside, this Arco Lamp reproduction, has 2 Circumference hole bored through the marble base for alleviation. As a result of a very well thought of design, Arco Floor Lamp Replica is embedded with eight 45 degree swerves have been provided for in the marble base, four on top and four at the bottom, to avoid collision.
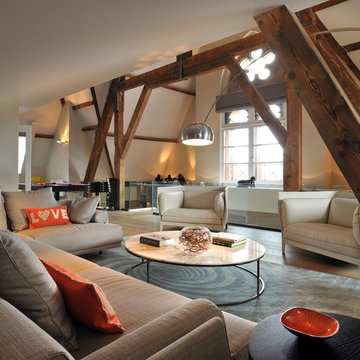 Barcelona Designs
A symbol of eternity, the Arco Floor Lamp by Barcelona Designs is a replica of Achille Castiglioni’s brainchild.
A timeless masterpiece, the Arco Floor Lamp by Barcelona Designs is a replica of Achille Castiglioni’s brainchild. At the pediment, is the exquisite and credible Carrara Marble stone. Using the marble stone as the sublime base, Barcelona Designs Arco Floor Lamp has a long, curved stainless steel arch which has three individual adjusting points, that looms through it. The whole structure culminates into an alluring dome shaped head, implemented with pores that allow light to shine through creating a beauteous pattern.
Alongside, this Arco Lamp reproduction, has 2 Circumference hole bored through the marble base for alleviation. As a result of a very well thought of design, Arco Floor Lamp Replica is embedded with eight 45 degree swerves have been provided for in the marble base, four on top and four at the bottom, to avoid collision.
 Tile Doctor Ltd
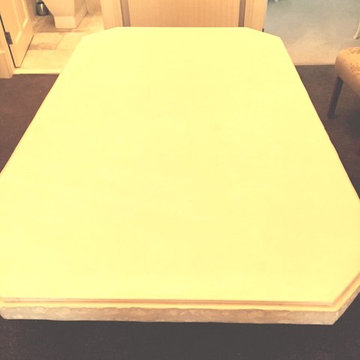
Here is a Limestone table that we stripped, cleaned and sealed in Edinburgh city centre. As you can see from the photographs below the old sealer/wax coating had started to deteriorate and wear off in places leaving the table looking dirty and the client hated the waxy/yellow shine finish it left so asked us to remove the old seal completely and make the Limestone look completely natural.
To remove the remaining wax coating the table was smothered in strong solution of Tile Doctor Pro-Clean which is an effective cleaning product that will strip off old sealers when used in a concentrated form. The solution was left to dwell for a while before being scrubbed in by hand and then rinsed off with water.
To make the job easier the table was cleaned in two sections and the process repeated a number of times in order to remove all the wax. Once complete the table was given a final clean using Tile Doctor Neutral Clean which is a PH neutral cleaning product to remove any trace of Pro-Clean and neutralise the stone before sealing.
The table was dried thoroughly before being sealed using three coats of Tile Doctor Colour Grow which is a penetrating sealer that soaks into the pores of the stone improving its natural colours and protecting it against staining from within.
The difference was remarkable and my client was delighted with the result.
Thomas Wilson
Edinburgh Tile Doctor
 Tile Doctor Ltd
This customer from the historic city of Cardiff was keen to see what Tile Doctor could do to put some life back into their treasured Limestone kitchen floor that was laid in 2008. My first observations were mainly centred on the horrific condition of the surface which although adequately sealed initially the floor had not received any subsequent maintenance and its condition had deteriorated over time. The light shining in from the patio doors highlighted all the imperfections in the floor caused by surface wear and tear commonly seen in high traffic areas such as a kitchen.
Upon closer inspection, there were further problems: the floor was stained and scuffed, and in most places the sealer had worn off completely allowing the dirt to become ingrained into the pores of the Limestone. Additionally the grout was recessed but was now flush with the tile surface due to dirt build-up. There were also areas contaminated with grease and kitchen cooking oil.
The Limestone floor tiles were 20mm thick French Limestone, and had been laid very well so there was no requirement to do any tile or grout repairs however to get this floor back to its original condition the surface would need to be reconditioned using the Tile Doctor four stage burnishing system.
I started by giving the floor a wash with a medium dilution of Tile Doctor Pro-Clean, focusing mainly on the grout lines in order to remove the muck that had built-up there. I used a special stiff grout brush for this activity; it’s quite narrow and ideal for grout scrubbing.
This worked well, but the significant build-up of dirt along some of the grout lines meant more work was required. I tackled this problem with a hand scraper assisted with steam. At the end of this process, the whole floor was then rinsed down with water to remove any soil and the resulting slurry was then extracted using a wet vacuum.
The next step was to start the burnishing process, which basically involves applying four diamond encrusted floor pads in sequence over the floor. Each pad is a different grade, starting with the most abrasive coarse pad and moving through to the finer grades using a little water to lubricate and rinsing away any slurry between each pad.
I eventually finished with the extra fine pad which builds up shine and lustre on the tile; it had taken two days to clean the grout and burnish the Limestone but the floor was much improved and so after a final rinse down I left the floor to dry off overnight with the aid of the underfloor heating.
During this time, I also addressed the stained Limestone in the area of the kitchen where the dustbin was situated. This had been a major upset for the customer and I’m happy to report I managed to deal with it. However, it was quite an involved process, so I’ll write about this in a separate post.
On the third day I came back to seal the floor, checking first that it had dried sufficiently with a damp meter. Fortunately, the underfloor heating had done a great job of drying the stone and I was able to seal the floor using three coats of Tile Doctor Colour Grow sealant. This sealant not only provides a durable seal but also penetrates deep into the pores of the stone protecting it from within and enhancing the natural colours of the Limestone in the process.
After the final layer of sealant, I worked over the floor again with the extra fine burnishing pad both to add shine again following sealing, and to ensure that no smear marks were visible as the lighting conditions were unforgiving and highlighted any imperfections.
The customer was delighted with the results: so much so, in fact, that they booked me in to restore their Victorian hallway floor as well but that’s a story for another time!
Julian Iancono
SE Wales Tile Doctor
 Tile Doctor Ltd
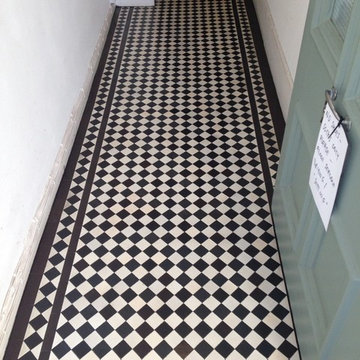
This Victorian floor was discovered at a house in Swiss Cottage in the London borough of Camden when the current owner took the old carpet up. It was in need of substantial restoration to bring it back to its former glory however we have had really good results from restoring similar floors so we were confident it could be done.
The carpet had literally just been taken away so we had to remove the gripper rods, underlay and deal with the adhesive which we managed to tackle using a strong solution of Tile Doctor Remove and Go which was left to dwell and penetrate the glue for ten minutes before being scrubbed in.
Once the glue was removed the tiles were given a thorough clean using Tile Doctor Pro-Clean using the same process of leaving it to soak in and then actively scrubbing it into the floor to get the tile and grout as clean as possible. The floor was then rinsed and stubborn areas re-treated until we were satisfied with the result.
The last cleaning step was to use a steam cleaner to pull as much dirt out of the pores of the tiles as possible and a wet vacuum to extract the liquids and get the floor as dry as possible and we also re-grouted where necessary due to the damage caused by the gripper rods.
We also gave the Victorian tiles in the entrance lobby a thorough clean using the same process, although they had not been covered in carpet they were still in need of a deep clean.
The floor was left to dry and when we returned the whole floor was ready to be sealed and for this we used five coats of Tile Doctor Seal and Go which adds a nice shine to the floor as well as providing a surface seal that will help protect the tiles from stains going forward. For the entrance lobby we used two coats of Colour Grow which doesn’t add the shine but as an impregnating sealer we felt it would perform better with the wear at the front of the house.
The owner of the house was very pleased with the outcome and left the following testimonial:
Prompt, courteous, hard working and great results !.
Nigel Voyce
North London Tile Doctor
 Tile Doctor Ltd
Another quick job here in Cheshire, this time in the town of Wilmslow. Much like Alderly Edge, where I recently completed another job, Wilmslow is an affluent area known for its upmarket lifestyle and as a popular option for residence amongst celebrities and famous figures. In fact it is currently, and has previously been, home to several Premier League footballers from the nearby clubs Manchester United and Manchester City.
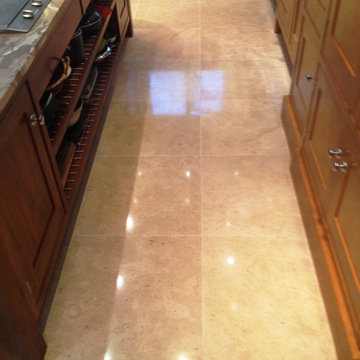
This job was another case of where a tiled floor had lost its shine due to the sealer wearing away over time. In this instance, my client had a Travertine tiled floor in her kitchen that she wanted to me to restore back to looking at its best.
Travertine is a fantastic natural stone which possesses unique features that no other stone can offer. It offers a particularly distinctive design style, making it a popular choice both for commercial and residential use. Many homeowners use Travertine tiles for kitchen flooring, bathroom walls and floors and for external floors, such as patios.
The process of stripping off old sealer can be done effectively and relatively quickly without using a liquid stripper. The best method is to use a series of fine diamond encrusted burnishing pads, which is exactly what I did in this case. The burnishing pads are applied in sequence from coarse, medium, fine and superfine to remove the old sealer without damaging the Travertine and then re-polish to a lovely polished shine.
One the floor had been burnished, rinsed and dried; I proceeded to re-seal the floor with Tile Doctor Colour Grow. Colour Grow is particularly effective when to seal porous natural stone surfaces such as Travertine and Limestone, whether internal or external. This is because the product is specially formulated to penetrate deep into the pores of the stone, providing durable surface protection from within.
The other key benefit of Colour Grow is that it intensifies the colours within the stone, as you can from the photos. This adds additional character and flair to already impressive household features like this Travertine floor.
The finished results were exactly what my client had hoped for. It goes to show that with the right methods and know-how such a big difference can be made to the appearance of tiled floors. I was very happy to help.
Steve Keary
North Cheshire Tile Doctor
 Tile Doctor Ltd
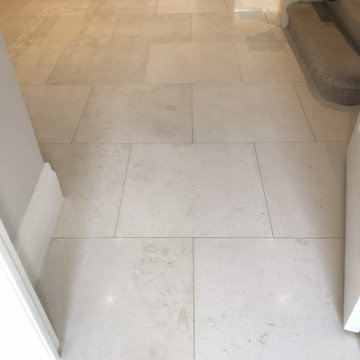
This client from Highgate in North London, N6 contacted us about their large honed Limestone tiled floor that was installed throughout the ground floor. It had been laid seven years prior and was now grubby and in need of a deep clean and seal including the grout which had turned black with dirt.
I visited the property to survey and assess what was required and provided the owner with a quotation for the renovation. The hallway pictured was in the worst condition, it was a busy house with young children and dogs and over the years the sealer had worn down leaving it vulnerable to ingrained dirt. Without a sealer to protect the stone it had become heavily soiled and lost its original polished appearance.
Happy with the quote we scheduled a date for the work to go ahead. The quote included deep cleaning and burnishing the stone to bring back the polish, grout cleaning and re-sealing the Limestone to protect it.
We arrived on the first day and prepared the area by taping up the skirting and woodwork to protect them from potential splashing. Next step was to burnish the floor using a set of Tile Doctor Diamond Burnishing Pads, specifically the 400, 800 and 1500 grit pads fitted to a rotary machine, these were used in sequence running each pad over the tiles several times with water to lubricate the process. The water turns into a fine slurry as pores in the stone are opened and the dirt is released, the slurry is rinsed off with more water and extracted using an industrial wet vacuum after each pad. The finer 800 and 1500-grit pads slowly close the pores and refine the appearance of the stone building up the polish in the process.
A strong dilution of Tile Doctor Pro-Clean was then applied to the grout lines, leaving it for a short while to soak in and then hand scrubbing with a grout brush. The dirty cleaning solution and were then removed from the floor with the wet vacuum.
This process was repeated across the different sections of the Limestone floor until I was satisfied with its appearance. Before leaving for the day, I rinsed the floor again using a buffing machine fitted with a brush fitted to give it a final clean. The floor was dried as much as possible using the wet vacuum and then allowed it to dry off fully overnight.
The following day the final 3000-grit pad in the four-pad set was applied to the floor to bring up the polish even further. The pad is applied dry with only a little water sprayed onto the tile. We call this process a “Spray Burnish” and as well as leaving the floor nice and dry ready for sealing it adds a nice subtle shine to the stone.
The floor was then sealed with two coats of Tile Doctor Colour Grow sealer. This is a colour intensifying impregnating sealer that works by occupying the pores in the stone so dirt cannot become ingrained there. It will provide durable protection and make the floor much easier to keep clean. It worked well on the pale Limestone and beautifully enhanced the colour and features in stone. Once complete the floor looked brand new again.
I left a complimentary bottle of Tile Doctor Stone Soap with the client and gave them some information about how best to maintain the floor. This product is pH neutral and cleans whilst maintaining the patina on the stone helping to keep the floor in great condition.
The client was delighted with the result and left us a great review.
“Andrew is excellent and gets on with the job and we got a fantastic result. Highly recommend. By Aaron S, Highgate, 15 March 2021”
Andrew Newstead
North London Tile Doctor
 Tile Doctor Ltd
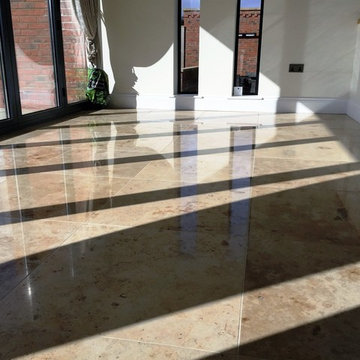
These Marble tiles were installed at a lovely property in North Ferriby by another tile company who although has done a great job laying the floor had neglected to provide the owner with any kind of post-installation maintenance.
Thus the tiles, which covered a large kitchen and hallway area, appeared dull and certainly not up to the standard that could be achieved with the right methods. Funnily enough, the tile company had told the property owner that the stone would need to be sealed, but did not offer to carry out the process themselves.
After conducting their own research, the property owner contacted her local Tile Doctor to see what could be done. I came round to inspect the floor and recommended the floor was polished through a process known as burnishing, followed by the application of a sealer to provide durable protection for the stone.
Burnishing involves the application of diamond encrusted pads with different levels of grit. At Tile Doctor we work with a four pad system that allows us to gradually refine the polish on suitable tiled floors, including Marble and Limestone.
I started the process by applying a Coarse grit burnishing pad across the entire floor lubricated with a little water, the 17 inch pads fit a rotary floor buffing machine and so are relatively straight forward to use but do take time. Following this, I worked my way through the burnishing system, repeating the process with Medium, Fine and Very Fine grit burnishing pads to achieve a brilliant, consistent shine. The floor is given a quick rinse between pads in-order to remove the resultant slurry before starting with the next pad.
The second part of the restoration was to seal the floor to protect the stone against future dirt, stains and damage, which is more common in busy areas of a house like the kitchen. I opted to seal the Marble tiles with two coats of Tile Doctor Ultra Seal.
This is a premium, no-sheen sealer that leaves the Marble with a more natural looking polished appearance. As a solvent-based, penetrating sealer it gets deep into the pores of the stone to protect against stains and ingrained dirt, especially in food preparation areas. To finish off I used the very fine diamond pad just to guarantee the brilliant shine you can see in the photos.
The property owners were exceptionally pleased with the results achieved and will undoubtedly be glad that their lovely Marble tiled flooring is now protected for long-term use. Another satisfied client.
Ronnie Phipps
East Yorkshire Tile Doctor
 Tile Doctor Ltd
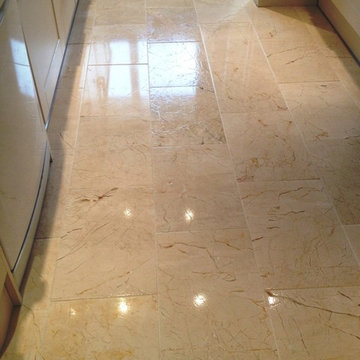
For this job I travelled to the town of Albrighton, which is actually the most easterly settlement in the whole of Shropshire. My client had an issue with their Marble tiled floor which was installed in the kitchen and hallway. They had dropped and broke a bottle of vinegar in the kitchen, and the substance unfortunately came in contact with the tiles. Since Marble is highly sensitive to acid, the vinegar (an acetic acid) had basically etched the surface of the tiles make it impossible clean chemically.
Although the tiles were a nice, expensive Marble, the person who had first installed them had done a poor job, leaving lippage of up to 5mm in some areas, which would make work trickier. Undeterred I could see it would be possible to restore the floor using a combination of burnishing for the tiles and cleaning with a high alkaline product for the grout lines. I demonstrated this to my client on one tile which went well and I was then given the go ahead to restore the entire floor.
My first task focused on cleaning the grout lines using a solution of Tile Doctor Pro-Clean worked in with a stiff grout brush. Pro-Clean is a high alkaline cleaner suitable for use on most types of natural stone floor. It helped to alleviate most of the grout staining caused by the vinegar, whilst also lifting out any ingrained dirt and muck, and this left the grout looking a lot cleaner.
After cleaning the grout lines I was able to move on to burnishing the tiles. As previously mentioned, no chemical product would be able to have an effect on the damaged tiles, so I resolved to burnish them using a system of four diamond encrusted burnishing pads fitted to a rotary machine. Working first with a coarse burnishing pad, and moving through to medium, fine and very fine pads, lubricated with a little water, I was able to significantly reduce the appearance of the acid stains, while also giving the tiles a nice polished finish.
Following the cleaning and burnishing processes I gave the tiles a good rinse to remove any remaining residue and then ensured the floor was completely dry before starting on the sealing.
To seal the floor and maximise the appearance I used Tile Doctor Colour Grow and Tile Doctor Shine powder. Colour Grow is an impregnating sealer that seeps into the pores of the stone intensifying and enhancing the natural shades and colours in the stone whilst also providing stain protection;
Shine Powder on the other hand is a crystallising powder that is ground directly into the tiles to provide a high shine finish and durable surface protection.
My client and her husband were really happy with the results and left the following message on the Tile Doctor Feedback system:
“Jozsef was a charming young man in every respect, who worked very hard and achieved an amazing result. The tiles look better than the day they were laid. We are absolutely delighted with the work he has done and will recommend him to all our acquaintances. Thank you, Jozsef!”
Jozsef Hoffmann
Shropshire Tile Doctor
1