
Search results for "Short periods" in Home Design Ideas
 Tile Doctor Ltd
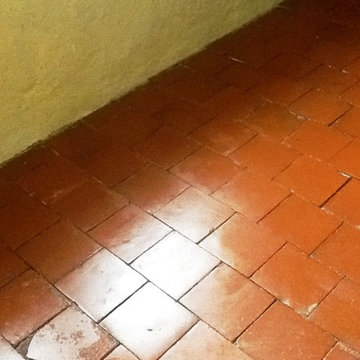
Here’s an interesting work I recently completed on a red Quarry tiled floor at a house in the town of Abington, Northampton. In post-war Britain (more specifically in the 1940s and 1950s), many new homes were built with Quarry tiled hallways and kitchens, so quite a popular feature back then. These floors are typically quite hard wearing and therefore ideal for such high traffic areas; additionally they don’t need a great deal of maintenance but their appearance will degrade over time.
In this particular house, the Quarry tiled floor had been covered with linoleum for many years, causing significant patches of visible black mould. The floor also had a loose tile (which I promptly reset to mitigate the potential tripping hazard) and splashes of paint due to a lack of precaution while the house was being renovated. Needless to say, the floor needed a lot of work.
Before beginning the cleaning I made sure to vacuum up all of the loose debris from the floor. I then applied Tile Doctor Remove & Go to the tiles, left it to dwell for a short period, and then agitated the area with a black stripping pad, adding water to aid the process. This helped to break down any old and ineffectual sealer, along with the paint splashes marking the tiles, leaving a much cleaner and more refined appearance.
I followed this up with Tile Doctor Grout Clean-Up to eliminate the odd speck of cement and grout haze dating back to when the floor was first installed; Gout Clean-up has an acid base so it’s not advised to leave it on the tiles for too long, consequently as soon as I was happy it had done the job I rinsed it off with water and give the floor a thorough wash down.
I used a wet-vacuum machine to extract as much water as possible and gave the floor a once over with steam cleaner which improves the evaporation of any remaining moisture by heating up the tiles.
After completing the cleaning process, I left the house to allow time for the floor to dry completely. Upon my return, I conducted a damp test which showed the floor needed to dry further before sealing so I left an industrial fan in place for a couple of hours to help speed things up.
Once I was satisfied that the floor was dry enough to take the sealant, I sealed the floor using Tile Doctor Colour Grow which is an interesting product that will not only provide durable stain protection but also improves the natural colours of the tile.
While the floor required a lot of time and work to restore, I think you will agree the results were certainly worth waiting for.
Phil Vissian
Northamptonshire Tile Doctor
 Eco Star Painting
Step #1 Apply BM CLEAN
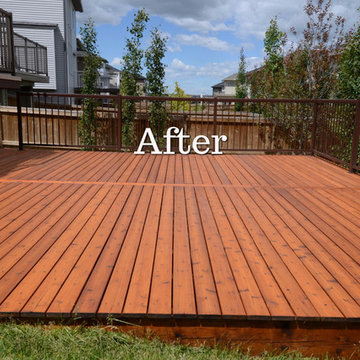
As you can see in the 'Before' picture above, this cedar deck was extremly dirty. This required an extra step in comparison to the typical deck stripping process. My paint rep at Benjamin Moore recommended a product called CLEAN. It comes in one gallon plastic containers and can be applied out of a plastic pail or with a garden sprayer. We used a Garden sprayer and chose a flat tip for application. The three gallon garden sprayer was filled with 2 gallons of water and one gallon of the CLEAN solution. This is a strong mixture and can be reduced to up to 6 parts water and one part of the Benjamin Moore CLEAN.
This approximately 22x20 deck had a board running perpindicular to the rest of the floor boards which divided it into 2 equal parts. Our method was to apply the solution to 3-4 of these 10' boards at a time. Allow it to set up for a few minutes and then scrub away with the deck brush. The agitation loosens up the dirt and grime and is then removed with a pressure washer a board a time. The flat tip on the pressure washer was almost the same width as the floor board. It is important to clean the sides of the board too because any remaining dirt or stain will be visible.
Benjamin Moore Deck Restoration products named Clean,Restore,brighten
Step #2 Apply BM RESTORE
The second step is exactly the same as the first step but with a different solution called Benjamin Moore RESTORE. The deck was dry before we started the 2nd step becuase it was baking hot outside. You use the same 2/1 mixture of water to chemical. This chemical will remove the stain still present in the deck floor. Make sure to rinse the garden sprayer clean before adding the restore solution. Unlike the BM CLEAN, the BM RESTORE has an orange-ish color in appearance. It did a fine job of removing most of the stain, but not 100% of it. There were a few areas that required a 3rd coat of restore but the process was quicker.
Step #3 Apply BM BRIGHTEN
The third step is exactly the same as the first two step but the chemical solution used was Benjamin Moore 'BRIGHTEN'. Again, the garden sprayer was cleaned and filled with 2 parts water and one part Brighten. The brightener not only lightens the wood but it also neutralizes the previous stripper solution. As stated before the Restore adds a bit of color and the Brighten will remove any traces of it. you still have to agitate the brightener with a scrub brush and either pressure wash it off or use a garden hose. We used the pressure washer for faster results. After it dries the wood look a lot brighter but we still found some spots of stain that had not come off.
Apply Sikkens Stain
As stated above the stain we used is called "Sikkens Proluxe" which is basically just a slight re-branding of the classic Sikkens Stain. The formula is exactly the same. In fact, the secondary name is still called 'Cetol' SRD RE. The color chosen was "CEDAR".
The weather was quite hot for a typical Calgary Spring day so we stained a 10' section of floor board at a time. The deck has a metal railing so the supporting feet had to be brushed in with a 2.5" natural bristle paint brush. for the rest of the job a 6" Wooster natural bristle deck brush was used. The handle was remove and a broom handle was inserted. The stain was stirred frequently and poured into a plastic Simms brand roller pan. Semi transparent Oil based stain has the consistency of water so you need to be careful not to spill any of it. When applying to a board you hit the sides first with the brush and then fillin the rest. Ten feet of floor board can be stain in a short period of time. it's important not to leave any streaks so it is adviseable to back-brush the entie length before moving on to the next board. The staining only took about 2.5 hours to complete. One coat is the manufacturers recommendation.
One last thing about Sikkens Stain. To maintain this beautiful look the deck should be re- coated once a year, preferably every spring. It's like applying sunscreen yearly to protect the wood against further damage. Two gallons was enough to cover this 450 sq foot deck.
 Tile Doctor Ltd
Terrazzo is a quite a bit different from the natural stone floors we most commonly work with. It’s a type of flooring material that was made popular by Venetian builders in Italy in the 1920s, but is ultimately descended from styles of design that date back hundreds of years. A typical Terrazzo floor consists of chips of marble or granite set in concrete and polished to result in a smooth surface.
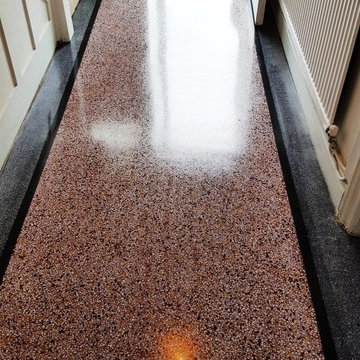
This Terrazzo floor, installed in the hallway of a property in Bridgend, South Wales, was in relatively good physical condition, but it had clearly lost its shine due to the build-up of dirt and muck over the years. In fact, it was first installed in around 1940! The owner was keen to have it rejuvenated to its best possible condition, so they asked me to come in to see what I could do.
My first course of action was to apply Tile Doctor Pro Clean liberally across the floor and leave it to dwell for a short period. This is a high alkaline cleaner that is designed to deal with light to moderate soil build-up, and to strip away any old sealer remaining on the floor. I scrubbed the product in using a black pad fitted to a rotary machine and vacuumed up the resulting cleaning with a wet-vac machine.
Next, to restore the shine to the floor, I undertook a process known as burnishing, which involves the application of diamond encrusted polishing pads. We will typically start with a Coarse grit pad to level off any uneven areas of the floor and grind down any particularly stubborn marks and stains. Then, we gradually refine the polish on the floor using Medium and Fine grit pads. A small amount of water is used as lubrication with each pad.
After I had finished applying the first three pads in our four-pad system, I gave the floor a thorough rinse and left it to dry overnight.
I returned to the property the next day and immediately ran some damp tests to check for excess moisture issues, which one might expect with an old floor like this one. Thankfully, the floor proved dry – and I could finish the burnishing process with the fourth and final Very Fine diamond encrusted burnishing pad, which achieved a beautiful shine finish.
Finally, I sealed the floor with three coats of Tile Doctor Colour Grow, an impregnating sealer which provides robust protection and enhances the coloured patterns in the Terrazzo.
As you can see from the photos above, the floor is looking so much more colourful and bright after a deep clean, polish and a fresh seal. The customer was over the moon!
Julian Iancono
South East Wales Tile Doctor
Find the right local pro for your project
 Modulor
The renovation of Maison Gray was an ambitious project, marked by technical challenges to transform this 1960s residence into a modern and bright living space. Due to urban planning constraints, it was impossible to completely demolish the house. Therefore, a progressive approach was adopted, methodically deconstructing and rebuilding each wall while keeping the roof in place with temporary supports. This required rigorous coordination between the demolition and construction teams, who worked in parallel to successfully complete the large-scale project.
Major structural and framing work allowed for the roof slopes to be redefined and the creation of a double-height space, a central feature of the house's new architecture. Despite the complexity of the project, the work was completed in a relatively short period, an impressive achievement for such a large-scale transformation.
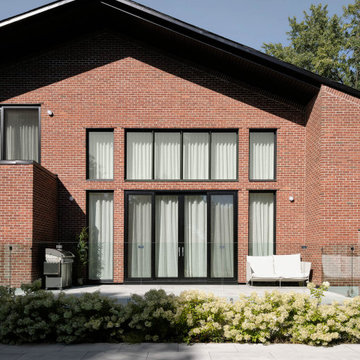
Thanks to meticulous execution, the house was practically rebuilt from scratch, with a mezzanine and new spaces arranged in half-levels within a generous volume. The tall arch on the façade marks the vaulted entrance leading to an open living space in double height, naturally lit by a skylight and large windows opening to the garden. Achieving these elements and alignments required great precision, with every architectural detail, from curves to openings, carefully executed to create a fluid and harmonious flow. Sangaré Studio designed the interior with natural materials in soft tones, creating intimate and fluid spaces.
Built with care, Maison Gray offers a welcoming and soothing environment, allowing the family to enjoy spaces designed for comfort and tranquility.
 Building Designers Association of Australia
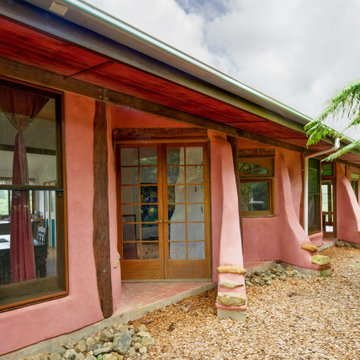
This is a great little house that has used back to basics construction methods that utilise ancient building techniques to help be a solution for the modern problem of climate change. The brief was a challenging one; build a beautiful, sustainable home for a family in a short period of time with a very small budget. The brief was fulfilled through the use of efficient design, second hand materials and the use of cob (earth) wall construction - which cost next to nothing but allowed for sculptural beauty. An amazing effort from a determined client then turned that into reality.
 Modulor
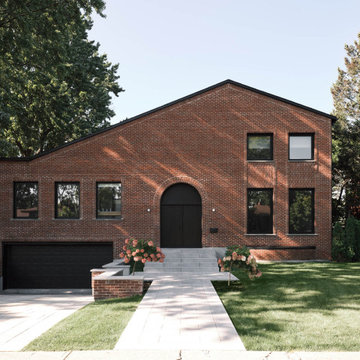
The renovation of Maison Gray was an ambitious project, marked by technical challenges to transform this 1960s residence into a modern and bright living space. Due to urban planning constraints, it was impossible to completely demolish the house. Therefore, a progressive approach was adopted, methodically deconstructing and rebuilding each wall while keeping the roof in place with temporary supports. This required rigorous coordination between the demolition and construction teams, who worked in parallel to successfully complete the large-scale project.
Major structural and framing work allowed for the roof slopes to be redefined and the creation of a double-height space, a central feature of the house's new architecture. Despite the complexity of the project, the work was completed in a relatively short period, an impressive achievement for such a large-scale transformation.
Thanks to meticulous execution, the house was practically rebuilt from scratch, with a mezzanine and new spaces arranged in half-levels within a generous volume. The tall arch on the façade marks the vaulted entrance leading to an open living space in double height, naturally lit by a skylight and large windows opening to the garden. Achieving these elements and alignments required great precision, with every architectural detail, from curves to openings, carefully executed to create a fluid and harmonious flow. Sangaré Studio designed the interior with natural materials in soft tones, creating intimate and fluid spaces.
Built with care, Maison Gray offers a welcoming and soothing environment, allowing the family to enjoy spaces designed for comfort and tranquility.
 Building Designers Association of Australia
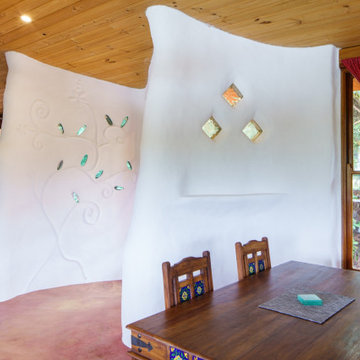
This is a great little house that has used back to basics construction methods that utilise ancient building techniques to help be a solution for the modern problem of climate change. The brief was a challenging one; build a beautiful, sustainable home for a family in a short period of time with a very small budget. The brief was fulfilled through the use of efficient design, second hand materials and the use of cob (earth) wall construction - which cost next to nothing but allowed for sculptural beauty. An amazing effort from a determined client then turned that into reality.
Sponsored
Columbus, OH

Hope Restoration & General Contracting
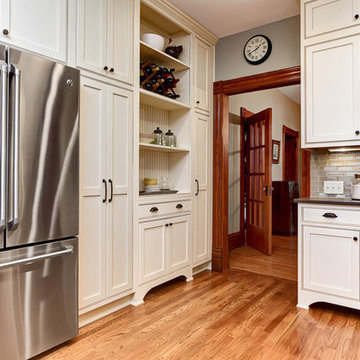
Columbus Design-Build, Kitchen & Bath Remodeling, Historic Renovations
 Modulor
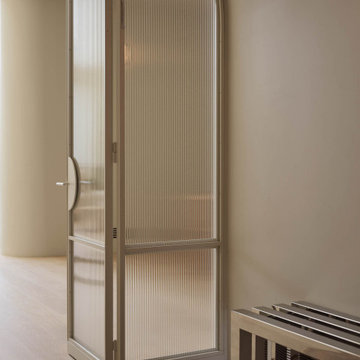
The renovation of Maison Gray was an ambitious project, marked by technical challenges to transform this 1960s residence into a modern and bright living space. Due to urban planning constraints, it was impossible to completely demolish the house. Therefore, a progressive approach was adopted, methodically deconstructing and rebuilding each wall while keeping the roof in place with temporary supports. This required rigorous coordination between the demolition and construction teams, who worked in parallel to successfully complete the large-scale project.
Major structural and framing work allowed for the roof slopes to be redefined and the creation of a double-height space, a central feature of the house's new architecture. Despite the complexity of the project, the work was completed in a relatively short period, an impressive achievement for such a large-scale transformation.
Thanks to meticulous execution, the house was practically rebuilt from scratch, with a mezzanine and new spaces arranged in half-levels within a generous volume. The tall arch on the façade marks the vaulted entrance leading to an open living space in double height, naturally lit by a skylight and large windows opening to the garden. Achieving these elements and alignments required great precision, with every architectural detail, from curves to openings, carefully executed to create a fluid and harmonious flow. Sangaré Studio designed the interior with natural materials in soft tones, creating intimate and fluid spaces.
Built with care, Maison Gray offers a welcoming and soothing environment, allowing the family to enjoy spaces designed for comfort and tranquility.
 Manuel and Son Contracting
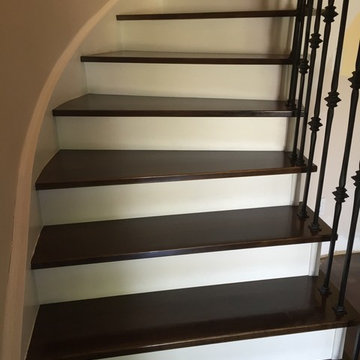
We can refinish your staircase in a short period of time and make sure you are pleased with the result. We have been perfecting stairs refinishing for many years. Please call us for a free estimate.
 Outdoor Creations Landscape & Design Inc.
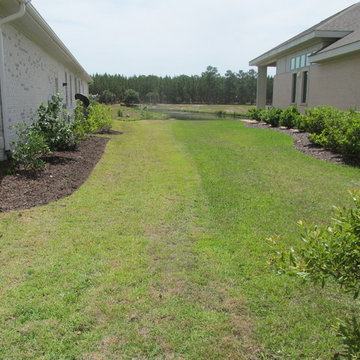
To the right is centipede adjoining our clients Zoysia variety. In a short period of time, working with all components of both soils, turf type, and nature herself, it's starting to awaken and look promising.


 Roughan Interior Design
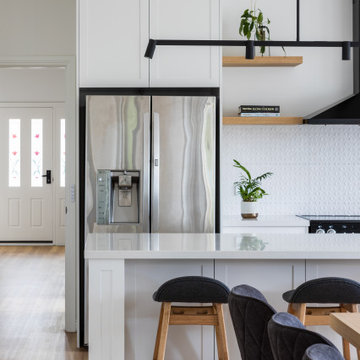
This wonderful French brick manor was brought to life twice, once with a gut renovation and another time with a cosmetic renovation. Each detail was carefully planned to complete a family home that was friendly, tailored and chic. The builder, contractors and designer all worked to bring this together in a short period of time. The colors are all earth tones with accents of curated art and ccessories. Each room tells a story yet flows nicely from one interior to the other.
Project Year: 2016
Jane Beiles
 Granit Architects + Interiors
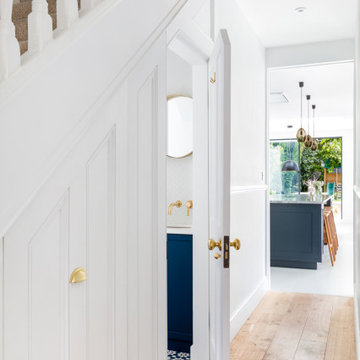
Our clients for this project are a professional couple with a young family. They approached us to help with extending and improving their home in London SW2 to create an enhanced space both aesthetically and functionally for their growing family. We were appointed to provide a full architectural and interior design service, including the design of some bespoke furniture too.
A core element of the brief was to design a kitchen living and dining space that opened into the garden and created clear links from inside to out. This new space would provide a large family area they could enjoy all year around. We were also asked to retain the good bits of the current period living spaces while creating a more modern day area in an extension to the rear.
It was also a key requirement to refurbish the upstairs bathrooms while the extension and refurbishment works were underway.
The solution was a 21m2 extension to the rear of the property that mirrored the neighbouring property in shape and size. However, we added some additional features, such as the projecting glass box window seat. The new kitchen features a large island unit to create a workspace with storage, but also room for seating that is perfect for entertaining friends, or homework when the family gets to that age.
The sliding folding doors, paired with floor tiling that ran from inside to out, created a clear link from the garden to the indoor living space. Exposed brick blended with clean white walls creates a very contemporary finish throughout the extension, while the period features have been retained in the original parts of the house.
Sponsored
Delaware, OH

Buckeye Basements, Inc.
Central Ohio's Basement Finishing ExpertsBest Of Houzz '13-'21
 Nick Smith www.nsphotography.co.uk
photographer Nick Smith
www.nsphotography.co.uk
designer : Fatima Fernandez
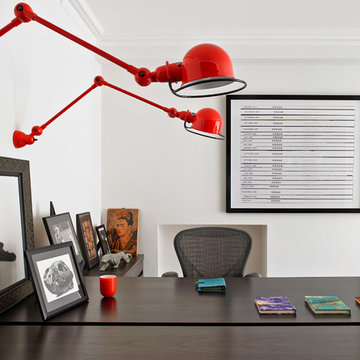
Example of a trendy study room design in London with white walls
Example of a trendy study room design in London with white walls
 Architecture Stones
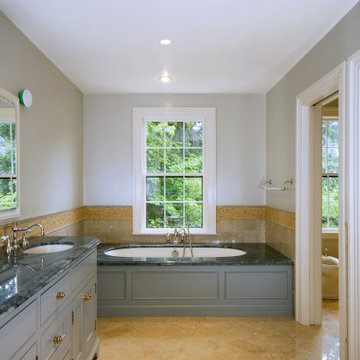
Can you replace just a top of a bathroom vanity? If you would like to change the look of your bathroom, the new countertop can be installed. The cost of removing the old top and installing a new vanity top starts at $400 and goes as high as the cost of the material that you would choose. In most cases, the replacement of a vanity top can improve the look of a bathroom drastically and add additional value to a house. It is a relatively simple process and can be done in a short period of time. With more than 4,000 stone slabs and a warehouse for production on site the time of replacement of an existing vanity top, kitchen countertops or a matching stone table top is shorter since we can address any issue right then and there. For many years, the Architecture Stones team has been working on helping customers from the DC Metro Area with any desire regarding custom-made stone related products such as: shower thresholds, fireplace mantels, custom-made stone sinks, quartz kitchen countertops, marble tiles, shower wall stone slabs, granite table tops, and as it was mentioned above, quartz bathroom vanity tops. Any size, shape, thickness and color of a vanity top can be custom-made by our team at Architecture Stones shop in Rockville, MD.
 Handmazing
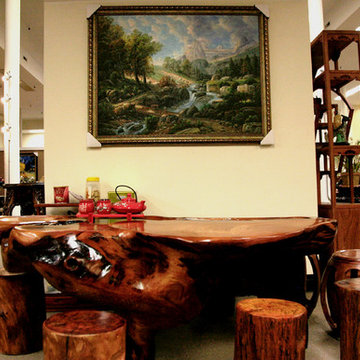
As a professional artwork supplier, we work exclusively with oil paintings. We reproduce classic masterpieces from Van Gogh to Monet and beyond, and provide our customers with an opportunity to enjoy these incredible works of art without the cost of purchasing them outright. Unlike prints, however, our works of art are crafted by real artists who reproduce the work by way of their own natural talent.
Each of our oil paintings is just as colorful and unique as the original. Our talented and experienced artists give our paintings a distinct feel and look with each brushstroke. Additionally, no two paintings are alike, and each one will differ slightly from the others, giving all our paintings a distinctive charm. Our canvas paintings are extremely durable and are the ideal way to breathe life into your home.
In addition to purchasing our reproductions, you may also rent our artwork to brighten your home or business for a short period. This is a budget friendly alternative available to both individuals and businesses.
 Roughan Interior Design
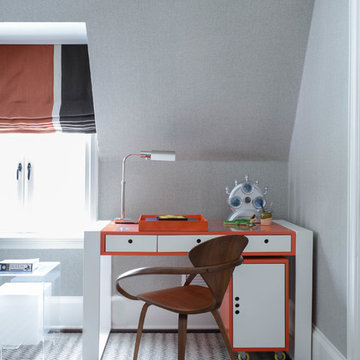
This wonderful French brick manor was brought to life twice, once with a gut renovation and another time with a cosmetic renovation. Each detail was carefully planned to complete a family home that was friendly, tailored and chic. The builder, contractors and designer all worked to bring this together in a short period of time. The colors are all earth tones with accents of curated art and ccessories. Each room tells a story yet flows nicely from one interior to the other.
Project Year: 2016
Jane Beiles

 Architecture Stones
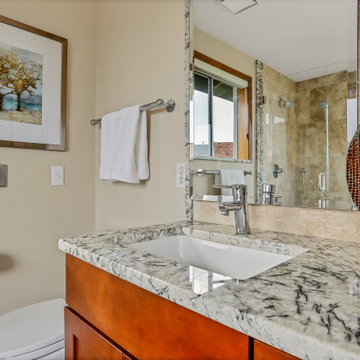
How to improve the look of a bathroom fast? In most cases, the replacement of a vanity top can improve the look of a bathroom drastically and add additional value to a house. It is a relatively simple process and can be done in a short period of time. With more than 4,000 stone slabs and a warehouse for production on site the time of replacement of an existing vanity top, kitchen countertops or a matching stone table top is shorter since we can address any issue right then and there. For many years, the Architecture Stones team has been working on helping customers from the DC Metro Area with any desire regarding custom-made stone related products such as: shower thresholds, fireplace mantels, custom-made stone sinks, quartz kitchen countertops, marble tiles, shower wall stone slabs, granite table tops, and as it was mentioned above, quartz bathroom vanity tops. Any size, shape, thickness and color of a vanity top can be custom-made by our team at Architecture Stones shop in Rockville, MD.
 Architecture Stones
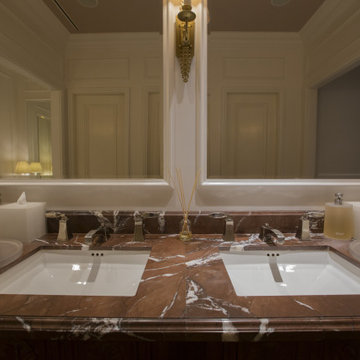
In most cases, the replacement of a vanity top can improve the look of a bathroom drastically and add additional value to a house. It is a relatively simple process and can be done in a short period of time. With more than 4,000 stone slabs and a warehouse for production on site the time of replacement of an existing vanity top, kitchen countertops or a matching stone table top is shorter since we can address any issue right then and there. For many years, the Architecture Stones team has been working on helping customers from the DC Metro Area with any desire regarding custom-made stone related products such as: shower thresholds, fireplace mantels, custom-made stone sinks, quartz kitchen countertops, marble tiles, shower wall stone slabs, granite table tops, and as it was mentioned above, quartz bathroom vanity tops. Any size, shape, thickness and color of a vanity top can be custom-made by our team at Architecture Stones shop in Rockville, MD.
 Architecture Stones
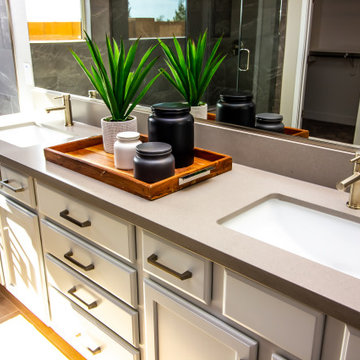
In most cases, the replacement of a vanity top can improve the look of a bathroom drastically and add additional value to a house. It is a relatively simple process and can be done in a short period of time. With more than 4,000 stone slabs and a warehouse for production on site the time of replacement of an existing vanity top, kitchen countertops or a matching stone table top is shorter since we can address any issue right then and there. For many years, the Architecture Stones team has been working on helping customers from the DC Metro Area with any desire regarding custom-made stone related products such as: shower thresholds, fireplace mantels, custom-made stone sinks, quartz kitchen countertops, marble tiles, shower wall stone slabs, granite table tops, and as it was mentioned above, quartz bathroom vanity tops. Any size, shape, thickness and color of a vanity top can be custom-made by our team at Architecture Stones shop in Rockville, MD.
9