
Search results for "Significantly" in Home Design Ideas


 Erika Lam
Open Homes Photography
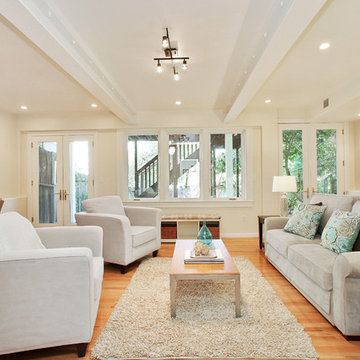
Example of a large classic formal and open concept light wood floor living room design in San Francisco with beige walls, a standard fireplace, a stone fireplace and no tv
Example of a large classic formal and open concept light wood floor living room design in San Francisco with beige walls, a standard fireplace, a stone fireplace and no tv
Find the right local pro for your project


 Xpand Inc. | Homes of Xcellence
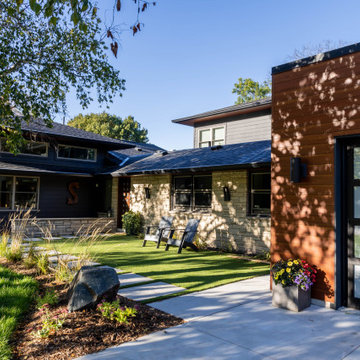
At the outset, this project began with the transformation of a 2-car attached garage. The goal was to create a mudroom, an exercise room, and a breezeway to seamlessly connect the spacious detached garage with the main part of the house. Additionally, the project involved partial roof removal and the addition of a new front entry.
But then came an unexpected twist – scope creep.
We found ourselves veering away from the initial client-supplied architectural plans. After numerous consultations with the clients and several iterations of the design, we arrived at a significantly improved plan for the remodel and addition.
Our journey commenced with the demolition of almost the entire former 2-car garage, making space for a new, oversized 3-car garage measuring 40′ x 28′. This garage was strategically placed between the existing house and the large detached garage. We introduced a custom low-sloped flat roof, designed to address historical drainage issues.
To mitigate water pooling, we created a custom concrete step at the back corner of the garage, equipped with a sturdy metal grate that sits flush with the step. We also installed a PVC drainage system, commencing at the step and running beneath a newly designed patio, ultimately draining into the yard. These measures have significantly reduced water accumulation around the house.
The new garage boasts several features, including Longboard aluminum siding, custom full glass garage doors, interior drywall finished to a level 4, an abundance of can lights, an epoxy floor coating, vinyl base trim, a new forced air garage heater, and more.
The clients also requested a designated space for their three kids and their friends to enjoy, thus giving birth to the “Kid Zone.” We partitioned a section of the existing oversized garage, resulting in a space measuring approximately 22′ x 32′, brimming with entertainment possibilities. To enhance control over the temperature in the Kid Zone, we collaborated with our licensed HVAC partner to install a cold weather mini-split system.
One of the most significant challenges was the modernization and consolidation of the home’s main electrical systems. We reconfigured and combined 6-7 different electrical panels into just two. One panel serves the main house, while the second is dedicated to backup power from a generator. These panels, along with the boiler for the in-floor heating system, are housed in a newly constructed mechanical room within the Kid Zone.
Inside the main house, we completed various tasks, such as removing the ceiling in the hallway from the new garage to address prior water damage, improve insulation, and rework electrical and HVAC systems. We also replaced the ceiling from the front door to the base of the stairs, adding new can lighting and enhancing insulation. Skilled drywall specialists then installed and finished new drywall to a level 5 standard.
The exterior of the house underwent a complete overhaul. Before installing new roofing on the entire house and garage, we modified an existing flat roof by adding custom lumber and plywood to enhance the pitch, preventing future ice dams. A new rubber roof was expertly installed on the oversized 3-car garage, and the flat roof section we re-framed.
Our meticulous exterior team removed old white aluminum soffit, fascia, and gutters, replacing them with new framing to accommodate Longboard soffit material. This task was particularly challenging due to the age of the house and the non-standard wall and roof framing. Our skilled exterior subcontractors ensured a perfect fit.
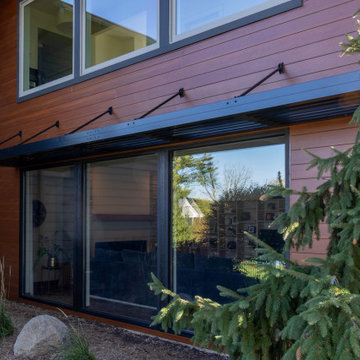
Near the pool area, we discovered severe rot and decay from years of water intrusion. After informing the homeowners, we ordered and installed five new commercial-style block framed windows and a custom 8′ high Anderson patio door. This involved careful removal and replacement of window headers from the outside to avoid disturbing the finished part of the house. We reframed the large openings to fit the new windows, and our skilled trim carpenters installed new walnut casing, base, and window sills.
In total, we replaced around 900 lineal feet of soffit and installed approximately 32 squares of aluminum siding. The entire house was meticulously prepped, repaired, and painted according to the client’s chosen color.
Throughout the project, we incorporated numerous custom touches and unique design elements, some of which you can see in the pictures. Our team also addressed various unforeseen challenges, from soil issues to rot and decay repair, roof leaks, drainage problems, electrical and HVAC complexities, and much more.
At Xpand Inc., we take pride in making it all happen, turning your remodeling and renovation dreams into reality.
 Xpand Inc. | Homes of Xcellence
At the outset, this project began with the transformation of a 2-car attached garage. The goal was to create a mudroom, an exercise room, and a breezeway to seamlessly connect the spacious detached garage with the main part of the house. Additionally, the project involved partial roof removal and the addition of a new front entry.
But then came an unexpected twist – scope creep.
We found ourselves veering away from the initial client-supplied architectural plans. After numerous consultations with the clients and several iterations of the design, we arrived at a significantly improved plan for the remodel and addition.
Our journey commenced with the demolition of almost the entire former 2-car garage, making space for a new, oversized 3-car garage measuring 40′ x 28′. This garage was strategically placed between the existing house and the large detached garage. We introduced a custom low-sloped flat roof, designed to address historical drainage issues.
To mitigate water pooling, we created a custom concrete step at the back corner of the garage, equipped with a sturdy metal grate that sits flush with the step. We also installed a PVC drainage system, commencing at the step and running beneath a newly designed patio, ultimately draining into the yard. These measures have significantly reduced water accumulation around the house.
The new garage boasts several features, including Longboard aluminum siding, custom full glass garage doors, interior drywall finished to a level 4, an abundance of can lights, an epoxy floor coating, vinyl base trim, a new forced air garage heater, and more.
The clients also requested a designated space for their three kids and their friends to enjoy, thus giving birth to the “Kid Zone.” We partitioned a section of the existing oversized garage, resulting in a space measuring approximately 22′ x 32′, brimming with entertainment possibilities. To enhance control over the temperature in the Kid Zone, we collaborated with our licensed HVAC partner to install a cold weather mini-split system.
One of the most significant challenges was the modernization and consolidation of the home’s main electrical systems. We reconfigured and combined 6-7 different electrical panels into just two. One panel serves the main house, while the second is dedicated to backup power from a generator. These panels, along with the boiler for the in-floor heating system, are housed in a newly constructed mechanical room within the Kid Zone.
Inside the main house, we completed various tasks, such as removing the ceiling in the hallway from the new garage to address prior water damage, improve insulation, and rework electrical and HVAC systems. We also replaced the ceiling from the front door to the base of the stairs, adding new can lighting and enhancing insulation. Skilled drywall specialists then installed and finished new drywall to a level 5 standard.
The exterior of the house underwent a complete overhaul. Before installing new roofing on the entire house and garage, we modified an existing flat roof by adding custom lumber and plywood to enhance the pitch, preventing future ice dams. A new rubber roof was expertly installed on the oversized 3-car garage, and the flat roof section we re-framed.
Our meticulous exterior team removed old white aluminum soffit, fascia, and gutters, replacing them with new framing to accommodate Longboard soffit material. This task was particularly challenging due to the age of the house and the non-standard wall and roof framing. Our skilled exterior subcontractors ensured a perfect fit.
Near the pool area, we discovered severe rot and decay from years of water intrusion. After informing the homeowners, we ordered and installed five new commercial-style block framed windows and a custom 8′ high Anderson patio door. This involved careful removal and replacement of window headers from the outside to avoid disturbing the finished part of the house. We reframed the large openings to fit the new windows, and our skilled trim carpenters installed new walnut casing, base, and window sills.
In total, we replaced around 900 lineal feet of soffit and installed approximately 32 squares of aluminum siding. The entire house was meticulously prepped, repaired, and painted according to the client’s chosen color.
Throughout the project, we incorporated numerous custom touches and unique design elements, some of which you can see in the pictures. Our team also addressed various unforeseen challenges, from soil issues to rot and decay repair, roof leaks, drainage problems, electrical and HVAC complexities, and much more.
At Xpand Inc., we take pride in making it all happen, turning your remodeling and renovation dreams into reality.
 The Place for Kitchens and Baths
Ed Butera | ibi Designs
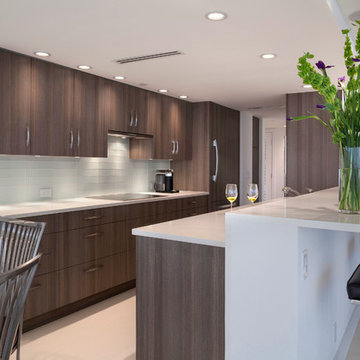
Eat-in kitchen - mid-sized contemporary galley marble floor and beige floor eat-in kitchen idea in Miami with flat-panel cabinets, medium tone wood cabinets, an undermount sink, solid surface countertops, gray backsplash, porcelain backsplash, stainless steel appliances and white countertops
Eat-in kitchen - mid-sized contemporary galley marble floor and beige floor eat-in kitchen idea in Miami with flat-panel cabinets, medium tone wood cabinets, an undermount sink, solid surface countertops, gray backsplash, porcelain backsplash, stainless steel appliances and white countertops
 Windy City Painters
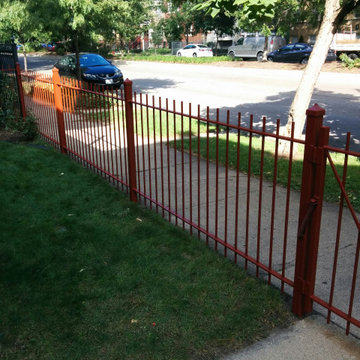
Iron Fence Painting Lincoln Park Chicago - Professional Metal Refinishing
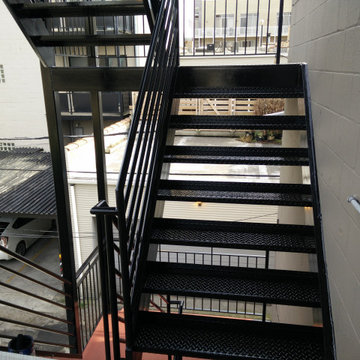
Windy City Painters completed this comprehensive iron fence painting project for a beautiful Lincoln Park greystone property. Lincoln Park's historic architecture demands careful attention to detail, and furthermore, Chicago's harsh weather conditions require professional-grade materials and techniques for lasting protection.
We utilized premium Sherwin-Williams rust inhibiting primer and Benjamin Moore exterior metal paint for maximum durability. Additionally, our team employed specialized rust removal tools and surface preparation equipment to ensure optimal adhesion and longevity.
Our four-step process included complete rust removal and surface cleaning, minor repairs to damaged sections, premium primer application with proper curing time, and final topcoat application using spray and brush techniques for even coverage.
Chicago's unique challenges include extreme temperature fluctuations, salt exposure from winter treatments, and moisture from Lake Michigan. Moreover, older properties often have multiple paint layers requiring careful removal. Therefore, professional expertise ensures proper preparation and material selection.
The results exceeded client expectations with a smooth, durable finish that enhances the property's curb appeal. Subsequently, the fence now provides years of protection while complementing the neighborhood's architectural character perfectly.
Before starting similar projects, homeowners should understand that proper surface preparation accounts for 80% of project success. Additionally, weather conditions significantly impact application timing and results.
See more work and request free estimate at windypainters.com.
Frequently Asked Questions:
Q: How much does iron fence painting cost in Lincoln Park Chicago?
A: Iron fence painting costs vary based on fence size, existing condition, rust damage extent, and preparation requirements needed.
Q: What preparation is required for successful iron fence painting projects?
A: Iron fence painting requires thorough rust removal, surface cleaning, minor repairs, primer application, and proper weather conditions.
Q: How long does professional iron fence painting last in Chicago weather?
A: Professional iron fence painting typically lasts 8-12 years with quality materials, proper preparation, and regular maintenance.
Q: When is the best season for iron fence painting in Chicago?
A: Spring through early fall provides optimal conditions for iron fence painting with appropriate temperature and humidity levels.
Q: Can you match existing colors for iron fence painting restoration projects?
A: Yes, we provide custom color matching services for iron fence painting to complement existing architectural elements perfectly.
Q: Do you warranty iron fence painting work in Lincoln Park?
A: Windy City Painters provides comprehensive warranties on all iron fence painting projects ensuring quality and customer satisfaction.
Q: What makes professional iron fence painting worth the investment cost?
A: Professional iron fence painting ensures proper preparation, quality materials, expert application techniques, and significantly extended fence lifespan.
Q: How do you prevent rust from returning after iron fence painting?
A: Our iron fence painting process includes rust inhibiting primer, quality topcoats, and proper surface preparation for maximum protection.
Q: Can iron fence painting increase Lincoln Park property values significantly?
A: Professional iron fence painting enhances curb appeal, property aesthetics, and market value in desirable Lincoln Park neighborhood.
Q: What safety precautions are necessary during iron fence painting projects?
A: Iron fence painting requires proper ventilation, protective equipment, lead paint testing, and professional safety protocols throughout.
 Erika Lam
Open Homes Photography
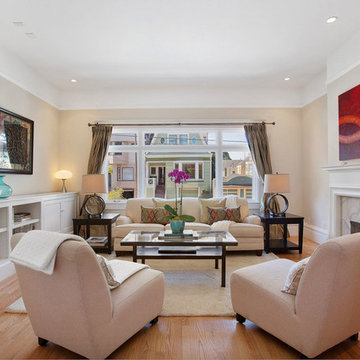
Example of a large classic formal and open concept light wood floor living room design in San Francisco with beige walls, a standard fireplace, a stone fireplace and no tv
Example of a large classic formal and open concept light wood floor living room design in San Francisco with beige walls, a standard fireplace, a stone fireplace and no tv
 Windy City Painters
Ever notice how your iron fence looks worse every spring after another Chicago winter? That slow deterioration is not cosmetic - it is active metal failure that compounds every freeze-thaw cycle until replacement becomes the only option. Windy City Painters works with homeowners across the Chicago North Side and Near West Side to restore original iron fencing on greystones, two-flats, Victorian brownstones, and coach houses before that point is reached.
PROJECT OVERVIEW
This iron fence restoration involved a classic Chicago residential property with original wrought iron fencing showing surface rust across the majority of pickets, flaking previous paint coats, and localized deep pitting near the base rails. A structural check identified two loose pickets requiring welding before any surface preparation or coating began. Total linear footage fell in the mid-range for a standard Chicago residential lot.
MATERIALS AND PRODUCTS
Windy City Painters selected Ospho rust converter for chemically neutralizing active iron oxide before priming. Ospho reacts with rust to form a stable phosphate compound that stops corrosion progression rather than simply sealing over it. Sherwin-Williams DTM rust-inhibitive primer was applied to all bare and converted surfaces, followed by two finish coats of Rust-Oleum DTM in satin black. DTM - direct to metal - formulas provide corrosion inhibitors built into the coating matrix, which matters significantly in Chicago's climate.
THE PROCESS
Step 1 - Structural Assessment and Welding Coordination. Before any surface preparation begins, Windy City Painters inspects every picket and rail connection for structural integrity. Loose or cracked iron must be welded before coating. Paint applied over a compromised joint will fail within one season as movement continues to break the bond. On this project, two pickets were tack-welded by a coordinating welder before prep started.
Step 2 - Wire Wheel Grinding and Needle Gun Descaling. All rusted sections were ground to bare or near-bare metal using wire wheel attachments and needle gun descaling tools. This step removes loose scale, flaking previous coatings, and surface contamination that would prevent primer adhesion. Skipping mechanical prep is the single most common reason iron fence paint fails prematurely on Chicago properties.
Step 3 - Ospho Rust Converter Application. Ospho was brushed into all pitted and converted areas and allowed to cure fully. The phosphoric acid chemistry converts iron oxide into iron phosphate, arresting active rust and creating a surface that accepts primer more effectively than bare metal alone. Corroseal is an equivalent alternative used on projects with heavier pitting.
Step 4 - DTM Primer and Finish Coat Application. Sherwin-Williams DTM rust-inhibitive primer was applied across all prepared surfaces. Two topcoats of Rust-Oleum DTM in satin black followed after full primer cure. DTM finish coats add a second corrosion-inhibiting layer and provide the UV and weather resistance needed for Chicago exterior iron work.
CHICAGO-SPECIFIC CHALLENGES
Chicago iron fencing faces conditions that accelerate corrosion faster than most US markets. Lake humidity keeps metal surface moisture elevated through much of the year. Road salt splash from winter maintenance reaches fencing along parkways and sidewalk edges, introducing chlorides that aggressively attack iron. Freeze-thaw cycles expand any rust pocket that has formed under paint, lifting coatings from the inside and creating the classic bubbled-paint appearance homeowners notice every spring.
WHAT TO EXPECT LONG-TERM
With Ospho conversion, DTM primer, and two DTM finish coats properly applied over mechanically prepared surfaces, most Chicago residential iron fences hold 5-8 years before needing significant touch-up. Annual visual inspection for any chips or bare spots, with immediate touch-up using Rust-Oleum DTM, extends that window considerably.
PRO TIPS
Tip 1 - Address any bare metal spot the same season you notice it. A pinhole of exposed iron becomes a rust bubble within one Chicago winter and a flaking section by the following spring.
Tip 2 - Never paint over active rust without a converter step. Ospho or Corroseal is inexpensive insurance against a complete repaint two years early.
Tip 3 - Check picket bases at grade level every spring. Ground contact accelerates corrosion at the base faster than anywhere else on the fence. Catching it early keeps welding out of the equation.
Contact Windy City Painters at windypainters.com for a project estimate.
FAQ
Q: What does iron fence painting cost in Chicago? A: Residential iron fence painting with proper rust prep typically runs $300-$900 for standard lot footage. Windy City Painters provides itemized estimates based on linear footage, rust severity, and whether structural welding is required before surface preparation begins.
Q: Do you paint over rust or remove it first? A: Windy City Painters always addresses active rust before priming. Ospho or Corroseal rust converter chemically neutralizes iron oxide, and wire wheel grinding removes loose scale - coating over unaddressed rust guarantees early failure on Chicago iron fences.
Q: When does an iron fence need welding before painting? A: Loose pickets, cracked rails, or connections with visible movement require welding before any coating work begins. Paint cannot stabilize a structural joint - Windy City Painters coordinates with welders when this condition is identified during initial assessment.
Q: How long does iron fence paint last in Chicago? A: With mechanical prep, Ospho conversion, and Sherwin-Williams or Rust-Oleum DTM coatings, properly restored iron fencing holds 5-8 years in Chicago's freeze-thaw climate before needing significant maintenance.
Q: Is Ospho better than Corroseal for Chicago iron fences? A: Both are effective rust converters. Ospho is a liquid phosphoric acid treatment suited for moderate rust and pitting. Corroseal is a latex-based converter-primer hybrid better suited to heavier rust profiles. Windy City Painters selects based on site conditions.
Q: What finish sheen works best on iron fencing? A: Satin or semi-gloss black is the traditional and most durable choice for Chicago greystone and brownstone properties. Satin hides minor surface imperfections better than gloss while still providing adequate UV and moisture resistance.
Q: Can iron fence painting be done in spring or fall in Chicago? A: Yes. Windy City Painters schedules iron fence work in temperatures above 50 degrees Fahrenheit with low ambient humidity - spring and early fall are often ideal windows that avoid both winter cold and peak summer humidity.
 Tile Doctor Ltd
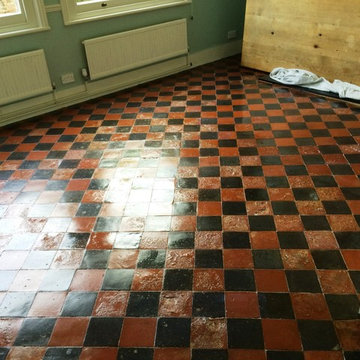
I was contacted recently by a client in East Grinstead, who asked me to restore a large area of damaged Quarry tiles in his house. East Grinstead actually dates back to the 14th century and is a town known for its many interesting houses and historic buildings. Hard-wearing Quarry tiles are most often used in high traffic areas, such as reception areas and hallways, although they are also commonly used for patio areas and porches. In these busy areas, the tiles can get dirty quickly, and this can lead to damage over time if they are not regularly tended to.
In this case, the damage to the tiles had actually been caused by regular flooding over a period of several years. The damage was so extreme that I advised my client that the only means of total restoration was re-tiling. However, my client informed me that the property was currently on the market for sale and this wasn’t an option. Instead, he settled on a deep clean and seal which, while not a complete restoration, would still significantly improve the condition of the tiled floor.
My first day of work was spent moving a significant amount of large furniture out of the room and into the garden. Once the area was completely clear, I was able to apply a layer of Tile Doctor Pro-Clean, using a stiff deck brush to really work it into the damaged stone. Pro-Clean helped to lift out a huge amount of the muck and ingrained dirt revealing, unfortunately, yet more damage beneath.
Once I had finished for the day, my client opened the windows to allow the warm sunshine to dry up any remaining moisture. This was important, as any excess moisture left on the floor may have affected the performance of the sealer when I returned to complete the sealing.
I allowed the floor a two-day drying period, during which time my client decided to colour some of the tiles with red doorstep paint. He counted up to two thousand tiles before giving up!
When I returned after 48 hours, I set about sealing the floor using Tile Doctor Seal & Go, which provided the eye-catching gloss finish and durable protection the client wanted whilst the house was still on the market. As it was another warm day, the homeowners went out cycling around the Ashdown forest, leaving me to complete the sealing carefully and without distraction.
When they returned a few hours later, they were amazed by the results! Although a complete re-tiling was not possible under the circumstances, both myself and my clients were extremely pleased with how great the Quarry tiles were now looking, especially after such significant water damage.
 Coulter Architects, PLLC
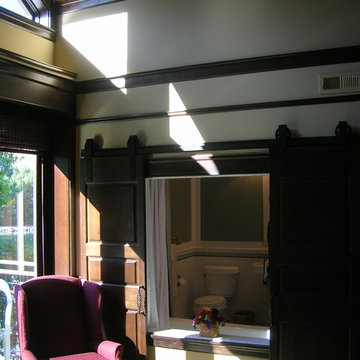
The premise for the Lakeview was to make it feel like an old hotel that had been refurbished and not be something new. Located in an historic building, you approach through the restaurant and bar on the main floor with the front desk shared with the bar.

 Smart-Solutiions
The Science of Light and Learning
To understand the relationship between lighting and learning, it’s critical to grasp the concept of correlated colour temperature (CCT). CCT refers to the warmth or coolness of light, measured in Kelvin (K). Lower CCTs (around 3000K) provide a warm, cosy atmosphere, while higher CCTs (5000K or above) emit a cool, daylight-like glow. Studies have shown that cool white light, which mimics natural daylight, can increase alertness and mood, contributing to improved cognitive performance. LED lighting, with its ability to produce this desired CCT, makes an ideal choice for educational settings.
LED Lighting: Brightening the Future of Education
Energy Efficiency and Cost Effectiveness
One of the main advantages of LED lighting is its energy efficiency. Traditional lighting solutions like fluorescent and incandescent bulbs consume much more energy to produce the same amount of light as LEDs, which is not only environmentally harmful but also financially costly. Switching to LED lights can result in substantial cost savings for schools, enabling them to redirect funds to other critical areas of education.
Durability and Longevity
LED lights are renowned for their durability and longevity. They have a significantly longer lifespan compared to conventional lights, which means less frequent replacement and reduced maintenance costs. This durability also minimises disruptions caused by light failure, providing a consistent, well-lit learning environment.
Improved Visibility and Reduced Eye Strain
With their superior colour rendering index (CRI), LED lights render colours more accurately, leading to improved visibility. This is particularly beneficial in educational settings, where activities often require distinguishing fine details and colours. LED lights also emit less glare than traditional lighting solutions, reducing eye strain and fatigue. This can lead to better concentration and increased comfort for both students and teachers.
Incorporating LED Lighting in Classrooms: Practical Considerations
When transitioning to LED lighting in classrooms, a few key factors need to be taken into account. Firstly, the lighting design should ensure an even distribution of light, preventing shadowy or overly bright spots that could distract or discomfort students. Secondly, the integration of dimming capabilities can provide flexibility, allowing educators to adjust the lighting level based on the task at hand. Finally, lighting controls can be used to take advantage of natural light, automatically dimming or turning off the LEDs when sufficient daylight is present.
Conclusion: The Bright Promise of LED Lighting in Education
As education systems continue to evolve, it’s imperative to keep sight of the physical factors that significantly impact learning, one of which is lighting. LED technology, with its myriad benefits, offers an innovative and effective way to enhance the quality of lighting in classrooms. By prioritising investments in such improvements, we can take a significant step towards creating an optimised learning environment that nurtures the educational success of future generations.
 David M. Kim, Realtor @ Village Properties
Photo Cred: David Palermo
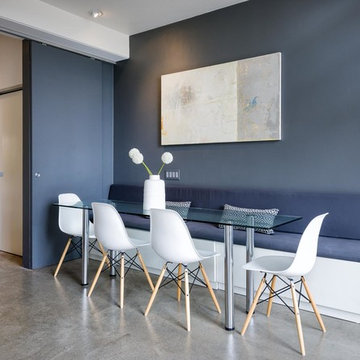
Inspiration for a contemporary home design remodel in Santa Barbara
Inspiration for a contemporary home design remodel in Santa Barbara

 Edible Earth Resources
Our original client at this property (we now care for it on behalf of its second owner) desired a garden that would produce significant amounts of essential oils that he could process in his own copper still.
As significant amounts of herbs must be processed in order to produce essential oil, this site’s primary obstacle was its lack of space. We designed a dense and stacked landscape in order to produce as much as possible.
With sidewalk beds narrower than 3 feet and significant slope, it was critical that we build retaining walls and import large amounts of compost to the site. This site was completed in 14 working days.
43