
Search results for "Simply apply" in Home Design Ideas
 Maverick City Builders
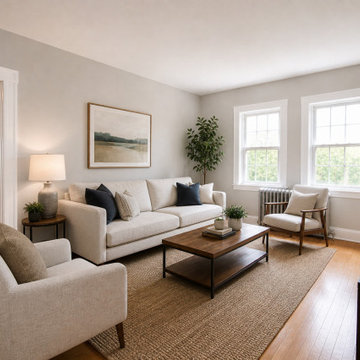
This whole home interior painting and trim upgrade project in Lancaster highlights how a professionally executed finish can completely transform the look, feel, and flow of an entire living space. The project began with a dated interior featuring worn paint, visible wall imperfections, and aging trim that no longer reflected a clean, modern aesthetic. While the home’s structure remained solid, the overall appearance felt dull and lacked the brightness, consistency, and refinement homeowners are looking for today.
Our team began with a comprehensive preparation process across the entire home, which is one of the most critical steps in achieving a high-quality and long-lasting paint finish. Every surface was carefully cleaned, patched, and sanded to create a smooth and uniform base. All floors, fixtures, and furnishings were fully protected using professional-grade coverings, and trim lines throughout the home were precisely taped to ensure sharp, clean edges. This level of preparation not only enhances the final appearance but also ensures durability and consistency from room to room.
As the project progressed, premium-quality paints were applied using a combination of rolling and precision cutting techniques to achieve a smooth, even finish across all wall and ceiling surfaces. The selected color palette focused on modern, neutral tones designed to maximize natural light and create a cohesive, open feel throughout the home. At the same time, all trim, baseboards, and interior details were upgraded with a crisp white finish, adding contrast, depth, and a polished look that ties every space together.
During the final stages, detailed touch-ups and trim refinements were completed in every room to achieve a flawless, professional-grade result. Each edge, corner, and transition was carefully inspected and perfected, ensuring consistency and craftsmanship at every level. The transformation is especially noticeable when comparing the before and after, as the home evolves from a worn, outdated environment into a bright, modern, and refreshed living space.
Once completed, the home was staged to highlight its full potential and demonstrate how a whole home painting upgrade can dramatically improve both aesthetics and functionality. The final result is a clean, cohesive, and welcoming interior that feels updated, spacious, and move-in ready.
Projects like this showcase the value of expert craftsmanship and attention to detail in full-home interior renovations. Whether you are preparing your property for sale or looking to modernize your living space, a whole home interior painting and trim upgrade remains one of the most effective ways to increase both visual appeal and overall property value in Lancaster, MA and surrounding areas.
Our team started with a detailed preparation process, which is one of the most critical steps in achieving a high-quality paint finish. All surfaces were carefully cleaned, patched, and sanded to ensure a smooth and even base. Floors and furniture were fully protected using professional-grade coverings, and trim areas were precisely taped to guarantee clean, sharp lines. This level of preparation ensures that the final result is not only visually appealing but also long-lasting.
As the painting phase progressed, high-quality paints were applied using a combination of rolling and cutting techniques to create a consistent, smooth finish across all wall surfaces. The color selection focused on modern, neutral tones that enhance natural light and create a more open, inviting atmosphere. At the same time, the trim and baseboards were upgraded with a crisp, clean white finish, adding contrast and definition throughout the space.
During the final stages, detailed touch-ups and trim work were completed to achieve a flawless result. Every corner, edge, and transition was carefully inspected and refined, ensuring a professional-grade finish that stands out. The transformation is most noticeable when comparing the before and after stages, where the room evolves from a dated and worn environment into a bright, modern living area.
The completed space was then staged to showcase its full potential, demonstrating how a simple upgrade like interior painting and trim work can dramatically improve both aesthetics and functionality. The result is a clean, polished, and welcoming environment that feels refreshed and ready for everyday living.
Projects like this demonstrate the impact of expert craftsmanship and attention to detail in interior renovations. Whether you are preparing your home for sale or simply looking to update your living space, professional painting and trim upgrades offer one of the most effective ways to enhance your home’s value and appearance.
 Tile Doctor Ltd
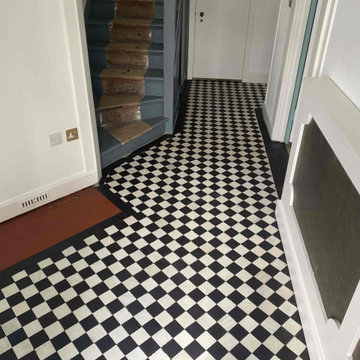
This client from North London had recently bought a property in Highgate N6 and during renovation had discovered an original Victorian tiled floor in the hallway. The floor was laid in a classic black and white diamond pattern but unfortunately a large section was missing and had been filled with concrete. Furthermore, most of the remaining floor had been covered in cement and glue.
I carried out a survey of the floor to determine the main issues and was then able to email over a quote later that day that included rebuilding the missing section of flooring. I suspect the floor had been excavated at some point in the past to install central heating and then rather than have the excavated section restored it was simply back filled and then levelled with a cement screed before finally gluing down a carpet on top.
Once the quote was accepted, I sourced replacement tiles from the Vintage Floor Tile company. Situated in Kent they are a reclamation yard that specialises in supplying original geometric and encaustic tiles including the major historical makers such as Minton and Craven Dunnill.
Armed with replacement tiles I started by removing the concrete that had been used to backfill the missing section and prepare a new surface for tiling with quick drying cement. When ready I was able to carefully build back the original pattern using the replacements. The tiles were secured with tile adhesive and once that had gone off, they were grouted.
The floor was left to set fully overnight and then the next day I was able to return and clean the whole floor using a strong dilution of Tile Doctor Remove and Go. As usual this was left to soak into the tiles for a good ten minutes before being scrubbed into the tiles using a black scrubbing pad. The Tile Doctor Remove and Go did a good job of cleaning the floor and the cleaning solution soon turned black with dirt during the scrubbing. The floor was rinsed with water and the soil extracted with a wet vacuum. After inspecting the floor any areas that needed further work were hand scrubbed and rinsed again until I was happy the floor was clean.
The last part of the cleaning process was to give the tiles an acid wash using Tile Doctor Acid Gel which further cleans the floor by removing old cement residue and grout haze. It also neutralises efflorescent salts in the tiles which are a common issue with floors of this age with no damp proof membrane. After another rinse and extraction, the floor was given a final rinse and then dried as much as possible using the wet vacuum.
I left the floor to dry out for a couple of days before returning to apply a protective sealer. Tile and Stone should be dry before sealing so I use a damp meter first to double check. All was well so to seal the tiles I proceeded to apply the first of what would be three coats of sealer. I used Tile Doctor Colour Grow for this, it works by impregnating the tile occupying the pores and thereby preventing dirt from becoming ingrained there. This product also enhances the black and white colour of the tiles and makes the floor much easier to clean.
Once done the floor was transformed and needless to say my customer was very pleased with the result. For the aftercare of Victorian Tiled floors, I recommend the use of a ph neural tile cleaner such as Tile Doctor Neutral Cleaner; most supermarket tile cleaners are simply too strong for use on sealed floors and can strip off the sealer prematurely.
Andrew Newstead
North London Tile Doctor
 MirrorMate
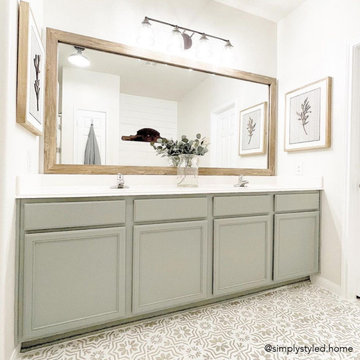
Simply apply a MirrorMate frame to your existing bathroom mirror in just minutes. The do-it-yourself frame kit is easy to install and ships to your door. It'll transform your builder's grade mirror and add quality, custom detailing to the room and is designed to cover the clips that hold your mirror. It also covers the de-silvering edge in the process. See all 65+ frames styles available and order samples to help pick the right look for your room. This room was finished with a Cherokee Barnwood frame.
Find the right local pro for your project
 MirrorMate
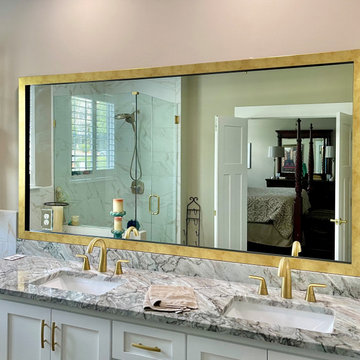
Simply apply a MirrorMate frame to your existing bathroom mirror in just minutes. The do-it-yourself frame kit is easy to install and ships to your door. It'll transform your builder's grade mirror and add quality, custom detailing to the room and is designed to cover the clips that hold your mirror. It also covers the de-silvering edge in the process. See all 65+ frames styles available and order samples to help pick the right look for your room. This bathroom was finished with a Broadway Designer Gold frame, applied to the mirror.
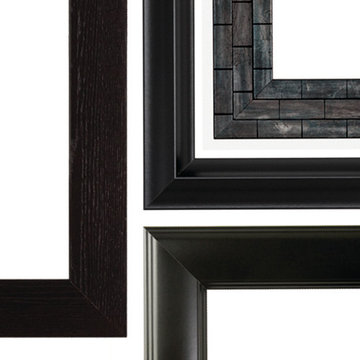 MirrorMate
Simply apply a MirrorMate frame to your existing bathroom mirror in just minutes. The do-it-yourself frame kit is easy to install and ships to your door. It'll transform your bath and is designed to cover the clips that hold your mirror. It also covers the de-silvering edge in the process. See all 65+ frames styles available and order samples to help pick the right look for your room.
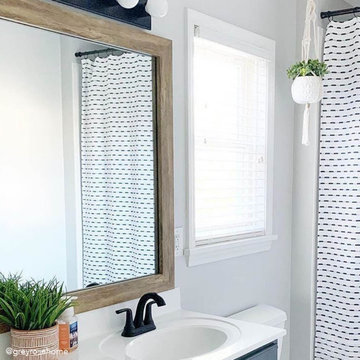 MirrorMate
Simply apply a MirrorMate frame to your existing bathroom mirror in just minutes. The do-it-yourself frame kit is easy to install and ships to your door. It'll transform your builder's grade mirror and add quality, custom detailing to the room and is designed to cover the clips that hold your mirror. It also covers the de-silvering edge in the process. See all 65+ frames styles available and order samples to help pick the right look for your room. This bathroom includes a Cherokee Old Vermont Grey frame.
 Simply Home Decorating
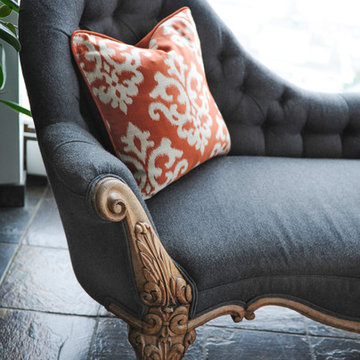
The homeowners of this condo sought our assistance when downsizing from a large family home on Howe Sound to a small urban condo in Lower Lonsdale, North Vancouver. They asked us to incorporate many of their precious antiques and art pieces into the new design. Our challenges here were twofold; first, how to deal with the unconventional curved floor plan with vast South facing windows that provide a 180 degree view of downtown Vancouver, and second, how to successfully merge an eclectic collection of antique pieces into a modern setting. We began by updating most of their artwork with new matting and framing. We created a gallery effect by grouping like artwork together and displaying larger pieces on the sections of wall between the windows, lighting them with black wall sconces for a graphic effect. We re-upholstered their antique seating with more contemporary fabrics choices - a gray flannel on their Victorian fainting couch and a fun orange chenille animal print on their Louis style chairs. We selected black as an accent colour for many of the accessories as well as the dining room wall to give the space a sophisticated modern edge. The new pieces that we added, including the sofa, coffee table and dining light fixture are mid century inspired, bridging the gap between old and new. White walls and understated wallpaper provide the perfect backdrop for the colourful mix of antique pieces. Interior Design by Lori Steeves, Simply Home Decorating. Photos by Tracey Ayton Photography

 Rebel Walls
Example of a large transitional master painted wood floor and white floor bedroom design in Gothenburg with multicolored walls and no fireplace
 LUX Design | Interior Design Build
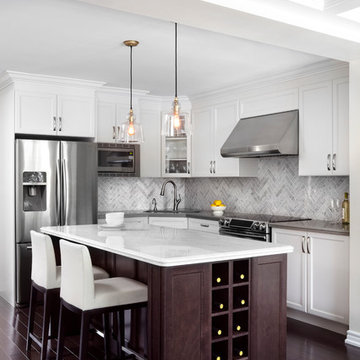
This white kitchen is grounded by the dark espresso island. Carrara marble island with wine storage on the side create a beautiful contrast to the white cabinets with the silestone grey countertops and herringbone backsplash tile. This kithchen renovation included the removal of a load bearing wall to open it up and make it feel bright and airy.
 Stone Selex
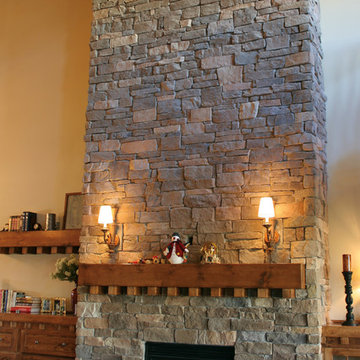
This ledgestone veneer provides the rustic appeal of an old cottage style fireplace. Equip with 90 degree corners this fireplace stone design add dimensional texture and style to this space.

 MirrorMate
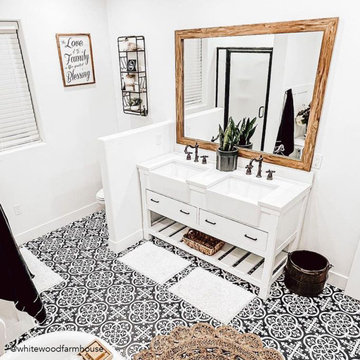
Simply apply a MirrorMate frame to your existing bathroom mirror in just minutes. The do-it-yourself frame kit is easy to install and ships to your door. It'll transform your builder's grade mirror and add quality, custom detailing to the room and is designed to cover the clips that hold your mirror. It also covers the de-silvering edge in the process. See all 65+ frames styles available and order samples to help pick the right look for your room. This bathroom was finished with a Cherokee Barnwood frame, simply applied to the existing mirror.
 MirrorMate
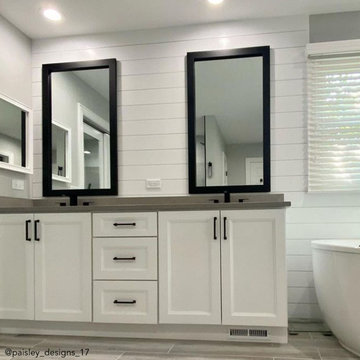
Simply apply a MirrorMate frame to your existing bathroom mirror in just minutes. The do-it-yourself frame kit is easy to install and ships to your door. It'll transform your builder's grade mirror and add quality, custom detailing to the room and is designed to cover the clips that hold your mirror. It also covers the de-silvering edge in the process. See all 65+ frames styles available and order samples to help pick the right look for your room. This bath was completed with a matching set of frames in Highline Slim Midnight Black, custom cut and simply applied to the existing mirrors.
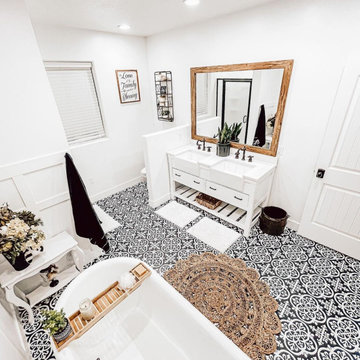 MirrorMate
Simply apply a MirrorMate frame to your existing bathroom mirror in just minutes. The do-it-yourself frame kit is easy to install and ships to your door. It'll transform your bath and is designed to cover the clips that hold your mirror. It also covers the de-silvering edge in the process. See all 65+ frames styles available and order samples to help pick the right look for your room.
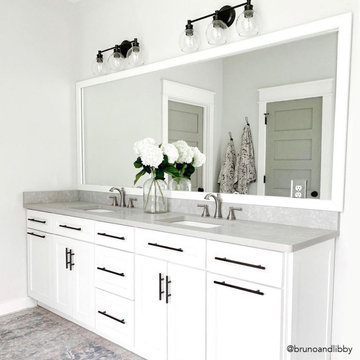 MirrorMate
Simply apply a MirrorMate frame to your existing bathroom mirror in just minutes. The do-it-yourself frame kit is easy to install and ships to your door. It'll transform your builder's grade mirror and add quality, custom detailing to the room and is designed to cover the clips that hold your mirror. It also covers the de-silvering edge in the process. See all 65+ frames styles available and order samples to help pick the right look for your room.
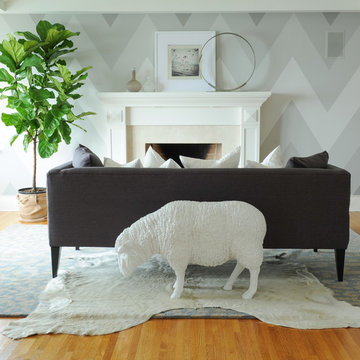
 PlaidFox Studio
Bedroom - large coastal master light wood floor and brown floor bedroom idea in Vancouver with gray walls, a standard fireplace and a stone fireplace
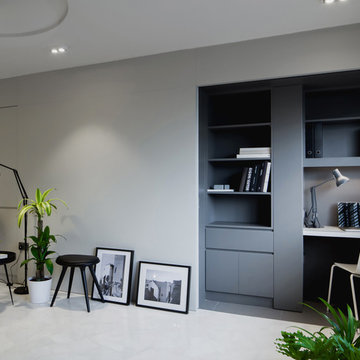
 Studio Wills + Architects
...a Study Nook deep in shadows. (Photography by Beton Brut).
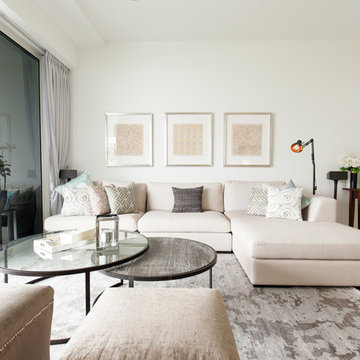
Trendy living room photo in Singapore
Trendy living room photo in Singapore
 MirrorMate
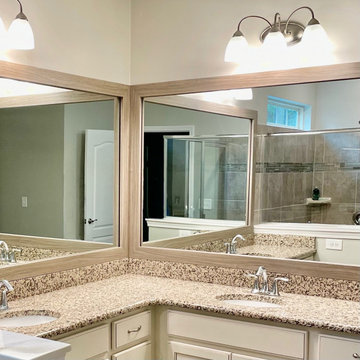
Simply apply a MirrorMate frame to your existing bathroom mirror in just minutes. The do-it-yourself frame kit is easy to install and ships to your door. It'll transform your bath and is designed to cover the clips that hold your mirror. It also covers the de-silvering edge in the process. See all 65+ frames styles available and order samples to help pick the right look for your room.
 MirrorMate
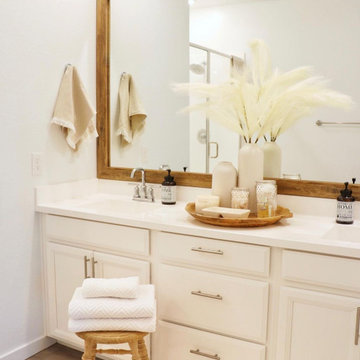
Simply apply a MirrorMate frame to your existing bathroom mirror in just minutes. The do-it-yourself frame kit is easy to install and ships to your door. It'll transform your bath and is designed to cover the clips that hold your mirror. It also covers the de-silvering edge in the process. See all 65+ frames styles available and order samples to help pick the right look for your room.
 MirrorMate
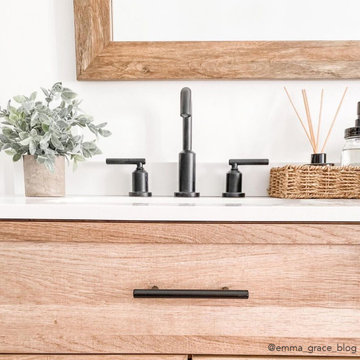
Simply apply a MirrorMate frame to your existing bathroom mirror in just minutes. The do-it-yourself frame kit is easy to install and ships to your door. It'll transform your builder's grade mirror and add quality, custom detailing to the room and is designed to cover the clips that hold your mirror. It also covers the de-silvering edge in the process. See all 65+ frames styles available and order samples to help pick the right look for your room. This rustic bathroom includes a Cherokee Barnwood frame from the popular Cherokee Rustic series.
8