
Search results for "Simply apply" in Home Design Ideas
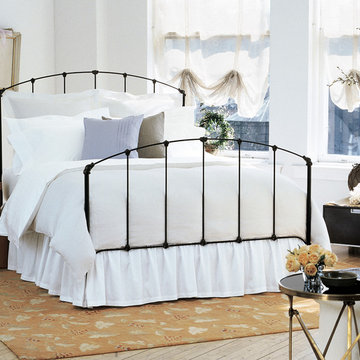
 Charles P. Rogers Beds & Mattresses
Hand-forged iron with decorative castings. Available as a bed or headboard only. Our Rutherford bed is still made by hand as it was over a century ago. Hand applied layered finish is black iron with gilded highlights.
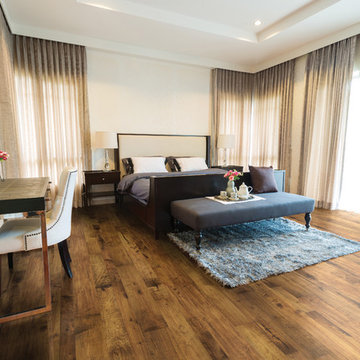
 Hallmark Floors
Hallmark Floors Monterey Cabana.
Creating a New demand for random width, by using tomorrows technology, has lead to the development of the Monterey Hardwood Collection. Available in maple and hickory, with a combined width of 4”, 6”, and 8” and random lengths up to 6’. Using proprietary Trueslice® technology, Hallmark is producing a very stable 2mm sliced face on a 1/2” thick (total) engineered plank making it simply savvy.
The slice face visuals mimic that of sawn face with a tighter, higher-end grain look than typical rotary cut products currently offered by the competition. Topped off with our incredibly durable Truemark Glaze Tek Poly Finish, Monterey is a definite game changer.
Simply Better…Discover Why.
www.hallmarkfloors.com
 MirrorMate
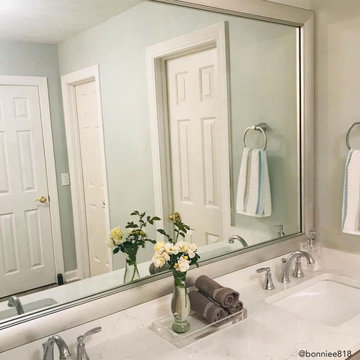
Simply apply a MirrorMate frame to your existing bathroom mirror in just minutes. The do-it-yourself frame kit is easy to install and ships to your door. It'll transform your builder's grade mirror and add quality, custom detailing to the room and is designed to cover the clips that hold your mirror. It also covers the de-silvering edge in the process. See all 65+ frames styles available and order samples to help pick the right look for your room. This bath was finished with a Solana Modern Silver frame, simply applied to the existing mirror.
Find the right local pro for your project
 MirrorMate
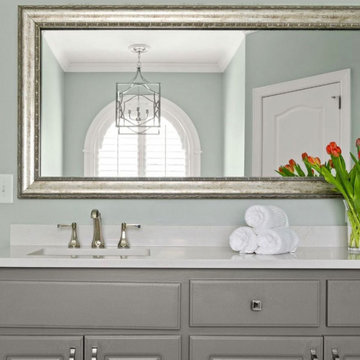
Simply apply a MirrorMate frame to your existing bathroom mirror in just minutes. The do-it-yourself frame kit is easy to install and ships to your door. It'll transform your builder's grade mirror and add quality, custom detailing to the room and is designed to cover the clips that hold your mirror. It also covers the de-silvering edge in the process. See all 65+ frames styles available and order samples to help pick the right look for your room. This bathroom was finished with a Grandezza Aged Silver frame, simply applied to the existing mirror.
 MirrorMate
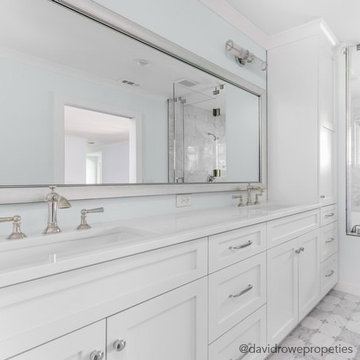
Simply apply a MirrorMate frame to your existing bathroom mirror in just minutes. The do-it-yourself frame kit is easy to install and ships to your door. It'll transform your builder's grade mirror and add quality, custom detailing to the room and is designed to cover the clips that hold your mirror. It also covers the de-silvering edge in the process. See all 65+ frames styles available and order samples to help pick the right look for your room. This bathroom was complete with a custom Solana Modern Silver frame, simply applied to the existing mirror.

 PlaidFox Studio
Inspiration for a transitional medium tone wood floor and brown floor dining room remodel in Other with yellow walls
 Simply Home Decorating
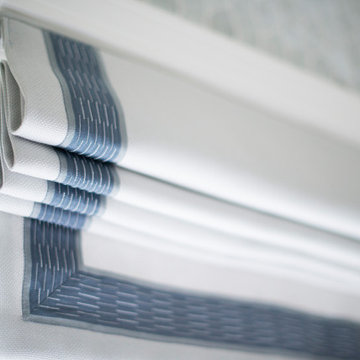
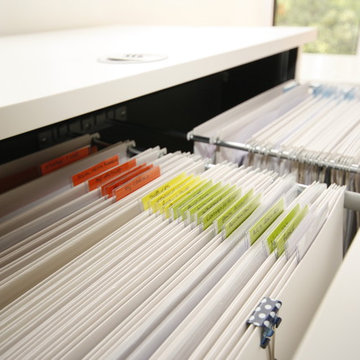
This spacious home in North Vancouver's Deep Cove community had been built and decorated just over 20 years ago and was in need of updating. Our clients who are empty nesters, spend much of their time in the kitchen and family room so we focused on these spaces keeping in mind that the more formal spaces on the main floor will follow in a few years time. For the most part the layout of their kitchen worked well for them so our role was to tweak the kitchen and family room furniture layout and to select updated finishes and furnishings. Since this home transformation is not happening all at once, we purposefully selected classic finishes, like antique brass hardware, that will tie in with the rest of the home's decor until it can be updated. The resulting refresh stays true to the original feel of the house while giving it a clean, updated look.

 Tile Doctor Ltd
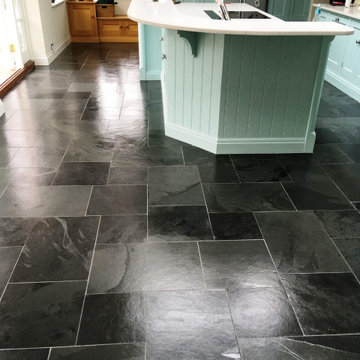
Our client had previously employed another company to tackle this large Slate floor in Walton on Thames but they hadn’t managed to remove the old sealer due to it being an old varnish seal. Varnish was used as a traditional way of sealing stone but can be damaged by scratching and it does little to improve the look of the stone. Varnish is also very difficult to break down which is a problem as it’s important to remove the old sealant before applying new, applying a new sealer onto Varnish simply wouldn’t work.
I visited the property to survey the floor and work out which combination of products and methods would work best and after some testing and I was able to confirm that not only could the old varnish be removed but once re-sealed with a modern sealer the slate would be transformed.
The client was over the moon to hear this news as they had thought there was nothing, they could do to improve the floor.
With a price and schedule agreed I returned to the property at a later date and started by tackling the varnish. The method I used was to apply Tile Doctor Remove and Go, let it soak into the floor for ten minutes and then work it in with a heavy rotary scrubbing machine fitted with a black pad. The soil was then rinsed with water and extracted off the floor with a wet vacuum.
The floor was then inspected, and each tile checked to ensure the varnish was completely gone, any stubborn areas were then spot treated and scrubbed by hand. Once I was satisfied, I set about giving the stone a deep clean by repeating the same process with Tile Doctor Pro-Clean. As before all the soil and cleaning products were then low pressure rinsed off the stone and vacuumed away. The floor was then left to dry overnight.
I returned the following day to apply a new modern sealer. First, I tested the floor was dry using the moisture meter. It was in the acceptable readings range, so I was able to start applying the sealer straight away.
For this floor I chose to apply Tile Doctor Seal and Go, it works really well on Slate tiles and as you can see from the photographs it completely transformed the appearance of the stone. Seal and Go is a water-based blend of acrylic polymers that provides both a stain resistant surface seal and a durable low-sheen finish, being water based it has the added advantage of not giving off any odour as it dries. The client had specified earlier that they didn’t want the floor to look shiny to the resultant silky appearance was the perfect solution. Thee coats were applied, and my client was very pleased with the finish.
Jonathan Oldham
South Middlesex Tile Doctor
 Windy City Painters
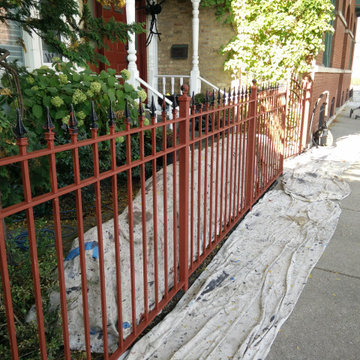
Iron Fence Painting in Wicker Park: A Windy City Painters Case Study
Iron fence painting in Wicker Park is one of the most requested exterior services Windy City Painters performs each season, and this recent project shows exactly why. Set behind an ornate 1890s greystone two-flat, the client's wrought iron fence had endured years of Chicago winters without professional attention. Rust had spread across the pickets, the original black enamel was flaking away in sheets, and the fence's structural hardware had begun to loosen at several joints.
As the trusted local expert for Chicago's North Side and Near West Side, Windy City Painters approached this project the same way we approach every iron fence painting job in Wicker Park: with a methodical, multi-step process designed to outlast Midwest weather rather than simply mask the damage.
The Process, Step by Step
Step 1 — Rust Removal and Surface Preparation. Our crew wire-brushed and mechanically ground every rusted section down to clean, stable metal. For pitted or heavily corroded areas, we applied a chemical rust converter to neutralize corrosion at the molecular level before any coating touched the surface. Furthermore, because this greystone was built well before 1978, Windy City Painters tested the existing paint layers for lead and followed strict containment protocols throughout the removal process.
Step 2 — Spot Repairs. Loose pickets were re-secured, small pits were filled, and hardware at the gate hinges was tightened. In contrast to a quick spray-paint refresh, this stage ensures the fence is structurally sound before a single drop of primer goes on.
Step 3 — Priming. A full coat of rust-inhibiting primer, engineered specifically for ferrous metal, was applied by brush to every surface — with particular attention to welds and joints where moisture tends to collect and restart the corrosion cycle.
Step 4 — Topcoat Application. Two finish coats of industrial-grade, direct-to-metal enamel were applied by brush and roller. This built a durable, uniform barrier in classic gloss black, the most popular finish among Wicker Park's historic properties. Finally, our team inspected every inch of the fence for thin spots or missed sections before calling the job complete.
Project Specs
Surface: Ornamental wrought iron fence, posts, and gate hardware
Products used: Rust-inhibiting DTM primer, chemical rust converter, industrial-grade direct-to-metal enamel
Coats applied: 1 primer coat, 2 finish coats
Finish: Gloss black
Timeline: Completed in under two days
Advice for Wicker Park Homeowners
Before starting a similar iron fence painting project in Wicker Park, homeowners should keep a few things in mind. Notably, never paint directly over active rust — trapped moisture underneath will cause the new coat to fail within a season. Additionally, always ask whether a contractor tests for lead paint on pre-1978 homes, since many Wicker Park greystones fall into that category. Meanwhile, hand brushwork matters: the intricate scrollwork common on Wicker Park ironwork requires careful, detailed application that spray equipment simply cannot replicate. Therefore, hiring a crew experienced specifically in historic Chicago ironwork, like Windy City Painters, makes a measurable difference in the finished result.
Windy City Painters also handles related exterior and interior work for Wicker Park properties, including interior painting, drywall and plaster repair, and additional metal refinishing for porches and railings.
Iron fence painting in Wicker Park protects one of the neighborhood's most defining architectural features while restoring curb appeal instantly. As a result, this greystone now has a fence that matches the quality of the home behind it — and will hold up through many more Chicago winters.
See more of our work and request a free estimate at www.windypainters.com.
Ready to transform your Wicker Park home? Contact Windy City Painters for a free estimate — visit www.windypainters.com today. Proudly serving Wicker Park, West Town, Lincoln Park, Roscoe Village, Lakeview, Ukrainian Village, River North, and all of Chicago.
 MirrorMate
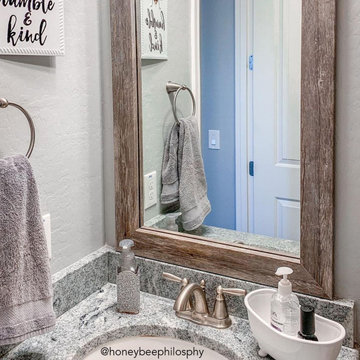
Simply apply a MirrorMate frame to your existing bathroom mirror in just minutes. The do-it-yourself frame kit is easy to install and ships to your door. It'll transform your builder's grade mirror and add quality, custom detailing to the room and is designed to cover the clips that hold your mirror. It also covers the de-silvering edge in the process. See all 65+ frames styles available and order samples to help pick the right look for your room. This bath was finished with a Cherokee Old Vermont Grey frame, simply applied to the existing mirror.
 MirrorMate
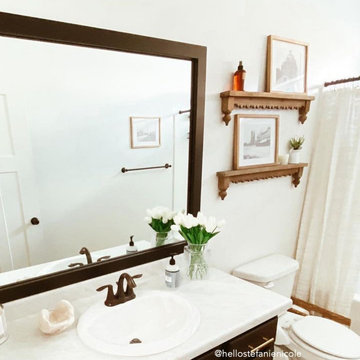
Simply apply a MirrorMate frame to your existing bathroom mirror in just minutes. The do-it-yourself frame kit is easy to install and ships to your door. It'll transform your builder's grade mirror and add quality, custom detailing to the room and is designed to cover the clips that hold your mirror. It also covers the de-silvering edge in the process. See all 65+ frames styles available and order samples to help pick the right look for your room. This space was finished with a Highline Slim Midnight Black frame, simply applied to the existing mirror.

 Argenta Painting and Restoration Ltd.
Exterior Strata Painting and Carpentry Repair Work in West Vancouver.
Another successful project completed by the Argenta Painting team.
For this project we had to come and do some carpentry repair work to remove and replace old rotted wood siding making sure the painting will last longer.
It sure was a drastic colour change but the end result is amazing, revitalizing this older looking strata and making blend into West Vancouver building trend by "simply" applying two coats of SuperPaint exterior flat paint to all wood siding and ConFlex elastomeric flat paint to the stucco walls.
Outstanding results that didn't break the strata's budget, outstanding results that you can achieve by simply hiring Argenta Painting so call or e-mail now to get a free estimate to have your home looking amazing for this summer.
P. (604) 763-7995
E. Info@ArgentaPainting.com
W. www.ArgentaPainting.com
 Live your home - Interior Design
Reinterpreted
"Every wall offers the opportunity to create beauty!", and so, in the interior design of this apartment, we were able to combine two of our favorite elements - wallpapers and wall trims - to achieve an elegant look. The vintage flower wallpaper is not simply applied to the wall but framed by wall trims, resulting in a particularly sophisticated appearance.
The chairs were mostly existing pieces, complemented by two design classics, creating a relaxed ensemble.
Diverse yet harmonious, just like the family who lives here.
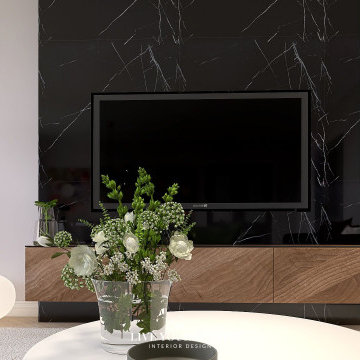
The sofa area was completely redesigned around an existing sofa. The television "disappears" visually into a dark marble-look wall. Two lounge chairs are now placed by the window for relaxation.
----
Altes neu interpretiert
“Jede Wand bietet die Möglichkeit, Schönes zu schaffen!” – und so konnten wir beim Interior Design in dieser in die Jahre gekommenen Wohnung in Wien gleich zwei unserer Lieblingselemente – nämlich Tapeten und Wandleisten – zu einem edlen Look kombinieren. Die Vintage-Flower-Tapete kommt nicht einfach an die Wand, sondern wird von Wandleisten eingerahmt. So ergibt sich ein besonders edler Look.
Die Stühle waren großteils Bestand, sie wurden durch zwei Design-Klassiker ergänzt und bilden nun ein lockeres Ensemble.
Unterschiedlich und harmonisch – wie die Familie, die hier wohnt.
Der Sofabereich wurde um ein vorhandenes Sofa komplett neu gestaltet. Der Fernseher “verschwindet” optisch in einer dunklen Wand in Marmoroptik. Beim Fenster befinden sich jetzt zwei Loungesessel zum Relaxen.
 Tile Doctor Ltd
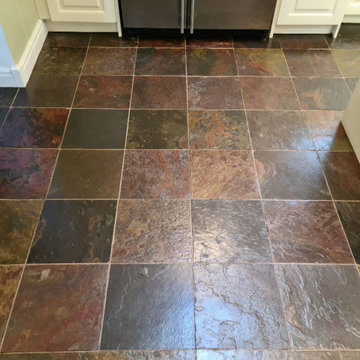
The pictures above are of a 12 metre squared Chinese slate floor in the kitchen of a property in Harrogate which had been laid ten years prior. You can see from the photographs that the grout had darkened and the slate itself had lost a lot of its character and colour.
Sealers typically last between three to five years so by now there was little protection left and so dirt had become trapped in the pores of the stone and grout making it difficult to keep clean. It was now overdue a deep clean and the application of a fresh seal.
I went over to survey the floor and provide a quote for stripping off what was left of the original sealer, cleaning the floor, and then resealing. I had been recommended by a previous customer so happy with my track record and the price I quoted, they asked me to do the work. They had received a quote from another firm which as it turned out was a lot more expensive than mine.
Given there was little sealer left to remove I decided to start by scrubbing the floor with a strong concentration of Tile Doctor Pro-Clean which was left to soak into the slate for ten minutes. Then I worked the solution in with a rotary machine fitted with a black scrubbing pad. Pro-Clean is a very versatile product that will strip the sealer off a floor when used in a strong dilution with water, it will also remove deep seated dirt too.
Due to the riven nature of the tiles however I found the black pad was struggling to reach into the crevices of the tile so to achieve the desired result I resorted to scrubbing the floor on my hands and knees with a scrubbing brush. Its important that the floor is as clean as it possibly can be before sealing otherwise you simply lock the dirt in and it will never look clean.
The floor was left to dry off overnight and I returned the next day to apply the new sealer. First, I checked to ensure that the floor was fully dry using a damp meter. The sealer would not cure properly if the floor damp and this can detract from the finished appearance.
I was happy with the readings, so I started to apply the first coat of Tile Doctor Seal and Go which I felt was the best product sealing Slate. The stone needed four coats; each one being left to dry before applying the next. Seal and Go is a stain resistant sealer which results in a low sheen silky appearance, it is good on surfaces such as the Chinese Slate which tend to be more porous and being water based it does not leave a smell as it dries.
The client was very happy with the result and mentioned to me that it had never looked that good even when new.
For aftercare cleaning I recommended the use of Tile Doctor Neutral Tile Cleaner which will keep the floor in the best condition. This is a pH neutral cleaner which can be used daily and won’t compromise the newly laid sealer like many of the stronger products you find in supermarkets.
Nigel Stoker
North West Yorkshire Tile Doctor
 Tile Doctor Ltd
If you’re looking to give your kitchen a face lift then read on as the following post details a very simple grout treatment that I think you will agree really refreshed the look of this kitchen in Edinburgh. In fact if you’re thinking of selling your property this quick but effective grout treatment will really make your tiles look a lot more appealing.
Normally to get grout clean we recommend a good scrub with Tile Doctor Pro-Clean however in some cases the staining cannot be removed completely and sometimes the customer simply wants a different grout colour. In either case whether its wall or floor grout the solution is to re-colour the grout with a Grout Colourant which are available in ten popular colours.
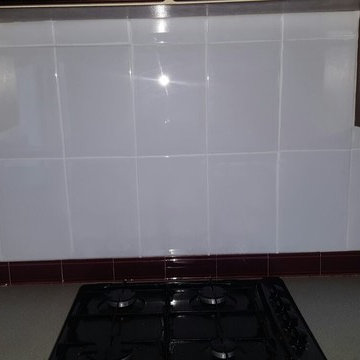
As you can see in the photographs above the Kitchen Wall Grout for this ceramic tiled kitchen in Edinburgh was a grey colour which looked dirty and was not very attractive.
The first step before grout colouring is to give the grout a good scrub with Tile Doctor Pro-Clean to get it as clean as possible before applying the colourant. The grout was then wiped and then allowed to dry ready for the colourant to be applied.
Once the grout was ready the colourant was run evenly along the grout line in thin coats so it didn’t run, working the brush backwards and forwards and taking care to minimise the amount of colourant left on the tile. One coat is usually sufficient but you may need to apply a number of coats if the original grout colour was quite dark.
I think you will agree from the photographs the white colourant gave the tiles a really fresh feel and gave the impression the tiling was recent. The colourant also adds a barrier over the grout protecting it from staining and making it easier to clean in future.
Thomas Wilson
Edinburgh Tile Doctor
 Tile Doctor Ltd
We received a request to renovate Victorian tiled hallway floor at a house in the London borough of Harlesden NW10. My client had modernised the heating system and this unfortunately required a section of the tiled flooring to be dug up so new pipework could be laid.
After speaking on the phone, I arranged an initial visit to the property so I could properly assess the work required and provide a price for restoring the floor. During my visit I could see there was another section of missing tiles at one of the door thresholds which would need attention. Except for the missing sections of floor I could see that the tiles themselves were in good condition for their age and would respond well to a deep clean and fresh seal.
I was confident on being able to source matching replacements for the missing tiles and reassured my client that we would be able not only repair the floor but also renovate it to a good standard. I gave them a price to do the restoration which they were happy to accept, and the work was booked.
After some research I managed to source replacement tiles from the Vintage Floor Tile Company in Kent; Victorian tiles are still popular so there a few companies that keep stock so we can usually find a match.
With the replacements in hand, work started by removing the cement and loose material from the missing sections of flooring and backfilling with self-levelling compound to bring the exposed base up to the right level for tiling.
The tiles were then cut to shape as required to match the existing patten and fixed into place with a quick setting adhesive and then grouted.
The floor was left to overnight to allow the adhesive to harden fully, and I returned the next day to deep clean the whole floor. To give the tiles are deep clean a strong dilution of Tile Doctor Remove and Go was sprayed onto the floor and left to soak in for ten minutes. It was then scrubbed into the floor using a rotary machine fitted with a with a black pad. This action lifted the dirt out of the tiles and the resulting slurry was removed with the wet vacuum.
It turned out that the pores of the tiles were holding a lot of dirt, so the process was repeated until I was satisfied. Due to the age of the property, there was no damp-proof membrane installed so I do try to minimise the amount of water I use in this process as there is always a chance of exacerbating any latent efflorescence issues.
Efflorescence occurs where moisture rises through the tile bringing with it salts from underneath the floor as it evaporates on the surface. This can lead to unsightly white marks appearing on the tile. To counteract this potential problem the cleaning was followed by an acid wash using Tile Doctor Acid Gel applied with a 100 then 200-grit pad, before finishing on a 400-grit burnishing pad. The floor was again rinsed with water after the application of each pad to remove the slurry and extracted with a wet vacuum.
Once I was satisfied the floor was as clean as possible, we left site and the area was left to dry over the weekend ready for application of a new sealer.
I returned on the Monday and started by taking a few moisture readings to check the floor was dry. The floor was in an acceptable range, so I applied the first of 4 coats of sealer. For this floor I chose Tile Doctor Seal and Go Extra which is specially formulated product that provides stain resistance with a hard wearing low-sheen finish.
This product is also breathable which is an important feature for old floors, anything that blocks moisture from rising through the tile will cause it to become trapped underneath where it will pool and eventually reach out to the walls and result in rising damp.
Once complete the floor looked brand new and I’m pleased to say with the deep clean and a fresh sealer applied it was impossible to tell the difference between the original and repaired sections of flooring.
For the aftercare of sealed Victorian tiled floors, I recommend Tile Doctor Neutral Cleaner, it’s a mild day to day cleaner with a neutral pH that won’t damage the sealer. Many of the tile cleaning products you find in supermarkets are simply too strong.
Andrew Newstead
North London Tile Doctor
 Tile Doctor Ltd
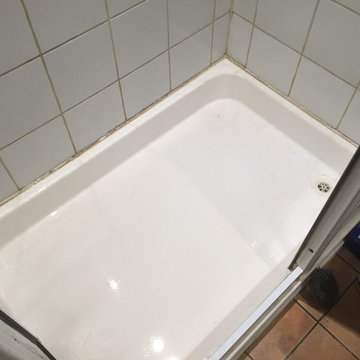
The photographs below are taken from a house in the old market town of Basingstoke which is now the largest town in Hampshire. I was asked to address a very severe case of Limescale build-up in a shower cubicle. The wall tiles were Ceramic and a shocking amount of Limescale had deposited itself on them and the shower tray over the years; the owners were going to have to replace everything if Tile Doctor could not come to the rescue!
The photos below really demonstrate the extent of the problem and needless to say the Gauntlet had been laid down and I was ready for a challenge!
My first task was to provide the Ceramic tiled walls with an initial clean. I did this by firstly mixing a diluted solution of the high alkaline cleaner known as Tile Doctor Pro Clean and then applying this on the tiles and leaving it to dwell for a while before scrubbing it in by hand in order to remove any surface dirt and scum. This was then washed off and I set my mind to the main task at hand: the Limescale removal.
To remove the Limescale it is necessary to apply an acidic product. However, there is an issue for homeowners that most products readily available on the market come in a liquid form, which of course simply drips down the tile, and therefore does not work to the best of its abilities. Fortunately, Tile Doctor recently launched a new product by the name of Acid Gel. Since it’s in a gel form it stays put on the surface and does not evaporate or dry out too quickly. This allows it time to break down the Limescale and other difficult stains.
Acid Gel was thus applied to the affected areas and left to dwell for a short while. I then scrubbed it deeply into the tile and grout lines, and follow up with an application of steam to tackle the stubborn areas and help the Acid Gel to tackle the Limescale.
The results were absolutely fantastic, and even the shower tray – which was in a very poor state indeed – came up very clean. Needless to say, my client was very pleased that they now do not have to replace the shower!
Charles Okwechime
Hampshire Tile Doctor
 CO Interiors
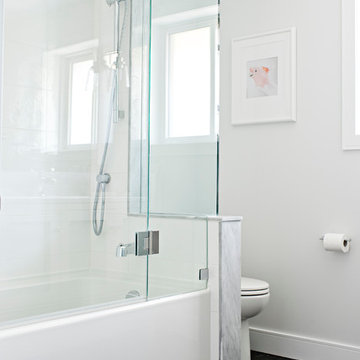
Sometimes relocating plumbing is simply not possible, whether it’s due to space or budget or simply obstacles within a wall. In this space, two of the reasons applied. Our challenge was not only to make the space feel brighter but larger as well. Our solution was to partially remove a section of the wall that housed the plumbing in order to visually open up the space versus having a full section of tiled wall divide the space up. This also created a unique architectural feature which merged two glass panels into an open like or invisible corner.
Photographer: Mike Chajecki
 Tile Doctor Ltd
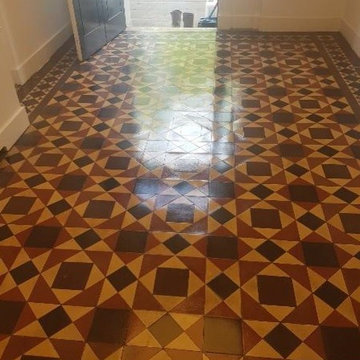
These are photos of a Victorian tiled floor we renovated at the new Scottish head office of the Peoples Postcode Lottery in the centre of Edinburgh City where the building was going through a multi million pound refurbishment. Edinburgh has a lot of Georgian and Victorian architecture, much of which is listed and as a result many still have original Victorian tiled flooring.
I’ve not really looked at the Postcode Lottery until now but put simply you give the lottery £10 a month and your postcode is your winning ticket number, there are prize draws every day and if your postcode comes up every one in the system with that postcode wins; they also give 31% to charity which is impressive.
You can see from the photograph that the floor was in good physical condition but was looking tired and dull. This is not unusual for Victorian tiles as once the sealer wears down dirt can penetrate into the pores of the tile causing it to lose its appearance.
On the first day we set about stripping the floor of what remained of the old sealant using a strong dilution of Tile Doctor Pro-Clean which is an industrial strength alkaline tile and grout cleaning product that is safe to use on Tile and Stone. The product is applied to the floor, left to soak in for ten minutes and the scrubbed into the tile using a black scrubbing pad fitted to a rotary bonnet machine. The floor was then rinsed and the now soiled cleaning solution extracted using a wet vacuum.
The process was repeated several times until we were happy the floor was clean and free of sealer and then given a final rinse with water. Before leaving for the day the floor was dried as much as possible using the wet vacuum to extract as much moisture as possible.
On the second day our first task was to check the floor with a damp meter in several places to ensure the tiles had dried off overnight. All was well and we began the process of sealing the floor with a Tile Doctor Seal and Go. This is a topical sealer which provides a high-quality low-sheen finish and protection against ingrained dirt and stains.
Victorian tiles are quite porous and five coats were needed to fully seal the floor. This took some time to complete as you have to wait until the first coat is dry before applying the next however it was well worth the effort as the floor looked fantastic afterwards.
Thomas Wilson
Edinburgh Tile Doctor
7