
Search results for "Specifications certificate" in Home Design Ideas

 Luxier
Enjoy the ultimate relaxation with the Luxier FSB-006 freestanding bathtub. Made for deep soaking and relaxation, you can stretch out and unwind in full comfort after a long day of hard work. This versatile bathtub complements a wide range of bathroom styles and becomes a luxurious centerpiece of your bathing area. All Luxier freestanding bath tubs are backed by one year US warranty and customer support.
Features:
- Stunning stylish European inspired design
- Freestanding design creates a striking focal point in your bathing area
- Offers 15 inch depth deep soaking experience
- Made with durable acrylic and fiberglass composite
- Adjustable legs for leveling
- 74 gallon capacity
- Overflow protection for optimal safety
- One year US warranty and customer support
- UPC, cUPC Certified
Specifications:
- Part Number: BT-FSB-006
- Length: 66.93"
- Width: 31.5"
- Height: 23.23"
- Material: Acrylic and fiberglass composite
- Color: White
- Overflow: Yes
- Drain: Chrome Pop up drain stopper
- Certification: UPC, cUPC Certified
- Drainage: Flexible drainage pipe
What’s included:
- FSB-006 Freestanding Bathtub
- Flexible drainage pipe

 Chapman Design Group, Inc.
This rustic style home on Hartwell Lake was designed and built for the owners to enjoy with family and friends during their active weekend lifestyle. The home was built on a narrow, deep lot that was semi-level on the roadside and steep on the lakeside. The back half of the lot heavily wooded with mature oak and poplar trees reducing the harsh sun’s heat gain on the home.
The exterior utilizes fiber cement cedar shake and lap siding complimented by deep brown colors for the windows, soffit, trim and the large square columns. A nice balance of natural earth toned stacked stone rounds out the exterior materials completing the rustic casual lake living.
The home 5400 SF is designed and built on thee levels each having a primary focus. The main level creates primary daily living for the owners. This level features an open plan with an entry, stair, dining, kitchen and living areas leading to a large lakeside screened porch. A master suite is privately tucked off its own hallway and allowing it to enjoy the lakeside as well with its own private deck. On the opposite side are two bedrooms, a study and a shared bathroom for each to utilize. An open carport for two vehicles was created with the motor court and connects to the mudroom/utility room giving the owners direct entry into their home.
The upper level is for the grand children with an oversized bedroom, bathroom and loft area for play.
The lower level is the considered the party level. Its primary feature is an elevated stage for the owner’s band opened to a large seating area, dining and kitchen for viewing and listening with direct access to another screened porch. Flanking each side is a theater and two additional bedrooms and bathrooms.
Energy Efficient features include:
• The majority of the lower level sunk into the site below grade
• 6” thick walls utilizing advanced framing techniques
• Foil covered roof sheathing
• Extensive use of blown in cellulous
• All windows & doors are double paned low E argon filed glass
• Tank-less water heaters
• Three separate high efficiency HVAC units with programmable thermostats and a fresh air ERV.
Lastly the owner requested we make every effort to sound proof the home. Many materials and techniques gave a duel purpose and added to the energy efficiency.
These items include:
• 2x6 walls with staggered studs
• Extensive use if rock wool acoustic batting
• Tempered glass in all exterior doors and windows
• ¼ thick Mass Loaded Vinyl (MLV) was installed on the top and bottom of the floor trusses and on all lower level walls.
The combination of the design and detailing utilizing these specific materials enabled us to achieve a 5 Star Plus Energy Star Certification with a HERS Index Score of 50. This home received a the 2015 Pinnacle Award from the SC Home Builders Association for the “Best Achievement in Energy Efficiency” sponsored by the SC Department Commerce.

 User
UserPhoto: Ten Ten Creative
Wet bar - transitional single-wall dark wood floor and brown floor wet bar idea in Dallas with shaker cabinets, black cabinets, black backsplash, subway tile backsplash and gray countertops
Wet bar - transitional single-wall dark wood floor and brown floor wet bar idea in Dallas with shaker cabinets, black cabinets, black backsplash, subway tile backsplash and gray countertops
Find the right local pro for your project

 Proline Range Hoods
Beautiful high contrast kitchen featuring our Contemporary Proline PLFW 750 Professional Stainless Steel Wall Mounted Range Hood. The Red Walls, Dark Wood Cabinets, Island Pendant Lighting, and Modern Clean Lines make this kitchen really stand out.
PLFW 750 Range Hood Product Details:
This is our Super Low Profile, Sleek, All Stainless, Contemporary Design, Wall Mounted Range Hood. This attractive and versatile range hood looks and works great in any size. Elegant LCD touch controls, with time delay and 6 speeds from 300 cfm up to 1100 cfm, this hood has the power to handle the largest cooktops efficiently and quietly. Easy to install and super low maintenance, this wall mounted range hood is available in 5 sizes (36", 42", 48", 54" and 60") and is one of the very few large format hoods available as a ductless model.
Stainless Baffle Filters that are easy to remove and clean, and the quietest 300 CFM setting in the industry. (Based on comparable size and local blower capacity). And power when you need it with 1100 CFM total capacity.
This Range Hood comes with dual blowers and fan completely installed and factory tested.
Specifications
110v 60hz (USA and Canada Certification)
Electronic LCD 6 Speed Switch, w/Time Delay Controls
6 Speed, 1100 Max. CFM Dual Blower
2 x LED lights
Stainless Baffle Filters
Carbon filters available for ductless operation
Seamless Design
Easy to Clean and Maintain
Brushed #430 Stainless Steel
2 x 6" Air Outlets
 Proline Range Hoods
Beautiful high contrast kitchen featuring our Contemporary Proline PLFW 750 Professional Stainless Steel Wall Mounted Range Hood. The Red Walls, Dark Wood Cabinets, Island Pendant Lighting, and Modern Clean Lines make this kitchen really stand out.
PLFW 750 Range Hood Product Details:
This is our Super Low Profile, Sleek, All Stainless, Contemporary Design, Wall Mounted Range Hood. This attractive and versatile range hood looks and works great in any size. Elegant LCD touch controls, with time delay and 6 speeds from 300 cfm up to 1100 cfm, this hood has the power to handle the largest cooktops efficiently and quietly. Easy to install and super low maintenance, this wall mounted range hood is available in 5 sizes (36", 42", 48", 54" and 60") and is one of the very few large format hoods available as a ductless model.
Stainless Baffle Filters that are easy to remove and clean, and the quietest 300 CFM setting in the industry. (Based on comparable size and local blower capacity). And power when you need it with 1100 CFM total capacity.
This Range Hood comes with dual blowers and fan completely installed and factory tested.
Specifications
110v 60hz (USA and Canada Certification)
Electronic LCD 6 Speed Switch, w/Time Delay Controls
6 Speed, 1100 Max. CFM Dual Blower
2 x LED lights
Stainless Baffle Filters
Carbon filters available for ductless operation
Seamless Design
Easy to Clean and Maintain
Brushed #430 Stainless Steel
2 x 6" Air Outlets

 Talon Construction Inc.
Designing and building a kitchen addition is a complex process that involves multiple steps and considerations. Here is a general outline to help you get started on your kitchen addition project:
Define Your Goals and Budget:
• Determine the purpose of the kitchen addition. Is it for more cooking space, a dining area, or a combination of both?
• Establish a realistic budget for your project. Consider all costs, including construction, permits, materials, and furnishings.
Hire a Design Professional:
• Seek the services of a design build company who specializes in kitchen additions.
• Discuss your vision, needs, and budget with the design professional to create a design concept.
Site Evaluation:
• Assess the existing space and structural condition of your home to ensure it can support the addition.
• Consider factors like zoning regulations, setbacks, and building codes.
Design Development:
• Collaborate with your design professional to refine the concept, including the layout, size, and architectural style.
• Choose materials, finishes, and fixtures that fit your design and budget.
Obtain Permits:
• Consult with your local design build contractor to determine the necessary permits and approvals.
• Prepare and submit all required documents, including architectural drawings and engineering plans.
Create Construction Documents:
• Work with your design build professional to develop detailed construction drawings and specifications.
• These documents will serve as a guide for contractors during construction.
Hire a design build contractor:
• Check references, credentials, and licenses before selecting a contractor.
• Sign a detailed contract that outlines the scope of work, timeline, and payment schedule.
Construction Phase:
• Demolition: If needed, remove any existing structures or walls.
• Foundation: Construct the foundation for the addition.
• Framing: Build the structural framework of the addition.
• Plumbing, Electrical, and HVAC: Install or update utilities as required.
• Insulation: Ensure proper insulation for energy efficiency.
• Drywall and Finish Work: Complete the walls and ceilings.
• Flooring and Cabinetry: Install flooring and kitchen cabinets.
• Appliances and Fixtures: Add appliances, plumbing fixtures, and lighting.
• Paint and Finish: Apply paint and finishes to achieve the desired look.
• Final Inspection: Schedule inspections to ensure compliance with building codes.
Final Inspections and Approvals:
• Arrange for final inspections to ensure the addition meets all safety and code requirements.
• Obtain any necessary certificates of occupancy or compliance.
Move In and Enjoy:
• Once all inspections and approvals are received, you can move into your new kitchen addition and start enjoying it.
Remember that every kitchen addition project is unique, so adapt this outline to your specific needs and circumstances. Consulting with professionals and obtaining the required permits and inspections is crucial to a successful and safe project.
 Talon Construction Inc.
Designing and building a kitchen addition is a complex process that involves multiple steps and considerations. Here is a general outline to help you get started on your kitchen addition project:
Define Your Goals and Budget:
• Determine the purpose of the kitchen addition. Is it for more cooking space, a dining area, or a combination of both?
• Establish a realistic budget for your project. Consider all costs, including construction, permits, materials, and furnishings.
Hire a Design Professional:
• Seek the services of a design build company who specializes in kitchen additions.
• Discuss your vision, needs, and budget with the design professional to create a design concept.
Site Evaluation:
• Assess the existing space and structural condition of your home to ensure it can support the addition.
• Consider factors like zoning regulations, setbacks, and building codes.
Design Development:
• Collaborate with your design professional to refine the concept, including the layout, size, and architectural style.
• Choose materials, finishes, and fixtures that fit your design and budget.
Obtain Permits:
• Consult with your local design build contractor to determine the necessary permits and approvals.
• Prepare and submit all required documents, including architectural drawings and engineering plans.
Create Construction Documents:
• Work with your design build professional to develop detailed construction drawings and specifications.
• These documents will serve as a guide for contractors during construction.
Hire a design build contractor:
• Check references, credentials, and licenses before selecting a contractor.
• Sign a detailed contract that outlines the scope of work, timeline, and payment schedule.
Construction Phase:
• Demolition: If needed, remove any existing structures or walls.
• Foundation: Construct the foundation for the addition.
• Framing: Build the structural framework of the addition.
• Plumbing, Electrical, and HVAC: Install or update utilities as required.
• Insulation: Ensure proper insulation for energy efficiency.
• Drywall and Finish Work: Complete the walls and ceilings.
• Flooring and Cabinetry: Install flooring and kitchen cabinets.
• Appliances and Fixtures: Add appliances, plumbing fixtures, and lighting.
• Paint and Finish: Apply paint and finishes to achieve the desired look.
• Final Inspection: Schedule inspections to ensure compliance with building codes.
Final Inspections and Approvals:
• Arrange for final inspections to ensure the addition meets all safety and code requirements.
• Obtain any necessary certificates of occupancy or compliance.
Move In and Enjoy:
• Once all inspections and approvals are received, you can move into your new kitchen addition and start enjoying it.
Remember that every kitchen addition project is unique, so adapt this outline to your specific needs and circumstances. Consulting with professionals and obtaining the required permits and inspections is crucial to a successful and safe project.
 Talon Construction Inc.
Designing and building a kitchen addition is a complex process that involves multiple steps and considerations. Here is a general outline to help you get started on your kitchen addition project:
Define Your Goals and Budget:
• Determine the purpose of the kitchen addition. Is it for more cooking space, a dining area, or a combination of both?
• Establish a realistic budget for your project. Consider all costs, including construction, permits, materials, and furnishings.
Hire a Design Professional:
• Seek the services of a design build company who specializes in kitchen additions.
• Discuss your vision, needs, and budget with the design professional to create a design concept.
Site Evaluation:
• Assess the existing space and structural condition of your home to ensure it can support the addition.
• Consider factors like zoning regulations, setbacks, and building codes.
Design Development:
• Collaborate with your design professional to refine the concept, including the layout, size, and architectural style.
• Choose materials, finishes, and fixtures that fit your design and budget.
Obtain Permits:
• Consult with your local design build contractor to determine the necessary permits and approvals.
• Prepare and submit all required documents, including architectural drawings and engineering plans.
Create Construction Documents:
• Work with your design build professional to develop detailed construction drawings and specifications.
• These documents will serve as a guide for contractors during construction.
Hire a design build contractor:
• Check references, credentials, and licenses before selecting a contractor.
• Sign a detailed contract that outlines the scope of work, timeline, and payment schedule.
Construction Phase:
• Demolition: If needed, remove any existing structures or walls.
• Foundation: Construct the foundation for the addition.
• Framing: Build the structural framework of the addition.
• Plumbing, Electrical, and HVAC: Install or update utilities as required.
• Insulation: Ensure proper insulation for energy efficiency.
• Drywall and Finish Work: Complete the walls and ceilings.
• Flooring and Cabinetry: Install flooring and kitchen cabinets.
• Appliances and Fixtures: Add appliances, plumbing fixtures, and lighting.
• Paint and Finish: Apply paint and finishes to achieve the desired look.
• Final Inspection: Schedule inspections to ensure compliance with building codes.
Final Inspections and Approvals:
• Arrange for final inspections to ensure the addition meets all safety and code requirements.
• Obtain any necessary certificates of occupancy or compliance.
Move In and Enjoy:
• Once all inspections and approvals are received, you can move into your new kitchen addition and start enjoying it.
Remember that every kitchen addition project is unique, so adapt this outline to your specific needs and circumstances. Consulting with professionals and obtaining the required permits and inspections is crucial to a successful and safe project.
 Talon Construction Inc.
Designing and building a kitchen addition is a complex process that involves multiple steps and considerations. Here is a general outline to help you get started on your kitchen addition project:
Define Your Goals and Budget:
• Determine the purpose of the kitchen addition. Is it for more cooking space, a dining area, or a combination of both?
• Establish a realistic budget for your project. Consider all costs, including construction, permits, materials, and furnishings.
Hire a Design Professional:
• Seek the services of a design build company who specializes in kitchen additions.
• Discuss your vision, needs, and budget with the design professional to create a design concept.
Site Evaluation:
• Assess the existing space and structural condition of your home to ensure it can support the addition.
• Consider factors like zoning regulations, setbacks, and building codes.
Design Development:
• Collaborate with your design professional to refine the concept, including the layout, size, and architectural style.
• Choose materials, finishes, and fixtures that fit your design and budget.
Obtain Permits:
• Consult with your local design build contractor to determine the necessary permits and approvals.
• Prepare and submit all required documents, including architectural drawings and engineering plans.
Create Construction Documents:
• Work with your design build professional to develop detailed construction drawings and specifications.
• These documents will serve as a guide for contractors during construction.
Hire a design build contractor:
• Check references, credentials, and licenses before selecting a contractor.
• Sign a detailed contract that outlines the scope of work, timeline, and payment schedule.
Construction Phase:
• Demolition: If needed, remove any existing structures or walls.
• Foundation: Construct the foundation for the addition.
• Framing: Build the structural framework of the addition.
• Plumbing, Electrical, and HVAC: Install or update utilities as required.
• Insulation: Ensure proper insulation for energy efficiency.
• Drywall and Finish Work: Complete the walls and ceilings.
• Flooring and Cabinetry: Install flooring and kitchen cabinets.
• Appliances and Fixtures: Add appliances, plumbing fixtures, and lighting.
• Paint and Finish: Apply paint and finishes to achieve the desired look.
• Final Inspection: Schedule inspections to ensure compliance with building codes.
Final Inspections and Approvals:
• Arrange for final inspections to ensure the addition meets all safety and code requirements.
• Obtain any necessary certificates of occupancy or compliance.
Move In and Enjoy:
• Once all inspections and approvals are received, you can move into your new kitchen addition and start enjoying it.
Remember that every kitchen addition project is unique, so adapt this outline to your specific needs and circumstances. Consulting with professionals and obtaining the required permits and inspections is crucial to a successful and safe project.
 Talon Construction Inc.
Designing and building a kitchen addition is a complex process that involves multiple steps and considerations. Here is a general outline to help you get started on your kitchen addition project:
Define Your Goals and Budget:
• Determine the purpose of the kitchen addition. Is it for more cooking space, a dining area, or a combination of both?
• Establish a realistic budget for your project. Consider all costs, including construction, permits, materials, and furnishings.
Hire a Design Professional:
• Seek the services of a design build company who specializes in kitchen additions.
• Discuss your vision, needs, and budget with the design professional to create a design concept.
Site Evaluation:
• Assess the existing space and structural condition of your home to ensure it can support the addition.
• Consider factors like zoning regulations, setbacks, and building codes.
Design Development:
• Collaborate with your design professional to refine the concept, including the layout, size, and architectural style.
• Choose materials, finishes, and fixtures that fit your design and budget.
Obtain Permits:
• Consult with your local design build contractor to determine the necessary permits and approvals.
• Prepare and submit all required documents, including architectural drawings and engineering plans.
Create Construction Documents:
• Work with your design build professional to develop detailed construction drawings and specifications.
• These documents will serve as a guide for contractors during construction.
Hire a design build contractor:
• Check references, credentials, and licenses before selecting a contractor.
• Sign a detailed contract that outlines the scope of work, timeline, and payment schedule.
Construction Phase:
• Demolition: If needed, remove any existing structures or walls.
• Foundation: Construct the foundation for the addition.
• Framing: Build the structural framework of the addition.
• Plumbing, Electrical, and HVAC: Install or update utilities as required.
• Insulation: Ensure proper insulation for energy efficiency.
• Drywall and Finish Work: Complete the walls and ceilings.
• Flooring and Cabinetry: Install flooring and kitchen cabinets.
• Appliances and Fixtures: Add appliances, plumbing fixtures, and lighting.
• Paint and Finish: Apply paint and finishes to achieve the desired look.
• Final Inspection: Schedule inspections to ensure compliance with building codes.
Final Inspections and Approvals:
• Arrange for final inspections to ensure the addition meets all safety and code requirements.
• Obtain any necessary certificates of occupancy or compliance.
Move In and Enjoy:
• Once all inspections and approvals are received, you can move into your new kitchen addition and start enjoying it.
Remember that every kitchen addition project is unique, so adapt this outline to your specific needs and circumstances. Consulting with professionals and obtaining the required permits and inspections is crucial to a successful and safe project.
 Talon Construction Inc.
Designing and building a kitchen addition is a complex process that involves multiple steps and considerations. Here is a general outline to help you get started on your kitchen addition project:
Define Your Goals and Budget:
• Determine the purpose of the kitchen addition. Is it for more cooking space, a dining area, or a combination of both?
• Establish a realistic budget for your project. Consider all costs, including construction, permits, materials, and furnishings.
Hire a Design Professional:
• Seek the services of a design build company who specializes in kitchen additions.
• Discuss your vision, needs, and budget with the design professional to create a design concept.
Site Evaluation:
• Assess the existing space and structural condition of your home to ensure it can support the addition.
• Consider factors like zoning regulations, setbacks, and building codes.
Design Development:
• Collaborate with your design professional to refine the concept, including the layout, size, and architectural style.
• Choose materials, finishes, and fixtures that fit your design and budget.
Obtain Permits:
• Consult with your local design build contractor to determine the necessary permits and approvals.
• Prepare and submit all required documents, including architectural drawings and engineering plans.
Create Construction Documents:
• Work with your design build professional to develop detailed construction drawings and specifications.
• These documents will serve as a guide for contractors during construction.
Hire a design build contractor:
• Check references, credentials, and licenses before selecting a contractor.
• Sign a detailed contract that outlines the scope of work, timeline, and payment schedule.
Construction Phase:
• Demolition: If needed, remove any existing structures or walls.
• Foundation: Construct the foundation for the addition.
• Framing: Build the structural framework of the addition.
• Plumbing, Electrical, and HVAC: Install or update utilities as required.
• Insulation: Ensure proper insulation for energy efficiency.
• Drywall and Finish Work: Complete the walls and ceilings.
• Flooring and Cabinetry: Install flooring and kitchen cabinets.
• Appliances and Fixtures: Add appliances, plumbing fixtures, and lighting.
• Paint and Finish: Apply paint and finishes to achieve the desired look.
• Final Inspection: Schedule inspections to ensure compliance with building codes.
Final Inspections and Approvals:
• Arrange for final inspections to ensure the addition meets all safety and code requirements.
• Obtain any necessary certificates of occupancy or compliance.
Move In and Enjoy:
• Once all inspections and approvals are received, you can move into your new kitchen addition and start enjoying it.
Remember that every kitchen addition project is unique, so adapt this outline to your specific needs and circumstances. Consulting with professionals and obtaining the required permits and inspections is crucial to a successful and safe project.
 Talon Construction Inc.
Designing and building a kitchen addition is a complex process that involves multiple steps and considerations. Here is a general outline to help you get started on your kitchen addition project:
Define Your Goals and Budget:
• Determine the purpose of the kitchen addition. Is it for more cooking space, a dining area, or a combination of both?
• Establish a realistic budget for your project. Consider all costs, including construction, permits, materials, and furnishings.
Hire a Design Professional:
• Seek the services of a design build company who specializes in kitchen additions.
• Discuss your vision, needs, and budget with the design professional to create a design concept.
Site Evaluation:
• Assess the existing space and structural condition of your home to ensure it can support the addition.
• Consider factors like zoning regulations, setbacks, and building codes.
Design Development:
• Collaborate with your design professional to refine the concept, including the layout, size, and architectural style.
• Choose materials, finishes, and fixtures that fit your design and budget.
Obtain Permits:
• Consult with your local design build contractor to determine the necessary permits and approvals.
• Prepare and submit all required documents, including architectural drawings and engineering plans.
Create Construction Documents:
• Work with your design build professional to develop detailed construction drawings and specifications.
• These documents will serve as a guide for contractors during construction.
Hire a design build contractor:
• Check references, credentials, and licenses before selecting a contractor.
• Sign a detailed contract that outlines the scope of work, timeline, and payment schedule.
Construction Phase:
• Demolition: If needed, remove any existing structures or walls.
• Foundation: Construct the foundation for the addition.
• Framing: Build the structural framework of the addition.
• Plumbing, Electrical, and HVAC: Install or update utilities as required.
• Insulation: Ensure proper insulation for energy efficiency.
• Drywall and Finish Work: Complete the walls and ceilings.
• Flooring and Cabinetry: Install flooring and kitchen cabinets.
• Appliances and Fixtures: Add appliances, plumbing fixtures, and lighting.
• Paint and Finish: Apply paint and finishes to achieve the desired look.
• Final Inspection: Schedule inspections to ensure compliance with building codes.
Final Inspections and Approvals:
• Arrange for final inspections to ensure the addition meets all safety and code requirements.
• Obtain any necessary certificates of occupancy or compliance.
Move In and Enjoy:
• Once all inspections and approvals are received, you can move into your new kitchen addition and start enjoying it.
Remember that every kitchen addition project is unique, so adapt this outline to your specific needs and circumstances. Consulting with professionals and obtaining the required permits and inspections is crucial to a successful and safe project.

 AYDIN Hides
Luxury – Prestige – Status
KEY FEATURES
Hand Made in Europe
Hand-Made by 3rd. generation of Aydin family.
Premium Quality
Hand lined bottom
Hand stitching
100% genuine cowhide leather
European (Balkan) breed animals
Each product is BRANDED with serial number and Craftsmanship seal.
Hides used for making Patchworks are sourced ethically and humanely and 100% as byproduct of meat production
Animals are free-range raised, sustainable sourced mainly on mountain pastures of Eastern Europe.
Animal skins are endemic to breeds specific for Eastern European region.
Skins ARE NOT processed by mass processing facility, but rather family owned business with "Old Craft" certificate. This means that such business falls in "Traditional" category of business.
All skins are hand processed using solutions with the P.H value of drinking water.
Skins are processed in small batches, usually 5-10 at the time, in order for skin to preserve, to the greatest extend, its natural distinctions and quality.
NOTE: The photo on this page represents design and style of this rug and IT IS AN IMAGE OF ACTUAL product you will receive. All rug sizes are approximate. Due to the difference of monitor colors, some rug colors may vary slightly.
NOTE: Few products may contain some natural flaws due to conditions inherent to natural animal products (scratches, insect bites, wrinkles, cuts, etc.) that will be discretely repaired. Please note that we do not wedge our cowhides but we rather discretely stitch and repair. Such flaws are acceptable for this type of product, since it represents the life of the animal to the fullest possible extent.
 Proline Range Hoods
Beautiful high contrast kitchen featuring our Contemporary Proline PLFW 750 Professional Stainless Steel Wall Mounted Range Hood. The Red Walls, Dark Wood Cabinets, Island Pendant Lighting, and Modern Clean Lines make this kitchen really stand out.
PLFW 750 Range Hood Product Details:
This is our Super Low Profile, Sleek, All Stainless, Contemporary Design, Wall Mounted Range Hood. This attractive and versatile range hood looks and works great in any size. Elegant LCD touch controls, with time delay and 6 speeds from 300 cfm up to 1100 cfm, this hood has the power to handle the largest cooktops efficiently and quietly. Easy to install and super low maintenance, this wall mounted range hood is available in 5 sizes (36", 42", 48", 54" and 60") and is one of the very few large format hoods available as a ductless model.
Stainless Baffle Filters that are easy to remove and clean, and the quietest 300 CFM setting in the industry. (Based on comparable size and local blower capacity). And power when you need it with 1100 CFM total capacity.
This Range Hood comes with dual blowers and fan completely installed and factory tested.
Specifications
110v 60hz (USA and Canada Certification)
Electronic LCD 6 Speed Switch, w/Time Delay Controls
6 Speed, 1100 Max. CFM Dual Blower
2 x LED lights
Stainless Baffle Filters
Carbon filters available for ductless operation
Seamless Design
Easy to Clean and Maintain
Brushed #430 Stainless Steel
2 x 6" Air Outlets
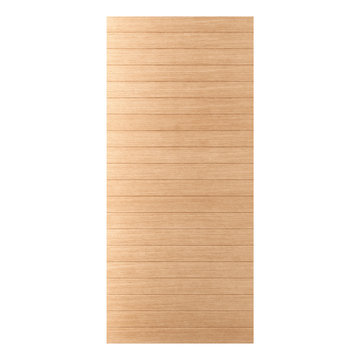
 ETO Doors
Please note: Doors are unfinished (the pictures may depict a finished door)
Request a Free Corner Sample to See the ETO Quality Difference
Enhance the entrance of your home or office with the Camden Exterior White Oak Door, featuring a sleek horizontal plank design and solid-core construction for superior strength and style. Crafted for front entryways, back doors, patio access, and garage side entrances, this door offers both modern appeal and long-term durability.
Constructed with a 3mm thick clear face veneer over a solid core, it resists warping, cracking, and splitting, ensuring a secure and reliable exterior solution. The integral panel structure eliminates separation issues common in stile and rail doors, providing lasting performance in any climate. Designed for residential and commercial use, this horizontal plank white oak exterior door delivers refined aesthetics, enhanced security, and premium craftsmanship, making it an excellent choice for any modern architectural setting.
Free Samples: Request a Free White Oak Exterior Horizontal Plank Door Corner Sample to See the ETO Quality Difference.
PRO Discounts: Pro discount program trade pricing available for contractors, architects, and designers on all our exterior white oak doors.
Lowest Prices Nationwide: At ETO Doors, we leverage our mass production to manufacture these high-quality exterior white oak doors at the lowest prices in the country, passing significant savings directly to you.
Versatile Usage: Our white oak doors are perfect for residential and commercial settings, including new construction and remodeling projects. Our horizontal plank interior doors are installed in places with high traffic volumes such as multifamily homes, office buildings, and hotels.
Customization Available: We understand that every project is unique. Our wood horizontal plank doors can be customized to fit your specific size and design requirements, ensuring a perfect fit and look for any application.
Optional Features (at an additional cost)
20-Minute Fire Rating for Wood Doors Available: Exterior horizontal plank white oak doors fire rated to withstand fire for 20 minutes, certified by UL or Warnock Hersey.
Exterior Pre-hanging: Our solid core white oak exterior doors can be pre-hung with matching engineered white oak jambs or exterior white primed jambs as pre-hung single doors or pre-hung double doors units.
Impact Hurricane Certification: Our Exterior White Oak doors are available with a Miami Dade hurricane impact wood door approval in both in-swing and out-swing configurations. Our wood Exterior White Oak storm doors certifications are equivalent to a "Miami-Dade NOA" which has the highest hurricane approval standard for wood doors in the country. Each of our horizontal plank white oak exterior doors can be assembled with the appropriate components to be Florida Building Code Compliant.
 AYDIN Hides
KEY FEATURES
• Hand Made in Europe
• Hand-Made by 3rd. generation of Aydin family.
• Premium Quality
• Hand lined bottom
• Hand stitching
• 100% genuine cowhide leather
• European (Balkan) breed animals
• Each product is BRANDED with serial number and Craftsmanship seal.
• Hides used for making Patchworks are sourced ethically and humanely and 100% as byproduct of meat production
• Animals are free-range raised, sustainable sourced mainly on mountain pastures of Eastern Europe.
• Animal skins are endemic to breeds specific for Eastern European region.
• Skins ARE NOT processed by mass processing facility, but rather family owned business with "Old Craft" certificate. This means that such business falls in "tradition" category of business, since third family generation takes care of business.
• All skins are hand processed using solutions with the P.H value of drinking water (7)! We have been assured into that by being present inside the workshop during skin processing
• Skins are processed in small batches, usually 5-10 at the time, in order for skin to preserve, to the greatest extend, its natural distinctions and quality.
• NOTE: The photo on this page represents design and style of this rug and IT IS AN IMAGE OF ACTUAL product you will receive. All rug sizes are approximate. Due to the difference of monitor colors, some rug colors may vary slightly.
• NOTE: Few products may contain some natural flaws due to conditions inherent to natural animal products (scratches, insect bites, wrinkles, cuts, etc.) that will be discretely repaired. Please note that we do not wedge our cowhides but we rather discretely stitch and repair. Such flaws are acceptable for this type of product, since it represents the life of the animal to the fullest possible extent.
SQ21
 AYDIN Hides
Luxury – Prestige – Status
KEY FEATURES
Hand Made in Europe
Hand-Made by 3rd. generation of Aydin family.
Premium Quality
Hand lined bottom
Hand stitching
100% genuine cowhide leather
European (Balkan) breed animals
Each product is BRANDED with serial number and Craftsmanship seal.
Hides used for making Patchworks are sourced ethically and humanely and 100% as byproduct of meat production
Animals are free-range raised, sustainable sourced mainly on mountain pastures of Eastern Europe.
Animal skins are endemic to breeds specific for Eastern European region.
Skins ARE NOT processed by mass processing facility, but rather family owned business with "Old Craft" certificate. This means that such business falls in "Traditional" category of business.
All skins are hand processed using solutions with the P.H value of drinking water.
Skins are processed in small batches, usually 5-10 at the time, in order for skin to preserve, to the greatest extend, its natural distinctions and quality.
NOTE: The photo on this page represents design and style of this rug and IT IS AN IMAGE OF ACTUAL product you will receive. All rug sizes are approximate. Due to the difference of monitor colors, some rug colors may vary slightly.
NOTE: Few products may contain some natural flaws due to conditions inherent to natural animal products (scratches, insect bites, wrinkles, cuts, etc.) that will be discretely repaired. Please note that we do not wedge our cowhides but we rather discretely stitch and repair. Such flaws are acceptable for this type of product, since it represents the life of the animal to the fullest possible extent.
 AYDIN Hides
Luxury – Prestige – Status
KEY FEATURES
Hand Made in Europe
Hand-Made by 3rd. generation of Aydin family.
Premium Quality
Hand lined bottom
Hand stitching
100% genuine cowhide leather
European (Balkan) breed animals
Each product is BRANDED with serial number and Craftsmanship seal.
Hides used for making Patchworks are sourced ethically and humanely and 100% as byproduct of meat production
Animals are free-range raised, sustainable sourced mainly on mountain pastures of Eastern Europe.
Animal skins are endemic to breeds specific for Eastern European region.
Skins ARE NOT processed by mass processing facility, but rather family owned business with "Old Craft" certificate. This means that such business falls in "Traditional" category of business.
All skins are hand processed using solutions with the P.H value of drinking water.
Skins are processed in small batches, usually 5-10 at the time, in order for skin to preserve, to the greatest extend, its natural distinctions and quality.
NOTE: The photo on this page represents design and style of this rug and IT IS AN IMAGE OF ACTUAL product you will receive. All rug sizes are approximate. Due to the difference of monitor colors, some rug colors may vary slightly.
NOTE: Few products may contain some natural flaws due to conditions inherent to natural animal products (scratches, insect bites, wrinkles, cuts, etc.) that will be discretely repaired. Please note that we do not wedge our cowhides but we rather discretely stitch and repair. Such flaws are acceptable for this type of product, since it represents the life of the animal to the fullest possible extent.
 AYDIN Hides
KEY FEATURES
• Hand Made in Europe
• Hand-Made by 3rd. generation of Aydin family.
• Premium Quality
• Hand lined bottom
• Hand stitching
• 100% genuine cowhide leather
• European (Balkan) breed animals
• Each product is BRANDED with serial number and Craftsmanship seal.
• Hides used for making Patchworks are sourced ethically and humanely and 100% as byproduct of meat production
• Animals are free-range raised, sustainable sourced mainly on mountain pastures of Eastern Europe.
• Animal skins are endemic to breeds specific for Eastern European region.
• Skins ARE NOT processed by mass processing facility, but rather family owned business with "Old Craft" certificate. This means that such business falls in "tradition" category of business, since third family generation takes care of business.
• All skins are hand processed using solutions with the P.H value of drinking water (7)! We have been assured into that by being present inside the workshop during skin processing
• Skins are processed in small batches, usually 5-10 at the time, in order for skin to preserve, to the greatest extend, its natural distinctions and quality.
• NOTE: The photo on this page represents design and style of this rug and IT IS AN IMAGE OF ACTUAL product you will receive. All rug sizes are approximate. Due to the difference of monitor colors, some rug colors may vary slightly.
• NOTE: Few products may contain some natural flaws due to conditions inherent to natural animal products (scratches, insect bites, wrinkles, cuts, etc.) that will be discretely repaired. Please note that we do not wedge our cowhides but we rather discretely stitch and repair. Such flaws are acceptable for this type of product, since it represents the life of the animal to the fullest possible extent.
SQ21
 AYDIN Hides
KEY FEATURES
• Hand Made in Europe
• Hand-Made by 3rd. generation of Aydin family.
• Premium Quality
• Hand lined bottom
• Hand stitching
• 100% genuine cowhide leather
• European (Balkan) breed animals
• Each product is BRANDED with serial number and Craftsmanship seal.
• Hides used for making Patchworks are sourced ethically and humanely and 100% as byproduct of meat production
• Animals are free-range raised, sustainable sourced mainly on mountain pastures of Eastern Europe.
• Animal skins are endemic to breeds specific for Eastern European region.
• Skins ARE NOT processed by mass processing facility, but rather family owned business with "Old Craft" certificate. This means that such business falls in "tradition" category of business, since third family generation takes care of business.
• All skins are hand processed using solutions with the P.H value of drinking water (7)! We have been assured into that by being present inside the workshop during skin processing
• Skins are processed in small batches, usually 5-10 at the time, in order for skin to preserve, to the greatest extend, its natural distinctions and quality.
• NOTE: The photo on this page represents design and style of this rug and IT IS AN IMAGE OF ACTUAL product you will receive. All rug sizes are approximate. Due to the difference of monitor colors, some rug colors may vary slightly.
• NOTE: Few products may contain some natural flaws due to conditions inherent to natural animal products (scratches, insect bites, wrinkles, cuts, etc.) that will be discretely repaired. Please note that we do not wedge our cowhides but we rather discretely stitch and repair. Such flaws are acceptable for this type of product, since it represents the life of the animal to the fullest possible extent.
SQ21
5