
Search results for "Spent boxing" in Home Design Ideas
 Michael Nash Design, Build & Homes
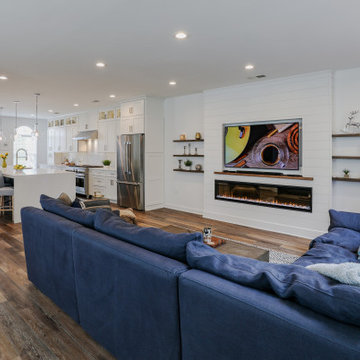
 The new owner of this Centex complex townhomes was about to overhaul there entire first floor. Having a building industries background, he wanted to explore taking all interior walls out and create a much-desired open floor plan with a massive kitchen.
The current home had a front living room followed by a small boxed out dining room. A structure wall separating the back of the house kitchen from the front living space. It was all to chopped up for their daily lives. The floor is concrete slab. the partition wall was bearing. The HVAC system is located on second floor and the supply and return ducts were all boxed in columns in living spaces.
Challenges:
• Eliminating bearing partition walls
• Relocating all supply and return ducts from box columns
• Run 1” gas line from exterior meter for new 48” stove
• Cutting slab concrete to relocate all plumbing and electrical for new island
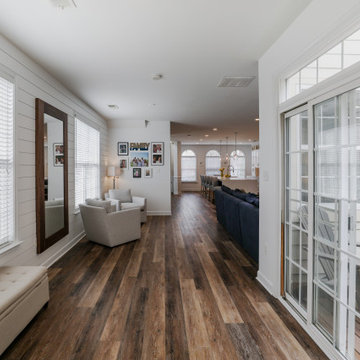
The plan was to combine the entire first level and create an open space floor-plan, with locating the new large kitchen in front of this town house, implementing a large island in middle of the space which accommodate big group seating.
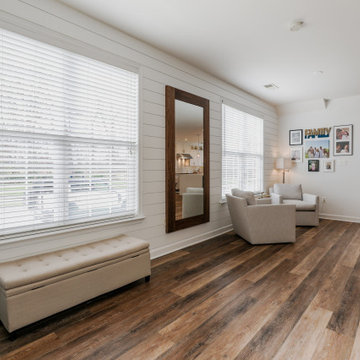
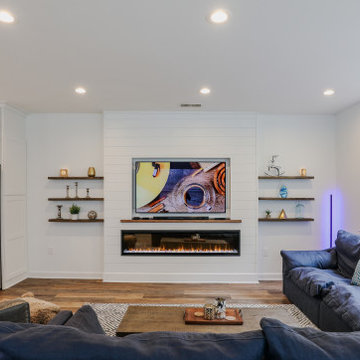
The old kitchen converted to a casual family room seating space facing a wall coved with linear fireplace and sheep-lap barded wall and embedded Tv.
The old glued down floor was removed and replaced with a more contemporary LVT flooring,
The entire space covered with new LED lighting, floor to ceiling cabinetry on south wall with upgraded appliances and inside lighting cabinetry.
A gorgeous quartz counter top coving the dark blue island with water falls on one end stand tall in middle this amazing kitchen. Three pendent lights over this massive Island brighten up this new space.
This new living space reveals what an amazing total overhaul has been accomplished and how happy this family is spending all their time on this floor.
The design team spent a lot of time with the couple for details such as color scheme, backsplash design, counter top slab and floor design to bring what they desired their new space to look like
 INSPIRED KITCHEN DESIGN
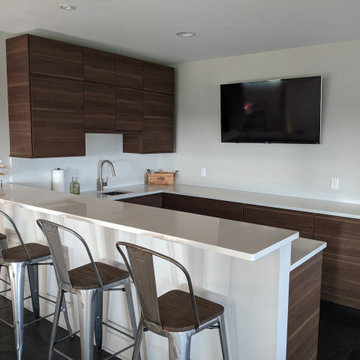
Ben is an experienced DIYer although he hadn’t ever done an IKEA kitchen design before.
“I wasn’t familiar with the product line, nor how to get started with the process. The design we came up with was largely our design, and we spent countless hours researching the door fronts, and of course decided on the VOXTORP doors in Walnut from IKEA. We find IKEA offers great quality for the money and we love the neat customization options.”
Ben does admit that he and his wife often second guessed their design decisions, however. Therefore, they recruited IKD to help them develop a layout that would work stylistically and functionally for their needs.
“Having an IKEA design expert from IKD provide additional insight was incredibly helpful for us to move forward though the process,” he says.”But as an avid DIYer I felt this was well within my realm to complete.”
And the design certainly was!
In fact, Ben says the installation process was seamless. He does mention that the plumbing and electrical was relocated to accommodate the IKEA kitchenette layout though.
“The overall experience of building the boxes was straight forward. Once you get the hang of doing one, they almost all go together about the same. It was a rewarding experience seeing everything come together,” he notes.
 Michael Nash Design, Build & Homes
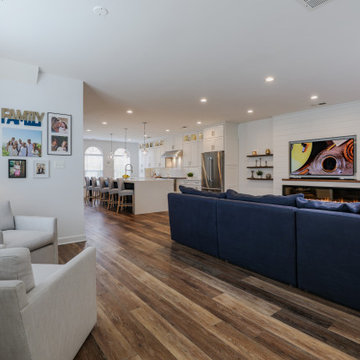
 The new owner of this Centex complex townhomes was about to overhaul there entire first floor. Having a building industries background, he wanted to explore taking all interior walls out and create a much-desired open floor plan with a massive kitchen.
The current home had a front living room followed by a small boxed out dining room. A structure wall separating the back of the house kitchen from the front living space. It was all to chopped up for their daily lives. The floor is concrete slab. the partition wall was bearing. The HVAC system is located on second floor and the supply and return ducts were all boxed in columns in living spaces.
Challenges:
• Eliminating bearing partition walls
• Relocating all supply and return ducts from box columns
• Run 1” gas line from exterior meter for new 48” stove
• Cutting slab concrete to relocate all plumbing and electrical for new island
The plan was to combine the entire first level and create an open space floor-plan, with locating the new large kitchen in front of this town house, implementing a large island in middle of the space which accommodate big group seating.
The old kitchen converted to a casual family room seating space facing a wall coved with linear fireplace and sheep-lap barded wall and embedded Tv.
The old glued down floor was removed and replaced with a more contemporary LVT flooring,
The entire space covered with new LED lighting, floor to ceiling cabinetry on south wall with upgraded appliances and inside lighting cabinetry.
A gorgeous quartz counter top coving the dark blue island with water falls on one end stand tall in middle this amazing kitchen. Three pendent lights over this massive Island brighten up this new space.
This new living space reveals what an amazing total overhaul has been accomplished and how happy this family is spending all their time on this floor.
The design team spent a lot of time with the couple for details such as color scheme, backsplash design, counter top slab and floor design to bring what they desired their new space to look like
Find the right local pro for your project
 Michael Nash Design, Build & Homes
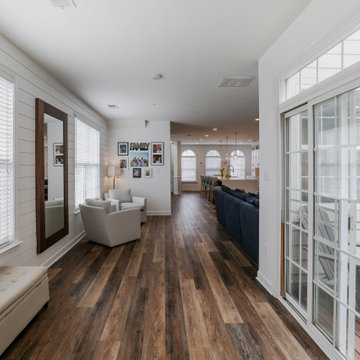
 The new owner of this Centex complex townhomes was about to overhaul there entire first floor. Having a building industries background, he wanted to explore taking all interior walls out and create a much-desired open floor plan with a massive kitchen.
The current home had a front living room followed by a small boxed out dining room. A structure wall separating the back of the house kitchen from the front living space. It was all to chopped up for their daily lives. The floor is concrete slab. the partition wall was bearing. The HVAC system is located on second floor and the supply and return ducts were all boxed in columns in living spaces.
Challenges:
• Eliminating bearing partition walls
• Relocating all supply and return ducts from box columns
• Run 1” gas line from exterior meter for new 48” stove
• Cutting slab concrete to relocate all plumbing and electrical for new island
The plan was to combine the entire first level and create an open space floor-plan, with locating the new large kitchen in front of this town house, implementing a large island in middle of the space which accommodate big group seating.
The old kitchen converted to a casual family room seating space facing a wall coved with linear fireplace and sheep-lap barded wall and embedded Tv.
The old glued down floor was removed and replaced with a more contemporary LVT flooring,
The entire space covered with new LED lighting, floor to ceiling cabinetry on south wall with upgraded appliances and inside lighting cabinetry.
A gorgeous quartz counter top coving the dark blue island with water falls on one end stand tall in middle this amazing kitchen. Three pendent lights over this massive Island brighten up this new space.
This new living space reveals what an amazing total overhaul has been accomplished and how happy this family is spending all their time on this floor.
The design team spent a lot of time with the couple for details such as color scheme, backsplash design, counter top slab and floor design to bring what they desired their new space to look like
 Michael Nash Design, Build & Homes
 The new owner of this Centex complex townhomes was about to overhaul there entire first floor. Having a building industries background, he wanted to explore taking all interior walls out and create a much-desired open floor plan with a massive kitchen.
The current home had a front living room followed by a small boxed out dining room. A structure wall separating the back of the house kitchen from the front living space. It was all to chopped up for their daily lives. The floor is concrete slab. the partition wall was bearing. The HVAC system is located on second floor and the supply and return ducts were all boxed in columns in living spaces.
Challenges:
• Eliminating bearing partition walls
• Relocating all supply and return ducts from box columns
• Run 1” gas line from exterior meter for new 48” stove
• Cutting slab concrete to relocate all plumbing and electrical for new island
The plan was to combine the entire first level and create an open space floor-plan, with locating the new large kitchen in front of this town house, implementing a large island in middle of the space which accommodate big group seating.
The old kitchen converted to a casual family room seating space facing a wall coved with linear fireplace and sheep-lap barded wall and embedded Tv.
The old glued down floor was removed and replaced with a more contemporary LVT flooring,
The entire space covered with new LED lighting, floor to ceiling cabinetry on south wall with upgraded appliances and inside lighting cabinetry.
A gorgeous quartz counter top coving the dark blue island with water falls on one end stand tall in middle this amazing kitchen. Three pendent lights over this massive Island brighten up this new space.
This new living space reveals what an amazing total overhaul has been accomplished and how happy this family is spending all their time on this floor.
The design team spent a lot of time with the couple for details such as color scheme, backsplash design, counter top slab and floor design to bring what they desired their new space to look like
 Michael Nash Design, Build & Homes
 The new owner of this Centex complex townhomes was about to overhaul there entire first floor. Having a building industries background, he wanted to explore taking all interior walls out and create a much-desired open floor plan with a massive kitchen.
The current home had a front living room followed by a small boxed out dining room. A structure wall separating the back of the house kitchen from the front living space. It was all to chopped up for their daily lives. The floor is concrete slab. the partition wall was bearing. The HVAC system is located on second floor and the supply and return ducts were all boxed in columns in living spaces.
Challenges:
• Eliminating bearing partition walls
• Relocating all supply and return ducts from box columns
• Run 1” gas line from exterior meter for new 48” stove
• Cutting slab concrete to relocate all plumbing and electrical for new island
The plan was to combine the entire first level and create an open space floor-plan, with locating the new large kitchen in front of this town house, implementing a large island in middle of the space which accommodate big group seating.
The old kitchen converted to a casual family room seating space facing a wall coved with linear fireplace and sheep-lap barded wall and embedded Tv.
The old glued down floor was removed and replaced with a more contemporary LVT flooring,
The entire space covered with new LED lighting, floor to ceiling cabinetry on south wall with upgraded appliances and inside lighting cabinetry.
A gorgeous quartz counter top coving the dark blue island with water falls on one end stand tall in middle this amazing kitchen. Three pendent lights over this massive Island brighten up this new space.
This new living space reveals what an amazing total overhaul has been accomplished and how happy this family is spending all their time on this floor.
The design team spent a lot of time with the couple for details such as color scheme, backsplash design, counter top slab and floor design to bring what they desired their new space to look like
 Michael Nash Design, Build & Homes
 The new owner of this Centex complex townhomes was about to overhaul there entire first floor. Having a building industries background, he wanted to explore taking all interior walls out and create a much-desired open floor plan with a massive kitchen.
The current home had a front living room followed by a small boxed out dining room. A structure wall separating the back of the house kitchen from the front living space. It was all to chopped up for their daily lives. The floor is concrete slab. the partition wall was bearing. The HVAC system is located on second floor and the supply and return ducts were all boxed in columns in living spaces.
Challenges:
• Eliminating bearing partition walls
• Relocating all supply and return ducts from box columns
• Run 1” gas line from exterior meter for new 48” stove
• Cutting slab concrete to relocate all plumbing and electrical for new island
The plan was to combine the entire first level and create an open space floor-plan, with locating the new large kitchen in front of this town house, implementing a large island in middle of the space which accommodate big group seating.
The old kitchen converted to a casual family room seating space facing a wall coved with linear fireplace and sheep-lap barded wall and embedded Tv.
The old glued down floor was removed and replaced with a more contemporary LVT flooring,
The entire space covered with new LED lighting, floor to ceiling cabinetry on south wall with upgraded appliances and inside lighting cabinetry.
A gorgeous quartz counter top coving the dark blue island with water falls on one end stand tall in middle this amazing kitchen. Three pendent lights over this massive Island brighten up this new space.
This new living space reveals what an amazing total overhaul has been accomplished and how happy this family is spending all their time on this floor.
The design team spent a lot of time with the couple for details such as color scheme, backsplash design, counter top slab and floor design to bring what they desired their new space to look like
Sponsored
Columbus, OH
Free consultation for landscape design!

Peabody Landscape Group
Columbus' Reliable Landscape Design & Contracting
 Michael Nash Design, Build & Homes
 The new owner of this Centex complex townhomes was about to overhaul there entire first floor. Having a building industries background, he wanted to explore taking all interior walls out and create a much-desired open floor plan with a massive kitchen.
The current home had a front living room followed by a small boxed out dining room. A structure wall separating the back of the house kitchen from the front living space. It was all to chopped up for their daily lives. The floor is concrete slab. the partition wall was bearing. The HVAC system is located on second floor and the supply and return ducts were all boxed in columns in living spaces.
Challenges:
• Eliminating bearing partition walls
• Relocating all supply and return ducts from box columns
• Run 1” gas line from exterior meter for new 48” stove
• Cutting slab concrete to relocate all plumbing and electrical for new island
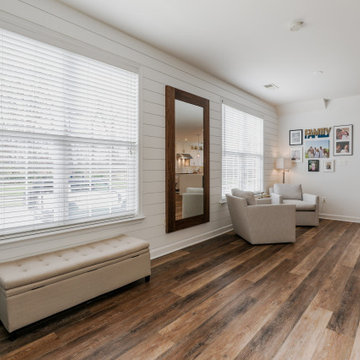
The plan was to combine the entire first level and create an open space floor-plan, with locating the new large kitchen in front of this town house, implementing a large island in middle of the space which accommodate big group seating.
The old kitchen converted to a casual family room seating space facing a wall coved with linear fireplace and sheep-lap barded wall and embedded Tv.
The old glued down floor was removed and replaced with a more contemporary LVT flooring,
The entire space covered with new LED lighting, floor to ceiling cabinetry on south wall with upgraded appliances and inside lighting cabinetry.
A gorgeous quartz counter top coving the dark blue island with water falls on one end stand tall in middle this amazing kitchen. Three pendent lights over this massive Island brighten up this new space.
This new living space reveals what an amazing total overhaul has been accomplished and how happy this family is spending all their time on this floor.
The design team spent a lot of time with the couple for details such as color scheme, backsplash design, counter top slab and floor design to bring what they desired their new space to look like
 Michael Nash Design, Build & Homes
 The new owner of this Centex complex townhomes was about to overhaul there entire first floor. Having a building industries background, he wanted to explore taking all interior walls out and create a much-desired open floor plan with a massive kitchen.
The current home had a front living room followed by a small boxed out dining room. A structure wall separating the back of the house kitchen from the front living space. It was all to chopped up for their daily lives. The floor is concrete slab. the partition wall was bearing. The HVAC system is located on second floor and the supply and return ducts were all boxed in columns in living spaces.
Challenges:
• Eliminating bearing partition walls
• Relocating all supply and return ducts from box columns
• Run 1” gas line from exterior meter for new 48” stove
• Cutting slab concrete to relocate all plumbing and electrical for new island
The plan was to combine the entire first level and create an open space floor-plan, with locating the new large kitchen in front of this town house, implementing a large island in middle of the space which accommodate big group seating.
The old kitchen converted to a casual family room seating space facing a wall coved with linear fireplace and sheep-lap barded wall and embedded Tv.
The old glued down floor was removed and replaced with a more contemporary LVT flooring,
The entire space covered with new LED lighting, floor to ceiling cabinetry on south wall with upgraded appliances and inside lighting cabinetry.
A gorgeous quartz counter top coving the dark blue island with water falls on one end stand tall in middle this amazing kitchen. Three pendent lights over this massive Island brighten up this new space.
This new living space reveals what an amazing total overhaul has been accomplished and how happy this family is spending all their time on this floor.
The design team spent a lot of time with the couple for details such as color scheme, backsplash design, counter top slab and floor design to bring what they desired their new space to look like
 Zelaya Properties LLC
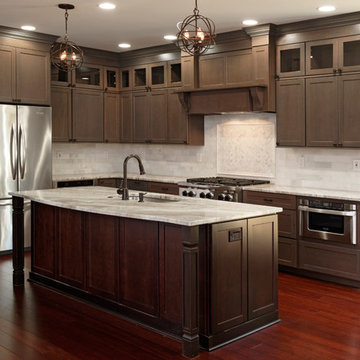
We used: Custom cherry cabinetry in Arts & Crafts Shaker style by Kabinart in Boulder and Espresso stains. Liberty Hardware Venetian bronze 1-1/2" cabinet knobs. KitchenAid Architect II Series 22 CF counter-depth French door refrigerator. KitchenAid Architect Series II 27" convection single wall oven. KitchenAid 36" 6-burner dual fuel freestanding commercial-style range. KitchenAid Architect II Series 24" dishwasher. Sharp Insight Pro Series 24" built-in microwave drawer (Model #KB6524PS). Crystorama Solaris 12" wide pendant lights in English bronze. Granite countertops in Brown Fantasy. 3"x6" polished marble backsplash.
Paint colors:
Walls: Glidden Silver Cloud 30YY 63/024
Ceilings/Trims/Doors: Glidden Swan White GLC23
Robert B. Narod Photography
 down2earth Interior Design, LLC.
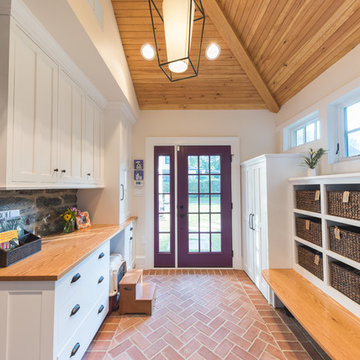
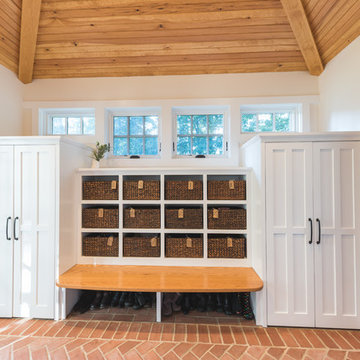
Whatever your storage needs, extensive or streamlined, carving out a mudroom area can keep the whole family more organized. And, being more organized saves you stress and countless hours that would otherwise be spent searching for misplaced items.
While we love to design mudroom niches, a full mudroom interior design allows us to do what we do best here at Down2Earth Interior Design: elevate a space that is primarily driven by pragmatic requirements into a space that is also beautiful to look at and comfortable to occupy. I find myself voluntarily taking phone calls while sitting on the bench of my mudroom, simply because it's a comfortable place to be. My kids do their homework in the mudroom sometimes. My cat loves to curl up on sweatshirts temporarily left on the bench, or cuddle up in boxes on their way out to the recycling bins, just outside the door. Designing a custom mudroom for our family has elevated our lifestyle in so many ways, and I look forward to the opportunity to help make your mudroom design dreams a reality as well.
Photos by Ryan Macchione
 down2earth Interior Design, LLC.
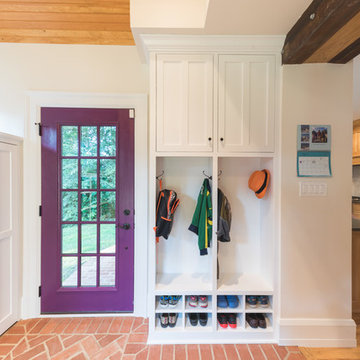
Is your closet busting at the seams? Or do you perhaps have no closet at all? Time to consider adding a mudroom to your house. Mudrooms are a popular interior design trend these days, and for good reason - they can house far more than a simple coat closet can. They can serve as a family command center for kids' school flyers and menus, for backpacks and shoes, for art supplies and sports equipment. Some mudrooms contain a laundry area, and some contain a mail station. Some mudrooms serve as a home base for a dog or a cat, with easy to clean, low maintenance building materials. A mudroom may consist of custom built-ins, or may simply be a corner of an existing room with pulled some clever, freestanding furniture, hooks, or shelves to house your most essential mudroom items.
Whatever your storage needs, extensive or streamlined, carving out a mudroom area can keep the whole family more organized. And, being more organized saves you stress and countless hours that would otherwise be spent searching for misplaced items.
While we love to design mudroom niches, a full mudroom interior design allows us to do what we do best here at Down2Earth Interior Design: elevate a space that is primarily driven by pragmatic requirements into a space that is also beautiful to look at and comfortable to occupy. I find myself voluntarily taking phone calls while sitting on the bench of my mudroom, simply because it's a comfortable place to be. My kids do their homework in the mudroom sometimes. My cat loves to curl up on sweatshirts temporarily left on the bench, or cuddle up in boxes on their way out to the recycling bins, just outside the door. Designing a custom mudroom for our family has elevated our lifestyle in so many ways, and I look forward to the opportunity to help make your mudroom design dreams a reality as well.
Photos by Ryan Macchione
 Kestrel Shutters & Doors
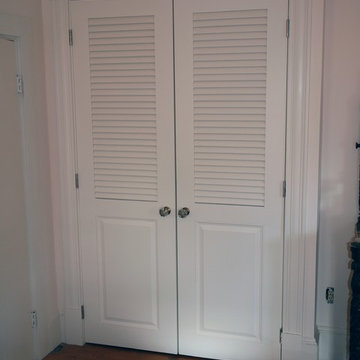
These traditional closet doors feature smaller, fixed louvers in the top and colonial raised panels in the bottom and are custom sized to fit your openings.
To receive a quote on our Fixed Louver over Raised Panel doors follow the "Visit Store" link: below.
Sponsored
Columbus, OH
Free consultation for landscape design!
Peabody Landscape Group
Columbus' Reliable Landscape Design & Contracting

 Twelve Stones Designs, LLC
The owners of this kitchen had spent the money to upgrade the finishes in their kitchen upon building the home 12 years ago, but after living in the space for several years they realized how nonfunctional the layout really was. The (then) two preschool aged children had grown into busy, hungry teenagers with many friends who also liked to hang out at the house. So the family needed a more functional kitchen with better traffic flow, space for daily activities revolving around the kitchen at different times of day, and a kitchen that could accommodate cooking for and serving large groups. Furthermore, the dark, traditional finishes no longer reflected the homeowners’ style. They requested a brighter, more relaxed, coastal style that reflected their love of the seaside cities they like to visit.
Originally, the kitchen was U-shaped with a narrow island in the middle. The island created narrow aisles that bottle-necked at the dishwasher, refrigerator, and cooktop areas. There was a pass-through from the foyer into the kitchen, but the owners never liked that the pass-through was also located so close to the powder room. The awkward proximity was unappealing and made guests feel uncomfortable.
The kitchen’s storage was made up of lots of narrow cabinets, apothecary drawers, clipped corner units, and very few drawers. It lacked useful storage for the larger items the family used on a daily basis. And the kitchen’s only pantry was small closet that had only builder-grade, narrow shelving with no illumination to be able to see the contents inside.
Overall, the kitchen’s lighting plan was poorly executed. Only six recessed cans illuminated the entire kitchen and nook areas. The under cabinet lighting was not evenly distributed either. In fact, the builder had mis-placed the under cabinet lighting around the decorative pilasters which made for choppy, dark cubbies. Further, the builder didn’t include any lighting over the sink or the bar area, which meant whoever was doing the dishes was always in their own shadow. That, coupled with the steep overhang of the game room above made the bar area feel like a dim, cavernous space that wasn’t inviting or task oriented. The kitchen looked out into the main living space, but the raised bar and a narrow wall (which held the only large cabinet in the kitchen) created more of a barrier than a relationship to the living room or breakfast nook. In fact, one couldn’t even see the breakfast nook from the cooktop or sink areas due to its orientation. The raised bar top was too narrow to comfortably sit to either dine at or chat from due to the lack of knee space. The the homeowners confided that the kitchen felt more like a dark, dirty prison than place where the family, or their guests, wanted to gather and commune.
The clients' needs and desires were:
➢ to create a kitchen that would be a space the family loved to be in; to relate to the adjacent spaces all around, and to have better flow for entertaining large groups
➢ to remove the walls between the breakfast nook and living area and to be able to utilize the natural light from the windows in both those areas
➢ to incorporate a functional chopping block for prepping fresh food for home cooked meals, an island with a large sink and drain board, 2 pull out trash cans, and seating for at least the 2 teens to eat or do homework
➢ to design a kitchen and breakfast nook with an airy, coastal, relaxed vibe that blended with the rest of the house's coastal theme
➢ to integrate a layered lighting plan which would include ample general illumination, specific task lighting, decorative lighting, and lots of illuminated storage
➢ to design a kitchen with not only more storage for all the husband’s kitchen gadgets and collection of oils and spices, but smart storage, including a coffee/breakfast bar and a place to store and conceal the toaster oven and microwave
➢ to find a way to utilize the large open space between the kitchen, pantry area, and breakfast nook
Twelve Stones Designs achieved the owner's goals by:
➢ removing the walls between the kitchen and living room to allow the natural light to filter in from the adjacent rooms and to create a connection between the kitchen, nook, and living spaces for a sense of unity and communion
➢ removing the existing pantry and designing 3 large pantry style cabinets with LED tape lights and rollout drawers to house lots of kitchen appliances, gadgets, and tons of groceries. We also took the cabinets all the way up to the 9’ ceiling for additional storage for seasonal items and bulk storage.
➢ designing 2 islands - 1 with a gorgeous black walnut chopping block that houses a drawer for chopping and carving knives and a custom double pull out trash unit for point of use utilization - and 1 that houses the dishwasher, a large Blanco Gourmet sink with integrated drain board, woven baskets for fresh root vegetables and kitchen towels, plenty of drawer storage for kitchen items, and bar seating for up to 4 diners.
➢ closing off the space between the kitchen and the powder room to create a beautiful new private alcove for the powder room as well as adding some decorative storage. This also gave us space to include more tall storage near the new range for precision placement of the husband’s extensive oil and spice collection as well as a location for a combo-steam oven the wife wanted for baking and cooking healthy meals.
The project is enhanced functionally by:
➢ incorporated USB and standard receptacles for the kids’ laptops and phone charging in the large island
➢ designing the small island to include additional open shelving for items used on a daily basis such as a variety of bowls, plates, and colanders. This set up also works well for the husband who prefers to “plate” his dinners in restaurant-style fashion before presenting them to the table.
➢ the integration of specific storage units, such as double stacked cutlery drawers, a custom spice pull-out, a Kuerig coffee and tea pod drawer, and custom double stacked utensil drawers
➢ moving the refrigerator to the old oven location - this eliminated the bottle neck as well as created a better relationship to the eating table. It also utilizes the floor space between the pantry, nook, and kitchen
➢ creating a banquet style breakfast nook - this banquette seating not only doubles the amount of seating for large gatherings but it better utilizes the odd space between the kitchen and the previous nook area. It also helps to create a distinct pathway from the mudroom room through the pantry area, kitchen, nook, and living room.
➢ the coffee/breakfast bar area which includes the perfect location for the concealed microwave and toaster oven, convenient storage for the coffee pods and tea accoutrements. Roll-out drawers below also house the smoothie maker, hot water kettle, and a plethora of smoothie-making ingredients such as protein powders, smoothie additives, etc. Furthermore, the drawers below the Keurig house measuring utensil, cutlery, baking supplies and tupperware storage.
➢ incorporating lots of wide drawers and pullouts to accommodate large cookware.
➢ utilizing as much vertical space as possible by building storage to the ceiling which accommodates the family’s abundant amount of serving platters, baking sheets, bakeware, casserole dishes, and additional cutting boards.
The project is enhanced aesthetically by:
➢ new 5-piece Versailles pattern porcelain tile that now seamlessly joins the entire down stairs area together creating a bright, cohesiveness feeling instead of choppy separated spaces - it also adds a coastal feeling
➢ designing a cabinet to conceal the microwave and toaster oven
➢ the coastal influenced light fixtures over the nook table and island
➢ the sandy colors of the Langdon Cambria countertops. The swirling pattern and sparkling quartz pieces remind the homeowner of black-and-tan sandy beaches
➢ the striped banquet seating whose creamy white background and blue-green stripes were the inspiration for the cabinet and wall colors.
➢ All the interior doors were painted black to coordinate with the blacks and grays in the backsplash tile and countertop. This also adds a hint of tailored formality to an otherwise casual space.
➢ the use of WAC's Oculux small aperture LED units for the overhead lighting complimented with Diode LED strips for task lighting under the cabinets and inside the pantry and glass wall cabinets. All of the lighting applications are on separate dimmer switches.
Innovative uses of materials or construction methods by Realty Restoration LLC:
➢ Each 1-1/2” x 3” block of reclaimed end-grain black walnut that makes up the center island chopping block was hand milled and built in the shop. It was designed to look substantial and proportional to the surrounding elements, executed by creating the 4 inch tall top with a solid wood chamfered edge band.
➢ The metal doors on either side of the vent hood were also custom designed for this project and built in the Realty Restoration LLC shop. They are made 1x2, 11-gauge mild steel with ribbed glass. Weighing 60 lbs a piece, heavy duty cabinet hinges were added to support the weight of the door and keep them from sagging.
➢ Under-cabinet receptacles were added along the range wall in order to have a clean, uninterrupted backsplash.
Design obstacles to overcome:
➢ Because we were removing the demising walls between the kitchen and living room, we had to find a way to plumb and vent the new island. We did this by tunneling through the slab (the slab had post tension cables which prevented us from just trenching) to run a new wet vent through a nearby structural wall. We pulled the existing hot and cold lines between upper floor joists and ran them down the structural wall as well and up through a conduit in the tunnel.
➢ Since we were converting from wall overs to a gas range it allowed us to utilize the 220 feed for the wall ovens to provide a new sub panel for all the new kitchen circuits
➢ Due to framing deficiencies inherited from the original build there was a 1-1/2” differential in the floor-to-ceiling height over a 20 foot span; by utilizing the process of cutting and furring coupled with the crown moulding details on the cabinet elevations we were able to mask the problem and provide seamless transitions between the cabinet components.
Evidence of superior craftsmanship:
➢ uniquely designed, one-of-a-kind metal “X” end panels on the large island. The end panels were custom made in the Realty Restoration LLC shop and fitted to the exact dimensions of the island. The welding seams are completely indistinguishable - the posts look like they are cut from a single sheet of metal
➢ square metal posts on the small island were also custom made and designed to compliment and carry through the metal element s throughout the kitchen
➢ the beautiful, oversized end panels on the pantry cabinets which give the breakfast nook a tailored look
➢ integrating a large format 5 piece Versailles tile pattern to seamlessly flow from the existing spaces into the new kitchen space
➢ By constructing a custom cabinet that jogged around a corner we could not remodel (housing the entry way coat closet) we were able to camouflage the adjacent wall offset within the upper and lower cabinets. By designing around the existing jog in the structural walls we accomplished a few things: we were able to find the space to house, and hide, the microwave and toaster oven yet still have a clean cohesive appearance from the kitchen side. Additionally, the owners were able to keep their much needed coat closet and we didn’t have to increase the budget with unnecessary structural work.
 down2earth Interior Design, LLC.
Is your closet busting at the seams? Or do you perhaps have no closet at all? Time to consider adding a mudroom to your house. Mudrooms are a popular interior design trend these days, and for good reason - they can house far more than a simple coat closet can. They can serve as a family command center for kids' school flyers and menus, for backpacks and shoes, for art supplies and sports equipment. Some mudrooms contain a laundry area, and some contain a mail station. Some mudrooms serve as a home base for a dog or a cat, with easy to clean, low maintenance building materials. A mudroom may consist of custom built-ins, or may simply be a corner of an existing room with pulled some clever, freestanding furniture, hooks, or shelves to house your most essential mudroom items.
Whatever your storage needs, extensive or streamlined, carving out a mudroom area can keep the whole family more organized. And, being more organized saves you stress and countless hours that would otherwise be spent searching for misplaced items.
While we love to design mudroom niches, a full mudroom interior design allows us to do what we do best here at Down2Earth Interior Design: elevate a space that is primarily driven by pragmatic requirements into a space that is also beautiful to look at and comfortable to occupy. I find myself voluntarily taking phone calls while sitting on the bench of my mudroom, simply because it's a comfortable place to be. My kids do their homework in the mudroom sometimes. My cat loves to curl up on sweatshirts temporarily left on the bench, or cuddle up in boxes on their way out to the recycling bins, just outside the door. Designing a custom mudroom for our family has elevated our lifestyle in so many ways, and I look forward to the opportunity to help make your mudroom design dreams a reality as well.
Photos by Ryan Macchione
 Flooret
Part of the Modin Vinyl Plank Collection, Available Exclusively From www.Flooret.com
$3.49 / sq ft, 22.08 sq ft per box
50% WIDER. 25% LONGER. TWICE AS DURABLE
Luxury Vinyl Plank, 5 mm x 9" x 60" (1.0 mm / 40 mil wear-layer)
Lifetime Residential Warranty, 20 year Commercial Warranty
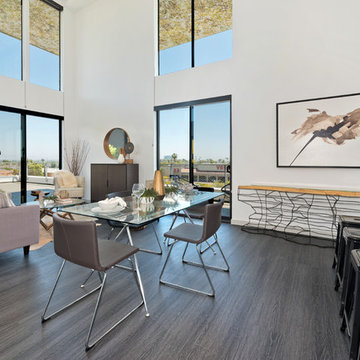
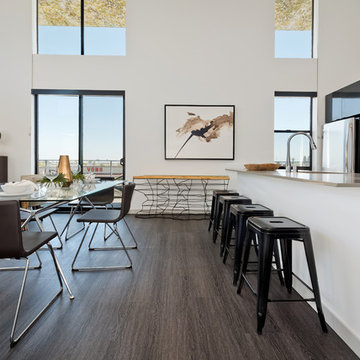
Sleek and chic. In terms of high-impact, going with a dark wire-brush pattern is a sure way to quickly define a space. Never boring, this modern pattern will set the mood immediately.
The most important specification for determining the durability of vinyl flooring is the thickness of the wear-layer. The best wear-layers are made of thick, clear virgin PVC, which covers the paper print-film that gives the floor its unique appearance. Once the wear-layer wears through, the paper is damaged and the floor will need replacement.
Most vinyl floors come with a 8-12 mil wear-layer (0.2-3 mm). The top commercial specs in the industry are higher, at 20-22 mil (0.5 mm). A select few manufacturers offer a “super” commercial spec of 28 mil (0.7 mm).
For Modin, we decided to set a new standard: 40 mil (1.0 mm) of premium virgin PVC. This allows us to offer an industry-leading 20 year Commercial Warranty (Lifetime Residential), compared to nearly all other commercial vinyl floors’ 10 year Commercial Warranty.
Beyond our superior wear-layer, we also use a patented click mechanism for superior hold, and a ceramic-bead coating.
SIZE MATTERS
Wider and longer planks create a sense of space and luxury. Most vinyl floors come in 6” or 7” widths, and 36” or 48” lengths.
For Modin, we designed our planks to be 9” wide, and 60” long. This extra large size allows our gorgeous designs to be fully expressed.
DETAILS THAT COUNT
We made sure to get all the details right. Real texture, to create the feel of wire-brushed wood. Low sheen level, to ensure a natural look that wears well over time. 4-sided bevels, to more accurately emulate the look of real planks. When added together they help create the unique look that is Modin.
DESIGNS THAT INSPIRE
We spent nearly a year just focusing on our designs, to ensure they provide the right mix of color and depth. Focusing on timeless wire-brush and European Oak styles, as well as more contemporary modern washes, our collection offers truly beautiful design that is both functional and inspiring.
 Flooret
Part of the Modin Vinyl Plank Collection, Available Exclusively From www.Flooret.com
$3.49 / sq ft, 22.08 sq ft per box
50% WIDER. 25% LONGER. TWICE AS DURABLE
Luxury Vinyl Plank, 5 mm x 9" x 60" (1.0 mm / 40 mil wear-layer)
Lifetime Residential Warranty, 20 year Commercial Warranty
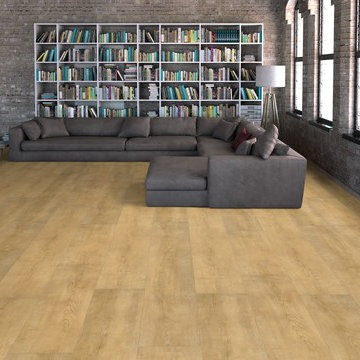
Sleek and chic. In terms of high-impact, going with a dark wire-brush pattern is a sure way to quickly define a space. Never boring, this modern pattern will set the mood immediately.
The most important specification for determining the durability of vinyl flooring is the thickness of the wear-layer. The best wear-layers are made of thick, clear virgin PVC, which covers the paper print-film that gives the floor its unique appearance. Once the wear-layer wears through, the paper is damaged and the floor will need replacement.
Most vinyl floors come with a 8-12 mil wear-layer (0.2-3 mm). The top commercial specs in the industry are higher, at 20-22 mil (0.5 mm). A select few manufacturers offer a “super” commercial spec of 28 mil (0.7 mm).
For Modin, we decided to set a new standard: 40 mil (1.0 mm) of premium virgin PVC. This allows us to offer an industry-leading 20 year Commercial Warranty (Lifetime Residential), compared to nearly all other commercial vinyl floors’ 10 year Commercial Warranty.
Beyond our superior wear-layer, we also use a patented click mechanism for superior hold, and a ceramic-bead coating.
SIZE MATTERS
Wider and longer planks create a sense of space and luxury. Most vinyl floors come in 6” or 7” widths, and 36” or 48” lengths.
For Modin, we designed our planks to be 9” wide, and 60” long. This extra large size allows our gorgeous designs to be fully expressed.
DETAILS THAT COUNT
We made sure to get all the details right. Real texture, to create the feel of wire-brushed wood. Low sheen level, to ensure a natural look that wears well over time. 4-sided bevels, to more accurately emulate the look of real planks. When added together they help create the unique look that is Modin.
DESIGNS THAT INSPIRE
We spent nearly a year just focusing on our designs, to ensure they provide the right mix of color and depth. Focusing on timeless wire-brush and European Oak styles, as well as more contemporary modern washes, our collection offers truly beautiful design that is both functional and inspiring.
 Flooret
Part of the Modin Vinyl Plank Collection, Available Exclusively From www.Flooret.com
$3.49 / sq ft, 22.08 sq ft per box
50% WIDER. 25% LONGER. TWICE AS DURABLE
Luxury Vinyl Plank, 5 mm x 9" x 60" (1.0 mm / 40 mil wear-layer)
Lifetime Residential Warranty, 20 year Commercial Warranty
Classic Oak Elegance. Arden provides a timeless template with which to define your space. We designed the grain pattern to have just a hint of rustic, but it is still clean enough that you can convincingly use it in a modern setting.
REDEFINING DURABILITY
The most important specification for determining the durability of vinyl flooring is the thickness of the wear-layer. The best wear-layers are made of thick, clear virgin PVC, which covers the paper print-film that gives the floor its unique appearance. Once the wear-layer wears through, the paper is damaged and the floor will need replacement.
Most vinyl floors come with a 8-12 mil wear-layer (0.2-3 mm). The top commercial specs in the industry are higher, at 20-22 mil (0.5 mm). A select few manufacturers offer a "super" commercial spec of 28 mil (0.7 mm).
For Modin, we decided to set a new standard: 40 mil (1.0 mm) of premium virgin PVC. This allows us to offer an industry-leading 20 year Commercial Warranty (Lifetime Residential), compared to nearly all other commercial vinyl floors' 10 year Commercial Warranty.
Beyond our superior wear-layer, we also use a patented click mechanism for superior hold, and a ceramic-bead coating.
SIZE MATTERS
Wider and longer planks create a sense of space and luxury. Most vinyl floors come in 6" or 7" widths, and 36" or 48" lengths.
For Modin, we designed our planks to be 9" wide, and 60" long. This extra large size allows our gorgeous designs to be fully expressed.
DETAILS THAT COUNT
We made sure to get all the details right. Real texture, to create the feel of wire-brushed wood. Low sheen level, to ensure a natural look that wears well over time. 4-sided bevels, to more accurately emulate the look of real planks. When added together they help create the unique look that is Modin.
DESIGNS THAT INSPIRE
We spent nearly a year just focusing on our designs, to ensure they provide the right mix of color and depth. Focusing on timeless wire-brush and European Oak styles, as well as more contemporary modern washes, our collection offers truly beautiful design that is both functional and inspiring.
 down2earth Interior Design, LLC.
Is your closet busting at the seams? Or do you perhaps have no closet at all? Time to consider adding a mudroom to your house. Mudrooms are a popular interior design trend these days, and for good reason - they can house far more than a simple coat closet can. They can serve as a family command center for kids' school flyers and menus, for backpacks and shoes, for art supplies and sports equipment. Some mudrooms contain a laundry area, and some contain a mail station. Some mudrooms serve as a home base for a dog or a cat, with easy to clean, low maintenance building materials. A mudroom may consist of custom built-ins, or may simply be a corner of an existing room with pulled some clever, freestanding furniture, hooks, or shelves to house your most essential mudroom items.
Whatever your storage needs, extensive or streamlined, carving out a mudroom area can keep the whole family more organized. And, being more organized saves you stress and countless hours that would otherwise be spent searching for misplaced items.
While we love to design mudroom niches, a full mudroom interior design allows us to do what we do best here at Down2Earth Interior Design: elevate a space that is primarily driven by pragmatic requirements into a space that is also beautiful to look at and comfortable to occupy. I find myself voluntarily taking phone calls while sitting on the bench of my mudroom, simply because it's a comfortable place to be. My kids do their homework in the mudroom sometimes. My cat loves to curl up on sweatshirts temporarily left on the bench, or cuddle up in boxes on their way out to the recycling bins, just outside the door. Designing a custom mudroom for our family has elevated our lifestyle in so many ways, and I look forward to the opportunity to help make your mudroom design dreams a reality as well.
Photos by Ryan Macchione
 Edgewater Design Group
As written in Northern Home & Cottage by Elizabeth Edwards
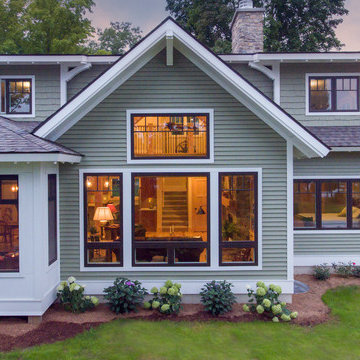
For years, Jeff and Ellen Miller spent their vacations sailing in Northern Michigan—so they had plenty of time to check out which small harbor town they might like to retire to someday. When that time arrived several years ago, they looked at properties up and down the coast and along inland lakes. When they discovered a sweet piece on the outskirts of Boyne City that included waterfront and a buildable lot, with a garage on it, across the street, they knew they’d found home. The couple figured they could find plans for their dream lake cottage online. After all, they weren’t looking to build anything grandiose. Just a small-to-medium sized contemporary Craftsman. But after an unfruitful online search they gave up, frustrated. Every plan they found had the back of the house facing the water—they needed a blueprint for a home that fronted on the water. The Millers first met the woman, Stephanie Baldwin, Owner & President of Edgewater Design Group, who solved that issue and a number of others on the 2015
Northern Home & Cottage Petoskey Area Home Tour. Baldwin’s home that year was a smart, 2000-square cottage on Crooked Lake with simple lines and a Craftsman sensibility. That home proved to the couple that Edgewater Design Group is as proficient at small homes as the larger ones they are often known for. Edgewater Design Group did indeed come up with the perfect plan for the Millers. At 2400 square feet, the simple Craftsman with its 3 bedrooms, vaulted ceiling in the great room and upstairs deck is everything the Millers wanted—including the fact that construction stayed within their budget. An extra courtesy of working with the talented design team is a screened in porch facing the lake (“She told us, of course you have to have a screened in porch,” Ellen says. “And we love it!’) Edgewater’s other touches are more subtle. The Millers wanted to keep the garage, but the home needed to be sited on a small knoll some feet away in order to capture the views of Lake Charlevoix across the street. The solution is a covered walkway and steps that are so artful they enhance the home. Another favor Baldwin did for them was to connect them with Legacy Construction, a firm known for its craftsmanship and attention to detail. The Miller home, outfitted with touches including custom molding, cherry cabinetry, a stunning custom range hood, built in shelving and custom vanities. A warm hickory floor and lovely earth-toned Craftsman-style color palette pull it all together, while a fireplace mantel hewn from a tree taken on the property rounds out this gracious lake cottage.
6