
Search results for "Standards overview" in Home Design Ideas
 A1 Garage Conversion
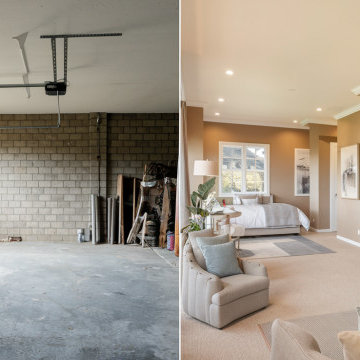
At A1 Garage Conversion, we specialize in transforming underutilized spaces into modern, functional living areas. This stunning garage conversion project in Reseda, CA, showcases our expertise in turning an ordinary garage into a beautifully designed living unit.
Project Overview:
? Location: Reseda, CA
? Type: Garage Conversion to Living Space
? Design: Modern, Open-Concept
Before:
The original garage was an unfinished space with exposed brick walls, a concrete floor, and a standard roll-up garage door. It lacked insulation, lighting, and any functional living features.
After:
Our transformation brought this space to life with a full renovation, including:
✅ Luxury Interior Finishes – Warm-toned walls, recessed lighting, and elegant crown molding.
✅ Open-Concept Layout – A seamless flow between the living, bedroom, and workspace areas.
✅ Comfort & Functionality – High-quality flooring, modern furnishings, and stylish décor.
✅ Enhanced Natural Light – New windows provide ample daylight, creating a cozy atmosphere.
✅ Bathroom & Kitchen Additions – Complete with modern fixtures and premium materials.
Why Choose A1 Garage Conversion?
✔ Expert Craftsmanship – We deliver high-quality, functional spaces.
✔ Maximized Property Value – Convert your garage into an ADU (Accessory Dwelling Unit) for extra rental income.
✔ Tailored Design Solutions – Customized to fit your needs and aesthetic preferences.
This project is a prime example of how a garage conversion can add value, comfort, and style to your home. Looking to transform your garage? Contact A1 Garage Conversion today!
? Call us for a consultation!
 Nakamoto Forestry
Project Overview:
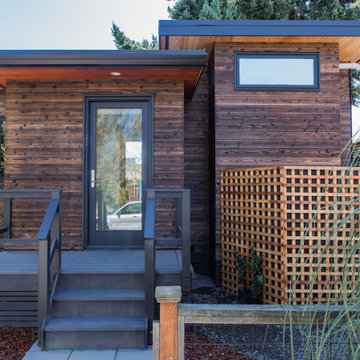
The owner of this project is a financial analyst turned realtor turned landlord, and the goal was to increase rental income on one of his properties as effectively as possible. The design was developed to minimize construction costs, minimize City of Portland building compliance costs and restrictions, and to avoid a county tax assessment increase based on site improvements.
The owner started with a large backyard at one of his properties, had a custom tiny home built as “personal property”, then added two ancillary sheds each under a 200SF compliance threshold to increase the habitable floor plan. Compliant navigation of laws and code ended up with an out-of-the-box design that only needed mechanical permitting and inspections by the city, but no building permits that would trigger a county value re-assessment. The owner’s final construction costs were $50k less than a standard ADU, rental income almost doubled for the property, and there was no resultant tax increase.
Product: Gendai 1×6 select grade shiplap
Prefinish: Unoiled
Application: Residential – Exterior
SF: 900SF
Designer:
Builder:
Date: March 2019
Location: Portland, OR
 Nakamoto Forestry
Project Overview:
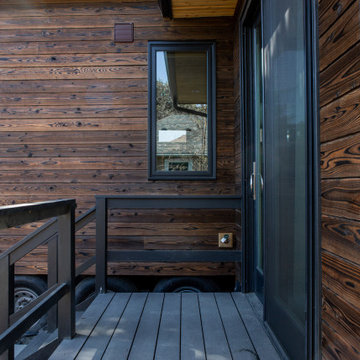
The owner of this project is a financial analyst turned realtor turned landlord, and the goal was to increase rental income on one of his properties as effectively as possible. The design was developed to minimize construction costs, minimize City of Portland building compliance costs and restrictions, and to avoid a county tax assessment increase based on site improvements.
The owner started with a large backyard at one of his properties, had a custom tiny home built as “personal property”, then added two ancillary sheds each under a 200SF compliance threshold to increase the habitable floor plan. Compliant navigation of laws and code ended up with an out-of-the-box design that only needed mechanical permitting and inspections by the city, but no building permits that would trigger a county value re-assessment. The owner’s final construction costs were $50k less than a standard ADU, rental income almost doubled for the property, and there was no resultant tax increase.
Product: Gendai 1×6 select grade shiplap
Prefinish: Unoiled
Application: Residential – Exterior
SF: 900SF
Designer:
Builder:
Date: March 2019
Location: Portland, OR
Find the right local pro for your project
 Middleton Inc.
Oakridge
Project Title: Oakridge
Project Type: Full House Remodel
Client Type: Builder
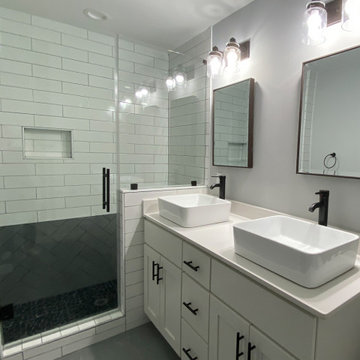
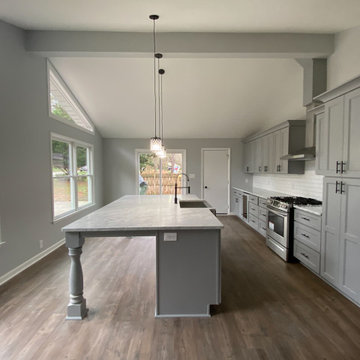
Overview: We were commissioned by our clients over at Housekick to create a set of design plans and provide our standard visualization package. The crew over at Housekick builds/renovates and sells over forty houses a year in the Raleigh Triangle area, so having an efficient construction process and the ability to pre-sell their properties is crucial to their business model. Because of our extensive experience with interior design, real estate, and construction projects, they rely on us to come up with complete design plans from start to finish and then use these to build and pre-sell their projects.
Original Conditions: This typical 1970’s choppy split-level house was e “functionally obsolete,” had three bedrooms, two baths, and no real master suite before we got our hands on it.
Changes: Upon completion, the home had four bedrooms, three full baths, a full master suite, and an open floorplan with modern architectural details.
The Result: Because of our design plans and visualizations, our clients were able to create a stunning property that was functionally current, appealed to the correct demographic, and wowed potential buyers resulting in the home selling before it ever hit the market!
 Success Floors LLC.
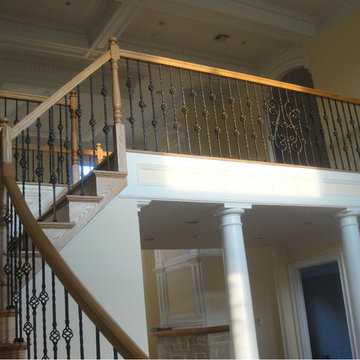
This is your standard L-Shape staircase with Oak wood. It was finished with a natural satin finish.
Example of a large classic wooden l-shaped staircase design in New York with wooden risers
Example of a large classic wooden l-shaped staircase design in New York with wooden risers
 Nakamoto Forestry
Project Overview:
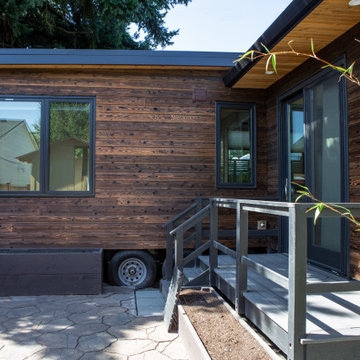
The owner of this project is a financial analyst turned realtor turned landlord, and the goal was to increase rental income on one of his properties as effectively as possible. The design was developed to minimize construction costs, minimize City of Portland building compliance costs and restrictions, and to avoid a county tax assessment increase based on site improvements.
The owner started with a large backyard at one of his properties, had a custom tiny home built as “personal property”, then added two ancillary sheds each under a 200SF compliance threshold to increase the habitable floor plan. Compliant navigation of laws and code ended up with an out-of-the-box design that only needed mechanical permitting and inspections by the city, but no building permits that would trigger a county value re-assessment. The owner’s final construction costs were $50k less than a standard ADU, rental income almost doubled for the property, and there was no resultant tax increase.
Product: Gendai 1×6 select grade shiplap
Prefinish: Unoiled
Application: Residential – Exterior
SF: 900SF
Designer:
Builder:
Date: March 2019
Location: Portland, OR
 Middleton Inc.
Project Type: Full House Remodel
Client Type: Builder
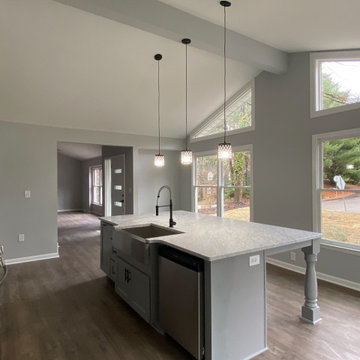
Overview: We were commissioned by our clients over at Housekick to create a set of design plans and provide our standard visualization package. The crew over at Housekick builds/renovates and sells over forty houses a year in the Raleigh Triangle area, so having an efficient construction process and the ability to pre-sell their properties is crucial to their business model. Because of our extensive experience with interior design, real estate, and construction projects, they rely on us to come up with complete design plans from start to finish and then use these to build and pre-sell their projects.
Original Conditions: This typical 1970’s choppy split-level house was e “functionally obsolete,” had three bedrooms, two baths, and no real master suite before we got our hands on it.
Changes: Upon completion, the home had four bedrooms, three full baths, a full master suite, and an open floorplan with modern architectural details.
The Result: Because of our design plans and visualizations, our clients were able to create a stunning property that was functionally current, appealed to the correct demographic, and wowed potential buyers resulting in the home selling before it ever hit the market!

 Middleton Inc.
Project Type: Full House Remodel
Client Type: Builder
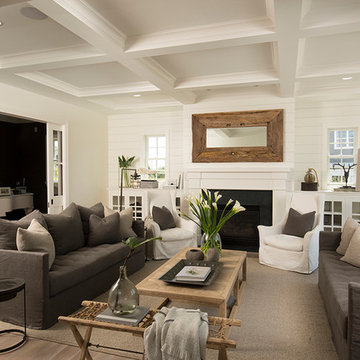
Overview: We were commissioned by our clients over at Housekick to create a set of design plans and provide our standard visualization package. The crew over at Housekick builds/renovates and sells over forty houses a year in the Raleigh Triangle area, so having an efficient construction process and the ability to pre-sell their properties is crucial to their business model. Because of our extensive experience with interior design, real estate, and construction projects, they rely on us to come up with complete design plans from start to finish and then use these to build and pre-sell their projects.
Original Conditions: This typical 1970’s choppy split-level house was e “functionally obsolete,” had three bedrooms, two baths, and no real master suite before we got our hands on it.
Changes: Upon completion, the home had four bedrooms, three full baths, a full master suite, and an open floorplan with modern architectural details.
The Result: Because of our design plans and visualizations, our clients were able to create a stunning property that was functionally current, appealed to the correct demographic, and wowed potential buyers resulting in the home selling before it ever hit the market!
 Envisioning Green
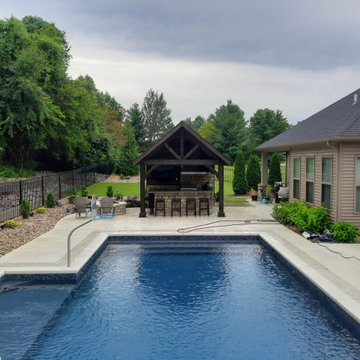
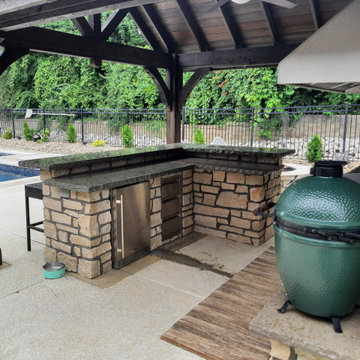
This Glen Carbon backyard was designed to feel like a private resort, where every detail invites relaxation and connection. At the heart of the space is a custom-built cedar pavilion that anchors the outdoor living area and provides shade and shelter for year-round enjoyment. Beneath the pavilion, a fully integrated outdoor kitchen with stone masonry, granite countertops, built-in grill, bar seating, and entertainment features creates a natural gathering place for guests.
A custom gas firepit seating area extends the experience beyond the kitchen, offering a warm and inviting spot to unwind on cool evenings. Surrounding the pool, the paver patio was designed with flowing curves and contrasting borders to visually connect the outdoor kitchen, pool, and lounge spaces into one cohesive backyard environment. Synthetic turf and low-maintenance landscaping were incorporated to keep the space clean, functional, and visually striking throughout the year.
This project was built to maximize entertainment, comfort, and property value, turning a standard backyard into a luxury outdoor living destination tailored for everyday enjoyment and unforgettable gatherings.
Project Overview
• Custom cedar pavilion
• Outdoor kitchen with grill and bar
• Gas firepit seating area
• Paver patio and pool integration
• Synthetic turf and landscaping
• Landscape lighting

 Cowbell Designs
Project Overview: This comprehensive renovation breathes new life into an existing home, meticulously preserving its foundational essence while introducing modern enhancements. The transformation includes the addition of a second story, thoughtfully designed with a dog shed roof that harmoniously aligns with the original roof’s architectural intent.
Exterior Expansion: The rear of the home has been skillfully extended to accommodate a basement access point, housing mechanical and electrical equipment. Above, a mudroom offers practicality and convenience. The newly constructed back porch serves as a serene retreat, boasting panoramic views of the property’s expansive depth.
Front Porch Extension: In keeping with the home’s original A-frame entryway, the front porch has been tastefully elongated, further accentuating the residence’s welcoming facade.
Energy Efficiency: This residential renovation proudly exceeds recommended energy efficiency standards by over 10%. This achievement is attributed to the strategic placement of high R-value insulation, tailored to each product’s function within the overall building envelope. Additionally, the incorporation of energy-efficient glazing with low Solar Heat Gain Coefficient (SGHC) values significantly contributes to the home’s sustainable design.
Aesthetic Vision: The client’s aesthetic preference shines through in the envisioned color scheme, featuring dark black and gray tones complemented by rich, dark wood accents. This bold palette underscores the home’s sophisticated and contemporary character.
Client Satisfaction: From the outset, the client has expressed immense satisfaction with the design, which not only meets but exceeds their expectations in both form and function.
 Windy City Painters
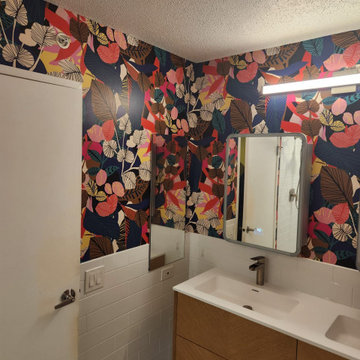
Expert wallpaper installer Lakeview services transform Chicago homes with precision and style. This stunning project showcases our commitment to quality craftsmanship in one of Chicago's most desirable neighborhoods.
Project Overview and Architecture
This beautiful Lakeview greystone required careful wallpaper installation that would complement the home's original architectural details. The vintage building's unique character demanded specialized techniques to ensure perfect results while preserving the historic charm that makes these homes so special.
Materials and Products
We utilized premium wallpaper adhesive, professional smoothing tools, and high-quality materials specifically chosen for Chicago's climate conditions. Our team selected products that work exceptionally well with the plaster walls common in vintage Lakeview homes.
Installation Process
First, we thoroughly prepared surfaces by repairing imperfections and priming walls. Next, we precisely measured and cut each strip, ensuring perfect pattern alignment. Then, we applied adhesive evenly and positioned wallpaper with expert precision. Finally, we eliminated bubbles, trimmed edges, and completed finishing touches.
Chicago Home Challenges
Lakeview's vintage homes present unique challenges including uneven plaster walls, settling issues, and temperature fluctuations. Our wallpaper installer Lakeview expertise addresses these concerns with specialized preparation techniques and climate-appropriate materials that ensure lasting results.
Results and Quality
The finished installation showcases flawless pattern matching, smooth surfaces, and crisp edges that enhance the room's architectural features. This wallpaper installer Lakeview project demonstrates our commitment to excellence and attention to detail.
Professional Tips
Homeowners should always hire experienced professionals for wallpaper installation. Proper surface preparation is crucial for longevity. Additionally, choosing quality materials appropriate for Chicago's climate ensures your investment lasts for years.
See more work and request free estimate at windypainters.com.
Q: Why choose professional wallpaper installer Lakeview services over DIY? / A: Professional installation prevents costly mistakes, ensures proper adhesion, and guarantees beautiful results that enhance your home's value and appearance.
Q: How do you handle vintage Lakeview home challenges? / A: Our wallpaper installer Lakeview team addresses plaster walls, settling issues, and architectural details with specialized techniques and appropriate materials.
Q: What preparation is required before wallpaper installation? / A: We repair wall imperfections, apply primer, ensure smooth surfaces, and address any moisture issues for optimal wallpaper installer Lakeview results.
Q: How long does professional wallpaper installation take? / A: Most rooms require 1-2 days depending on complexity, though our wallpaper installer Lakeview team works efficiently while maintaining quality standards.
Q: Can you work with designer or specialty wallpapers? / A: Absolutely, our wallpaper installer Lakeview experts handle luxury papers, grasscloth, murals, and specialty materials with appropriate techniques and care.
Q: Do you remove existing wallpaper before installation? / A: Yes, we provide complete removal services using safe methods that protect your walls and prepare surfaces for new wallpaper installer Lakeview projects.
Q: How do you ensure pattern alignment and matching? / A: Our wallpaper installer Lakeview professionals use precise measuring, professional tools, and years of experience to achieve perfect pattern continuity.
Q: What types of walls can accommodate wallpaper? / A: We install wallpaper on various surfaces including drywall, plaster, and painted walls after proper preparation for wallpaper installer Lakeview projects.
Q: How do you handle corners and trim work? / A: Our wallpaper installer Lakeview team uses specialized techniques for inside corners, outside corners, and detailed trim work ensuring professional results.
Q: What warranty do you provide on installation? / A: Windy City Painters guarantees our wallpaper installer Lakeview work with comprehensive warranty coverage protecting your investment and ensuring satisfaction.
 Middleton Inc.
Project Type: Full House Remodel
Client Type: Builder
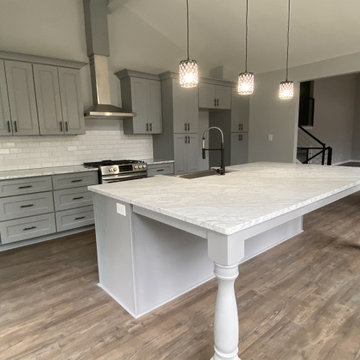
Overview: We were commissioned by our clients over at Housekick to create a set of design plans and provide our standard visualization package. The crew over at Housekick builds/renovates and sells over forty houses a year in the Raleigh Triangle area, so having an efficient construction process and the ability to pre-sell their properties is crucial to their business model. Because of our extensive experience with interior design, real estate, and construction projects, they rely on us to come up with complete design plans from start to finish and then use these to build and pre-sell their projects.
Original Conditions: This typical 1970’s choppy split-level house was e “functionally obsolete,” had three bedrooms, two baths, and no real master suite before we got our hands on it.
Changes: Upon completion, the home had four bedrooms, three full baths, a full master suite, and an open floorplan with modern architectural details.
The Result: Because of our design plans and visualizations, our clients were able to create a stunning property that was functionally current, appealed to the correct demographic, and wowed potential buyers resulting in the home selling before it ever hit the market!
 Envisioning Green
This Glen Carbon backyard was designed to feel like a private resort, where every detail invites relaxation and connection. At the heart of the space is a custom-built cedar pavilion that anchors the outdoor living area and provides shade and shelter for year-round enjoyment. Beneath the pavilion, a fully integrated outdoor kitchen with stone masonry, granite countertops, built-in grill, bar seating, and entertainment features creates a natural gathering place for guests.
A custom gas firepit seating area extends the experience beyond the kitchen, offering a warm and inviting spot to unwind on cool evenings. Surrounding the pool, the paver patio was designed with flowing curves and contrasting borders to visually connect the outdoor kitchen, pool, and lounge spaces into one cohesive backyard environment. Synthetic turf and low-maintenance landscaping were incorporated to keep the space clean, functional, and visually striking throughout the year.
This project was built to maximize entertainment, comfort, and property value, turning a standard backyard into a luxury outdoor living destination tailored for everyday enjoyment and unforgettable gatherings.
Project Overview
• Custom cedar pavilion
• Outdoor kitchen with grill and bar
• Gas firepit seating area
• Paver patio and pool integration
• Synthetic turf and landscaping
• Landscape lighting

 Envisioning Green
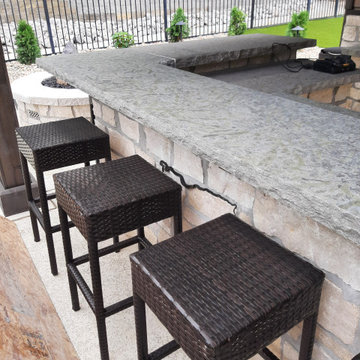
This Glen Carbon backyard was designed to feel like a private resort, where every detail invites relaxation and connection. At the heart of the space is a custom-built cedar pavilion that anchors the outdoor living area and provides shade and shelter for year-round enjoyment. Beneath the pavilion, a fully integrated outdoor kitchen with stone masonry, granite countertops, built-in grill, bar seating, and entertainment features creates a natural gathering place for guests.
A custom gas firepit seating area extends the experience beyond the kitchen, offering a warm and inviting spot to unwind on cool evenings. Surrounding the pool, the paver patio was designed with flowing curves and contrasting borders to visually connect the outdoor kitchen, pool, and lounge spaces into one cohesive backyard environment. Synthetic turf and low-maintenance landscaping were incorporated to keep the space clean, functional, and visually striking throughout the year.
This project was built to maximize entertainment, comfort, and property value, turning a standard backyard into a luxury outdoor living destination tailored for everyday enjoyment and unforgettable gatherings.
Project Overview
• Custom cedar pavilion
• Outdoor kitchen with grill and bar
• Gas firepit seating area
• Paver patio and pool integration
• Synthetic turf and landscaping
• Landscape lighting
 Envisioning Green
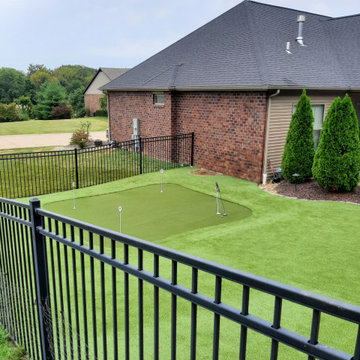
This Glen Carbon backyard was designed to feel like a private resort, where every detail invites relaxation and connection. At the heart of the space is a custom-built cedar pavilion that anchors the outdoor living area and provides shade and shelter for year-round enjoyment. Beneath the pavilion, a fully integrated outdoor kitchen with stone masonry, granite countertops, built-in grill, bar seating, and entertainment features creates a natural gathering place for guests.
A custom gas firepit seating area extends the experience beyond the kitchen, offering a warm and inviting spot to unwind on cool evenings. Surrounding the pool, the paver patio was designed with flowing curves and contrasting borders to visually connect the outdoor kitchen, pool, and lounge spaces into one cohesive backyard environment. Synthetic turf and low-maintenance landscaping were incorporated to keep the space clean, functional, and visually striking throughout the year.
This project was built to maximize entertainment, comfort, and property value, turning a standard backyard into a luxury outdoor living destination tailored for everyday enjoyment and unforgettable gatherings.
Project Overview
• Custom cedar pavilion
• Outdoor kitchen with grill and bar
• Gas firepit seating area
• Paver patio and pool integration
• Synthetic turf and landscaping
• Landscape lighting
 Envisioning Green
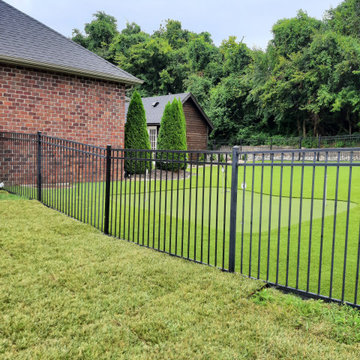
This Glen Carbon backyard was designed to feel like a private resort, where every detail invites relaxation and connection. At the heart of the space is a custom-built cedar pavilion that anchors the outdoor living area and provides shade and shelter for year-round enjoyment. Beneath the pavilion, a fully integrated outdoor kitchen with stone masonry, granite countertops, built-in grill, bar seating, and entertainment features creates a natural gathering place for guests.
A custom gas firepit seating area extends the experience beyond the kitchen, offering a warm and inviting spot to unwind on cool evenings. Surrounding the pool, the paver patio was designed with flowing curves and contrasting borders to visually connect the outdoor kitchen, pool, and lounge spaces into one cohesive backyard environment. Synthetic turf and low-maintenance landscaping were incorporated to keep the space clean, functional, and visually striking throughout the year.
This project was built to maximize entertainment, comfort, and property value, turning a standard backyard into a luxury outdoor living destination tailored for everyday enjoyment and unforgettable gatherings.
Project Overview
• Custom cedar pavilion
• Outdoor kitchen with grill and bar
• Gas firepit seating area
• Paver patio and pool integration
• Synthetic turf and landscaping
• Landscape lighting
 Windy City Painters
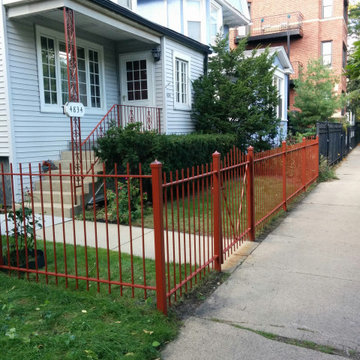
ver look at your iron fence and wonder how rust crept up so fast? For homeowners across Chicago's North Side and Near West Side, that moment of recognition often comes too late. Windy City Painters built this project guide to help you understand exactly what a professional iron fence restoration involves, what products matter, and what Chicago's climate demands from every coat of paint applied to exposed metal.
PROJECT OVERVIEW
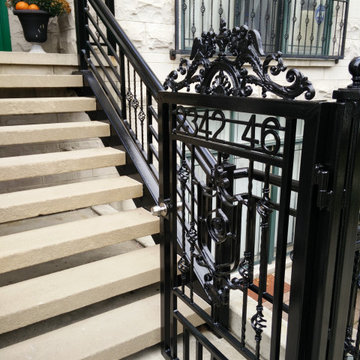
This iron fence restoration involved a multi-unit property featuring an ornamental iron perimeter fence typical of Chicago's greystone and courtyard building streetscape. The fence presented moderate-to-severe surface rust, multiple areas of paint delamination, and two sections with deep pitting requiring needle gun descaling before any coating could be applied. The goal was full rust remediation and a durable topcoat finish built for Chicago's demanding climate. Windy City Painters completed the project in two days with zero damage to surrounding hardscape.
MATERIALS AND PRODUCTS
Ospho Rust Converter - A phosphoric acid-based treatment that chemically transforms iron oxide into iron phosphate, halting active corrosion before primer is applied. Essential on Chicago iron exposed to decades of salt air and freeze-thaw cycling.
Corroseal Rust-Inhibitive Primer - A water-based latex primer with built-in rust inhibitors, applied over converted surfaces to seal and prepare metal for topcoating.
Sherwin-Williams DTM Acrylic Coating - Direct-to-Metal formulation delivering exceptional adhesion, flexibility, and corrosion resistance. Available in satin and semi-gloss, ideal for ornamental iron fence painting across Chicago properties.
THE PROCESS
Step 1 - Mechanical Surface Preparation: Wire wheel grinding with angle grinder attachments removed all loose rust scale, failing paint, and surface contamination. Heavily pitted sections received needle gun descaling to expose clean stable metal beneath. This step determines everything. No primer or topcoat performs correctly over compromised metal, regardless of product quality. Windy City Painters treats prep as the primary investment on every iron fence project.
Step 2 - Rust Conversion: Ospho was applied liberally to all areas showing active rust. The phosphoric acid reaction was allowed to complete fully before any priming began. On severely oxidized sections, a second Ospho application ensured complete conversion. This step is non-negotiable in Chicago where freeze-thaw cycles push moisture into every surface irregularity.
Step 3 - Priming with Corroseal: Full coverage Corroseal primer coat sealed the converted surface and established adhesion for the finish coats. Corroseal's rust-inhibitive chemistry adds a secondary barrier against moisture penetration, extending the effective life of the topcoat by years in Chicago's humid lakefront environment.
Step 4 - DTM Topcoat Application: Two coats of Sherwin-Williams DTM acrylic in satin black were applied by brush to ensure full penetration into ornamental detail. DTM's flexibility accommodates the metal expansion and contraction Chicago temperatures demand, from minus-15 winters to 95-degree July afternoons. Final coverage was uniform and true to color.
CHICAGO-SPECIFIC CHALLENGES
Chicago iron faces challenges most other markets do not. Lake Michigan humidity accelerates surface oxidation year-round. Road salt from winter de-icing migrates to fence bases and lower rails. Freeze-thaw cycling cracks poorly adhered coatings within a single winter. Greystones, two-flats, and Victorian brownstones often feature original ornamental ironwork with decades of layered paint that must be assessed before any new coating is added. Windy City Painters factors all of these conditions into every iron fence estimate and material selection.
WHAT TO EXPECT LONG-TERM
A properly prepared and coated iron fence using the Ospho, Corroseal, and Sherwin-Williams DTM system should deliver 5-8 years of performance in Chicago conditions. Annual visual inspection for chips or scratches, followed by prompt spot priming, extends that timeline significantly. Full refinishing cycles become less frequent when the initial prep work is done correctly.
PRO TIPS
Tip 1 - Never skip the rust converter. Painting over active rust with even the best topcoat guarantees early failure. Ospho or a comparable phosphoric acid treatment must precede any primer on iron showing orange or brown oxidation.
Tip 2 - Assess for weld repairs before scheduling painting. If rust has eaten through the metal creating structural voids or broken sections, a welder must address those areas before painting begins. Windy City Painters identifies weld repair needs during the free estimate.
Tip 3 - Choose satin or semi-gloss finish on iron. Flat finishes on metal hold moisture and show wear faster. Satin DTM provides enough sheen to shed water while maintaining the traditional look Chicago ornamental iron demands.
Ready to restore your iron fence the right way? Visit windypainters.com to schedule your free estimate with Windy City Painters.
FAQ
Q: What does iron fence painting cost in Chicago?
A: Most residential iron fence projects range from $500 to $1,800 depending on linear footage, rust severity, and prep requirements. Windy City Painters provides free detailed on-site estimates for accurate iron fence painting cost in Chicago.
Q: How do I know if my fence needs rust conversion or just repainting?
A: Any visible orange or brown rust requires chemical conversion before priming. Windy City Painters evaluates every fence during the estimate to determine whether Ospho, mechanical prep, or weld repair is needed before coating begins.
Q: Can you paint iron in cold Chicago weather?
A: DTM coatings have lower application temperature thresholds than standard exterior paint, but we avoid application below 35 degrees Fahrenheit. Windy City Painters schedules iron fence projects for appropriate weather windows throughout the season.
Q: How long does iron fence paint last in Chicago?
A: With complete rust conversion, Corroseal priming, and Sherwin-Williams DTM topcoat, iron fence painting in Chicago lasts 5-8 years. Annual inspections and prompt touch-ups of chips extend that timeline further.
Q: Do I need a welder before an iron fence can be painted?
A: Only if rust has created structural voids or breaks in the metal. Windy City Painters assesses this during the free estimate and can coordinate with welders when needed before our painting crew begins.
Q: What is the difference between Ospho and Corroseal?
A: Ospho is a rust converter applied directly to active rust to chemically neutralize it. Corroseal is a rust-inhibitive primer applied over converted or clean metal. Windy City Painters often uses both in sequence for maximum protection on Chicago iron.
Q: How often should Chicago iron fences be inspected?
A: Annual inspection is recommended, ideally in early spring after winter salt and freeze-thaw exposure. Catching small chips and bare spots early allows simple touch-up rather than full iron fence repainting, saving significant cost.
 Middleton Inc.
Oakridge
Project Title: Oakridge
Project Type: Full House Remodel
Client Type: Builder
Overview: We were commissioned by our clients over at Housekick to create a set of design plans and provide our standard visualization package. The crew over at Housekick builds/renovates and sells over forty houses a year in the Raleigh Triangle area, so having an efficient construction process and the ability to pre-sell their properties is crucial to their business model. Because of our extensive experience with interior design, real estate, and construction projects, they rely on us to come up with complete design plans from start to finish and then use these to build and pre-sell their projects.
Original Conditions: This typical 1970’s choppy split-level house was e “functionally obsolete,” had three bedrooms, two baths, and no real master suite before we got our hands on it.
Changes: Upon completion, the home had four bedrooms, three full baths, a full master suite, and an open floorplan with modern architectural details.
The Result: Because of our design plans and visualizations, our clients were able to create a stunning property that was functionally current, appealed to the correct demographic, and wowed potential buyers resulting in the home selling before it ever hit the market!
 Windy City Painters
Ever notice how your iron fence looks more rust than paint after another brutal Chicago winter? That is usually the moment homeowners start searching for a painting contractor who actually understands metal - not just someone who will brush a coat of black paint over active corrosion and call it done. At Windy City Painters, iron fence restoration is one of our most requested services on the North Side and Near West Side, and for good reason. These fences are old, they are beautiful, and they deserve a proper finish system.
PROJECT OVERVIEW
This project involved a full ornamental iron fence on a North Side greystone property. The fence was original to the building - likely installed in the 1910s or 1920s - and had gone through multiple paint cycles without any rust conversion work. By the time Windy City Painters arrived, the horizontal rails showed active pitting, the vertical spindles had surface rust under lifting paint, and two corner posts had minor joint separation. The homeowner wanted the fence restored to a sharp satin black finish that would hold through multiple Chicago winters.
MATERIALS AND PRODUCTS
Ospho Rust Converter - phosphoric acid formula that chemically neutralizes iron oxide and converts it to iron phosphate, a stable paintable surface. Used on all pitted and actively corroded areas before primer application.
Rust-Oleum DTM Rust-Inhibitive Primer - direct-to-metal primer that bonds to both converted rust zones and bare metal, blocking moisture intrusion at the substrate level.
Sherwin-Williams DTM Acrylic Topcoat - flexible, moisture-resistant finish formulated to expand and contract with metal through temperature cycling. Applied in two finish coats in satin black.
For cases with deeper rust penetration, Corroseal Water-Based Rust Converter and Metal Primer is an alternative that combines conversion and priming in a single product, useful on complex ornamental profiles where two-product systems are harder to apply.
THE PROCESS
Step 1 - Mechanical Preparation. Windy City Painters wire-wheels all loose rust, flaking paint, and scale using angle grinders fitted with wire wheel attachments. On heavily pitted sections, needle gun descaling is used to reach rust in tight ornamental grooves. This step is non-negotiable. No coating bonds reliably to iron oxide, and skipping this step is the single most common reason iron fence paint fails within a year.
Step 2 - Rust Conversion. Ospho is brushed into all pitted and bare metal areas and allowed to fully react. The surface shifts from orange to a grayish-black iron phosphate layer. This stable base accepts primer without the risk of rust migrating upward through the paint film over time.
Step 3 - Primer Coat. Rust-Oleum DTM rust-inhibitive primer is applied full coverage over the entire fence surface, including areas that appeared clean but showed minor surface oxidation. DTM primer acts as a moisture barrier and mechanical adhesion layer for the finish coats.
Step 4 - Finish Coats. Two coats of Sherwin-Williams DTM acrylic topcoat are applied in satin black, with adequate dry time between coats. The DTM formula remains flexible after cure, allowing the iron to expand and contract through Chicago temperature swings without the topcoat cracking or peeling at joints.
CHICAGO-SPECIFIC CHALLENGES
Ornamental iron on Chicago greystones, two-flats, and Victorian brownstones was almost never hot-dip galvanized. It was painted from installation and has relied on continuous paint maintenance ever since. Chicago winters add specific stress: freeze-thaw cycles force water into any paint film crack, expanding it; road salt spray elevates corrosive chloride exposure; and humidity during spring thaw keeps metal surfaces wet for extended periods. This combination accelerates rust spread beneath paint films that appear intact on the surface.
WHAT TO EXPECT LONG-TERM
A properly prepped and primed iron fence finished with a DTM topcoat system should hold 5-8 years in Chicago conditions before any touch-up is warranted. Annual inspection of joints, welds, and areas near grade level will catch early moisture entry before it becomes a larger rust issue. Windy City Painters recommends scheduling touch-up earlier rather than waiting for full paint failure to protect the prep investment.
PRO TIPS
Tip 1 - Address joint separation before painting. If fence rails have separated at welds or mechanical joints, water will enter and rust will restart from inside the connection point regardless of the exterior coating. Flag any separated joints for welding before any paint system is applied.
Tip 2 - Never use latex house paint on iron fences. Standard exterior latex lacks the adhesion and flexibility for bare metal. Always use a product labeled DTM or specify a rust-inhibitive primer underneath any finish coat applied to iron.
Tip 3 - Paint in late spring or early fall. Iron fences exposed to full sun in peak summer heat can reach surface temperatures that cause solvent-based coatings to blister during application. Ideal application conditions are 50-85 degrees Fahrenheit with low humidity and no direct intense sun on the metal surface.
Learn more about iron fence painting cost in Chicago and schedule your free estimate at windypainters.com
FAQ
Q: What does iron fence painting cost in Chicago?
A: Windy City Painters typically prices residential iron fence painting at $8-$18 per linear foot. Variables include rust severity, spindle density, ornamental profile complexity, and whether rust conversion products like Ospho or Corroseal are required before priming.
Q: Can you paint over rust without grinding it off first?
A: No. Windy City Painters always performs mechanical prep before any coating. Wire wheel grinding removes loose scale and flaking paint. Rust converters handle residual oxidation chemically. Skipping this step means the new paint film will delaminate within one season.
Q: How do I know if my iron fence needs a welder before painting?
A: Windy City Painters inspects all joints and rail connections during the estimate. Rail separation, cracked welds, or sections that flex when pressed indicate structural issues that should be welded before any paint system is applied to avoid reopening at stress points.
Q: What is the difference between Ospho and Corroseal?
A: Both are rust converters. Ospho is a phosphoric acid solution applied as a separate step before priming, giving maximum control over conversion and primer selection. Corroseal combines conversion and primer in one product, which works well on complex ornamental profiles where a two-step system is harder to apply evenly.
Q: How long does the paint last on an iron fence in Chicago?
A: With full mechanical prep, rust conversion, DTM primer, and two DTM topcoats, Windy City Painters clients typically see 5-8 years of performance before touch-up is needed, even through Chicago freeze-thaw cycling and road salt exposure.
Q: Do you paint iron fences that are still structurally sound but heavily rusted on the surface?
A: Yes. Surface rust, even heavy pitting, does not necessarily indicate structural failure. Windy City Painters evaluates each fence individually. As long as the metal is sound under the rust, proper mechanical prep and a rust converter restore the surface to a paintable condition.
 Lawn Enforcement Landscaping LTD
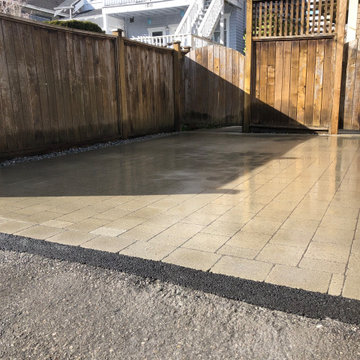
Lawn Enforcement Landscaping takes great pride in our hardscape work. Pictured here is a recent installation of paving stones in Vancouver for a driveway.
COVID-19: We practice safe social distancing with our team and you, and are pleased to be able to help you move forward on projects during this time.
Proper Paving Stone Installation
By following the proper steps of base preparation/compaction, detailed laying of the pavers, certified edge restraints and polymeric jointing sand – we are left with a driveway parking pad that will stay true for years to come!
Know your base! Lawn Enforcement takes pride in their high attention to detail and we only install to ICPI standards International Concrete Paver Institute. The most common failure that comes from paving stones is improper base and compaction. This will cause settling, rutting and edging failure in your finished product.
Overview of Materials Required for Paving Stones
Geotextile Fabric: Prevents gravel base migration into soil sub-base.
Gravel Base (3/4” minus road base gravel). Here are some rough amounts required:
Walkways, Patios: 4”
Driveways, parking pads: 6”-12”
Compacted in 2” lifts depending on plate compactor used at time of installation
Sand base:
1” of bedding sand MAX
Paving Stones/Jointing Sand/Edge Restraints
Keeping Our Pavers As Local as Possible
We work with a variety of local suppliers to bring you a great selection of interlocking and hydrapressed slab pavers!
Click here to request a Paving Stone Installation today!
6