
Search results for "Start online" in Home Design Ideas
 Robin's Nest Interiors
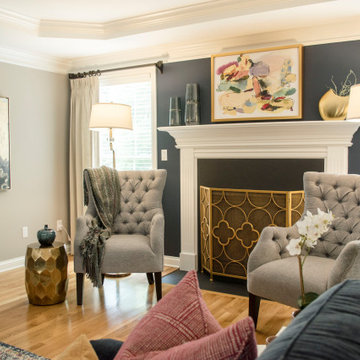
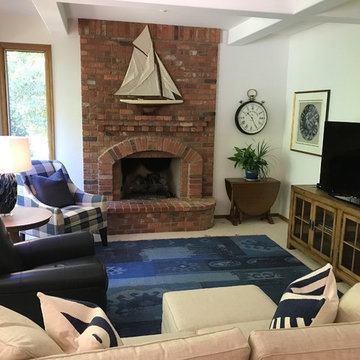
This J-town client worked with an online design service to select their furniture for this long and narrow Family Room. They made some great choices including a navy sectional and a colorful rug. However, they still needed help pulling everything together. We started by adding the incredible media cabinet along the wall opposite the sectional to balance the space. And as large as the space is, there was no place to display their travel treasures so we added this unique etagere. We framed the windows with lovely linen drapery panels in an oatmeal color to pop off the navy accent walls. We tied all of our colors together will this vibrant artwork for over the mantle. This is such a fun couple, and now their main Living Area truly reflects their personality and love of travel.
The moral of this story is you can have great furniture and your room still won’t feel like home. It is the finishing touches that make a house a home. Enjoy!
 DENALI BUILDERS & Design
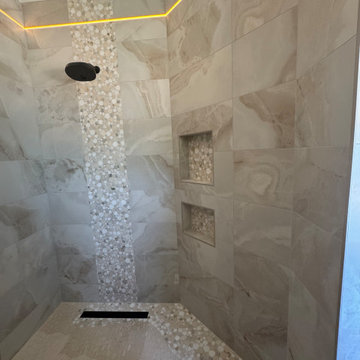
This bathroom was created for homeowners who found us online and reached out after seeing our work, trusting us to bring their vision to life. From the start, we worked together seamlessly, listening closely to what they wanted and guiding them through every step of the process. The result is a calm, spa-like space with a large walk-in shower, warm stone-look tile, a built-in bench, and sleek matte black fixtures that feel modern yet timeless. Soft LED lighting highlights the tile and adds a relaxing glow, while the double vanity with custom cabinetry and backlit mirrors keeps the room bright, functional, and uncluttered. Natural stone floors add warmth and flow throughout the space. This project is a perfect example of how collaboration, clear communication, and attention to detail can turn a homeowner’s vision into a beautiful, well-crafted bathroom they’ll enjoy every day—and the same level of care we bring to every client who finds us and trusts us with their home.
 All Seasons Pools
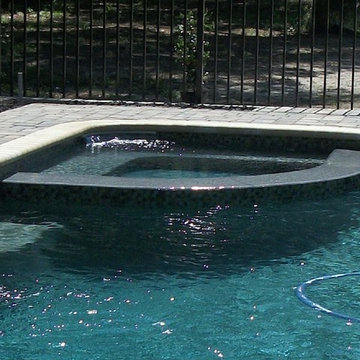
Ready to get started on your family’s new favorite spot? Design Your Florida Pool today with our free online pool builder!
Find the right local pro for your project
 Kimba Hills
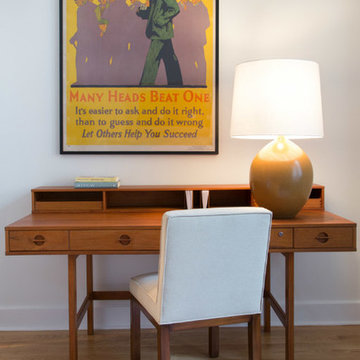
A SpeedDesign client relocates from Los Angeles to an empty Manhattan apartment. We started and finished this job on both coasts in two weeks.
Vintage table lamp and chair from our shop, rumba, in L.A., desk purchased from an online vintage shop, art is from the client's own collection.
Photo credit: Brett Beyer
 Heidi Reis / Abode Agency LLC
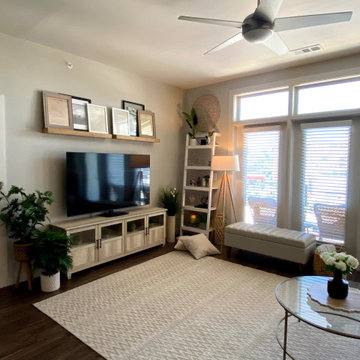
This living room started from a blank canvas. The client had just recently moved in and had no furniture except for a desk in her office. My initial goal was to figure out what she was looking for, her preferred style, and color palette. She told me her must-haves: plenty of seating for friend gatherings, lots of plants, neutral tones, and a midcentury style with a twist.
Given her preferences and needs, I went to work. Luckily, I’m quite savvy with resources including Facebook Marketplace, Next Door, Offer-up, and Instagram as well as using various online and local retailers.
This renovation was designed by Heidi Reis with Abode Agency LLC, she serves clients in Atlanta including but not limited to Intown neighborhoods such as: Grant Park, Inman Park, Midtown, Kirkwood, Candler Park, Lindberg area, Martin Manor, Brookhaven, Buckhead, Decatur, and Avondale Estates.
For more information on working with Heidi Reis, click here: https://www.AbodeAgency.Net/
 Berkshire Hathaway HomeServices
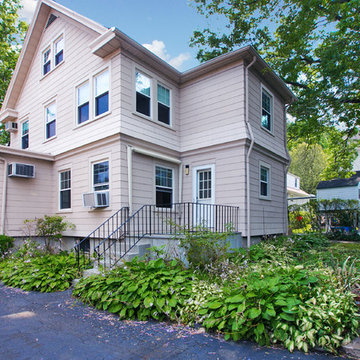
84% of all homebuyers today start their search online. Whether you're selling a luxurious property or a fixer-upper, high-quality, professional photos are a must!
Roamy Fils-Aime and Obeo.com
 Homework Remodels
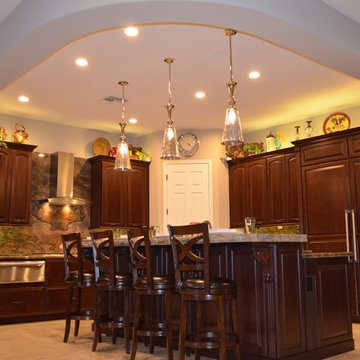
 With education being key to our remodel process, our designer discussed lighting elements, space planning, cabinet options and finish materials with our homeowners. To begin, she talked about under cabinet and above cabinet lighting options. They also discussed the popularity and functionality of LED lights for task, decorative and ambient lighting scenes. Eavesdropping on our conversation, one of the brothers chimed in on how often they had to change the recessed ceiling fixtures. That comment from the brother led our designer to increase our scope of work to add dimmable LED can lights in the color frequency close to daylight. Now it was time to complete the finish selections.
Product selection had to go quickly, as the homeowner was only able to dedicate one long weekend to shop. With this goal in mind, our designer made choosing plumbing products and decorative lighting an online event. Then they went to an appliance showroom and granite/tile showroom to make the final choices. Our designer made sure they found a gorgeous set of slabs for the granite above the cooktop, since it was a key factor for the client and her mother.
With all the selections made, final space plan drawings and the electrical layout complete, the client met with our designer to sign off on all the paperwork and move forward with their new kitchen. The key improvements incorporated into the final design were:
LED can lights, under cabinet and above cabinet lights all on dimmers.
Accessible items for wheelchair use with a touch-free faucet and microwave drawer .
Extra deep counter space and seating at the island.
Additional storage cabinets under the seating area of the island.
Decreased traffic flow issues by adjusting refrigerator/freezer location and double oven cabinet.
Plug strips under the wall cabinets to eliminate backsplash outlets.
An expansive granite slab backsplash centered on the cooktop area.
Our project manager started the job with rough electrical and rough plumbing, as the homeowner had enlisted the assistance of a family friend to remove the kitchen cabinets and re-install them in her garage. The plumbing was straight forward with the gas line already in place and the sink location staying in the island. The electrician wired for the new under-cabinet and above cabinet LED strip lights. The sconce locations were adjusted for the new bar top location, as were a row of can lights to accommodate for an even pour of ambient light throughout the space. The new LED can lights are a hit, as none have needed to be changed out.
Our project manager specializes in trim carpentry so he did the cabinet install to keep our schedule on time. The cabinets went in smoothly except for the custom refrigerator panel. One of the panels needed to be remade three times, as each time it was produced the manufacturer’s quality control caught a defect. Our project manager worked closely with manufacturer and homeowner to keep everyone in the loop waiting patiently on its arrival.
When it came time for the quartzite installation, we worked closely with our fabricator at cut layout to create the focal point at the hood. His team did an excellent job with the installation. The sink area was a surprise. They went above and beyond in framing the sink with the similar vein to the hood backsplash. Upon installation, the tile backsplash just did not do justice to the amazing quartzite. Discussion with the family and pictures sent to the homeowner lead to a decision to call the fabricator to see how much quartzite might be left. He had just enough to complete the island and beverage center. In the end, the backsplash worked out beautifully in all stone.
We met our schedule for the end date of the project and the wheelchair-bound sister was able to move in. For this large Italian family, big meals with lots of family and friends in the new wonderful hub/kitchen is now a part of their happy life. Mission accomplished.
 Ryan's Landscaping Hanover, Pa Patios & Walls
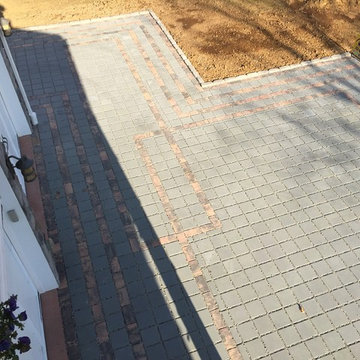
Ryan's Landscaping installing Nicolock SF-Rima & Eco-Ridge Permeable Pavers Driveway Hardscape near Hanover, PA. When you’re serious about starting your paver project, look no further then Ryan's Landscaping. We are York County Area's preferred paver - hardscape contractor. Our hard work, attention to detail fosters success right from the beginning. Give us a call today @ 717-632-4074 or contact us online @ www.ryanslandscaping.com
 DENALI BUILDERS & Design
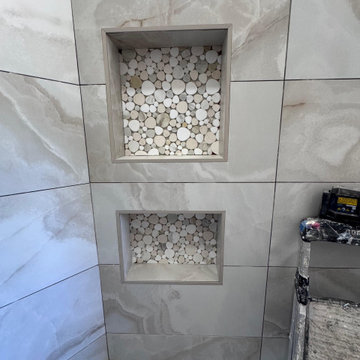
This bathroom was created for homeowners who found us online and reached out after seeing our work, trusting us to bring their vision to life. From the start, we worked together seamlessly, listening closely to what they wanted and guiding them through every step of the process. The result is a calm, spa-like space with a large walk-in shower, warm stone-look tile, a built-in bench, and sleek matte black fixtures that feel modern yet timeless. Soft LED lighting highlights the tile and adds a relaxing glow, while the double vanity with custom cabinetry and backlit mirrors keeps the room bright, functional, and uncluttered. Natural stone floors add warmth and flow throughout the space. This project is a perfect example of how collaboration, clear communication, and attention to detail can turn a homeowner’s vision into a beautiful, well-crafted bathroom they’ll enjoy every day—and the same level of care we bring to every client who finds us and trusts us with their home.

 Zepboo
Presenting a case study of a client located in Nagoya, Japan. This client resides in an 85 square meter, two-bedroom, two-living room residence. The overall style of the house incorporates a blend of Japanese wooden and Nordic modern aesthetics. The client discovered us through a Google search and sought our expertise in recommending and selecting lighting fixtures suitable for their living room and dining area. The client expressed a preference for localized lighting, indicating a high requirement for accentuating specific areas. After reviewing the floor plans and renderings provided by the client, we assisted them in making their choices.
Starting with the dining area, which is a separate space occupying approximately 10 square meters, the client has a solid wood dining table measuring 1.8 meters in length. Their preference for warm lighting led us to recommend the PH5 Macaron Pendant Light in a Nordic modern style. This pendant light offers a wide range of color options, and the client personally selected a combination of white and orange, paired with warm light sources. The actual result of this combination is truly remarkable. As the client had additional auxiliary lighting such as light strips installed in the dining area, the pendant light primarily serves the purpose of focusing the light on the food, perfectly meeting the client's requirements.
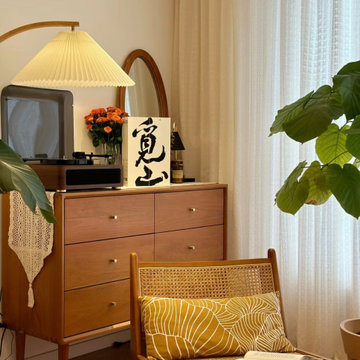
Moving on to the living room, the client also has light strips installed on the ceiling and track lights in place. They expressed a need for a floor lamp beside the sofa to provide localized lighting, as they enjoy reading in the living room. Hence, we selected a unique umbrella-shaped wooden floor lamp that complements the pendant light in the dining area. This choice harmonizes well with the overall style of the dining area, which showcases a Japanese wooden aesthetic. When the client received the products, they expressed their complete satisfaction with how well the lighting fixtures aligned with their needs.
I am sharing this case study with everyone, hoping it will provide inspiration and ideas for your own home renovations.
 MODIVO LIGHT
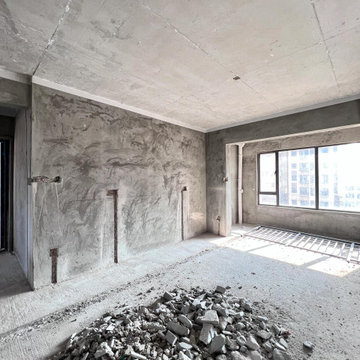
This is our first time decorating a house. Starting from knowing nothing at all to now having the hard decoration completed, we have experienced every emotion along the way—anxiety, doubt, tiredness, hesitation, joy, satisfaction, and touch. We learned and explored on our own, and bit by bit, we finished decorating our home. We’ve accumulated so much experience in this process, and now we want to share it, hoping it can be of a little help to all of you who are doing your own home decoration.
Preparations in Advance
1、Clarify your own ideas: Whether you are looking online, talking to designers, or copying ideas from friends' homes, you should have a clear vision of what your home should look like before designing—such as the style, color scheme, and elements to be used... It is crucial to avoid wanting to install everything that looks good in others' homes in your own. This way, you can clearly put forward your requirements during the design and decoration process, and also avoid frequent revisions to the plan, which may lead to unnecessary rework.
2、Understand your own needs: You need to first figure out the needs of your family, such as how many people live in the house permanently, how many rooms are needed, everyone's living habits, and daily preferences... A home is always for living in, so functionality is always the most important. It is best to list these needs and give priority to meeting them during the design and decoration. This way, you won't find out after decoration that many necessary things are missing, while a bunch of installed things are useless.
3、Determine your budget: There are ways to decorate with more money, and also ways to do it with less. No matter how much money you have, the decorated house can be both beautiful and practical. Therefore, it is essential to decide exactly how much you want to spend on decoration. In every link, such as designing the plan, making a budget table, selecting materials, and construction, you should act in accordance with your own budget.
4、Understand the advantages and disadvantages of your house: There is no perfect house in the world, and every house has its pros and cons. Your design plan should avoid its shortcomings and amplify its advantages. I once wrote an article about the drawbacks of my house ("My house is not perfect, but I still want to find ways to save it"), so we figured out solutions to these problems during the decoration.
5、Learn as much decoration knowledge as possible in advance: Although you can pick up this knowledge in the subsequent decoration process, it is better to learn more beforehand. This will make you much more calm when facing problems.
6、Know your strengths: Before decoration, you must be clear about what you are good at and what you are not. If you are good at design, do the design yourself; if you are skilled at bargaining, go buy building materials on your own; if you have strong hands-on ability, you can even do the decoration and repairs yourself... During the decoration process, you should focus on what you are good at, and leave what you are not good at to others.

 Mayflower Construction Group
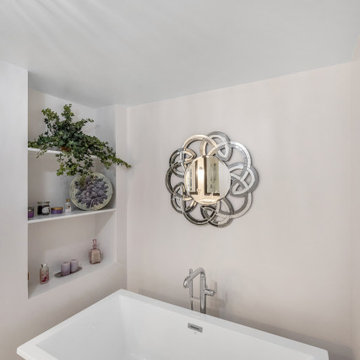
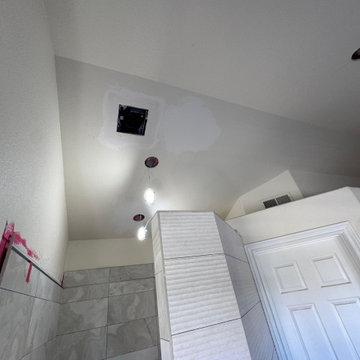
Switch off from the outside world and be alone with your thoughts with a newly remodeled bathroom.Get a relaxing atmosphere ? and a spa-like feeling ??♀️?✨right within your house.
We offer comprehensive consultation to help you turn your home into the haven you deserve! ??
Call us today or schedule online to get started!
https://mayflowerva.com/15-minute-phone-consultation/
?info@mayflowerva.com
☎ (703) 388.9088
#bathroom #bathroomremodel #bathroomrenovation #bathroomideas #bathroominspiration #vienna
 DENALI BUILDERS & Design
This bathroom was created for homeowners who found us online and reached out after seeing our work, trusting us to bring their vision to life. From the start, we worked together seamlessly, listening closely to what they wanted and guiding them through every step of the process. The result is a calm, spa-like space with a large walk-in shower, warm stone-look tile, a built-in bench, and sleek matte black fixtures that feel modern yet timeless. Soft LED lighting highlights the tile and adds a relaxing glow, while the double vanity with custom cabinetry and backlit mirrors keeps the room bright, functional, and uncluttered. Natural stone floors add warmth and flow throughout the space. This project is a perfect example of how collaboration, clear communication, and attention to detail can turn a homeowner’s vision into a beautiful, well-crafted bathroom they’ll enjoy every day—and the same level of care we bring to every client who finds us and trusts us with their home.
 Care Free Homes, Inc.
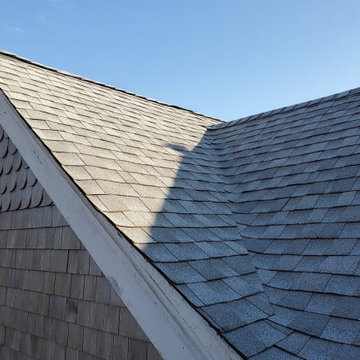
Our 2020 New Year, New Roof Winners, Jim & Robin Manning of Falmouth, MA, love their new GAF roofing system!
The couple was nominated by their daughter, Lilly, for our 5th Annual New Year, New Roof Giveaway. The Mannings were selected as one of our five finalists and the community voted online to choose the winner. The Manning family rallied the support of friends, family, and the Cape Cod community to help Robin and Jim take home almost half of the 5,500 votes. Thanks to a partnership between Care Free Homes and GAF Roofing, Robin & Jim received a GAF Timberline HD Roofing System in the color, Fox Hollow Grey, at absolutely no cost. With a factory-registered 50 Year Non-Prorated Roof Warranty and a 130 mph wind rating, the Manning’s roof is ready for any New England weather!
After years of shingles blowing off into their yard, Robin & Jim finally have peace of mind. “It’s amazing…it’s already finished and a big wind storm came and I had no worries. We really do have a Care Free home.” said Robin.
The Mannings developed an instant friendship with Care Free Homes Marketing Coordinator, Stephanie Pickup, who enjoyed several visits with the family. “The day Stephanie said she was going to come and take our photograph, I was a little nervous but then she came and I felt so comfortable….we felt so comfortable that I’m sad that Care Free Homes is in Fairhaven and not right next door to us.” chuckled Robin.
Like most Care Free customers, Robin and Jim are already looking forward to future projects. “I started to think about other things we can do to our house so we can get them back here.” said Jim.
Our team really enjoyed working with entire Manning family and we are so excited to share their roof’s transformation!
 DENALI BUILDERS & Design
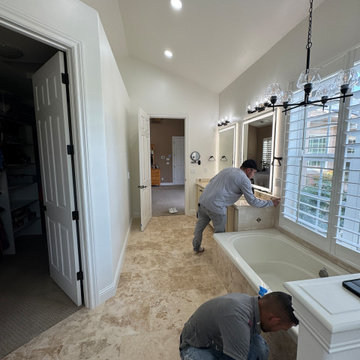
This bathroom was created for homeowners who found us online and reached out after seeing our work, trusting us to bring their vision to life. From the start, we worked together seamlessly, listening closely to what they wanted and guiding them through every step of the process. The result is a calm, spa-like space with a large walk-in shower, warm stone-look tile, a built-in bench, and sleek matte black fixtures that feel modern yet timeless. Soft LED lighting highlights the tile and adds a relaxing glow, while the double vanity with custom cabinetry and backlit mirrors keeps the room bright, functional, and uncluttered. Natural stone floors add warmth and flow throughout the space. This project is a perfect example of how collaboration, clear communication, and attention to detail can turn a homeowner’s vision into a beautiful, well-crafted bathroom they’ll enjoy every day—and the same level of care we bring to every client who finds us and trusts us with their home.
 Great Southeast Flooring America
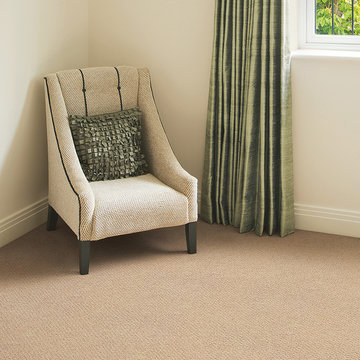
“Wonderful customer service. They took the time to find out our needs. Even the guys who came out to install the carpet were awesome. Very professional and courteous. Would definitely use you all again and recommend you to our family
and friends.” Cindy (Brevard)
To get started on your next flooring project, visit us at 2780 N Harbor City Boulevard, Melbourne, FL 32935 or online: bit.ly/1nUY2R9.
 MODIVO LIGHT
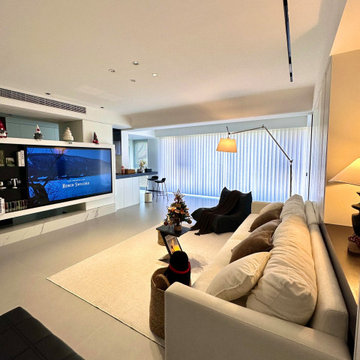
This is our first time decorating a house. Starting from knowing nothing at all to now having the hard decoration completed, we have experienced every emotion along the way—anxiety, doubt, tiredness, hesitation, joy, satisfaction, and touch. We learned and explored on our own, and bit by bit, we finished decorating our home. We’ve accumulated so much experience in this process, and now we want to share it, hoping it can be of a little help to all of you who are doing your own home decoration.
Preparations in Advance
1、Clarify your own ideas: Whether you are looking online, talking to designers, or copying ideas from friends' homes, you should have a clear vision of what your home should look like before designing—such as the style, color scheme, and elements to be used... It is crucial to avoid wanting to install everything that looks good in others' homes in your own. This way, you can clearly put forward your requirements during the design and decoration process, and also avoid frequent revisions to the plan, which may lead to unnecessary rework.
2、Understand your own needs: You need to first figure out the needs of your family, such as how many people live in the house permanently, how many rooms are needed, everyone's living habits, and daily preferences... A home is always for living in, so functionality is always the most important. It is best to list these needs and give priority to meeting them during the design and decoration. This way, you won't find out after decoration that many necessary things are missing, while a bunch of installed things are useless.
3、Determine your budget: There are ways to decorate with more money, and also ways to do it with less. No matter how much money you have, the decorated house can be both beautiful and practical. Therefore, it is essential to decide exactly how much you want to spend on decoration. In every link, such as designing the plan, making a budget table, selecting materials, and construction, you should act in accordance with your own budget.
4、Understand the advantages and disadvantages of your house: There is no perfect house in the world, and every house has its pros and cons. Your design plan should avoid its shortcomings and amplify its advantages. I once wrote an article about the drawbacks of my house ("My house is not perfect, but I still want to find ways to save it"), so we figured out solutions to these problems during the decoration.
5、Learn as much decoration knowledge as possible in advance: Although you can pick up this knowledge in the subsequent decoration process, it is better to learn more beforehand. This will make you much more calm when facing problems.
6、Know your strengths: Before decoration, you must be clear about what you are good at and what you are not. If you are good at design, do the design yourself; if you are skilled at bargaining, go buy building materials on your own; if you have strong hands-on ability, you can even do the decoration and repairs yourself... During the decoration process, you should focus on what you are good at, and leave what you are not good at to others.
27