
Search results for "Start signing" in Home Design Ideas

 Anna O Design
The homeowners of this Marblehead residence wished to remodel their master bathroom, which had been redone only a few years prior. The previous renovation, however, was not a pleasant experience and they were hesitant to dive-in again. After an initial conversation, the homeowners agreed to meet with me to discuss the project.
listened to their vision for the room, paid close attention to their concerns, and desire to create a tranquil environment, that would be functional and practical for their everyday lifestyle.
In my first walk-through of the existing bathroom, several major issues became apparent. First, the vanity, a wooden table with two vessel sinks, did not allow access to the medicine cabinets due to its depth. Second, an oversized window installed in the shower did not provide privacy and had visible signs of rot. Third, the wallpaper by the shower was peeling and contained mold due to moisture. Finally, the hardwood flooring selected was impractical for a master bathroom.
My suggestion was to incorporate timeless and classic materials that would provide longevity and create an elegant environment. I designed a standard depth custom vanity which contained plenty of storage. We chose lovely white and blue quartzite counter tops, white porcelain tile that mimic the look of Thasos marble, along with blue accents, polished chrome fixtures and coastal inspired lighting. Next, we replaced, relocated, and changed the window style and shape. We then fabricated a window frame out of the quartzite for protection which proved to give the shower a lovely focal point. Lastly, to keep with the coastal theme of the room, we installed shiplap for the walls.
The homeowners now look forward to starting and ending their day in their bright and relaxing master bath. It has become a sanctuary to escape the hustle and bustle of everyday life.

 Molly Higgins Interior Design LLC
My oldest daughter, Grace, is a "tween" and asked for her room to be redecorated. Previously it was bright colors of teal, pink and purple walls (which she picked when she was 4....now she is 12). I agreed that it needed a fresh start. Grace wanted her room to be less cluttered and more grown-up. First, she sorted, threw out and donated. Extra items that remained went in new under-the-bed storage containers. Second, I decided to work from her furniture colors. The pieces were purchased in the Netherlands during our time living in Germany. Gradations of "blush" were used throughout the room and in various textures. Next, Grace and I collaborated on selecting draperies, a rug and bedding. A complentary neutral paint color was then chosen. Finishing touches were placed in specific places to provide balance, such as the canvas artwork, which also adds a touch of shimmer. Glass lamps add harmony to the design. Grace is thrilled with her new room! (And with some smart shopping, cost-effecient!)
 Anna O Design
The homeowners of this Marblehead residence wished to remodel their master bathroom, which had been redone only a few years prior. The previous renovation, however, was not a pleasant experience and they were hesitant to dive-in again. After an initial conversation, the homeowners agreed to meet with me to discuss the project.
listened to their vision for the room, paid close attention to their concerns, and desire to create a tranquil environment, that would be functional and practical for their everyday lifestyle.
In my first walk-through of the existing bathroom, several major issues became apparent. First, the vanity, a wooden table with two vessel sinks, did not allow access to the medicine cabinets due to its depth. Second, an oversized window installed in the shower did not provide privacy and had visible signs of rot. Third, the wallpaper by the shower was peeling and contained mold due to moisture. Finally, the hardwood flooring selected was impractical for a master bathroom.
My suggestion was to incorporate timeless and classic materials that would provide longevity and create an elegant environment. I designed a standard depth custom vanity which contained plenty of storage. We chose lovely white and blue quartzite counter tops, white porcelain tile that mimic the look of Thasos marble, along with blue accents, polished chrome fixtures and coastal inspired lighting. Next, we replaced, relocated, and changed the window style and shape. We then fabricated a window frame out of the quartzite for protection which proved to give the shower a lovely focal point. Lastly, to keep with the coastal theme of the room, we installed shiplap for the walls.
The homeowners now look forward to starting and ending their day in their bright and relaxing master bath. It has become a sanctuary to escape the hustle and bustle of everyday life.
Find the right local pro for your project

 Valentini Kids Furniture Brooklyn NY
Modern Italian Wall Unit Exential Art Lodola 3 by Spar
Made in Italy
Exential Art by Spar is an italian modular wall unit line that could be an excellent design solution for any modern or contemporary styled living room. A renewed modern design with a high functionality creates an entertainment center of refined rarity. With Exential Art, a new concept of values, culture and passionate living is born. This italian wall unit will enter your house and the areas of your daily life not only as an aesthetic but also as a functional addition, featuring an abundance of storage space so essential in an everyday life use. The artwork of international fame by Marco Lodola is reproduced and signed on refined surface of glass making this wall unit composition a precious object giving a value to your home. The composition is shown in a White Gloss lacquer.
PLEASE NOTE: The ART Exential is a modular wall unit line offering a wide variety of units in different sizes. You can order this wall unit either as a complete composition, as shown in the main picture, or build your own composition according to your own dimensions and preferences. Please contact our office about details on the customization of this wall unit.
MATERIAL/CONSTRUCTION:
Structure: Made with particle board of wood, covered with E1 melamine finishes or high gloss lacquer
Drawers: Made with panels of wood particles in E1-coated finish PVC beech. Metal runners with fine race to fall
Glass Doors: Decorated by Marco Lodola
The starting price is for the Wall Unit Composition Lodola 03 as shown in the main picture.
Dimensions:
Wall Unit Composition: W130" x D22.8" x H72.2"

 Five Star Tree Care
Most trees have leaves that will change colours every time the seasons change. This means that you may see changes three to four times a year depending on where you live. However, they will typically retain some measure of green colouring on their leaves until fall rolls around.
During the fall season, trees explode with bright reds, oranges, and vibrant yellows. This is a natural part of their growth and hibernation process. However, if you see these colours in the offseason, it may be a sign that there is a problem. Below, Five Star Tree Services discusses why your leaves may be yellow during the summer and what you can do about it.
Should Leaves Turn Yellow in the Summer?
If your trees have yellow leaves in the summer, it is a sign that it is suffering from disease, or having a problem with its growth cycle. Having your trees inspected periodically by a trained professional will help you catch problems early. If your trees already have yellow leaves in the offseason, they can identify the cause and suggest a solution. When diagnosed early, suggested treatments can help save the tree. Keep reading for some common causes of yellowing leaves.
Improper Watering
One of the most common reasons trees start to develop yellow leaves in the summer is due to dehydration. Checking the soil moisture levels will help determine if your trees are getting enough water. Hydration is important all year long, but especially crucial during the hot summer months. If there are dry areas around your tree trunk, it is a good idea to partake in deep root watering to help keep your trees healthy and well-watered. Make sure that you don’t overwater your trees because flooding their roots can also be unhealthy.
Lacking Nutrition
Just like people, trees need to get the right blend of nutrients in order to remain healthy. If your tree has yellow leaves in the summer and is also getting enough water, chances are it is not getting the nutrients it needs from the soil. If soil testing shows low levels of nutrients, it is a good idea to schedule a deep root fertilization treatment to adjust the levels. In many instances, correcting the soil will help you save the tree.
Insect or Pest Infestation
Yellow summer leaves are also a sign that a tree has been infested with pests. Some pest is only active in the summer. Some of the most common are:
Emerald Ash Borer
Asian Long-Horned Beetle
Yellownecked Caterpillar
Ash Flower Gall
Bronze Birch Borer
Apple-and-Thorn Skeletonizer
Eastern Tent Caterpillar
Birch Leafminer
Fall Webworm
Gypsy Moth
And many others
The first thing you should do is call an arborist to have the tree inspected. They will be able to identify the root of the problem and formulate a solution to treat the pest infestation. This will help you get rid of the bugs once and for all and save your tree in the process.
How We Can Help
If you have noticed that one of your trees have begun to develop yellow leaves, give Five Star Tree Services a call as soon as possible. We have been providing tree care services in Toronto for over 10 years. Our skilled arborist would be more than happy to evaluate your tree and suggest a solution to treat the problem, so don’t wait. Contact us at (416) 990-3355 today!


 Home service
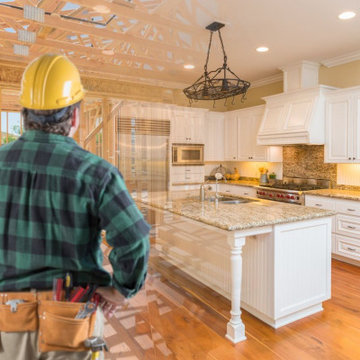
Your kitchen is more than just a cooking space; it's the heart of your home—a place for family gatherings, shared meals, and unforgettable memories. If you're here, chances are you're dreaming of a kitchen upgrade that better serves your needs while enhancing its beauty and functionality. Whether you're aiming for a sleek modern design, a functional workspace, or a charming rustic vibe, finding the right kitchen remodel services is key to turning that dream into reality.
This guide will walk you through everything you need to know about choosing the best kitchen remodel near me. From understanding your specific needs to identifying reliable services, we've got you covered.
Understanding Your Unique Kitchen Remodeling Needs
Before hiring a kitchen remodel service, it’s essential to pinpoint why you're looking to remodel in the first place. Knowing your priorities will help you make informed decisions and ensure you choose a service that aligns with your vision.
1. Functionality Upgrades
Is your kitchen outdated or inefficient? Maybe you're dealing with limited countertop space or outdated appliances that make cooking a hassle. A remodel can help optimize the layout and incorporate modern solutions, such as smart appliances or ergonomic cabinets.
2. Aesthetic Enhancements
Perhaps you’re looking to give your kitchen a fresh, stylish look that reflects your personality. Whether it’s a chic industrial design or a cozy farmhouse style, professional remodelers can help bring your aesthetic dreams to life.
3. Improved Home Value
A beautifully renovated kitchen is one of the top features potential buyers look for. According to real estate experts, a well-designed kitchen remodel can deliver up to a 70%-80% return on investment.
4. Lifestyle Changes
Has your family grown? Do you cook at home more often now? Your kitchen should adapt to these shifts, accommodating more people or making meal prep seamless.
Clearly outlining your specific goals will make it easier to choose home remodeling contractor professionals who can meet (and exceed) your expectations.
Researching for the Best Kitchen Remodel Services Near Me
Once you’ve defined your needs, the next step is to start researching. But how do you pinpoint the best kitchen remodelers in your area? Here are actionable tips:
1. Read Reviews and Testimonials
Start by checking online reviews on platforms like Google, Yelp, and Houzz. Look for consistently positive feedback, with special attention paid to customer comments about quality, communication, and timelines.
2. Check Portfolios
A picture is worth a thousand words—and reading about a remodeling company’s success isn’t enough. Browse their portfolio to ensure the quality of their work aligns with what you’re envisioning.
3. Ask for Recommendations
Word of mouth is still one of the best ways to find trustworthy services. Ask friends, family, or coworkers if they’ve worked with a remodeling service they’d recommend.
4. Look for Professional Credentials
Make sure the companies you’re vetting hold all required licenses, certifications, and insurance. It’s a sign of their professionalism and ensures accountability.
5. Conduct Interviews
Consider meeting with a few top contenders. Ask about their experience, approach to projects similar to yours, and estimated costs. Don’t shy away from asking detailed questions—it’s important to feel confident in your choice.
By thoroughly researching, you'll narrow down your options and find a remodeler who matches your vision, budget, and style.
Key Factors to Consider Before Hiring
Deciding on the right kitchen remodel near me is about more than just skills. Here are some critical factors to weigh before signing any contracts.
1. Set a Clear Budget
It’s important to have a realistic budget in mind before you begin. A reliable remodeler will respect your financial boundaries and offer solutions that maximize your investment without overspending.
2. Outline Your Timeline
Discussing deadlines ensures the project starts and finishes on time. Make sure the remodeler can meet your schedule without compromising quality.
3. Communication is Key
Clear communication is essential. You want experts who listen carefully to your needs, explain their process, and keep you updated throughout the project.
4. Warranties and Guarantees
Always ask if the service provides warranties for craftsmanship and materials. It’s a sign they stand by the quality of their work.
Why RightWay Home Builders is the Solution to Your Kitchen Remodeling Needs
Looking for trusted experts who deliver stunning, functional kitchens? Meet RightWay Home Builders, a leading name in local remodeling services. Here's why they're a standout choice for your kitchen remodel project.
1. Proven Expertise: With over 10 years of experience in the industry, their portfolio boasts beautifully transformed kitchens that reflect each client’s unique style.
2. Customer-Centric Approach: RightWay prioritizes the client experience. From the initial consultation to the project's completion, their team ensures you’re heard every step of the way.
3. Comprehensive Services: From initial designs to installation, RightWay Home Builders handles every stage of remodeling with precision and care.
Their happy customers say it all. “RightWay took my outdated kitchen and turned it into something from a magazine. Their attention to detail was amazing, and they were a pleasure to work with!” - Sarah M.
Why Visit RightWayHomeBuilders.com?
Booking your dream remodel has never been simpler. RightWay’s website offers a streamlined process where you can request a consultation, view portfolios, and even access exclusive home remodeling tips. Don’t wait! Visit https://www.rightwayhomebuilders.com to kick-start your remodeling adventure.
FAQs About Kitchen Remodeling
1. How much does a kitchen remodel cost?
The cost depends on the size of your kitchen and the scope of the project, but the average remodel.
2. How long does the remodeling process take?
Most remodeling projects take 6 to 12 weeks, depending on the complexity.
3. Will a kitchen remodel increase my home’s value?
Absolutely! A well-done remodel can boost your home value significantly and make it more appealing to buyers.
4. Can I stay home during the remodel?
While it’s possible, the noise and dust might be inconvenient. Many clients prefer staying elsewhere temporarily.
Conclusion
Your dream kitchen is closer than you think. Whether you're upgrading for better functionality, fresh aesthetics, or added value, investing in the right kitchen remodel service will ensure your vision comes to life.
Explore your options, do your research, and don’t hesitate to reach out to trusted experts like RightWay Home Builders. Begin the first step today—schedule your consultation at RightWayHomeBuilders.com and take the leap toward the ultimate kitchen transformation.
 Anna O Design
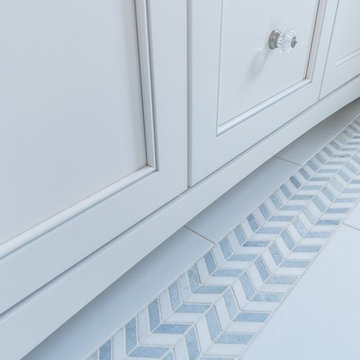
The homeowners of this Marblehead residence wished to remodel their master bathroom, which had been redone only a few years prior. The previous renovation, however, was not a pleasant experience and they were hesitant to dive-in again. After an initial conversation, the homeowners agreed to meet with me to discuss the project.
listened to their vision for the room, paid close attention to their concerns, and desire to create a tranquil environment, that would be functional and practical for their everyday lifestyle.
In my first walk-through of the existing bathroom, several major issues became apparent. First, the vanity, a wooden table with two vessel sinks, did not allow access to the medicine cabinets due to its depth. Second, an oversized window installed in the shower did not provide privacy and had visible signs of rot. Third, the wallpaper by the shower was peeling and contained mold due to moisture. Finally, the hardwood flooring selected was impractical for a master bathroom.
My suggestion was to incorporate timeless and classic materials that would provide longevity and create an elegant environment. I designed a standard depth custom vanity which contained plenty of storage. We chose lovely white and blue quartzite counter tops, white porcelain tile that mimic the look of Thasos marble, along with blue accents, polished chrome fixtures and coastal inspired lighting. Next, we replaced, relocated, and changed the window style and shape. We then fabricated a window frame out of the quartzite for protection which proved to give the shower a lovely focal point. Lastly, to keep with the coastal theme of the room, we installed shiplap for the walls.
The homeowners now look forward to starting and ending their day in their bright and relaxing master bath. It has become a sanctuary to escape the hustle and bustle of everyday life.



 Tradition Outdoor Living
This fabulous backyard started as small patio with no covered area to escape the heat or grill outdoors. Tradition Outdoor Living transformed it into an oasis with three distinct areas for year -round entertaining.
To achieve the clients’ vision for a space that flows seamlessly between indoors and outdoors, two outside walls were removed and replaced with panoramic glass doors.
We designed the ultimate outdoor kitchen with built in Kamado, stainless steel grill, refrigerator and ice maker. Pull up a bar stool and enjoy glass of wine or a beer on tap.
The outdoor dining area is directly off the kitchen, making it perfect for family meals and dinner parties. The space’s true focal point is the grand stacked stone fireplace. A large sectional allows the family to enjoy a movie or cheer on their favorite team even on chilly winter nights.
Day or night, this outdoor space is the ideal setting for friends and family to gather.
 Valentini Kids Furniture Brooklyn NY
Modern Italian Wall Unit Exential Art Carnevali 3 by Spar
Made in Italy
Exential Art by Spar is an italian modular wall unit line that could be an excellent design solution for any modern or contemporary styled living room. A renewed modern design with a high functionality creates an entertainment center of refined rarity. With Exential Art, a new concept of values, culture and passionate living is born. This italian wall unit will enter your house and the areas of your daily life not only as an aesthetic but also as a functional addition, featuring an abundance of storage space so essential in an everyday life use. The artwork of international fame by Erio Carnevali is reproduced and signed on refined surface of glass making this wall unit composition a precious object giving a value to your home. The composition is shown in a White Gloss structure with Mirrored glass fronts.
PLEASE NOTE: The ART Exential is a modular wall unit line offering a wide variety of units in different sizes. You can order this wall unit either as a complete composition, as shown in the main picture, or build your own composition according to your own dimensions and preferences. Please contact our office about details on the customization of this wall unit.
MATERIAL/CONSTRUCTION:
Structure: Made with particle board of wood, covered with E1 melamine finishes or high gloss lacquer
Drawers: Made with panels of wood particles in E1-coated finish PVC beech. Metal runners with fine race to fall
Glass Doors: Decorated by Erio Carnevali
The starting price is for the Wall Unit Composition Carnevali 03 as shown in the main picture.
Dimensions:
Wall Unit Composition: W130" x D22.8" x H72.2"

 Ballard + Mensua Architecture
Built originally in the late 1800's, and lived in by only two families, this gem of a historic mansion was in need of a lot of work.
The goal of this project was to add central air, renovate and expand 3-1/2 baths, add one bath, add a 2nd level laundry, replace old wall paper, and to combine a kitchen, breakfast room, laundry and butler's pantry into one large farmhouse style kitchen. We also added radiator covers, replaced kitchen flooring, added a mudroom, and added wainscot to the main stair. Finally, we upgraded all lighting and wiring throughout the house. We are about to start phase 2 of the project to restore the windows, new landscaping, painting and restoring the trim and siding for the house and restoring the roofing and flashing. We are also looking to add a side porch and deck.
The challenge of this project was to do all of this work, but to keep the soul and character of the house in tact. The owners loved the house as it was, so it was very important to keep and restore as much as possible.
In the rest of the house, the owners decided to just add tongue oil to the floors. Fireplaces were kept in tact. Original pine trim and millwork were restored and we added a window seat on the 3rd floor.
The further challenge was to do this work, including planning and all interior design in 4-1/2 months. By signing up Hyo Lee and his company Millennium Homes as our contractor from the beginning, we met the demanding schedule.
We looked back to the time period and selected finishes and details that seemed appropriate. The client built a large idea book on Houzz which helped throughout the project to make sure we could design to their style.
Bathrooms carry a theme of natural marble and stones.
The kitchen features an antique oak herringbone floor from Mountain Lumber. Cabinets are inset, with a small bead to emulate antiques in the owner's collection and to maintain the simple details of the existing Butler's Pantry cabinets which we kept and restored. Wallpaper selections were made by the client with help from Mona Berman Interiors.
 Valentini Kids Furniture Brooklyn NY
Modern Italian Wall Unit Exential Art Lombardi 01 by Spar
Made in Italy
Exential Art by Spar is an italian modular wall unit line that could be an excellent design solution for any modern or contemporary styled living room. A renewed modern design with a high functionality creates an entertainment center of refined rarity. With Exential Art, a new concept of values, culture and passionate living is born. This italian wall unit will enter your house and the areas of your daily life not only as an aesthetic but also as a functional addition, featuring an abundance of storage space so essential in an everyday life use. The artwork of international fame by Enrico Lombardi is reproduced and signed on refined surface of glass making this wall unit composition a precious object giving a value to your home. The composition is shown in a White Gloss lacquer.
PLEASE NOTE: The ART Exential is a modular wall unit line offering a wide variety of units in different sizes. You can order this wall unit either as a complete composition, as shown in the main picture, or build your own composition according to your own dimensions and preferences. Please contact our office about details on the customization of this wall unit.
MATERIAL/CONSTRUCTION:
Structure: Made with particle board of wood, covered with E1 melamine finishes or high gloss lacquer
Drawers: Made with panels of wood particles in E1-coated finish PVC beech. Metal runners with fine race to fall
Glass Doors: Decorated by Enrico Lombardi
The starting price is for the Wall Unit Composition Lombardi 01 as shown in the main picture.
Dimensions:
Wall Unit Composition: W130" x D22.8" x H68.6"
 Five Star Tree Care
Storms are nature’s way of cleaning out the atmosphere and showing off her awesome power. As essential as this process may be, it can also cause tree damage. If your trees suffer damage during a storm, there are a few things you should do to set things back to their proper order, such as hire a tree removal service. Before you start cleaning up the mess, however, take a look at our suggestions to ensure you are doing what’s best for your trees and your property.
Check the Damage
Before you do anything, you should take the time to check the damage on your property and to the trees themselves. Sometimes broken branches and fallen leaves can hide serious damage that may require special attention. Check to ensure that there is no damage to your property, home, cars, and electrical lines. Next, after you confirm that there is no immediate danger, you can start assessing the tree itself. If you find serious damage to your trees such as splitting, leaning, or even burns from a lightning strike, it is best to call in professionals for help. If the tree is leaning on your home or vehicle, it is also a good idea to have a professional tree care service move forward with the cleanup.
Clean Up Minor Damage and Debris
After the storm has calmed down, and you have assessed the fallout, you can start your yard cleanup. Stick to cleaning up small branches and twigs in addition to leaves and other debris. Avoid large branches, any trees that may be leaning or heavily damaged. Even if your tree is upright, but showing signs of damage you should steer clear until the professionals can assess the situation. Pay close attention to any branches or trees that may be leaning near overhead power lines and also avoid damaged trees that are planted near underground utilities such as gas or power mains.
Call the Professionals at Five Star Tree Services
Anytime a storm damages your landscape, plants, or trees, a professional team of arborists can help. Not only are they trained in the proper methods of cleaning up storm debris in a safe manner, but they can also help decide the best course of action to save or remove your damaged trees. As tree care professionals, every team from Five Star Tree Services will arrive with the proper equipment needed to get the job done safely.
Five Star is fully certified and will also work with your insurance company to assess the damage and coordinate extended cleanup services if needed. For trees that are damaged but still have a chance of surviving, our experienced arborists will create a customized treatment plant and pruning plant to give your tree the best chance of survival. If other treatments are needed, we will also support your tree during its recovery until it is back to its healthy state. For more information regarding our storm tree services in Richmond Hill or our regular tree care services, give us a call at (416) 990-3355 today.

 Valentini Kids Furniture Brooklyn NY
Modern Italian Wall Unit Exential Art Ronci 4 by Spar
Made in Italy
Exential Art by Spar is an italian modular wall unit line that could be an excellent design solution for any modern or contemporary styled living room. A renewed modern design with a high functionality creates an entertainment center of refined rarity. With Exential Art, a new concept of values, culture and passionate living is born. This italian wall unit will enter your house and the areas of your daily life not only as an aesthetic but also as a functional addition, featuring an abundance of storage space so essential in an everyday life use. The artwork of international fame by Rossano Ronci is reproduced and signed on refined surface of glass making this wall unit composition a precious object giving a value to your home. The composition is shown with structure in White Gloss lacquer and fronts in Mirrored glass.
PLEASE NOTE: The ART Exential is a modular wall unit line offering a wide variety of units in different sizes. You can order this wall unit either as a complete composition, as shown in the main picture, or build your own composition according to your own dimensions and preferences. Please contact our office about details on the customization of this wall unit.
MATERIAL/CONSTRUCTION:
Structure: Made with particle board of wood, covered with E1 melamine finishes or high gloss lacquer
Drawers: Made with panels of wood particles in E1-coated finish PVC beech. Metal runners with fine race to fall
Glass Doors: Decorated by Rossano Ronci
The starting price is for the Wall Unit Composition Ronci 04 as shown in the main picture.
Dimensions:
Wall Unit Composition: W141.7" x D22.8" x H72.2"

 Rosen+Co Design Studio
Stephani Buchman
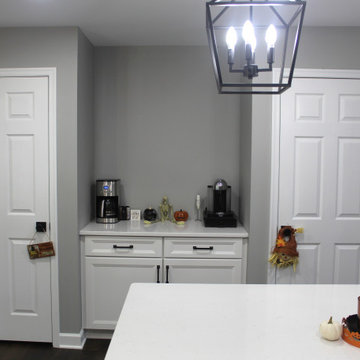
Example of a mid-sized trendy galley dark wood floor kitchen design in Toronto with an undermount sink, flat-panel cabinets, white cabinets, quartz countertops, white backsplash, stone slab backsplash, stainless steel appliances and a peninsula
Example of a mid-sized trendy galley dark wood floor kitchen design in Toronto with an undermount sink, flat-panel cabinets, white cabinets, quartz countertops, white backsplash, stone slab backsplash, stainless steel appliances and a peninsula
 Valentini Kids Furniture Brooklyn NY
Modern Italian Wall Unit Exential Art Lodola 1 by Spar
Made in Italy
Exential Art by Spar is an italian modular wall unit line that could be an excellent design solution for any modern or contemporary styled living room. A renewed modern design with a high functionality creates an entertainment center of refined rarity. With Exential Art, a new concept of values, culture and passionate living is born. This italian wall unit will enter your house and the areas of your daily life not only as an aesthetic but also as a functional addition, featuring an abundance of storage space so essential in an everyday life use. The artwork of international fame by Marco Lodola is reproduced and signed on refined surface of glass making this wall unit composition a precious object giving a value to your home. The composition is shown in a White Gloss lacquer.
PLEASE NOTE: The ART Exential is a modular wall unit line offering a wide variety of units in different sizes. You can order this wall unit either as a complete composition, as shown in the main picture, or build your own composition according to your own dimensions and preferences. Please contact our office about details on the customization of this wall unit.
MATERIAL/CONSTRUCTION:
Structure: Made with particle board of wood, covered with E1 melamine finishes or high gloss lacquer
Drawers: Made with panels of wood particles in E1-coated finish PVC beech. Metal runners with fine race to fall
Glass Doors: Decorated by Marco Lodola
The starting price is for the Wall Unit Composition Lodola 01 as shown in the main picture.
Dimensions:
Wall Unit Composition: W130" x D22.8" x H72.2"
 Talon Construction Inc.
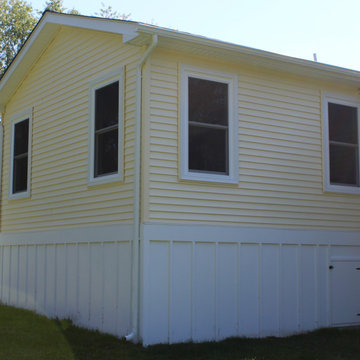
Designing and building a kitchen addition is a complex process that involves multiple steps and considerations. Here is a general outline to help you get started on your kitchen addition project:
Define Your Goals and Budget:
• Determine the purpose of the kitchen addition. Is it for more cooking space, a dining area, or a combination of both?
• Establish a realistic budget for your project. Consider all costs, including construction, permits, materials, and furnishings.
Hire a Design Professional:
• Seek the services of a design build company who specializes in kitchen additions.
• Discuss your vision, needs, and budget with the design professional to create a design concept.
Site Evaluation:
• Assess the existing space and structural condition of your home to ensure it can support the addition.
• Consider factors like zoning regulations, setbacks, and building codes.
Design Development:
• Collaborate with your design professional to refine the concept, including the layout, size, and architectural style.
• Choose materials, finishes, and fixtures that fit your design and budget.
Obtain Permits:
• Consult with your local design build contractor to determine the necessary permits and approvals.
• Prepare and submit all required documents, including architectural drawings and engineering plans.
Create Construction Documents:
• Work with your design build professional to develop detailed construction drawings and specifications.
• These documents will serve as a guide for contractors during construction.
Hire a design build contractor:
• Check references, credentials, and licenses before selecting a contractor.
• Sign a detailed contract that outlines the scope of work, timeline, and payment schedule.
Construction Phase:
• Demolition: If needed, remove any existing structures or walls.
• Foundation: Construct the foundation for the addition.
• Framing: Build the structural framework of the addition.
• Plumbing, Electrical, and HVAC: Install or update utilities as required.
• Insulation: Ensure proper insulation for energy efficiency.
• Drywall and Finish Work: Complete the walls and ceilings.
• Flooring and Cabinetry: Install flooring and kitchen cabinets.
• Appliances and Fixtures: Add appliances, plumbing fixtures, and lighting.
• Paint and Finish: Apply paint and finishes to achieve the desired look.
• Final Inspection: Schedule inspections to ensure compliance with building codes.
Final Inspections and Approvals:
• Arrange for final inspections to ensure the addition meets all safety and code requirements.
• Obtain any necessary certificates of occupancy or compliance.
Move In and Enjoy:
• Once all inspections and approvals are received, you can move into your new kitchen addition and start enjoying it.
Remember that every kitchen addition project is unique, so adapt this outline to your specific needs and circumstances. Consulting with professionals and obtaining the required permits and inspections is crucial to a successful and safe project.
 Talon Construction Inc.
Designing and building a kitchen addition is a complex process that involves multiple steps and considerations. Here is a general outline to help you get started on your kitchen addition project:
Define Your Goals and Budget:
• Determine the purpose of the kitchen addition. Is it for more cooking space, a dining area, or a combination of both?
• Establish a realistic budget for your project. Consider all costs, including construction, permits, materials, and furnishings.
Hire a Design Professional:
• Seek the services of a design build company who specializes in kitchen additions.
• Discuss your vision, needs, and budget with the design professional to create a design concept.
Site Evaluation:
• Assess the existing space and structural condition of your home to ensure it can support the addition.
• Consider factors like zoning regulations, setbacks, and building codes.
Design Development:
• Collaborate with your design professional to refine the concept, including the layout, size, and architectural style.
• Choose materials, finishes, and fixtures that fit your design and budget.
Obtain Permits:
• Consult with your local design build contractor to determine the necessary permits and approvals.
• Prepare and submit all required documents, including architectural drawings and engineering plans.
Create Construction Documents:
• Work with your design build professional to develop detailed construction drawings and specifications.
• These documents will serve as a guide for contractors during construction.
Hire a design build contractor:
• Check references, credentials, and licenses before selecting a contractor.
• Sign a detailed contract that outlines the scope of work, timeline, and payment schedule.
Construction Phase:
• Demolition: If needed, remove any existing structures or walls.
• Foundation: Construct the foundation for the addition.
• Framing: Build the structural framework of the addition.
• Plumbing, Electrical, and HVAC: Install or update utilities as required.
• Insulation: Ensure proper insulation for energy efficiency.
• Drywall and Finish Work: Complete the walls and ceilings.
• Flooring and Cabinetry: Install flooring and kitchen cabinets.
• Appliances and Fixtures: Add appliances, plumbing fixtures, and lighting.
• Paint and Finish: Apply paint and finishes to achieve the desired look.
• Final Inspection: Schedule inspections to ensure compliance with building codes.
Final Inspections and Approvals:
• Arrange for final inspections to ensure the addition meets all safety and code requirements.
• Obtain any necessary certificates of occupancy or compliance.
Move In and Enjoy:
• Once all inspections and approvals are received, you can move into your new kitchen addition and start enjoying it.
Remember that every kitchen addition project is unique, so adapt this outline to your specific needs and circumstances. Consulting with professionals and obtaining the required permits and inspections is crucial to a successful and safe project.
13