
Search results for "Struggle" in Home Design Ideas
 MC Home & Design, LLC
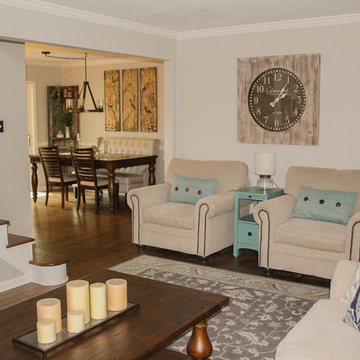
Previously the homeowner struggled with furniture placement and only used about 2/3 of living room. This new layout creates a nice flow into the dining area and maximizes seating!
 Renovisions
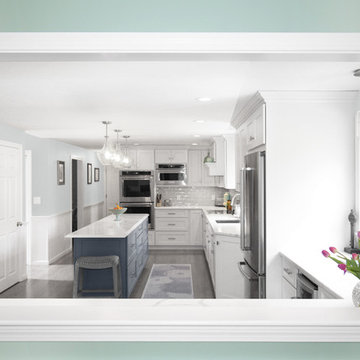
The kitchen is where you spend most of your time, shouldn’t it be the most inviting room in the house? That was the logic behind this South Shore of Boston Renovision. The owners entertained frequently but struggled with lack of organized storage space and poor flow for traffic in and out of their kitchen.
Renovisions totally reorganized the way the kitchen worked. The wall between the family room and kitchen was re-built to accommodate bar stools and added countertop space. Considerations were given to the design layout for a separate beverage/wine refrigeration station, while making sure additional prep space was adequate. A better flow in the kitchen was created, eliminating the annoyance of the typical ‘bottle-neck’.
Fine shaker cabinetry in a white painted finish with contrasting dark blue-grey island cabinets which boast large, deep drawers set the stage. A full gamut of appliances was provided including a 36” induction cooktop, convection microwave, double wall ovens, full size refrigerator and a bar refrigerator. The matching paneled dishwasher ensured an integrated look. The custom wood hood along with the unique shaped arabesque glass tile design frames a stunning focal point when entering this kitchen. Glass mullion doors flanking the hood with clear seeded glass created an upscale look and coordinated with the seeded glass shades of the island pendants.
Renovisions custom fit red oak wood flooring to match the existing floor and then re-finished with a grey stain and 3 coats of poly to add durability while also providing a beautiful new look throughout the house.
Good lighting is key especially when spending so much time in a space. LED under-cabinet lights, recessed ceiling lights and three separate pendant fixtures which all operate on dimmer switches created options for mood lighting, work lighting and everything in between. New double-hung windows with 6/1 grid configurations were added in just the right places – adding more essential natural light.
In addition to the kitchen ‘Renovision’, two corner cabinets in a white painted finish were installed in the dining room to not only accommodate the clients fine china and glassware, but also to provide a more custom built-in look to the space with the interior of the cabinets matching the wall.
Overall, our client could not have been happier with the completed project. Family, friends and guests were impressed with the design and fit and finish of every detail provided by Renovisions.
 Amsted Design-Build
Previously renovated with a two-story addition in the 80’s, the home’s square footage had been increased, but the current homeowners struggled to integrate the old with the new.
An oversized fireplace and awkward jogged walls added to the challenges on the main floor, along with dated finishes. While on the second floor, a poorly configured layout was not functional for this expanding family.
From the front entrance, we can see the fireplace was removed between the living room and dining rooms, creating greater sight lines and allowing for more traditional archways between rooms.
At the back of the home, we created a new mudroom area, and updated the kitchen with custom two-tone millwork, countertops and finishes. These main floor changes work together to create a home more reflective of the homeowners’ tastes.
On the second floor, the master suite was relocated and now features a beautiful custom ensuite, walk-in closet and convenient adjacency to the new laundry room.
Gordon King Photography
Find the right local pro for your project
 Well Arranged Home
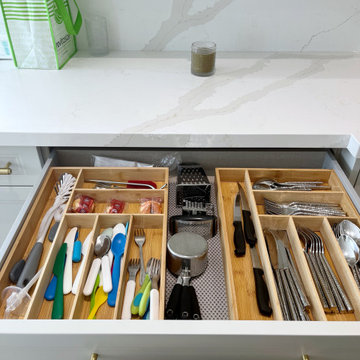
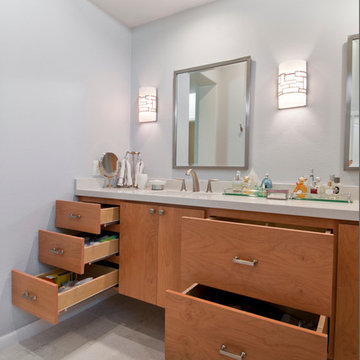
This drawer was struggling with ill-fitting bamboo organizers that not only wasted space but also clashed with the sleek kitchen design. The mismatched sections and awkward layout made it hard to keep everything in place or find what you needed. A functional and stylish upgrade was overdue!
 Concept Renovations, Inc.
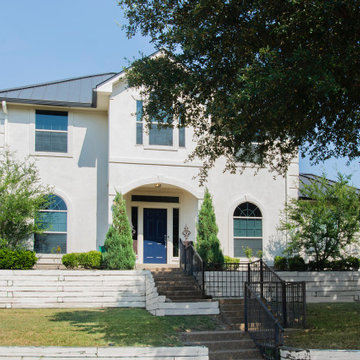
Remodeling your master bathroom in Calabasas offers the perfect opportunity to optimize both functionality and style. Custom features, such as built-in cabinetry and spacious shower designs, can transform an ordinary bathroom into a highly organized, luxurious retreat. I recently worked with a homeowner in Calabasas who struggled with limited storage and a dated design. By integrating custom storage cabinets and a sleek walk-in shower, we were able to create a space that not only looked great but solved their storage woes. The built-in cabinetry, combined with the shower’s marble finishes, added much-needed storage for linens, toiletries, and more, all while maintaining a clean, open layout. The result was a bathroom that was both practical for daily use and aesthetically aligned with the homeowner’s vision.
 Alair Homes Plano
Our clients wanted to increase the size of their kitchen, which was small, in comparison to the overall size of the home. They wanted a more open livable space for the family to be able to hang out downstairs. They wanted to remove the walls downstairs in the front formal living and den making them a new large den/entering room. They also wanted to remove the powder and laundry room from the center of the kitchen, giving them more functional space in the kitchen that was completely opened up to their den. The addition was planned to be one story with a bedroom/game room (flex space), laundry room, bathroom (to serve as the on-suite to the bedroom and pool bath), and storage closet. They also wanted a larger sliding door leading out to the pool.
We demoed the entire kitchen, including the laundry room and powder bath that were in the center! The wall between the den and formal living was removed, completely opening up that space to the entry of the house. A small space was separated out from the main den area, creating a flex space for them to become a home office, sitting area, or reading nook. A beautiful fireplace was added, surrounded with slate ledger, flanked with built-in bookcases creating a focal point to the den. Behind this main open living area, is the addition. When the addition is not being utilized as a guest room, it serves as a game room for their two young boys. There is a large closet in there great for toys or additional storage. A full bath was added, which is connected to the bedroom, but also opens to the hallway so that it can be used for the pool bath.
The new laundry room is a dream come true! Not only does it have room for cabinets, but it also has space for a much-needed extra refrigerator. There is also a closet inside the laundry room for additional storage. This first-floor addition has greatly enhanced the functionality of this family’s daily lives. Previously, there was essentially only one small space for them to hang out downstairs, making it impossible for more than one conversation to be had. Now, the kids can be playing air hockey, video games, or roughhousing in the game room, while the adults can be enjoying TV in the den or cooking in the kitchen, without interruption! While living through a remodel might not be easy, the outcome definitely outweighs the struggles throughout the process.
 Best Custom Screens Las Vegas
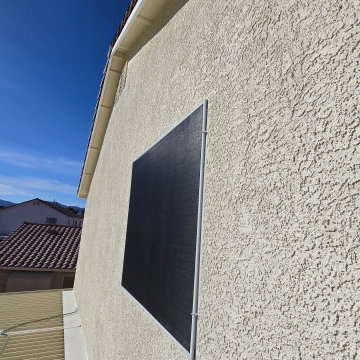
Before installing solar screens, this Las Vegas homeowner struggled with harsh sun, hot rooms, and rising energy bills. The desert heat was making afternoons unbearable—until they called Best Custom Screens Las Vegas.
Our expert team installed custom-fit solar screens designed to block UV rays, reduce heat, and improve comfort. With over 30 years of experience, we delivered fast, clean installation—and big results.
Now the home stays cooler, looks great, and the customer finally feels at ease.
Las Vegas heat? Handled.
Solar screen installation? Done right.
Trust Best Custom Screens Las Vegas for your next window screen upgrade.


 Virtu USA
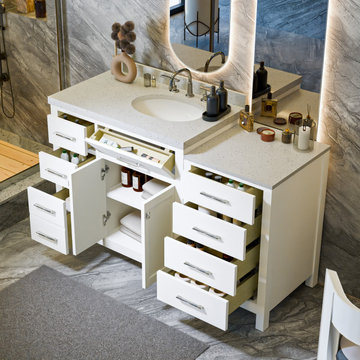
Struggling with limited storage? Our Small–Medium Space Vanity Collection combines clever storage solutions—like deep drawers and open shelves—with sleek design, giving you space to stay organized without sacrificing style.
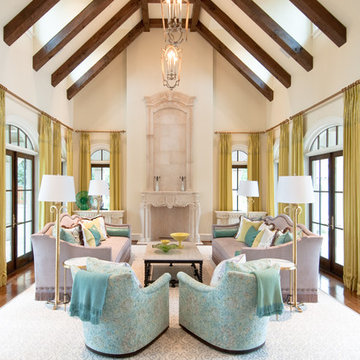
 TV Lift Cabinet by Cabinet Tronix
Cabinet Tronix displays how custom beautiful matching furniture can be placed on each side of the fire place all while secretly hiding the flat screen TV in one of them with a motorized TV lift. This solution is great option versus placing the TV above the fire place which many home owners, interior designers, architects, custom home builders and audio video integrator specialists have struggled with.
Placing the TV above the fireplace has been in many cases the only option. Here we show how you can have 2 furniture pieces made to order that match and one has space for storage and the other on the right hides the TV and electronic components. The TV lift system on this piece was controlled by a Universal Remote so the home owner only presses one button and the TV lifts up and all components including the flat screen turn on. Vise versa when pressing the off button.
Shabby-Chic in design, this interior is a stunner and one of our favorite projects to be part of.
Miami Florida
Greenwich, Connecticut
New York City
Beverly Hills, California
Atlanta Georgia
Palm Beach
Houston
Los Angeles
Palo Alto
San Francisco
Chicago Illinios
London UK
Boston
Hartford
New Canaan
Pittsburgh, Pennsylvania
Washington D.C.
Butler Maryland
Bloomfield Hills, Michigan
Bellevue, Washington
Portland, Oregon
Honolulu, Hawaii
Wilmington, Delaware
University City
Fort Lauerdale
Rancho Santa Fe
Lancaster
 iCork Floor
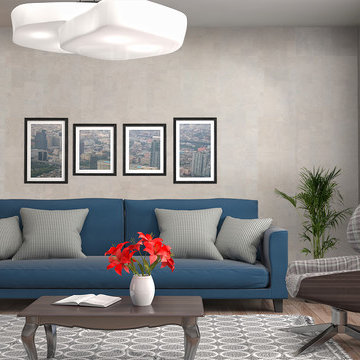
Love a warmer or cooler home with cork wall coverings.
Cork is filled with millions of tiny air chambers that soak up noise, so a cork wall goes a long way in keeping a room comfortably quiet. These air chambers also help to keep a room warm in the winter and cool in the summer and help to cut down on energy bills throughout the seasons. This can be a boon for all of us who struggle with high bills. Come and check cork out today.
https://www.icorkfloor.com/store/product-category/cork-wall-tiles/cork-wall-tiles-6mm/

 Covington and Company, Inc.
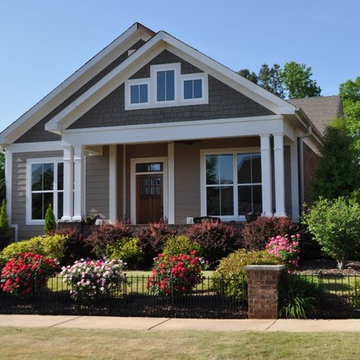
Inspiration for a mid-sized craftsman gray one-story wood exterior home remodel in Other with a shingle roof


 iCork Floor
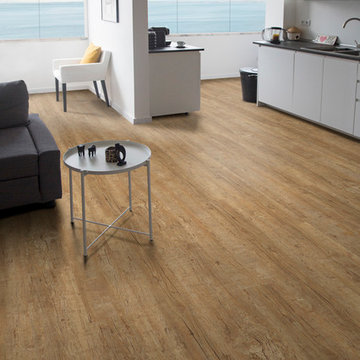
Tired of standing on hard wooden floors or stone cold tile? Then come check out floating cork flooring for a happy alternative. Cork is naturally shock-absorbing, so it works wonders for those who struggle with joint conditions and sore feet. Find some relief, go with floating cork floors.
 Neil Kelly Company
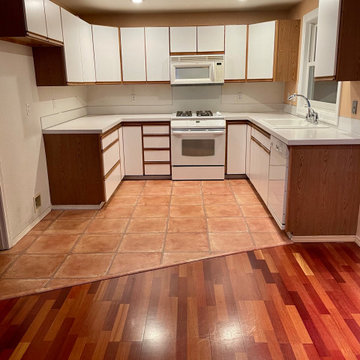
The decision to keep the original cabinet boxes meant simply replacing the cabinet drawers and drawer fronts for a refreshing transformation. The porcelain tile floor has the unmistakable look of brick without the struggle to keep it clean. New appliances, stylish range hood, and a new cabinet box for the refrigerator. A custom island located in the original dining nook satisfies the client's number one request, providing a place to drink wine and make cookies.
 Earth Design, Inc.
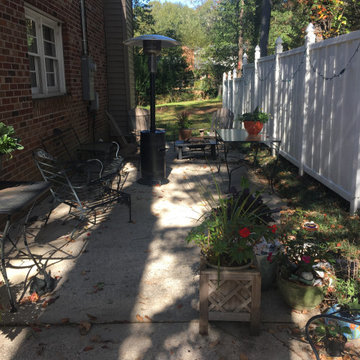
This homeowner was struggling with tree roots in the lawn, dying trees, grass that wouldn't grow, lack of circulation around the house, creek stabilization in the backyard, and now outdoor living spaces.
 Closets To Go
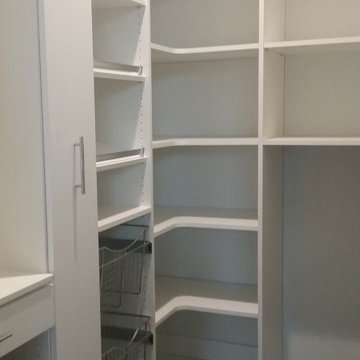
Are you struggling for a little extra space? Try a custom pull out vertical shelf from Closets To Go. They are great for easy access and allow you to see every item form either side. Try storing canned foods, spices and more. Stop in our Tigard showroom today to discuss your storage needs with our design professionals.
 Tile Doctor Ltd
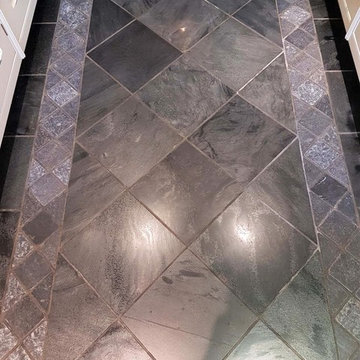
I was recently asked to survey an unusual stone floor at a house in in Harrogate comprising of Slate inlaid with Granite. The client advised that it had not been cleaned properly for 20 years and wanted it renovating! It was now definitely overdue a deep clean and professional attention. Fortunately, having worked on these floors for many years I knew I could make a substantial impact and transform its appearance. Fossilized slate is a beautiful stone when cleaned and sealed correctly.
The owner confessed they had actually been sealing the floor every two years but without a deep clean first, so they were effectively sealing in the dirt each time. I discussed with them the process I would use to clean and re-seal the floor and we agreed a price to carry to out the work.
To remove the layers of old sealer and dirt used a set of Tile Doctor Diamond Burnishing pads. The pads are attached to a rotary floor machine starting with the coarse 400-grit pad which was lubricated with a dilution of Tile Doctor Remove and Go to help strip the floor of dirt and layers of sealer. After rinsing and extracting the soil I worked through the different grades of pads in sequence finishing with the 1500-grit and this time using just water for lubrication.
A set of diamond handheld burnishing blocks were then used to clean up the edges and corners where the large 17” pads struggle to reach. This ensures all areas are treated and free of dirt and old sealer.
The floor was then rinsed and extracted again to remove the remaining soil. I find a wet vacuum is an invaluable tool for this. The floor was then left to dry out overnight ready for sealing the next day.
I returned the next day to seal the floor, first checking with a damp meter that the floor was dry, and the moisture reading was below the acceptable level. These results were fine, so I had a green light to continue and seal the stone.
The customer wanted a shine on the floor so rather than apply a satin sealer which I felt wouldn’t adhere to the stone properly I decided to polish the floor further with a the last of the four burnishing pads which is a very fine 3000-grit pad. You don’t need to use a lot of water with this last pad just a small amount sprayed onto the floor using a technique we refer to as a ‘Spray Burnish’.
To seal the floor, two coats of Tile Doctor Colour Grow were applied. This is an impregnating matt sealer which intensifies the natural colours of this beautiful stone and provides long lasting durable protection.
Even I was impressed with the finished result but more importantly the client was over the moon. To keep the floor looking its best I recommended they use Tile Doctor Stone Soap which is pH neutral. You should always read the label in detail when choosing a floor cleaning product as many are too strong and not recommended for sealed stone surfaces as they will prematurely erode the sealer.
Nigel Stoker
North West Yorkshire Tile Doctor
 Alair Homes Plano
Our clients wanted to increase the size of their kitchen, which was small, in comparison to the overall size of the home. They wanted a more open livable space for the family to be able to hang out downstairs. They wanted to remove the walls downstairs in the front formal living and den making them a new large den/entering room. They also wanted to remove the powder and laundry room from the center of the kitchen, giving them more functional space in the kitchen that was completely opened up to their den. The addition was planned to be one story with a bedroom/game room (flex space), laundry room, bathroom (to serve as the on-suite to the bedroom and pool bath), and storage closet. They also wanted a larger sliding door leading out to the pool.
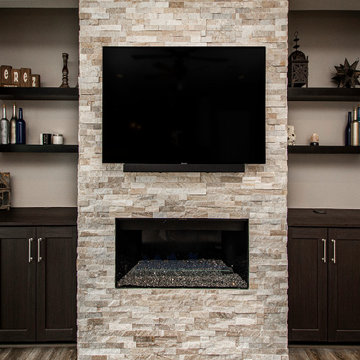
We demoed the entire kitchen, including the laundry room and powder bath that were in the center! The wall between the den and formal living was removed, completely opening up that space to the entry of the house. A small space was separated out from the main den area, creating a flex space for them to become a home office, sitting area, or reading nook. A beautiful fireplace was added, surrounded with slate ledger, flanked with built-in bookcases creating a focal point to the den. Behind this main open living area, is the addition. When the addition is not being utilized as a guest room, it serves as a game room for their two young boys. There is a large closet in there great for toys or additional storage. A full bath was added, which is connected to the bedroom, but also opens to the hallway so that it can be used for the pool bath.
The new laundry room is a dream come true! Not only does it have room for cabinets, but it also has space for a much-needed extra refrigerator. There is also a closet inside the laundry room for additional storage. This first-floor addition has greatly enhanced the functionality of this family’s daily lives. Previously, there was essentially only one small space for them to hang out downstairs, making it impossible for more than one conversation to be had. Now, the kids can be playing air hockey, video games, or roughhousing in the game room, while the adults can be enjoying TV in the den or cooking in the kitchen, without interruption! While living through a remodel might not be easy, the outcome definitely outweighs the struggles throughout the process.
 Mottram Architecture
Timber frame homes offer unique challenges during a remodel. What often makes them beautiful and attractive to most homeowners, also makes them challenging for space requirements.
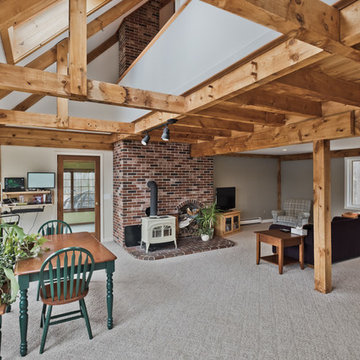
Context: The lovely couple that owned this home were struggling with some interesting floor plan challenges that just didn't work for their family. The loved the beautiful timbers and woodwork of their home, but the dramatically sloping ceilings on the second floor, particularly in the bathroom, just didn't work for this 1 1/2 bath home. Needing to use the skylight to approach the toilet was a less then ideal scenario. Although the bathroom footprint was more then adequate, the sloped ceiling only made half of the space useable. Check out the Before/After post on our blog to see the photos of the house pre-renovation. As much as they loved all the wood features in their home, another challenge they had was light. The wood ceiling made everything inside the house darker, even with a fantastic array of south facing windows, there were spaces in the home that felt dark and small. When they contacted us they wanted to know how could they make their brighter and more inviting, were there solutions to the 2nd floor sloped ceiling issues, and if they were going to do all of this work, how could they make their home more comfortable and efficient. A nagging water leak in the upstairs bathroom spurred them into action and here is how we solved their dilemma.
Conclusion: First, we added a little dormer to the rear of the house so we could get full headroom in nearly all of the upstairs bathroom! Then we decided to extend that dormer one more timber bay over to create a walk in closet with natural light and plenty of space. Since we were contemplating energy efficiency, we resolved a nagging issue that is present in a lot of timber frame construction, air tightness. Commonly found in timber frame construction, fiberglass insulation is installed in the rafter bays and board ceilings are installed over top. Unfortunately, board ceilings are anything but air tight, and fiberglass insulation needs to be in an airtight cavity for maximum effectiveness. So we were able to solve two issues at the same time for this homeowner. We removed the board ceiling and fiberglass insulation, we dense packed the rafter bays with cellulose insulation, and installed sheetrock in place of the boards. The boards were salvaged for re-use by the homeowner, and the space and light quality was dramatically improved. Some may think that losing the board ceiling took something away from the space, but what you'll see in the pictures is that it highly accentuates the heavy timbers and really makes them stand out in a beautiful way. Now with this added airtightness, better insulation, and brighter space, the homeowner hardly runs their wood stove, and it's so quiet in the space, an added bonus from changing the insulation. It became necessary to also add a sheetrock ceiling to the living room to hide the plumbing from the new bathroom layout above. Changing this ceiling gave the homeowner some real quality lighting that was lacking in the living room before. The brighter ceiling and new lighting layout completely transforms the living room into a space you want to hang out, even though the layout didn't change at all. When the homeowner saw the finished spaces she said "I can't believe this is my house, I want to live in this house"
Energy Efficiency: I touched a little on the efficiency above, but like all projects done with Mottram Architecture, we always want to leave you with a little extra. Timber frame construction with board ceilings and fiberglass insulation are notoriously leaky! If you want to know what we think about fiberglass insulation, check our our blog post on Why Fiberglass Insulation Sucks. By installing cellulose insulation and covering it with sheetrock we were able to greatly reduce the heat flowing out of this home. It not only improves cashflow it improves the comfort level in the space. Who wants to sit in their living room and feel a draft? Let us remind you, we are not saying cellulose insulation is an air barrier, we use the sheetrock to help with that, but it does significantly reduce the air flow over fiberglass insulation. And when we reduce the airflow, we reduce the heat flow. And when we reduce the heat flow, we reduce the need to re-heat that drafty air from outside. When it comes to energy efficiency the first and best place to start is air infiltration. We greatly reduced the air infiltration with the new insulation, but we also added a hat and warm boots. What I mean by that is, we improved the insulation in the roof, and we installed insulation in the basement. Maybe it's a silly analogy, but when you think about keeping warm, we always start with the hat and boots! With sustainability in mind, the next project will be to add a deck to the front of this house with rain catchment barrels from the metal roof. They are planning to plant a garden in the spring and the rain catchment system will help to irrigate the new garden.
Builder: East Shore Builders
Photographer: Michael Eric Berube
62