
Search results for "Subsequent" in Home Design Ideas
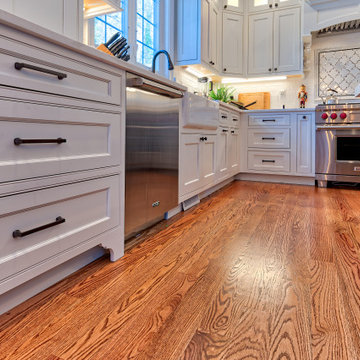
 Main Line Kitchen Design
Main Line Kitchen Design’s unique business model allows our customers to work with the most experienced designers and get the most competitive kitchen cabinet pricing..
.
How can Main Line Kitchen Design offer both the best kitchen designs along with the most competitive kitchen cabinet pricing? Our expert kitchen designers meet customers by appointment only in our offices, instead of a large showroom open to the general public. We display the cabinet lines we sell under glass countertops so customers can see how our cabinetry is constructed. Customers can view hundreds of sample doors and and sample finishes and see 3d renderings of their future kitchen on flat screen TV’s. But we do not waste our time or our customers money on showroom extras that are not essential. Nor are we available to assist people who want to stop in and browse. We pass our savings onto our customers and concentrate on what matters most. Designing great kitchens!
Main Line Kitchen Design designers are some of the most experienced and award winning kitchen designers in the Delaware Valley. We design with and sell 8 nationally distributed cabinet lines. Cabinet pricing is slightly less than at major home centers for semi-custom cabinet lines, and significantly less than traditional showrooms for custom cabinet lines.
After discussing your kitchen on the phone, first appointments always take place in your home, where we discuss and measure your kitchen. Subsequent appointments usually take place in one of our offices and selection centers where our customers consider and modify 3D kitchen designs on flat screen TV’s. We can also bring sample cabinet doors and finishes to your home and make design changes on our laptops in 20-20 CAD with you, in your own kitchen.
Call today! We can estimate your kitchen renovation from soup to nuts in a 15 minute phone call and you can find out why we get the best reviews on the internet. We look forward to working with you. As our company tag line says: “The world of kitchen design is changing…”
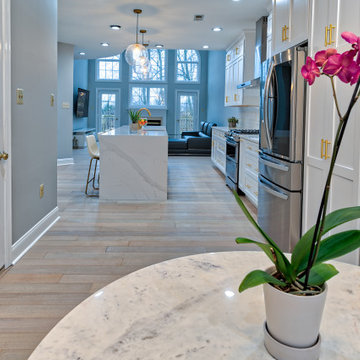 Main Line Kitchen Design
Main Line Kitchen Design’s unique business model allows our customers to work with the most experienced designers and get the most competitive kitchen cabinet pricing..
.
How can Main Line Kitchen Design offer both the best kitchen designs along with the most competitive kitchen cabinet pricing? Our expert kitchen designers meet customers by appointment only in our offices, instead of a large showroom open to the general public. We display the cabinet lines we sell under glass countertops so customers can see how our cabinetry is constructed. Customers can view hundreds of sample doors and and sample finishes and see 3d renderings of their future kitchen on flat screen TV’s. But we do not waste our time or our customers money on showroom extras that are not essential. Nor are we available to assist people who want to stop in and browse. We pass our savings onto our customers and concentrate on what matters most. Designing great kitchens!
Main Line Kitchen Design designers are some of the most experienced and award winning kitchen designers in the Delaware Valley. We design with and sell 8 nationally distributed cabinet lines. Cabinet pricing is slightly less than at major home centers for semi-custom cabinet lines, and significantly less than traditional showrooms for custom cabinet lines.
After discussing your kitchen on the phone, first appointments always take place in your home, where we discuss and measure your kitchen. Subsequent appointments usually take place in one of our offices and selection centers where our customers consider and modify 3D kitchen designs on flat screen TV’s. We can also bring sample cabinet doors and finishes to your home and make design changes on our laptops in 20-20 CAD with you, in your own kitchen.
Call today! We can estimate your kitchen renovation from soup to nuts in a 15 minute phone call and you can find out why we get the best reviews on the internet. We look forward to working with you. As our company tag line says: “The world of kitchen design is changing…”
 Metamorphosis Architecture Chandigarh - 9316511166
RESIDENCE FOR Mr PRADEEP JAIN
Location: Sector 28, Chandigarh
Year of Construction : 2005
So the old sewage connection was retained..........basically to save oneself from harassment from the sharks in the various departments connected with house sanction, and concomitant procedures.
The plot was a large one – upwards of around 1500 sq yds. - which could qualify locally as a 3 kanal house. (1 kanal = 1/8 of an acre = 4840/8=605 sq yds.)
We’ll not get into the travails of getting the plot transferred to oneself, and the subsequent sanction of the building plans – but it was relatively easy compared to the norm – thanx to a dynamic young AEO in the Estate Office.
Since the Owner was based in Ambala, the plans for the house were relatively simple – considering that the construction firm was based out of Meerut........!!!
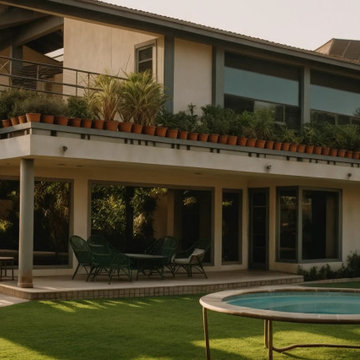
So the program was for the house to be born out of 9 squares of around 16’ side each, (the traditional Vastu Purusha Mandala) with an additional 8’ wide wrap around space where needed – ie the SE, the SW and the NW sides.
While the SW side had an insulating wrap of walk-in closets and toilets, the SE and the NW sides had a verandah – with suitable pop-outs of study-rooms, etc. to shade the glazing from the low East and West sun.
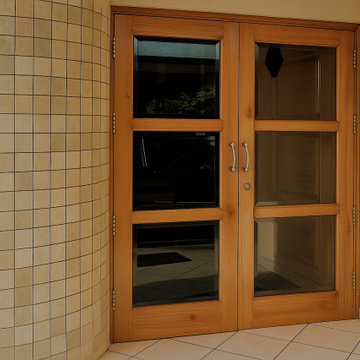
The central square was designed like an atrium, with an attic above, just under the peak of the pyramidal roof topping the house. To allow for an unique character – this pyramid was clad in terracotta tiles.
As the sketch of the plan shows – there is a square each for the entrance lobby, the living room, and the kitchen. The lobby has a powder room attached on the left, behind which is the kitchen.
On the right, and opening onto a huge garden at the rear (NW) is the large living room – occupying 1.5 squares of space. And there is a 8’ wide verandah insulating this living room from the rear garden. Although packed with flowers from the Potted Plant Committee...........
The central Atrium is the Dining room – with suitable storage all around for crockery and other decorative memorabilia.......and leading onto another family seating (the TV area) between the 3 bedrooms adjoining this atrium.
The staircase to the FF is just SW of this lounge, with a hobby room or tool room (the owner is an engineer who loves to tinker) as is the exit to the SW garden.
As aforesaid – the SW side of the house is insulated from the afternoon sun with a set of toilets and walk-in closets. On both floors.
From the FF one can look down and communicate with the GF easily, leading to a great feeling of space.
The FF also has additional rooms used as a gym, and games room, while a large deck is left open as a verandah of the NE side. If a 70’ long x 17’ wide space plus more seems reasonable. - instead of large.
Well, there you are – supposed to be impressed with all those large spaces – which is what the house was supposed to do to the visitor in the first place.......!!!!
Find the right local pro for your project
 Tile Doctor Ltd
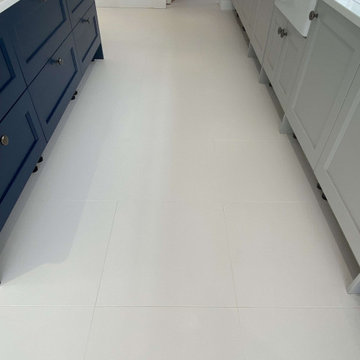
I was called out to clean a Porcelain tiled floor at a newly built property in Winwick near Huntingdon. The tiles were heavily marked with grout and dirt and were impossible to get clean. To make things worse the tiles were pale, almost white, in colour which made the staining more obvious. It was clear to me that the builder had not managed to polish off all the grout after tiling and this had now set hard on the surface.
This is a very common problem known as Grout Haze and fortunately there is a solution, in that it can be removed by giving the tiles a rinse with an acidic tile cleaner called Tile Doctor Grout Clean-up. To prove the point, I carried out a quick demonstration so the new owners could appreciate the difference.
I always like to test porcelain tiles for a reaction to acid prior to commencing work as acidic cleaners can have a negative effect on some types of polished porcelain however this one had a textured feel to it so there was no issue.
The test went well so having got the go head I began by first cleaning the tiles with a medium dilution of Tile Doctor Pro-Clean, this was left for about ten minutes before being worked into the tile with a black scrubbing pad fitted to a rotary machine. I also used a stiff brush along the grout lines to make sure the grout was as clean as the tile.
This process generates a lot of soiling which was then extracted using a truck mount machine. By Truck Mount I’m referring to a powerful cleaning machine that’s fitted into my van, it blasts the floor with hot water and then immediately extracts it using an equally powerful vacuum to grey tank in the vehicle, it’s incredibly effective and leaves very little water on the floor afterwards.
The next step was to tackle the grout haze and this is done as before by Acid Washing the floor using a dilution of Tile Doctor Grout Clean-up and scrubbing into the tile as before. Again, the resultant soils were extracted as before using the truck mount.
The floor was then speed dried using Dripods which are small horizontal fans designed to blow air downwards and ideal for drying carpets and hard floors. Once dry, a coat of Tile Doctor Ultra-Seal was applied, left to dry and any excess buffed away with a White pad.
The work was completed in one day and completely transformed the floor much to the delight of my customer who left the following message in a subsequent email:
“Thank you very much indeed, we are delighted with the floor.”
I’m pleased to say I have since returned to the neighbourhood and completed another identical grout removal job at a neighbour’s property who had the same issue with builder.
Tom Conlon
Cambridge Tile Doctor
 Metamorphosis Architecture Chandigarh - 9316511166
RESIDENCE FOR Mr PRADEEP JAIN
Location: Sector 28, Chandigarh
Year of Construction : 2005
So the old sewage connection was retained..........basically to save oneself from harassment from the sharks in the various departments connected with house sanction, and concomitant procedures.
The plot was a large one – upwards of around 1500 sq yds. - which could qualify locally as a 3 kanal house. (1 kanal = 1/8 of an acre = 4840/8=605 sq yds.)
We’ll not get into the travails of getting the plot transferred to oneself, and the subsequent sanction of the building plans – but it was relatively easy compared to the norm – thanx to a dynamic young AEO in the Estate Office.
Since the Owner was based in Ambala, the plans for the house were relatively simple – considering that the construction firm was based out of Meerut........!!!
So the program was for the house to be born out of 9 squares of around 16’ side each, (the traditional Vastu Purusha Mandala) with an additional 8’ wide wrap around space where needed – ie the SE, the SW and the NW sides.
While the SW side had an insulating wrap of walk-in closets and toilets, the SE and the NW sides had a verandah – with suitable pop-outs of study-rooms, etc. to shade the glazing from the low East and West sun.
The central square was designed like an atrium, with an attic above, just under the peak of the pyramidal roof topping the house. To allow for an unique character – this pyramid was clad in terracotta tiles.
As the sketch of the plan shows – there is a square each for the entrance lobby, the living room, and the kitchen. The lobby has a powder room attached on the left, behind which is the kitchen.
On the right, and opening onto a huge garden at the rear (NW) is the large living room – occupying 1.5 squares of space. And there is a 8’ wide verandah insulating this living room from the rear garden. Although packed with flowers from the Potted Plant Committee...........
The central Atrium is the Dining room – with suitable storage all around for crockery and other decorative memorabilia.......and leading onto another family seating (the TV area) between the 3 bedrooms adjoining this atrium.
The staircase to the FF is just SW of this lounge, with a hobby room or tool room (the owner is an engineer who loves to tinker) as is the exit to the SW garden.
As aforesaid – the SW side of the house is insulated from the afternoon sun with a set of toilets and walk-in closets. On both floors.
From the FF one can look down and communicate with the GF easily, leading to a great feeling of space.
The FF also has additional rooms used as a gym, and games room, while a large deck is left open as a verandah of the NE side. If a 70’ long x 17’ wide space plus more seems reasonable. - instead of large.
Well, there you are – supposed to be impressed with all those large spaces – which is what the house was supposed to do to the visitor in the first place.......!!!!
 MODIVO LIGHT
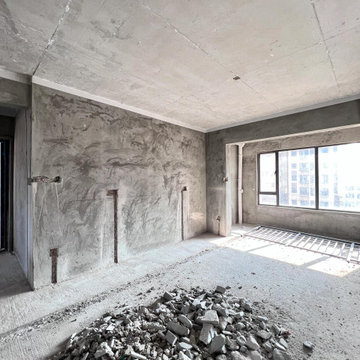
This is our first time decorating a house. Starting from knowing nothing at all to now having the hard decoration completed, we have experienced every emotion along the way—anxiety, doubt, tiredness, hesitation, joy, satisfaction, and touch. We learned and explored on our own, and bit by bit, we finished decorating our home. We’ve accumulated so much experience in this process, and now we want to share it, hoping it can be of a little help to all of you who are doing your own home decoration.
Preparations in Advance
1、Clarify your own ideas: Whether you are looking online, talking to designers, or copying ideas from friends' homes, you should have a clear vision of what your home should look like before designing—such as the style, color scheme, and elements to be used... It is crucial to avoid wanting to install everything that looks good in others' homes in your own. This way, you can clearly put forward your requirements during the design and decoration process, and also avoid frequent revisions to the plan, which may lead to unnecessary rework.
2、Understand your own needs: You need to first figure out the needs of your family, such as how many people live in the house permanently, how many rooms are needed, everyone's living habits, and daily preferences... A home is always for living in, so functionality is always the most important. It is best to list these needs and give priority to meeting them during the design and decoration. This way, you won't find out after decoration that many necessary things are missing, while a bunch of installed things are useless.
3、Determine your budget: There are ways to decorate with more money, and also ways to do it with less. No matter how much money you have, the decorated house can be both beautiful and practical. Therefore, it is essential to decide exactly how much you want to spend on decoration. In every link, such as designing the plan, making a budget table, selecting materials, and construction, you should act in accordance with your own budget.
4、Understand the advantages and disadvantages of your house: There is no perfect house in the world, and every house has its pros and cons. Your design plan should avoid its shortcomings and amplify its advantages. I once wrote an article about the drawbacks of my house ("My house is not perfect, but I still want to find ways to save it"), so we figured out solutions to these problems during the decoration.
5、Learn as much decoration knowledge as possible in advance: Although you can pick up this knowledge in the subsequent decoration process, it is better to learn more beforehand. This will make you much more calm when facing problems.
6、Know your strengths: Before decoration, you must be clear about what you are good at and what you are not. If you are good at design, do the design yourself; if you are skilled at bargaining, go buy building materials on your own; if you have strong hands-on ability, you can even do the decoration and repairs yourself... During the decoration process, you should focus on what you are good at, and leave what you are not good at to others.
 MODIVO LIGHT
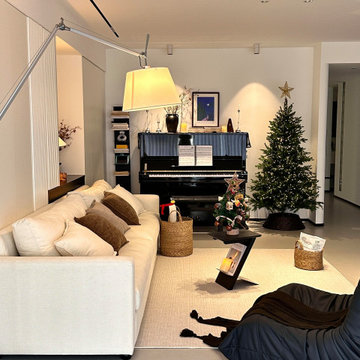
This is our first time decorating a house. Starting from knowing nothing at all to now having the hard decoration completed, we have experienced every emotion along the way—anxiety, doubt, tiredness, hesitation, joy, satisfaction, and touch. We learned and explored on our own, and bit by bit, we finished decorating our home. We’ve accumulated so much experience in this process, and now we want to share it, hoping it can be of a little help to all of you who are doing your own home decoration.
Preparations in Advance
1、Clarify your own ideas: Whether you are looking online, talking to designers, or copying ideas from friends' homes, you should have a clear vision of what your home should look like before designing—such as the style, color scheme, and elements to be used... It is crucial to avoid wanting to install everything that looks good in others' homes in your own. This way, you can clearly put forward your requirements during the design and decoration process, and also avoid frequent revisions to the plan, which may lead to unnecessary rework.
2、Understand your own needs: You need to first figure out the needs of your family, such as how many people live in the house permanently, how many rooms are needed, everyone's living habits, and daily preferences... A home is always for living in, so functionality is always the most important. It is best to list these needs and give priority to meeting them during the design and decoration. This way, you won't find out after decoration that many necessary things are missing, while a bunch of installed things are useless.
3、Determine your budget: There are ways to decorate with more money, and also ways to do it with less. No matter how much money you have, the decorated house can be both beautiful and practical. Therefore, it is essential to decide exactly how much you want to spend on decoration. In every link, such as designing the plan, making a budget table, selecting materials, and construction, you should act in accordance with your own budget.
4、Understand the advantages and disadvantages of your house: There is no perfect house in the world, and every house has its pros and cons. Your design plan should avoid its shortcomings and amplify its advantages. I once wrote an article about the drawbacks of my house ("My house is not perfect, but I still want to find ways to save it"), so we figured out solutions to these problems during the decoration.
5、Learn as much decoration knowledge as possible in advance: Although you can pick up this knowledge in the subsequent decoration process, it is better to learn more beforehand. This will make you much more calm when facing problems.
6、Know your strengths: Before decoration, you must be clear about what you are good at and what you are not. If you are good at design, do the design yourself; if you are skilled at bargaining, go buy building materials on your own; if you have strong hands-on ability, you can even do the decoration and repairs yourself... During the decoration process, you should focus on what you are good at, and leave what you are not good at to others.
 MODIVO LIGHT
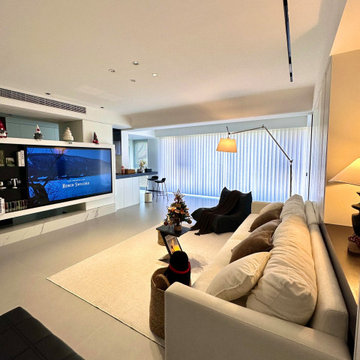
This is our first time decorating a house. Starting from knowing nothing at all to now having the hard decoration completed, we have experienced every emotion along the way—anxiety, doubt, tiredness, hesitation, joy, satisfaction, and touch. We learned and explored on our own, and bit by bit, we finished decorating our home. We’ve accumulated so much experience in this process, and now we want to share it, hoping it can be of a little help to all of you who are doing your own home decoration.
Preparations in Advance
1、Clarify your own ideas: Whether you are looking online, talking to designers, or copying ideas from friends' homes, you should have a clear vision of what your home should look like before designing—such as the style, color scheme, and elements to be used... It is crucial to avoid wanting to install everything that looks good in others' homes in your own. This way, you can clearly put forward your requirements during the design and decoration process, and also avoid frequent revisions to the plan, which may lead to unnecessary rework.
2、Understand your own needs: You need to first figure out the needs of your family, such as how many people live in the house permanently, how many rooms are needed, everyone's living habits, and daily preferences... A home is always for living in, so functionality is always the most important. It is best to list these needs and give priority to meeting them during the design and decoration. This way, you won't find out after decoration that many necessary things are missing, while a bunch of installed things are useless.
3、Determine your budget: There are ways to decorate with more money, and also ways to do it with less. No matter how much money you have, the decorated house can be both beautiful and practical. Therefore, it is essential to decide exactly how much you want to spend on decoration. In every link, such as designing the plan, making a budget table, selecting materials, and construction, you should act in accordance with your own budget.
4、Understand the advantages and disadvantages of your house: There is no perfect house in the world, and every house has its pros and cons. Your design plan should avoid its shortcomings and amplify its advantages. I once wrote an article about the drawbacks of my house ("My house is not perfect, but I still want to find ways to save it"), so we figured out solutions to these problems during the decoration.
5、Learn as much decoration knowledge as possible in advance: Although you can pick up this knowledge in the subsequent decoration process, it is better to learn more beforehand. This will make you much more calm when facing problems.
6、Know your strengths: Before decoration, you must be clear about what you are good at and what you are not. If you are good at design, do the design yourself; if you are skilled at bargaining, go buy building materials on your own; if you have strong hands-on ability, you can even do the decoration and repairs yourself... During the decoration process, you should focus on what you are good at, and leave what you are not good at to others.
 Windy City Painters
PREPARATION AND PLANNING
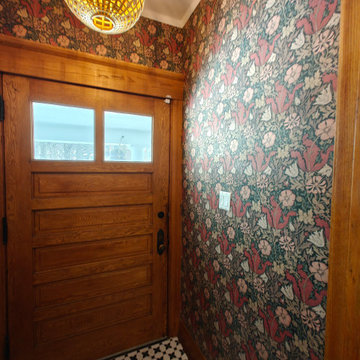
First, we assessed existing wall conditions and repaired minor imperfections. Next, surfaces were thoroughly cleaned and primed for maximum adhesion. Then, precise measurements ensured perfect pattern alignment throughout the space.
INSTALLATION PROCESS
Subsequently, we carefully cut each strip accounting for pattern matching. Moreover, professional installation techniques eliminated bubbles and ensured seamless seams. Finally, detailed finishing work created flawless edges and corners.
CHICAGO-SPECIFIC CHALLENGES
Furthermore, older Chicago buildings present unique challenges including settling walls, vintage plaster surfaces, and lead paint considerations. Therefore, proper preparation becomes crucial for long-lasting results that withstand seasonal temperature fluctuations.
RESULTS AND QUALITY
Consequently, the finished installation showcases perfect pattern alignment and professional craftsmanship. The wallpaper enhances the entry hall's architectural character while providing durability for high-traffic use.
PROFESSION AL TIPS
Homeowners should always hire experienced installers for complex patterns. Additionally, investing in quality primer saves money long-term by ensuring proper adhesion and easier future removal.
See more work and request free estimate at windypainters.com.
Q: How long does wallpaper installation take? / A: Most entry halls require one to two days depending on pattern complexity, surface preparation needs, and room size for professional wallpaper installation.
Q: Can you install over existing wallpaper? / A: We recommend removing old wallpaper first for best adhesion, though some situations allow installation over existing wallpaper after proper preparation and assessment.
Q: What wallpaper works best in Chicago? / A: Vinyl and fabric-backed wallpapers handle Chicago's climate changes best, providing durability against humidity fluctuations and temperature variations throughout seasons.
Q: Do you guarantee installation work? / A: Yes, Windy City Painters provides comprehensive warranties covering wallpaper installation craftsmanship and adhesion for specified warranty periods on all projects.
Q: How do you handle pattern matching? / A: We carefully measure walls, calculate pattern repeats, and plan installation sequence to ensure perfect wallpaper installation pattern alignment throughout the space.
Q: Can wallpaper work in vintage buildings? / A: Absolutely, we specialize in wallpaper installation for older Chicago homes, understanding unique challenges like settling walls and vintage plaster surfaces.
Q: What preparation is required? / A: Proper wallpaper installation requires surface assessment, repairs, thorough cleaning, appropriate priming, and climate control for optimal adhesion and lasting results.
Q: Do you remove old wallpaper? / A: Yes, we provide professional wallpaper removal services using safe techniques that protect underlying wall surfaces during the wallpaper installation preparation process.
Q: How much does installation cost? / A: Wallpaper installation costs vary based on room size, pattern complexity, surface preparation needs, and wallpaper selection - contact for detailed estimates.
Q: What tools do professionals use? / A: Professional wallpaper installation requires specialized smoothing tools, precision cutting equipment, quality brushes, and professional-grade adhesives for optimal results and longevity.

 contact7524
This stained glass window was created as part of our signature Aspen Stained Glass line. These windows look beautiful in cottage style or contemporary homes and are a great way for outdoor enthusiasts to celebrate their love of nature. The textured appearance of the glass provides the homeowners with a high level of privacy and comfort.
 Metamorphosis Design
So the old sewage connection was retained..........basically to save oneself from harassment from the sharks in the various departments connected with house sanction, and concomitant procedures.
The plot was a large one – upwards of around 1500 sq yds. - which could qualify locally as a 3 kanal house. (1 kanal = 1/8 of an acre = 4840/8=605 sq yds.)
We’ll not get into the travails of getting the plot transferred to oneself, and the subsequent sanction of the building plans – but it was relatively easy compared to the norm – thanx to a dynamic young AEO in the Estate Office.
Since the Owner was based in Ambala, the plans for the house were relatively simple – considering that the construction firm was based out of Meerut........!!!
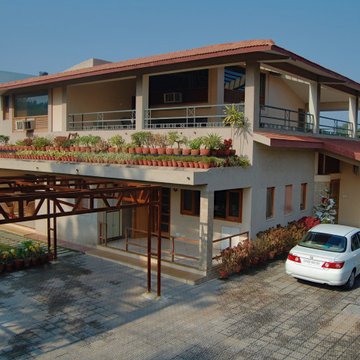
So the program was for the house to be born out of 9 squares of around 16’ side each, (the traditional Vastu Purusha Mandala) with an additional 8’ wide wrap around space where needed – ie the SE, the SW and the NW sides.
While the SW side had an insulating wrap of walk-in closets and toilets, the SE and the NW sides had a verandah – with suitable pop-outs of study-rooms, etc. to shade the glazing from the low East and West sun.
The central square was designed like an atrium, with an attic above, just under the peak of the pyramidal roof topping the house. To allow for an unique character – this pyramid was clad in terracotta tiles.
As the sketch of the plan shows – there is a square each for the entrance lobby, the living room, and the kitchen. The lobby has a powder room attached on the left, behind which is the kitchen.
On the right, and opening onto a huge garden at the rear (NW) is the large living room – occupying 1.5 squares of space. And there is a 8’ wide verandah insulating this living room from the rear garden. Although packed with flowers from the Potted Plant Committee...........
The central Atrium is the Dining room – with suitable storage all around for crockery and other decorative memorabilia.......and leading onto another family seating (the TV area) between the 3 bedrooms adjoining this atrium.
The staircase to the FF is just SW of this lounge, with a hobby room or tool room (the owner is an engineer who loves to tinker) as is the exit to the SW garden.
As aforesaid – the SW side of the house is insulated from the afternoon sun with a set of toilets and walk-in closets. On both floors.
From the FF one can look down and communicate with the GF easily, leading to a great feeling of space.
The FF also has additional rooms used as a gym, and games room, while a large deck is left open as a verandah of the NE side. If a 70’ long x 17’ wide space plus more seems reasonable. - instead of large.
Well, there you are – supposed to be impressed with all those large spaces – which is what the house was supposed to do to the visitor in the first place.......!!!!
designed by www.MetamorphosisDesign.org
Struggling to bring clarity to your vision before starting your dream project?
Let us help you refine your ideas and align them seamlessly with your budget.
Schedule your design consultation today - call - 9316511166

 Heritage Construction Companies, LLC.
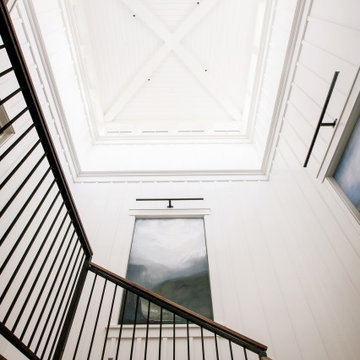
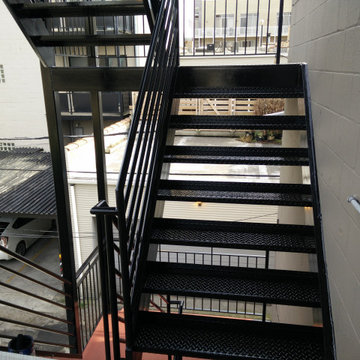
Example of a huge trendy metal floating open staircase design in Minneapolis



 Root Design Company.com
 Landscape & Pool Design: Root Design Company
Photo credits: Jessica Carr
Design ideas for a mediterranean landscaping in Austin.
Design ideas for a mediterranean landscaping in Austin.

 Tile Doctor Ltd
This customer from the historic city of Cardiff was keen to see what Tile Doctor could do to put some life back into their treasured Limestone kitchen floor that was laid in 2008. My first observations were mainly centred on the horrific condition of the surface which although adequately sealed initially the floor had not received any subsequent maintenance and its condition had deteriorated over time. The light shining in from the patio doors highlighted all the imperfections in the floor caused by surface wear and tear commonly seen in high traffic areas such as a kitchen.
Upon closer inspection, there were further problems: the floor was stained and scuffed, and in most places the sealer had worn off completely allowing the dirt to become ingrained into the pores of the Limestone. Additionally the grout was recessed but was now flush with the tile surface due to dirt build-up. There were also areas contaminated with grease and kitchen cooking oil.
The Limestone floor tiles were 20mm thick French Limestone, and had been laid very well so there was no requirement to do any tile or grout repairs however to get this floor back to its original condition the surface would need to be reconditioned using the Tile Doctor four stage burnishing system.
I started by giving the floor a wash with a medium dilution of Tile Doctor Pro-Clean, focusing mainly on the grout lines in order to remove the muck that had built-up there. I used a special stiff grout brush for this activity; it’s quite narrow and ideal for grout scrubbing.
This worked well, but the significant build-up of dirt along some of the grout lines meant more work was required. I tackled this problem with a hand scraper assisted with steam. At the end of this process, the whole floor was then rinsed down with water to remove any soil and the resulting slurry was then extracted using a wet vacuum.
The next step was to start the burnishing process, which basically involves applying four diamond encrusted floor pads in sequence over the floor. Each pad is a different grade, starting with the most abrasive coarse pad and moving through to the finer grades using a little water to lubricate and rinsing away any slurry between each pad.
I eventually finished with the extra fine pad which builds up shine and lustre on the tile; it had taken two days to clean the grout and burnish the Limestone but the floor was much improved and so after a final rinse down I left the floor to dry off overnight with the aid of the underfloor heating.
During this time, I also addressed the stained Limestone in the area of the kitchen where the dustbin was situated. This had been a major upset for the customer and I’m happy to report I managed to deal with it. However, it was quite an involved process, so I’ll write about this in a separate post.
On the third day I came back to seal the floor, checking first that it had dried sufficiently with a damp meter. Fortunately, the underfloor heating had done a great job of drying the stone and I was able to seal the floor using three coats of Tile Doctor Colour Grow sealant. This sealant not only provides a durable seal but also penetrates deep into the pores of the stone protecting it from within and enhancing the natural colours of the Limestone in the process.
After the final layer of sealant, I worked over the floor again with the extra fine burnishing pad both to add shine again following sealing, and to ensure that no smear marks were visible as the lighting conditions were unforgiving and highlighted any imperfections.
The customer was delighted with the results: so much so, in fact, that they booked me in to restore their Victorian hallway floor as well but that’s a story for another time!
Julian Iancono
SE Wales Tile Doctor


 Windy City Painters
Iron Fence Painting Lincoln Park Chicago - Professional Metal Refinishing
Windy City Painters completed this comprehensive iron fence painting project for a beautiful Lincoln Park greystone property. Lincoln Park's historic architecture demands careful attention to detail, and furthermore, Chicago's harsh weather conditions require professional-grade materials and techniques for lasting protection.
We utilized premium Sherwin-Williams rust inhibiting primer and Benjamin Moore exterior metal paint for maximum durability. Additionally, our team employed specialized rust removal tools and surface preparation equipment to ensure optimal adhesion and longevity.
Our four-step process included complete rust removal and surface cleaning, minor repairs to damaged sections, premium primer application with proper curing time, and final topcoat application using spray and brush techniques for even coverage.
Chicago's unique challenges include extreme temperature fluctuations, salt exposure from winter treatments, and moisture from Lake Michigan. Moreover, older properties often have multiple paint layers requiring careful removal. Therefore, professional expertise ensures proper preparation and material selection.
The results exceeded client expectations with a smooth, durable finish that enhances the property's curb appeal. Subsequently, the fence now provides years of protection while complementing the neighborhood's architectural character perfectly.
Before starting similar projects, homeowners should understand that proper surface preparation accounts for 80% of project success. Additionally, weather conditions significantly impact application timing and results.
See more work and request free estimate at windypainters.com.
Frequently Asked Questions:
Q: How much does iron fence painting cost in Lincoln Park Chicago?
A: Iron fence painting costs vary based on fence size, existing condition, rust damage extent, and preparation requirements needed.
Q: What preparation is required for successful iron fence painting projects?
A: Iron fence painting requires thorough rust removal, surface cleaning, minor repairs, primer application, and proper weather conditions.
Q: How long does professional iron fence painting last in Chicago weather?
A: Professional iron fence painting typically lasts 8-12 years with quality materials, proper preparation, and regular maintenance.
Q: When is the best season for iron fence painting in Chicago?
A: Spring through early fall provides optimal conditions for iron fence painting with appropriate temperature and humidity levels.
Q: Can you match existing colors for iron fence painting restoration projects?
A: Yes, we provide custom color matching services for iron fence painting to complement existing architectural elements perfectly.
Q: Do you warranty iron fence painting work in Lincoln Park?
A: Windy City Painters provides comprehensive warranties on all iron fence painting projects ensuring quality and customer satisfaction.
Q: What makes professional iron fence painting worth the investment cost?
A: Professional iron fence painting ensures proper preparation, quality materials, expert application techniques, and significantly extended fence lifespan.
Q: How do you prevent rust from returning after iron fence painting?
A: Our iron fence painting process includes rust inhibiting primer, quality topcoats, and proper surface preparation for maximum protection.
Q: Can iron fence painting increase Lincoln Park property values significantly?
A: Professional iron fence painting enhances curb appeal, property aesthetics, and market value in desirable Lincoln Park neighborhood.
Q: What safety precautions are necessary during iron fence painting projects?
A: Iron fence painting requires proper ventilation, protective equipment, lead paint testing, and professional safety protocols throughout.

 Diego Bringas
vi-deo! Person of Interest S.eason 5, E.pisode 12 F.ull O.nline. Here we go thhen for sure all the fans, this is the nice and wonderful time for all of us to start watch into the rest about Person of Interest season 5, episode 12 online. Entitled as .exe, here's such a wonderful over view to explore more, As Reese and Shaw race to catch up with Finch, he infiltrates a maximum-security government facility in a desperate mission which could mean the end for not only Samaritan, but for himself and The Machine as well.
"Synecdoche" reminder looks fantastic, When Reese, Shaw and Fusco travel to Washington, D.C. to protect their next number, The President of the United States, the Machine classifies this threat as extremely relevant - in terms of national security - but Shaw is worried about the implications behind Samaritan's neglecting to intervene. The threat is neutralized, but the inner-governmental privacy-activist group with a mole in the U.S.S.S. has turned the full force of the Secret Service on Reese and Shaw.
The Machine has secretly enlisted Logan Pierce, Joey Durban and Harper Rose to secure a clever exit strategy, with each of whom camouflaging into various resourceful associations; when Reese and Fusco are extracted, they band together with Logan, Joey and Harper to discuss their enlistment by the Machine, what has happened and what is to come.
Harold, meanwhile, is grieving over the loss of Root, and reaches a conclusion that brings him to a highly-secured government facility in San Antonio, Texas with a weaponized virus capable of destroying Samaritan. Harold has become ready to go to any lengths, and Reese and Shaw prepare for their final battle.
Series over view, They are helped by NYPD Detectives Lionel Fusco, a corrupt officer whom Reese coerces into helping them, and Joss Carter, who in early episodes investigates Reese for his vigilante activities.
Reese arranges for Fusco to spy on Carter by becoming her partner, but Carter eventually becomes Reese's ally and drops her investigation on him. Nevertheless, for the entirety of season one neither Fusco nor Carter is aware that the other is also working with Finch and Reese and both detectives are kept in the dark about the Machine. Periodically, the team enlists the aid of Zoe Morgan, a professional "fixer" who applies her skills to particularly difficult tasks.
The series features several subplots. One significant story arc involves "HR", an organization of corrupt NYPD officers who are initially in league with budding mob boss Carl Elias and later with the Russian mafia; in earlier parts of this arc, Fusco is forced to go undercover. Another important story line revolves around Root, a psychopathic hacker who is determined to gain access to The Machine.
During season two, another organization of powerful business figures, Decima Technologies, is revealed to be attempting to gain access to the Machine. Carter vows vengeance against HR after they have her boyfriend, Detective Cal Beecher, murdered. Reese and Finch encounter Sameen Shaw, an ISA assassin, on the run after being betrayed by her employers.
Shaw learns about The Machine in the season two finale and subsequently becomes a member of Reese and Finch's team. In Season three, Carter delves deeper into her investigation of HR, eventually uncovering its leader; but she is killed. In his grief, Reese briefly leaves the team. The team also battles Vigilance, a violent anti-government organization devoted to securing people's privacy.
100% working here:
http://tinyurl.com/zkfrsad
http://tinyurl.com/j6kjlsz
During the second half of season three, Decima Technologies starts to acquire hardware to bring to life a new artificial intelligence called Samaritan, using the codes from Harold's old college classmate, Arthur Claypool. In the season three finale, it is revealed that Vigilance was created by Decima to make them appear as domestic terrorists. This allowed Decima to obtain all the NSA feeds to make Samaritan operational. The Machine creates new identities for the Team so that they can fly beneath Samaritan's radar. Go for it finally fans, start watching for Person of Interest season 5, episode 12 : .exe online.
59