
Search results for "Suggestions provide" in Home Design Ideas
 Talon Construction Inc.
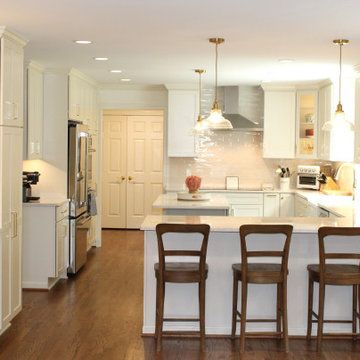
Finding a reputable contractor to design and build your kitchen remodel in Maryland with quality results involves several steps. Here are some general guidelines to help you find the right professional for your project:
1. Ask for Recommendations: Start by asking friends, family, neighbors, or colleagues who have recently completed kitchen remodels for recommendations. Personal referrals can be a valuable source of trustworthy contractors.
2. Check Online Reviews: Websites like Yelp, Angie's List, and Google Reviews can provide insights into the experiences of previous clients. Look for contractors with consistently positive feedback.
3. Check Credentials: Verify that the contractor has the necessary licenses and insurance to work in Maryland. You can typically check this information on your state's licensing board website.
4. Ask for References: Request references from the contractor and contact previous clients to inquire about their experiences. Visit some of their completed projects if possible.
5. Review Portfolios: Examine the contractor's portfolio of past kitchen remodels. Look for examples of work that match your style and preferences.
6. Check for Permits: Ensure that the contractor will handle any necessary permits and inspections for your remodel. Avoid contractors who suggest bypassing required permits, as this can lead to legal and safety issues.
7. Discuss Communication: Clear communication is crucial throughout the project. Discuss how the contractor will keep you updated on progress and address any concerns or changes during the remodel.
8. Get Everything in Writing: Never rely solely on verbal agreements. Ensure that all project details, warranties, and expectations are documented in a written contract.
9. Check for Red Flags: Be wary of contractors who pressure you into making quick decisions, lack a physical business address, or have a history of disputes or legal issues.
10. Trust Your Instincts: Choose a contractor you feel comfortable working with. Trust your instincts and select someone who listens to your ideas and concerns.
11. Visit Completed Projects: If possible, visit some of the contractors’ completed kitchen remodels to assess the quality of their work in person.
Once you've completed your due diligence and gathered all the necessary information, you'll be better equipped to make an informed decision about which contractor to hire for your kitchen remodel in Maryland. Remember that quality results often come from working with experienced, licensed professionals who prioritize clear communication and transparency throughout the project.
 Tom Brzoskwinia
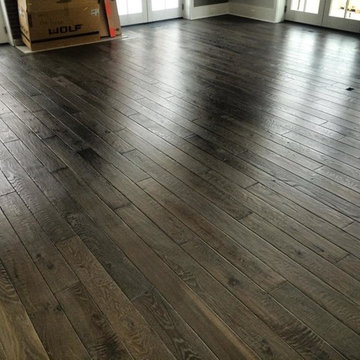
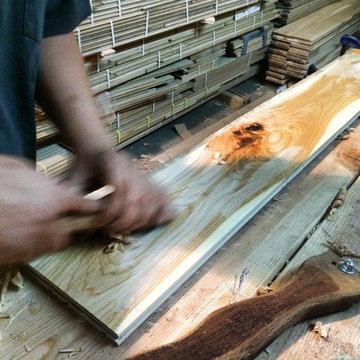
One of the most popular hardwood floor finishing which offers Tom & Peter Flooring is provided by WOCA. If you’ve decided that you want a natural looking wooden floor that is lacquer-free, then the likelihood is that you’ve chosen oil as your way of protecting your wood and making your floor look great at the same time. WOCA for wood flooring comes in various forms and is a great way of making sure that your wood is protected, but at the same time looks natural. A highly popular as well as effective way of treating wood floors, oils effectively penetrate into the wood and in some cases harden into the surface of the floor to stop damage and to maintain the wood in its optimum condition.
WOCA Oil finish hardwood flooring has taken the United States market by in 2014 and shows no signs of slowing down in 2016 and now. Here are some of the most common questions we have regarding this type of finish which we will I’m to answer in today’s my blog:
Is oil finish as durable as traditional factory urethane finishes with aluminum oxide?
When it comes to durability, oil finish flooring tackles the issue with a completely different method. The penetrating oil serves as protection from moisture and wear while allowing the user to feel the wood grains in their bare feet. If compared directly to factory finished aluminum oxide finish, the oil finish flooring will not perform as well to abrasion and impact. However, the beauty of this finish is the fact that it will camouflage any scratches which will inevitably accumulate over time.
Will this finish evaporate over time and will this be harmful for indoor air quality?
Another concern for oil finished floors its effect on indoor air quality. For on-site applications, some varieties suggest several coats which typically require the residents to be out of the home due to mild odors. However, there are factory finished UV-cured or single coat applications which lessen the downtime. Despite the odors produced during the drying process, oil finish floors rank amongst the lowest for VOC (volatile organic compound) emissions. Certain brands even boast true zero VOC. This fact alone makes oil finished floors one of the best options for green building solutions.
“WOCA products are certified by independent laboratories, the German Institute for Biological Building Materials, and are in accordance with DIN–Norm 53–160. WOCA WoodCare Denmark products meet or exceed the most stringent U.S. standards for volatile organic compounds.” –WOCA Oil Finish Manufacture
Does this type of finish require additional maintenance which I am not familiar with?
For weekly cleaning, oiled floors use a special cleaner which contains an oil and soap mixture. After a period of 12-18 months some oil may evaporate causing the wood grains to appear dry. An additional layer of oil can be reapplied to keep the floor looking fresh. Although oil finished floors require more involvement in periodic maintenance in high traffic areas, this maintenance can be done much easier than the equivalent of an onsite sand and refinish.
WOCA Master Color Oil contains pigment, which provides a single-step hardwood floor staining process. Laying down the stain and the finish in one step.
This product comes 14 different colors, from Black to Extra White, and you can mix them freely to create various color palettes that will meet the demands of any job.
Below are some pictures of the finished job…
 Tom Brzoskwinia
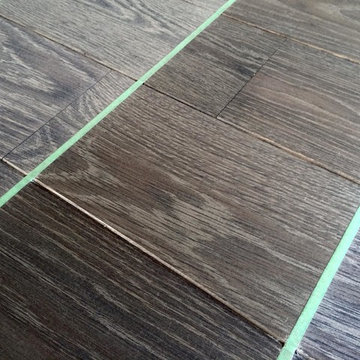
One of the most popular hardwood floor finishing which offers Tom & Peter Flooring is provided by WOCA. If you’ve decided that you want a natural looking wooden floor that is lacquer-free, then the likelihood is that you’ve chosen oil as your way of protecting your wood and making your floor look great at the same time. WOCA for wood flooring comes in various forms and is a great way of making sure that your wood is protected, but at the same time looks natural. A highly popular as well as effective way of treating wood floors, oils effectively penetrate into the wood and in some cases harden into the surface of the floor to stop damage and to maintain the wood in its optimum condition.
WOCA Oil finish hardwood flooring has taken the United States market by in 2014 and shows no signs of slowing down in 2016 and now. Here are some of the most common questions we have regarding this type of finish which we will I’m to answer in today’s my blog:
Is oil finish as durable as traditional factory urethane finishes with aluminum oxide?
When it comes to durability, oil finish flooring tackles the issue with a completely different method. The penetrating oil serves as protection from moisture and wear while allowing the user to feel the wood grains in their bare feet. If compared directly to factory finished aluminum oxide finish, the oil finish flooring will not perform as well to abrasion and impact. However, the beauty of this finish is the fact that it will camouflage any scratches which will inevitably accumulate over time.
Will this finish evaporate over time and will this be harmful for indoor air quality?
Another concern for oil finished floors its effect on indoor air quality. For on-site applications, some varieties suggest several coats which typically require the residents to be out of the home due to mild odors. However, there are factory finished UV-cured or single coat applications which lessen the downtime. Despite the odors produced during the drying process, oil finish floors rank amongst the lowest for VOC (volatile organic compound) emissions. Certain brands even boast true zero VOC. This fact alone makes oil finished floors one of the best options for green building solutions.
“WOCA products are certified by independent laboratories, the German Institute for Biological Building Materials, and are in accordance with DIN–Norm 53–160. WOCA WoodCare Denmark products meet or exceed the most stringent U.S. standards for volatile organic compounds.” –WOCA Oil Finish Manufacture
Does this type of finish require additional maintenance which I am not familiar with?
For weekly cleaning, oiled floors use a special cleaner which contains an oil and soap mixture. After a period of 12-18 months some oil may evaporate causing the wood grains to appear dry. An additional layer of oil can be reapplied to keep the floor looking fresh. Although oil finished floors require more involvement in periodic maintenance in high traffic areas, this maintenance can be done much easier than the equivalent of an onsite sand and refinish.
WOCA Master Color Oil contains pigment, which provides a single-step hardwood floor staining process. Laying down the stain and the finish in one step.
This product comes 14 different colors, from Black to Extra White, and you can mix them freely to create various color palettes that will meet the demands of any job.
Below are some pictures of the finished job…
Find the right local pro for your project
 Talon Construction Inc.
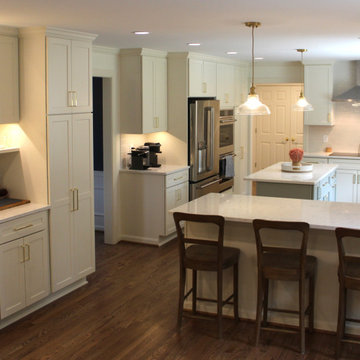
Finding a reputable contractor to design and build your kitchen remodel in Maryland with quality results involves several steps. Here are some general guidelines to help you find the right professional for your project:
1. Ask for Recommendations: Start by asking friends, family, neighbors, or colleagues who have recently completed kitchen remodels for recommendations. Personal referrals can be a valuable source of trustworthy contractors.
2. Check Online Reviews: Websites like Yelp, Angie's List, and Google Reviews can provide insights into the experiences of previous clients. Look for contractors with consistently positive feedback.
3. Check Credentials: Verify that the contractor has the necessary licenses and insurance to work in Maryland. You can typically check this information on your state's licensing board website.
4. Ask for References: Request references from the contractor and contact previous clients to inquire about their experiences. Visit some of their completed projects if possible.
5. Review Portfolios: Examine the contractor's portfolio of past kitchen remodels. Look for examples of work that match your style and preferences.
6. Check for Permits: Ensure that the contractor will handle any necessary permits and inspections for your remodel. Avoid contractors who suggest bypassing required permits, as this can lead to legal and safety issues.
7. Discuss Communication: Clear communication is crucial throughout the project. Discuss how the contractor will keep you updated on progress and address any concerns or changes during the remodel.
8. Get Everything in Writing: Never rely solely on verbal agreements. Ensure that all project details, warranties, and expectations are documented in a written contract.
9. Check for Red Flags: Be wary of contractors who pressure you into making quick decisions, lack a physical business address, or have a history of disputes or legal issues.
10. Trust Your Instincts: Choose a contractor you feel comfortable working with. Trust your instincts and select someone who listens to your ideas and concerns.
11. Visit Completed Projects: If possible, visit some of the contractors’ completed kitchen remodels to assess the quality of their work in person.
Once you've completed your due diligence and gathered all the necessary information, you'll be better equipped to make an informed decision about which contractor to hire for your kitchen remodel in Maryland. Remember that quality results often come from working with experienced, licensed professionals who prioritize clear communication and transparency throughout the project.
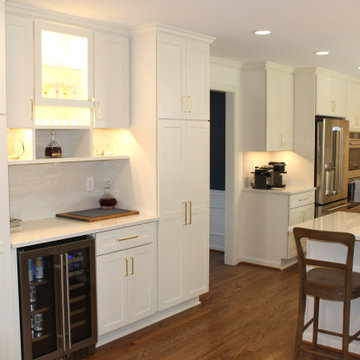 Talon Construction Inc.
Finding a reputable contractor to design and build your kitchen remodel in Maryland with quality results involves several steps. Here are some general guidelines to help you find the right professional for your project:
1. Ask for Recommendations: Start by asking friends, family, neighbors, or colleagues who have recently completed kitchen remodels for recommendations. Personal referrals can be a valuable source of trustworthy contractors.
2. Check Online Reviews: Websites like Yelp, Angie's List, and Google Reviews can provide insights into the experiences of previous clients. Look for contractors with consistently positive feedback.
3. Check Credentials: Verify that the contractor has the necessary licenses and insurance to work in Maryland. You can typically check this information on your state's licensing board website.
4. Ask for References: Request references from the contractor and contact previous clients to inquire about their experiences. Visit some of their completed projects if possible.
5. Review Portfolios: Examine the contractor's portfolio of past kitchen remodels. Look for examples of work that match your style and preferences.
6. Check for Permits: Ensure that the contractor will handle any necessary permits and inspections for your remodel. Avoid contractors who suggest bypassing required permits, as this can lead to legal and safety issues.
7. Discuss Communication: Clear communication is crucial throughout the project. Discuss how the contractor will keep you updated on progress and address any concerns or changes during the remodel.
8. Get Everything in Writing: Never rely solely on verbal agreements. Ensure that all project details, warranties, and expectations are documented in a written contract.
9. Check for Red Flags: Be wary of contractors who pressure you into making quick decisions, lack a physical business address, or have a history of disputes or legal issues.
10. Trust Your Instincts: Choose a contractor you feel comfortable working with. Trust your instincts and select someone who listens to your ideas and concerns.
11. Visit Completed Projects: If possible, visit some of the contractors’ completed kitchen remodels to assess the quality of their work in person.
Once you've completed your due diligence and gathered all the necessary information, you'll be better equipped to make an informed decision about which contractor to hire for your kitchen remodel in Maryland. Remember that quality results often come from working with experienced, licensed professionals who prioritize clear communication and transparency throughout the project.
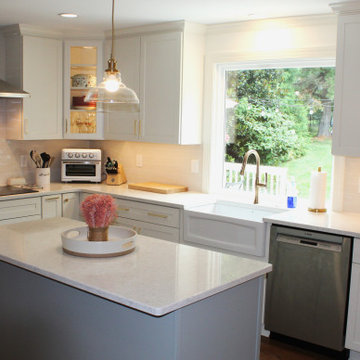 Talon Construction Inc.
Finding a reputable contractor to design and build your kitchen remodel in Maryland with quality results involves several steps. Here are some general guidelines to help you find the right professional for your project:
1. Ask for Recommendations: Start by asking friends, family, neighbors, or colleagues who have recently completed kitchen remodels for recommendations. Personal referrals can be a valuable source of trustworthy contractors.
2. Check Online Reviews: Websites like Yelp, Angie's List, and Google Reviews can provide insights into the experiences of previous clients. Look for contractors with consistently positive feedback.
3. Check Credentials: Verify that the contractor has the necessary licenses and insurance to work in Maryland. You can typically check this information on your state's licensing board website.
4. Ask for References: Request references from the contractor and contact previous clients to inquire about their experiences. Visit some of their completed projects if possible.
5. Review Portfolios: Examine the contractor's portfolio of past kitchen remodels. Look for examples of work that match your style and preferences.
6. Check for Permits: Ensure that the contractor will handle any necessary permits and inspections for your remodel. Avoid contractors who suggest bypassing required permits, as this can lead to legal and safety issues.
7. Discuss Communication: Clear communication is crucial throughout the project. Discuss how the contractor will keep you updated on progress and address any concerns or changes during the remodel.
8. Get Everything in Writing: Never rely solely on verbal agreements. Ensure that all project details, warranties, and expectations are documented in a written contract.
9. Check for Red Flags: Be wary of contractors who pressure you into making quick decisions, lack a physical business address, or have a history of disputes or legal issues.
10. Trust Your Instincts: Choose a contractor you feel comfortable working with. Trust your instincts and select someone who listens to your ideas and concerns.
11. Visit Completed Projects: If possible, visit some of the contractors’ completed kitchen remodels to assess the quality of their work in person.
Once you've completed your due diligence and gathered all the necessary information, you'll be better equipped to make an informed decision about which contractor to hire for your kitchen remodel in Maryland. Remember that quality results often come from working with experienced, licensed professionals who prioritize clear communication and transparency throughout the project.
 Tom Brzoskwinia
One of the most popular hardwood floor finishing which offers Tom & Peter Flooring is provided by WOCA. If you’ve decided that you want a natural looking wooden floor that is lacquer-free, then the likelihood is that you’ve chosen oil as your way of protecting your wood and making your floor look great at the same time. WOCA for wood flooring comes in various forms and is a great way of making sure that your wood is protected, but at the same time looks natural. A highly popular as well as effective way of treating wood floors, oils effectively penetrate into the wood and in some cases harden into the surface of the floor to stop damage and to maintain the wood in its optimum condition.
WOCA Oil finish hardwood flooring has taken the United States market by in 2014 and shows no signs of slowing down in 2016 and now. Here are some of the most common questions we have regarding this type of finish which we will I’m to answer in today’s my blog:
Is oil finish as durable as traditional factory urethane finishes with aluminum oxide?
When it comes to durability, oil finish flooring tackles the issue with a completely different method. The penetrating oil serves as protection from moisture and wear while allowing the user to feel the wood grains in their bare feet. If compared directly to factory finished aluminum oxide finish, the oil finish flooring will not perform as well to abrasion and impact. However, the beauty of this finish is the fact that it will camouflage any scratches which will inevitably accumulate over time.
Will this finish evaporate over time and will this be harmful for indoor air quality?
Another concern for oil finished floors its effect on indoor air quality. For on-site applications, some varieties suggest several coats which typically require the residents to be out of the home due to mild odors. However, there are factory finished UV-cured or single coat applications which lessen the downtime. Despite the odors produced during the drying process, oil finish floors rank amongst the lowest for VOC (volatile organic compound) emissions. Certain brands even boast true zero VOC. This fact alone makes oil finished floors one of the best options for green building solutions.
“WOCA products are certified by independent laboratories, the German Institute for Biological Building Materials, and are in accordance with DIN–Norm 53–160. WOCA WoodCare Denmark products meet or exceed the most stringent U.S. standards for volatile organic compounds.” –WOCA Oil Finish Manufacture
Does this type of finish require additional maintenance which I am not familiar with?
For weekly cleaning, oiled floors use a special cleaner which contains an oil and soap mixture. After a period of 12-18 months some oil may evaporate causing the wood grains to appear dry. An additional layer of oil can be reapplied to keep the floor looking fresh. Although oil finished floors require more involvement in periodic maintenance in high traffic areas, this maintenance can be done much easier than the equivalent of an onsite sand and refinish.
WOCA Master Color Oil contains pigment, which provides a single-step hardwood floor staining process. Laying down the stain and the finish in one step.
This product comes 14 different colors, from Black to Extra White, and you can mix them freely to create various color palettes that will meet the demands of any job.
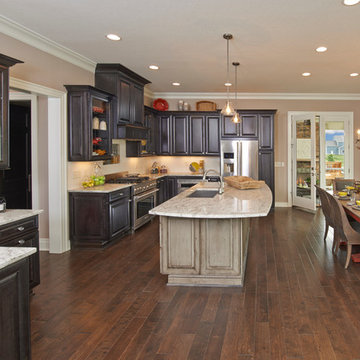
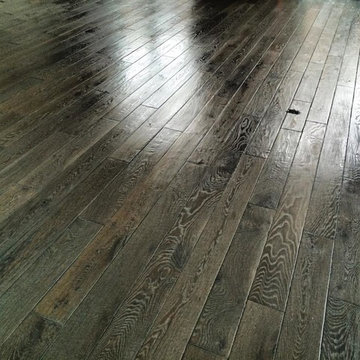
Below are some pictures of the finished job…

 Tom Brzoskwinia
One of the most popular hardwood floor finishing which offers Tom & Peter Flooring is provided by WOCA. If you’ve decided that you want a natural looking wooden floor that is lacquer-free, then the likelihood is that you’ve chosen oil as your way of protecting your wood and making your floor look great at the same time. WOCA for wood flooring comes in various forms and is a great way of making sure that your wood is protected, but at the same time looks natural. A highly popular as well as effective way of treating wood floors, oils effectively penetrate into the wood and in some cases harden into the surface of the floor to stop damage and to maintain the wood in its optimum condition.
WOCA Oil finish hardwood flooring has taken the United States market by in 2014 and shows no signs of slowing down in 2016 and now. Here are some of the most common questions we have regarding this type of finish which we will I’m to answer in today’s my blog:
Is oil finish as durable as traditional factory urethane finishes with aluminum oxide?
When it comes to durability, oil finish flooring tackles the issue with a completely different method. The penetrating oil serves as protection from moisture and wear while allowing the user to feel the wood grains in their bare feet. If compared directly to factory finished aluminum oxide finish, the oil finish flooring will not perform as well to abrasion and impact. However, the beauty of this finish is the fact that it will camouflage any scratches which will inevitably accumulate over time.
Will this finish evaporate over time and will this be harmful for indoor air quality?
Another concern for oil finished floors its effect on indoor air quality. For on-site applications, some varieties suggest several coats which typically require the residents to be out of the home due to mild odors. However, there are factory finished UV-cured or single coat applications which lessen the downtime. Despite the odors produced during the drying process, oil finish floors rank amongst the lowest for VOC (volatile organic compound) emissions. Certain brands even boast true zero VOC. This fact alone makes oil finished floors one of the best options for green building solutions.
“WOCA products are certified by independent laboratories, the German Institute for Biological Building Materials, and are in accordance with DIN–Norm 53–160. WOCA WoodCare Denmark products meet or exceed the most stringent U.S. standards for volatile organic compounds.” –WOCA Oil Finish Manufacture
Does this type of finish require additional maintenance which I am not familiar with?
For weekly cleaning, oiled floors use a special cleaner which contains an oil and soap mixture. After a period of 12-18 months some oil may evaporate causing the wood grains to appear dry. An additional layer of oil can be reapplied to keep the floor looking fresh. Although oil finished floors require more involvement in periodic maintenance in high traffic areas, this maintenance can be done much easier than the equivalent of an onsite sand and refinish.
WOCA Master Color Oil contains pigment, which provides a single-step hardwood floor staining process. Laying down the stain and the finish in one step.
This product comes 14 different colors, from Black to Extra White, and you can mix them freely to create various color palettes that will meet the demands of any job.
Below are some pictures of the finished job…
 Tom Brzoskwinia
One of the most popular hardwood floor finishing which offers Tom & Peter Flooring is provided by WOCA. If you’ve decided that you want a natural looking wooden floor that is lacquer-free, then the likelihood is that you’ve chosen oil as your way of protecting your wood and making your floor look great at the same time. WOCA for wood flooring comes in various forms and is a great way of making sure that your wood is protected, but at the same time looks natural. A highly popular as well as effective way of treating wood floors, oils effectively penetrate into the wood and in some cases harden into the surface of the floor to stop damage and to maintain the wood in its optimum condition.
WOCA Oil finish hardwood flooring has taken the United States market by in 2014 and shows no signs of slowing down in 2016 and now. Here are some of the most common questions we have regarding this type of finish which we will I’m to answer in today’s my blog:
Is oil finish as durable as traditional factory urethane finishes with aluminum oxide?
When it comes to durability, oil finish flooring tackles the issue with a completely different method. The penetrating oil serves as protection from moisture and wear while allowing the user to feel the wood grains in their bare feet. If compared directly to factory finished aluminum oxide finish, the oil finish flooring will not perform as well to abrasion and impact. However, the beauty of this finish is the fact that it will camouflage any scratches which will inevitably accumulate over time.
Will this finish evaporate over time and will this be harmful for indoor air quality?
Another concern for oil finished floors its effect on indoor air quality. For on-site applications, some varieties suggest several coats which typically require the residents to be out of the home due to mild odors. However, there are factory finished UV-cured or single coat applications which lessen the downtime. Despite the odors produced during the drying process, oil finish floors rank amongst the lowest for VOC (volatile organic compound) emissions. Certain brands even boast true zero VOC. This fact alone makes oil finished floors one of the best options for green building solutions.
“WOCA products are certified by independent laboratories, the German Institute for Biological Building Materials, and are in accordance with DIN–Norm 53–160. WOCA WoodCare Denmark products meet or exceed the most stringent U.S. standards for volatile organic compounds.” –WOCA Oil Finish Manufacture
Does this type of finish require additional maintenance which I am not familiar with?
For weekly cleaning, oiled floors use a special cleaner which contains an oil and soap mixture. After a period of 12-18 months some oil may evaporate causing the wood grains to appear dry. An additional layer of oil can be reapplied to keep the floor looking fresh. Although oil finished floors require more involvement in periodic maintenance in high traffic areas, this maintenance can be done much easier than the equivalent of an onsite sand and refinish.
WOCA Master Color Oil contains pigment, which provides a single-step hardwood floor staining process. Laying down the stain and the finish in one step.
This product comes 14 different colors, from Black to Extra White, and you can mix them freely to create various color palettes that will meet the demands of any job.
Below are some pictures of the finished job…

 Star Renovations NY
Open kitchen, White shaker cabinets again the marble backsplash and a waterfall island!
Example of a mid-sized minimalist galley light wood floor and brown floor eat-in kitchen design in New York with an undermount sink, shaker cabinets, white cabinets, quartz countertops, gray backsplash, porcelain backsplash, stainless steel appliances, an island and white countertops
Example of a mid-sized minimalist galley light wood floor and brown floor eat-in kitchen design in New York with an undermount sink, shaker cabinets, white cabinets, quartz countertops, gray backsplash, porcelain backsplash, stainless steel appliances, an island and white countertops
 Tile Doctor Ltd
This enquiry from Neath came from an elderly gentleman who was moving into a care home in the near future and wanted his Victorian tiled hallway renovated before the property went on the market. He mentioned he didn’t think it was that dirty however it could do with a clean and reseal.
We arranged to call in one morning and take a look at the tiles and whilst there we completed a test clean so we could provide an accurate price for renovating the floor. For the clean I applied Tile Doctor Pro-Clean, the purpose of this was to see whether and how fast the dirt would shift and also to get an idea of the condition of the floor beneath the layer of dirt.
The test clean went well and the owner was happy to accept our price and suggested that as we had already made a start we might as well continue. Fortunately, there were two of us that day and I only had a couple of other quotes in the area, so I was able to crack on. I should mention this work was done at the beginning of 2020 before the COVID-19 lockdown.
All sorts of detritus gets walked into hallways so we began by using a hand held scraper to take off any anything that sat upon/above the floors surface. This also makes the cleaning process that little bit easier for us. The earlier test clean had enabled us to establish which cleaning methods and products would work best on the floor so it was just a question of putting the plan into action.
The process involved applying a strong dilution of Tile Doctor Pro-Clean to the floor, leaving it to soak in for ten minutes and then working it with a coarse 400-grit diamond pad fitted to a rotary buffer. More water was applied for lubrication where required and the soil produced afterwards was rinsed off and extracted with a wet vacuum. The pad is encrusted with industrial diamonds and cuts into the tile and removes a very thin layer leaving the tile very clean.
After extracting the soil, the floor was inspected, and we noticed that there were a few tiles throughout the floor that needed more work. To deal with these we used hand-held diamond blocks of varying grits to remove the ingrained dirt and bring the tiles back to life.
The client was over the moon with the results of the cleaning and we scheduled a date of the following week to come back and seal the tiles. We also discussed sealers and he had asked if we could leave the floor with a shiny finish. With that in mind we recommended Tile Doctors Seal and Go which works really well on Victorian tiles. It is also water based and so doesn’t produce a smell as it dries.
On our return the floor was given a quick wipe down and once dry sealed with four coats of Tile Doctor Seal and Go which will add protection and make them easy to keep clean.
Once complete the floor looked great and very welcoming, just what you need when selling a property as initial impressions always count.
Adrian Iacono
Swansea Tile Doctor

 Donald A. Gardner Architects
Living comfortably has never been easier! This gorgeous Craftsman home exposes rich architectural detail throughout the open floor plan. Perfect for those who enjoy outdoor living, this design features copious areas for taking advantage of Mother Nature. A sunroom, rear deck and screened porch are all on the main level, while the lower level boasts a screened porch with summer kitchen, as well as a second covered porch. Entertaining spaces continue with the spacious great room/dining room and lower-level entertainment room with a wet bar and outdoor summer kitchen. Multiple mudrooms, a large pantry and utility room provide abundant storage space, while a covered walkway ensures dry trips to and from the three-car garage.

 TVL Creative Ltd.
Cramped kitchen be gone! That was the project motto and top priority. The goal was to transform the current layout from multiple smaller spaces into a connected whole that would activate the main level for our clients, a young family of four.
The biggest obstacle was the wall dividing the kitchen and the dining room. Removing this wall was central to opening up and integrating the main living spaces, but the existing ductwork that ran right through the center of the wall posed a design challenge, er design opportunity. The resulting design solution features a central pantry that captures the ductwork and provides valuable storage- especially when compared to the original kitchen's 18" wide pantry cabinet. The pantry also anchors the kitchen island and serves as a visual separation of space between the kitchen and homework area.
Through our design development process, we learned the formal living room was of no service to their lifestyle and therefore space they rarely spent time in. With that in mind, we proposed to eliminate the unused living room and make it the new dining room. Relocating the dining room to this space inherently felt right given the soaring ceiling and ample room for holiday dinners and celebrations. The new dining room was spacious enough for us to incorporate a conversational seating area in the warm, south-facing window alcove.
Now what to do with the old dining room?! To answer that question we took inspiration from our clients' shared profession in education and developed a craft area/homework station for both of their boys. The semi-custom cabinetry of the desk area carries over to the adjacent wall and forms window bench base with storage that we topped with butcher block for a touch of warmth. While the boys are young, the bench drawers are the perfect place for a stash of toys close to the kitchen.
The kitchen begins just beyond the window seat with their refrigerator enclosure. Opposite the refrigerator is the new pantry with twenty linear feet of shelving and space for brooms and a stick vacuum. Extending from the backside of the pantry the kitchen island design incorporates counter seating on the family room side and a cabinetry configuration on the kitchen side with drawer storage, a trashcan center, farmhouse sink, and dishwasher.
We took careful time in design and execution to align the range and sink because while it might seem like a small detail, it plays an important role in supporting the symmetrical configuration of the back wall of the kitchen. The rear wall design utilizes an appliance garage mirrors the visual impact of the refrigerator enclosure and helps keep the now open kitchen tidy. Between the appliance garage and refrigerator enclosure is the cooking zone with 30" of cabinetry and work surface on either side of the range, a chimney style vent hood, and a bold graphic tile backsplash.
The backsplash is just one of many personal touches we added to the space to reflect our client's modern eclectic style and love of color. Swooping lines of the mid-mod style barstools compliment the pendants and backsplash pattern. A pop of vibrant green on the frame of the pantry door adds a fresh wash of color to an otherwise neutral space. The big show stopper is the custom charcoal gray and copper chevron wall installation in the dining room. This was an idea our clients softly suggested, and we excitedly embraced the opportunity. It is also a kickass solution to the head-scratching design dilemma of how to fill a large and lofty wall.
We are so grateful to bring this design to life for our clients and now dear friends.
Sponsored
Columbus, OH
Free consultation for landscape design!

Peabody Landscape Group
Columbus' Reliable Landscape Design & Contracting
 Morris Black Designs
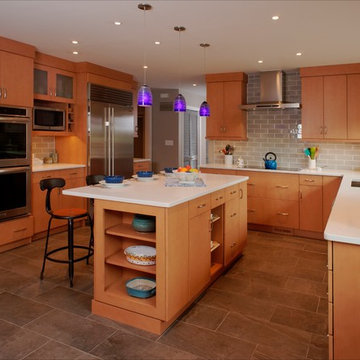
This wide-open, amazing-looking and highly functional maple wood kitchen is quite an improvement over the homeowners’ previous setup. Their old kitchen was done in dark wood with soffits, and the space was dominated by a thick brick wall. The whole space was divided in half by a peninsula with wall cabinets. Over time, the couple grew to realize that while they liked some elements of the kitchen, overall the space was not addressing their needs — particularly in terms of being functional.
“The old kitchen — which was original to the house — was actually lovely,” explains the wife. “The cabinetry was very nice but it wasn’t working for us. Some cabinetry was too high for us to use. We needed more cabinet space. Overhead cabinets divided the kitchen in two. The arrangement of the cabinets and I’d say the kitchen itself were becoming more awkward for us over time.”
Designer Lydia Bogle worked with the couple to open up the space, make the kitchen more functional than it was, and provide the homeowners with a light-filled kitchen in the contemporary style they prefer today. From day one, the homeowners could tell they were in good hands with Lydia and liked all the ideas she suggested to improve the space — even her idea to remove the brick wall which the couple was fond of and assumed would remain in their new kitchen.
“We loved the brick façade that was in the old kitchen,” continues the wife, recalling her old kitchen. “So when Lydia visited for the first time and she came in and told us right away she wanted to take it out because there was so much wasted space behind it we were like, ‘no!’ But she was right. Just doing that alone opened up the kitchen. From there on we wanted to hear all her ideas.”
Rutt Custom Cabintery
Rutt Regency cabinets with full overlay in “Villa Savoye” door style. Maple wood with custom finish. Full extension slab drawers with soft close feature and concealed hinges.
Base cabinets include rollout tray shelves, a lazy susan, spice drawer, pullout waste baskets, an d hidden cutting board and knife block. Island has extended countertop for casual dining.
36” high Wall cabinets with contemporary flat molding to ceiling. Frosted glass doors over microwave. include 24” cabinets mounted over 42” wall cabinets and enclosed refrigerator with cabinet above. Undercounter lighting.
Buffet area has 36” high wall cabinets with both glass and bronze wire inserts, a bar sink and an undercounter wine cooler.
Countertop & Backsplash
Caesarstone “Frosty Carbiano” with eased edge
O. W. Dunwich tiles with crackle finish.
Accessories
Blanco sink in stainless steel with “Linus” lever faucet with satin nickle finish.
Laundry sink is Elkay undermount in stainless steel with Moen faucet.
Top Knobs in brushed satin nickel
 Tile Doctor Ltd
It’s not often that we get called abroad for a job, but when we do, it’s always a fantastic experience. We have done a few jobs abroad in the past, including the restoration of Terracotta tiled restaurant floor at a hotel in Addis Ababa, Ethiopia. This job was closer to home at a chateau in the town of Arcis-le-Ponsart near Reims, located in the Champagne-Ardenne region of North Eastern France. As its name suggests, the Champagne-Ardenne region is famous for its champagne.
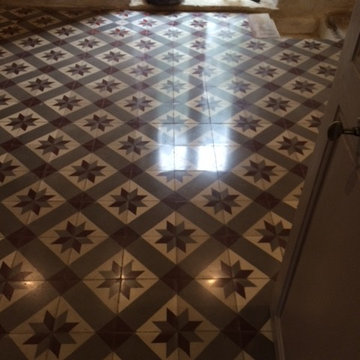
The owner of the chateau was, in fact, an English property developer. He asked us to work on two floors: a Terracotta tiled hallway, and a French Victorian tiled floor. The French style of Victorian tiles are actually made of encaustic cement rather than clay, so we were excited to have the chance to work on something a bit out of the ordinary.
It was going to be a long trip, so after packing the van with the necessary equipment and Tile Doctor products Heidi and I set off to France via the Channel Tunnel. Fortunately, we avoided any disruptions both on the way there and the way back!
On arrival at the chateau, we immediately spent two hours running tests on the two floors to determine the most effective processes. We had four days in which to complete the job, so it was essential to make sure our methods were correct before beginning to avoid any unwelcome surprises later on!
After running the tests, we set about cleaning the Victorian tiles using a combination of clean water and diamond burnishing pads. No damage was done to the tiles, and they polished up well. Following the cleaning process, we began sealing the floor using Tile Doctor Colour Grow, a sealer which helps to bring out the colour in the stone while also providing durable surface protection. We were only able to apply one coat of sealer, however, as the second coat kept smearing, preventing the shine from settling in – this was despite testing the process earlier. Nonetheless, we resolved to polish off the one coat we could apply with a fine burnishing pad. Thankfully, the results were still very good.
The Terracotta tiled hallway had no sealer, and so it had, over time, become very dirty. We cleaned the tiles using a solution of one part Tile Doctor Pro Clean to five parts clean water, in combination with a couple of black burnishing pads.
As you can see from the pictures, the combination really helped to lift out the ingrained dirt, leaving the tiles looking at their best again. The floor took three days to dry completely before we could begin the sealing process. Once the floor was dry enough to seal, we applied eight coats of Tile Doctor Seal & Go, which is suitable for use on a variety of internal, unsealed porous surfaces.
It was a long and exhausting week but the client was delighted with the results on both floors and left the following comments, he also mentioned using Tile Doctor in the future to work on the other properties he is developing.
“Thanks for yours and Heidi’s work in renovating our floors. It was also great to meet you guys and I hope you have enjoyed your visit to champagne and will come back some time. “
 TVL Creative Ltd.
Cramped kitchen be gone! That was the project motto and top priority. The goal was to transform the current layout from multiple smaller spaces into a connected whole that would activate the main level for our clients, a young family of four.
The biggest obstacle was the wall dividing the kitchen and the dining room. Removing this wall was central to opening up and integrating the main living spaces, but the existing ductwork that ran right through the center of the wall posed a design challenge, er design opportunity. The resulting design solution features a central pantry that captures the ductwork and provides valuable storage- especially when compared to the original kitchen's 18" wide pantry cabinet. The pantry also anchors the kitchen island and serves as a visual separation of space between the kitchen and homework area.
Through our design development process, we learned the formal living room was of no service to their lifestyle and therefore space they rarely spent time in. With that in mind, we proposed to eliminate the unused living room and make it the new dining room. Relocating the dining room to this space inherently felt right given the soaring ceiling and ample room for holiday dinners and celebrations. The new dining room was spacious enough for us to incorporate a conversational seating area in the warm, south-facing window alcove.
Now what to do with the old dining room?! To answer that question we took inspiration from our clients' shared profession in education and developed a craft area/homework station for both of their boys. The semi-custom cabinetry of the desk area carries over to the adjacent wall and forms window bench base with storage that we topped with butcher block for a touch of warmth. While the boys are young, the bench drawers are the perfect place for a stash of toys close to the kitchen.
The kitchen begins just beyond the window seat with their refrigerator enclosure. Opposite the refrigerator is the new pantry with twenty linear feet of shelving and space for brooms and a stick vacuum. Extending from the backside of the pantry the kitchen island design incorporates counter seating on the family room side and a cabinetry configuration on the kitchen side with drawer storage, a trashcan center, farmhouse sink, and dishwasher.
We took careful time in design and execution to align the range and sink because while it might seem like a small detail, it plays an important role in supporting the symmetrical configuration of the back wall of the kitchen. The rear wall design utilizes an appliance garage mirrors the visual impact of the refrigerator enclosure and helps keep the now open kitchen tidy. Between the appliance garage and refrigerator enclosure is the cooking zone with 30" of cabinetry and work surface on either side of the range, a chimney style vent hood, and a bold graphic tile backsplash.
The backsplash is just one of many personal touches we added to the space to reflect our client's modern eclectic style and love of color. Swooping lines of the mid-mod style barstools compliment the pendants and backsplash pattern. A pop of vibrant green on the frame of the pantry door adds a fresh wash of color to an otherwise neutral space. The big show stopper is the custom charcoal gray and copper chevron wall installation in the dining room. This was an idea our clients softly suggested, and we excitedly embraced the opportunity. It is also a kickass solution to the head-scratching design dilemma of how to fill a large and lofty wall.
We are so grateful to bring this design to life for our clients and now dear friends.
 Tile Doctor Ltd
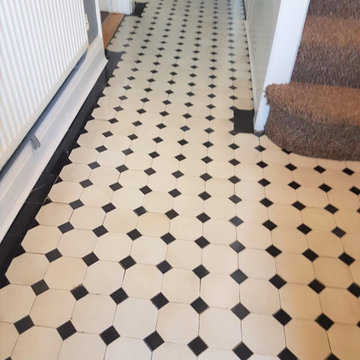
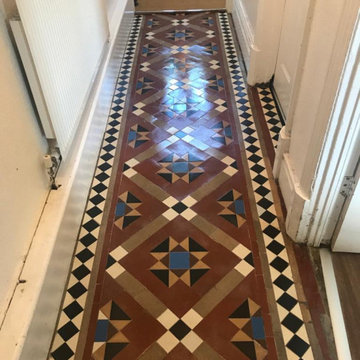
I recently worked on the restoration of a Victorian tiled hallway in Cwmbran Wales which is six miles North of Newport. As you can see from the photographs the floor was in quite a neglected dirty state and many of the the black and white border tiles needed removing and replacing. The worst part was the area by the front door where most of the tiles had been removed and then backfilled with concrete. I can only assume at some point in the past it was deemed to difficult or expensive to restore the floor, so they simply covered it up.
After visiting to survey the floor I did offer to source replacements for the concreted section and restore that as part of the work however my client’s budget would not stretch to that at the time. My quote was therefore focused on the main section of flooring and included replacing border tiles, deep cleaning the whole floor and then sealing the tiles to add protection. Although I did need to check that I could indeed source the replacement tiles before being able to provide the quote which as it turned out would not be an issue.
They were happy to go ahead and we arranged a suitable time to carry out the work which would enable me to work in the property whilst minimising contact with the owners due to the Covid-19 situation.
I spend the first day sorting out the black and white border tiles which needed to be gently prised out of position without upsetting the main part of the floor. The exposed subfloor was then cleaned up to remove old adhesive and replacements were fitted where required and secured into place. The floor would need to be solid before cleaning so that was left for day two so the new adhesive could go off overnight.
On day two I gave the floor an initial clean using a combination of Tile Doctor Pro-Clean and Remove and Go diluted with water. This produces a strong cleaner/stripper that will tackle dirt and remove coatings such as previous sealers. The old tiles had accumulated years of ingrained dirt, so I needed this extra power to remove the years of dirt and contaminates from the tile. It was sprayed onto the tiles and then left to soak in for ten minutes before being actively scrubbed into the tile using a rotary machine fitted with a black scrubbing pad. The soil was then rinsed off with water and extracted with a wet vacuum. The floor was inspected, and the process repeated on the tough stains until I was satisfied all the dirt had been removed.
Next the floor was treated to an acid wash using Tile Doctor Acid Gel using a similar method as before. This is an important treatment for these old Victorian floors that have no damp proof course as it neutralises efflorescent salts trapped in the tile which can appear as white salt deposits later. Once I was happy with the condition of the floor it was given a final rinse and left to dry off. I use a wet vacuum to remove liquids from the floor and on this last extraction I spent extra time to remove as much moisture from the tiles as possible.
I came back a few days later and after checking the tiles were dry using a damp meter, I started the application of the sealer. For this floor I applied seven coats of Tile Doctor Seal and Go for a satin finish. Tile Doctor Seal and Go is a specially formulated water-based sealer that provides both stain resistance and a durable low-sheen finish. It is perfect on a floor of this age where it leaves a lovely finish and will remain durable in what is a essentially a high traffic area.
Although we didn’t manage to sort out the area by the front door the client managed to fit a made to measure coir door mat along with carpet bar which was quite practical and looked fine so they were able to resolve that problem without blowing their budget.
The client was over the moon with results, the floor had a lovely pattern and the colours now shone through. I suggested the use of Tile Doctor Neutral Tile Cleaner to keep the floor clean and in good condition. It is neutral in pH so will ensure that the newly applied sealer stays in place and will ensure maintenance is nice and easy for them.
Paul Wales
Monmouthshire Tile Doctor
Sponsored
Columbus, OH

Hope Restoration & General Contracting
Columbus Design-Build, Kitchen & Bath Remodeling, Historic Renovations

 Cantoni Irvine
Designed By: Richard Bustos Photos By: Chad Mellon
It is practically unheard of in interior design—that, in a matter of four hours, the majority of furnishings, accessories, lighting and artwork could be selected for an entire 5,000-square-foot home. But that was exactly the story for Cantoni designer Richard Bustos and his clients, Karen and Mike Moran. The couple, who had purchased and were in the midst of gutting a home on the water in Newport Beach, California, knew what they wanted.
Combined with Richard’s design assistance, it was a match made for swift decision-making and the resulting beautifully neutral, modern space. “We went into Cantoni in Irvine and fell in love with it—it was everything we liked,” Karen says. “Richard had the same vision we did, and we told him what we wanted, and he would direct us. He was on the same level.”
Even more surprising: they selected the furnishings before the home’s bones were even complete. They had wanted a more contemporary vibe to capitalize on the expansive bay views and were in the midst of ripping out low ceilings and outdated spaces. “We wanted modern warmth,” Karen says. “Cantoni furniture was the perfect fit.”
After their initial meeting, Richard met with the couple several times to take measurements and ensure pieces would fit. And they did—with elegant cohesion. In the living room, they leaned heavily on the Fashion Affair collection by Malerba, which is exclusive to Cantoni in the U.S. He flanked the Fashion Affair sofa in ivory leather with the Fashion Affair club chairs in taupe leather and the ivory Viera area rug to create a sumptuous textural mix. In the center, he placed the brown-glossed Fashion Affair low cocktail table and Fashion Affair occasional table for ease of entertaining and conversation.
A punch of glamour came by way of a set of Ravi table lamps in gold-glazed porcelain set on special-ordered Fashion Affair side tables. The Harmony floor sculpture in black stone and capiz shell was brought in for added interest. “Because of the grand scale of the living room—with high ceilings and numerous windows overlooking the water—the pieces in the space had to have more substance,” Richard says. “They are heavier-scaled than traditional modern furnishings, and in neutral tones to allow the architectural elements, such as a glass staircase and elevator, to be the main focal point.”
The trio settled on the Fashion Affair extension table in brown gloss with a bronze metal arc base in the formal dining area, and flanked it with eight Arcadia high-back chairs. “We like to have Sunday dinners with our large family, and now we finally have a big dining-room table,” Karen says. The master bedroom also affords bay views, and they again leaned heavily on neutral tones with the M Place California-king bed with chrome accents, the M Place nightstand with M Place table lamps, the M Place bench, Natuzzi’s Anteprima chair and a Scoop accent table. “They were fun, happy, cool people to work with,” Richard says.
One of the couple’s favorite spaces—the family room—features a remote-controlled, drop-down projection screen. For comfortable viewing, Richard paired the Milano sectional (with a power recliner) with the Sushi round cocktail table, the Lambrea accent table, and a Ravi table lamp in a gold metallic snakeskin pattern.
“Richard was wonderful, was on top of it, and was a great asset to our team,” Karen says. Mike agrees. “Richard was a dedicated professional,” he says. “He spent hours walking us through Cantoni making suggestions, measuring, and offering advice on what would and wouldn’t work. Cantoni furniture was a natural fit.”
 TVL Creative Ltd.
Cramped kitchen be gone! That was the project motto and top priority. The goal was to transform the current layout from multiple smaller spaces into a connected whole that would activate the main level for our clients, a young family of four.
The biggest obstacle was the wall dividing the kitchen and the dining room. Removing this wall was central to opening up and integrating the main living spaces, but the existing ductwork that ran right through the center of the wall posed a design challenge, er design opportunity. The resulting design solution features a central pantry that captures the ductwork and provides valuable storage- especially when compared to the original kitchen's 18" wide pantry cabinet. The pantry also anchors the kitchen island and serves as a visual separation of space between the kitchen and homework area.
Through our design development process, we learned the formal living room was of no service to their lifestyle and therefore space they rarely spent time in. With that in mind, we proposed to eliminate the unused living room and make it the new dining room. Relocating the dining room to this space inherently felt right given the soaring ceiling and ample room for holiday dinners and celebrations. The new dining room was spacious enough for us to incorporate a conversational seating area in the warm, south-facing window alcove.
Now what to do with the old dining room?! To answer that question we took inspiration from our clients' shared profession in education and developed a craft area/homework station for both of their boys. The semi-custom cabinetry of the desk area carries over to the adjacent wall and forms window bench base with storage that we topped with butcher block for a touch of warmth. While the boys are young, the bench drawers are the perfect place for a stash of toys close to the kitchen.
The kitchen begins just beyond the window seat with their refrigerator enclosure. Opposite the refrigerator is the new pantry with twenty linear feet of shelving and space for brooms and a stick vacuum. Extending from the backside of the pantry the kitchen island design incorporates counter seating on the family room side and a cabinetry configuration on the kitchen side with drawer storage, a trashcan center, farmhouse sink, and dishwasher.
We took careful time in design and execution to align the range and sink because while it might seem like a small detail, it plays an important role in supporting the symmetrical configuration of the back wall of the kitchen. The rear wall design utilizes an appliance garage mirrors the visual impact of the refrigerator enclosure and helps keep the now open kitchen tidy. Between the appliance garage and refrigerator enclosure is the cooking zone with 30" of cabinetry and work surface on either side of the range, a chimney style vent hood, and a bold graphic tile backsplash.
The backsplash is just one of many personal touches we added to the space to reflect our client's modern eclectic style and love of color. Swooping lines of the mid-mod style barstools compliment the pendants and backsplash pattern. A pop of vibrant green on the frame of the pantry door adds a fresh wash of color to an otherwise neutral space. The big show stopper is the custom charcoal gray and copper chevron wall installation in the dining room. This was an idea our clients softly suggested, and we excitedly embraced the opportunity. It is also a kickass solution to the head-scratching design dilemma of how to fill a large and lofty wall.
We are so grateful to bring this design to life for our clients and now dear friends.

 Eve Castles Design
South Monroe Sanctuary
These delightful homeowners wanted to increase their usable patio space, create privacy from pesky neighbors, have a new uniform patio surface (they had aggregate concrete and sandset flagstone), to mask freeway noise and create much needed shade.
We started by suggesting they move the hot tub into the body of the pool and relocating the pool equipment to the remote right corner of the yard so you could actually hear people talk while relaxing. Unfortunately, the pool contractor hired by the client turned out to be an absolute nightmare. He went off the air completely for weeks at a time with no communication, creating huge project delays. There appeared to be some issue between him and his subcontractors. The pool contractor installed the pool and pool coping for this project, therefore they are not part of our contract with the homeowner.
Despite the challenges and delays with the pool contractor, we were able to move the project forward. We installed drainage, re-graded the property and laid the pavers for the two patios. The existing patio was funky as there was a step down in an awkward location, creating a tripping hazard. We adjusted the step location by making a step up from the infrequently used garage door. Now the patio and walk are all at the same level. We removed some of the existing concrete along the sidewalk so you see a cohesive flow of pavers once you are through the side yard, rather than a mishmash of materials.
Installing five 24” box laurels helped with the visual privacy from the pesky neighbors. The water features installed in the pool and the standalone fountain help eliminate the sound of the freeway noise.
The focal point of the yard is the wall at the base of the pool, constructed out of cinderblock, finished with beautiful 2” and 3” pieces of K2 Full Range Ashlar stone and a bluestone cap, and water weirs. We added visual green by placing the stepping stones into the lawn, which also draws your attention to the other side of the yard and makes the yard look larger.
Reducing the lawn footprint a bit, reducing the patio footprint from 1430 SF to 1140 SF, while increasing the planting beds, all made the yard seem more spacious and lush. We recommended increasing the coping size to 18” wide so there would be enough space to around the pool.
Many existing plants and trees remained so we had to match and plan for the future since some existing trees look to be nearing end of life. The owner wanted an all white plant palette and loves shade plants like hydrangeas so we had to find full sun, white flowering plants which met with her approval.
Providing much needed shade for this uber hot backyard, the oversized pergola allows for expansion of shaded seating for large parties. The fan helps keep guests cool on hot days and the heaters keep them warm during the fall and spring shoulder seasons. Their budget did not allow for a built in BBQ at the moment so we helped them source a sleek looking MontAlpi BBQ island at a reasonable price point.
68