
Search results for "Surface preparation" in Home Design Ideas


 Todd Haiman Landscape Design
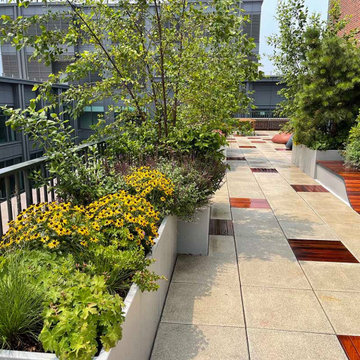
Polychromatic glass pergola, planters, custom storage cabinet, outdoor tv, ipe pavers, curved storage benches, native plant material
Minimalist home design photo in New York
Minimalist home design photo in New York

 User
Detail of Iridescent Venetian plaster finish on all walls in Living Room by Christianson Lee Studios
Example of a transitional home design design in New York
Example of a transitional home design design in New York
Find the right local pro for your project
 User
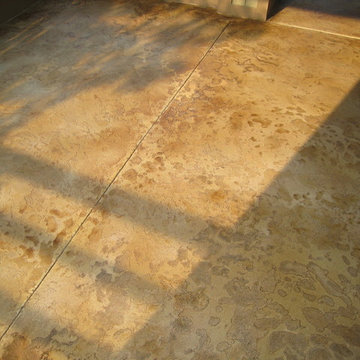
Closeup of a beautiful new custom stamped and colored concrete brick-pattern walkway leading to a new custom concrete porch on a new front addition. Photo credit: tjwhomeservices.com.
 Tile Doctor Ltd
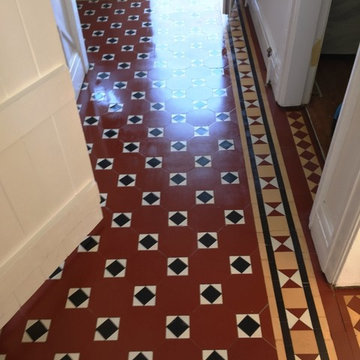
This Victorian tiled hallway was one of the most beautiful Victorian floors I have ever had the pleasure to work on. With the wide range of patterns and colours they are available in, it seems no two Victorian tiled floors are exactly the same, and this uniqueness is part of what makes them so appealing to property owners.
Unfortunately, this floor had been poorly maintained over the years, even suffering from a few loose and missing tiles. There was a thick coating of dust and dirt soiling its appearance, and the property owner was understandably keen to remedy the situation. Having realised that everyday household cleaners are not likely to achieve great results, she asked me to carry out a full professional restoration, including making some repairs where necessary. I was pleasantly surprised to find out that this property was situated in the town of Wyken, which is a few miles outside of Coventry city centre and in fact just down the road from where I live myself!
Before making a start on the cleaning process, it was first necessary to re-fix the small number of loose tiles and replace a single missing tile by the radiator. Fortunately, I’ve been working on these types of floors for some time and have built up a good collection of replacement Victorian tiles so I was able to find one that matched in nicely with the rest of the floor without too much problem.
To clean the tiles, I began by applying a layer of Tile Doctor Oxy-Gel directly into the floor with a small brush. This product is very similar to the popular Tile Doctor Pro Clean: both are strong alkaline cleaners, strippers and degreasers, with the main difference being that Oxy-Clean comes in a gel form, making it easier to control and therefore ideal for precise cleaning, or for application to vertical surfaces. Like Pro Clean and being an alkaline base it is suitable for use on all types of natural stone and tile. The Oxy-Gel was left to soak into the tiles for around ten minutes before being scrubbed in and then rinsed off carefully with water, I then used a wet vacuum to extract the now soiled cleaning solution off the floor.
The next step was to acid wash the floor using Tile Doctor Acid Gel; this served to break down alkaline mineral deposits inherent in the grout along with some excess grout that had been left on the untidily left on tile from installation. It is recommended not to use this product on acid-sensitive soon such as Marble and Limestone as it can cause irreparable etching but its fine on Victorian tiles as long as you don’t leave it on too long.
Finally, the floor was given a rinse with clean water to remove any trace of chemicals from the cleaning and to neutralise the area in preparation for sealing.
I left the floor for 48 hours to dry before returning to the property to seal the tiles. This allowed plenty of time for the floor to dry completely, which is important as any excess moisture can damage the ability of the sealer to protect against dirt and stains.
My choice of sealer for this floor was Tile Doctor High Shine; three coats in total were applied, providing – as the product name suggests – the high shine finish that the customer had requested. The sealer will provide durable surface protection going forward preventing dirt from becoming ingrained into the pores of the tile and ensuring it remains easy to clean and keeping its appearance for some time to come.
As a big fan of Victorian tiles, it was a great pleasure to restore this floor, and my customer was certainly pleased too. It’s amazing how far a little professional maintenance can go to improving the appearance of these fantastic types of floor.
Mick Gayton
Warwickshire Tile Doctor

 North State Custom Builders
Inspiration for a large coastal l-shaped medium tone wood floor and brown floor open concept kitchen remodel with a double-bowl sink, shaker cabinets, white cabinets, granite countertops, blue backsplash, subway tile backsplash, stainless steel appliances and an island
 Tile Doctor Ltd
This was a substantial engagement at a luxury rental apartment in Brighton rejuvenating the Limestone tiles in two bathrooms and a hallway taking six days of hard work. In addition, I would be working around two decorators, making for even more testing work conditions.
I first set to work on the smallest bathroom, which featured limestone tiles from floor to ceiling, as well as a large bath, copper sink and a tiled surround. Limestone is a very popular choice for interior and exterior decoration, but the tiles in this bathroom were in need of some care to get them looking their best again. My initial task was to strip away any previous sealer by hand; this was done using a mixture of warm water and Tile Doctor Pro-Clean which, along with Limestone, is also suitable for use on other types of natural stone, such as Granite, Slate and Travertine. Pro-Clean serves both as an effective stripper and cleaner, meaning that once the sealer had been stripped away, the tiles also received a thorough clean. Once I had cleaned the tiles, I sucked up any excess water and residue using a Wet-Dry Vac machine.
Since the tiles would have to be left to dry for a couple of days, I offered to restore the copper sink for the customer, even though this was not actually part of my job description. After conducting some research into copper cleaning, I opted to use a combination of lemon juice, vinegar and salt. The research paid off as, once I began to apply the solution to the sink, the bright orange and brown colours of the copper quickly rose to the surface. Within the space of an hour, I had transformed what initially appeared to be a ruined sink into a lovely, shimmering copper feature for the bathroom. Both the decorators and I were truly amazed at the results – but all credit goes to Google!
The larger of the two bathrooms was a much stiffer test for the Tile Doctor products. It had not been left in great condition, as the shower area had clearly not been sealed correctly, and the tiles had been left in such a manner that soap scum from shampoos, soaps and shower gels had built up on the window sill. In fact, the damage was significant enough that I had to explain to the customer before starting the work that whilst I could greatly improve the appearance of the tiles, I would not be able to restore them to new. This is because many shampoo and body wash products are acidic and can cause permanent damage to stone work especially when left to dwell for a long time.
My choice of product was Tile Doctor Mould Away, a formula which, over time, seeps deeply into the pores of the stone, effectively lifting away the muck. In cases of particularly stubborn areas, it is necessary to apply another covering of Mould Away and leave it for an extended period of time. This is exactly what I did over the next few days, leaving the product overnight to work its magic. The change was certainly drastic, if not perfect.
As both bathrooms required extended periods of drying, I spent two days working on the hallway, which had been partially covered with a plastic sealing for the previous six months due to building work. Needless to say, the hallway was in need of a good clean. I set about cleaning the hallway with a solution of warm water and Tile Doctor Pro-Clean, before once again using a Wet-Dry Vac machine to remove any excess water to prepare the floor for sealing at a later point. It is very important to remove any residue of cleaning solution before sealing, as this may impact the performance of the sealer. Following this, I left the hallway to dry for two days, providing the builders with strict instructions to cover it with blankets for protection while they were working.
While the floor was drying, I sealed the bathrooms – both now fully dried – with Tile Doctor Colour Grow Sealer, a solvent-based sealer that was highly effective at enhancing the colour of the brown tiles around the sinks. The product will also provide durable surface protection. I spent the final of the six days sealing the hallway floor with Tile Doctor Seal & Go, which provides both a stain-resistant surface seal and a durable, low-sheen finish. This was an ideal choice of product, as the customer requested a hard-wearing, yet shiny finish.
The hard work really paid off, as both the customer and the decorators were very impressed with the final results in the two bathrooms and the hallway. I was extremely pleased that I was able to complete this big job to the highest possible standards.



 threshold interiors
Location: New York, NY, United States
This Loft was tastefully renovated back in the '90s, but was due for an update and an expansion of the kitchen and dining areas to accommodate the client's cooking skills and entertaining needs. EnlargIing the island and adding cabinetry to delineate the office, bar and dining areas was a priority. The bathroom was updated to feel like a tranquil spa with beautiful new tile, plumbing fixtures and cabinets. Our biggest challenge was coordinating the entire renovation while our client was out of town for the Summer!
Photographed by: James Salomon

 Arbordale Landscaping Ltd
Long cobblestone driveway using a combination of grey and rose coloured cobbles lead to the front iron gates.
Inspiration for a small traditional partial sun courtyard stone driveway in Toronto for spring.
Inspiration for a small traditional partial sun courtyard stone driveway in Toronto for spring.
 Windy City Painters
Transform Your Home with Expert Wallpaper Installation by Windy City Painters
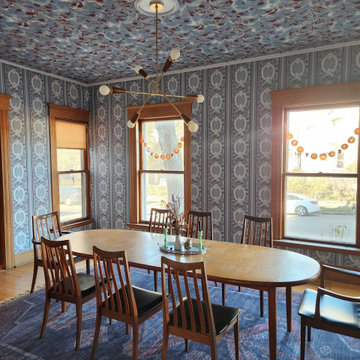
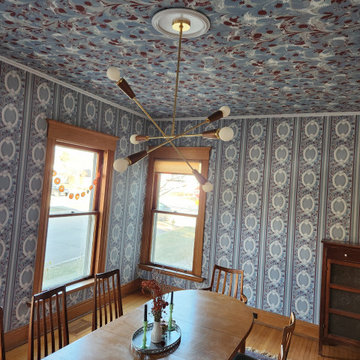
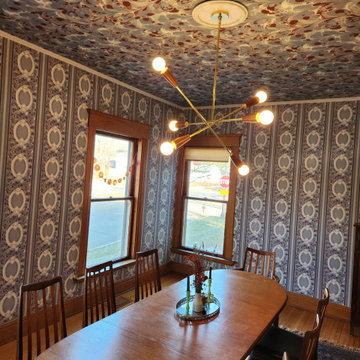
This dining room in Evanston, Illinois, recently underwent a stunning transformation, thanks to the team at Windy City Painters. As a trusted Chicago painter and wallpaper installer, we specialize in elevating spaces with expert craftsmanship and attention to detail. For this project, we installed bold, eclectic wallpaper on both the walls and ceiling—a design style that’s making a huge comeback in modern home décor.
The ceiling wallpaper, in particular, is the highlight of this room. This intricate pattern required careful planning and precise installation to achieve a seamless look. Ceiling wallpaper installation is one of the most challenging aspects of our work. Gravity, delicate materials, and complex patterns make it a task that only skilled professionals should tackle. Every seam, alignment, and adhesive application must be perfect, as even minor mistakes can be glaringly obvious on a ceiling. This is why hiring an experienced wallpaper installer is essential, especially when working with expensive, custom, or delicate wallpaper.
The process of wallpaper installation begins with careful surface preparation. Walls and ceilings need to be cleaned, repaired, and smoothed to ensure the wallpaper adheres properly. Next comes the meticulous measuring and cutting of wallpaper pieces, taking into account pattern repeats to ensure a flawless design flow. For ceilings, additional steps include precise alignment and support systems to keep the wallpaper in place as the adhesive sets. It’s a time-intensive process, but the results speak for themselves—creating a space that feels polished, cohesive, and unique.
Bold, busy patterns, like the one used in this dining room, are becoming increasingly popular. This eclectic style is perfect for homeowners looking to add personality and drama to their spaces. When paired with complementary furniture and décor, it creates a harmonious yet striking aesthetic. In this case, the rich blue tones, paired with natural wood accents and mid-century modern furniture, make the room feel both elegant and inviting.
At Windy City Painters, we pride ourselves on being a top Chicago painting contractor and wallpaper expert. Whether you’re looking to enhance your walls or tackle the challenge of ceiling wallpaper, our experienced team has you covered.
Ready to bring your vision to life? Contact us today to learn more about our wallpaper installation services and start transforming your space!


 About All Floors
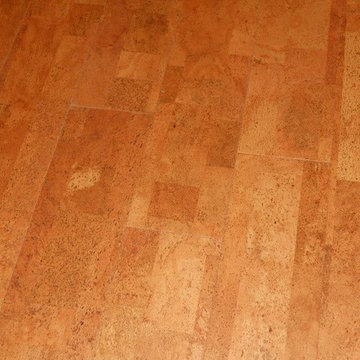
Close up of Cork Planking
Home design - mid-sized contemporary cork floor home design idea in Philadelphia with light wood cabinets, stainless steel appliances and an island
Home design - mid-sized contemporary cork floor home design idea in Philadelphia with light wood cabinets, stainless steel appliances and an island

Sponsored
Columbus, OH

Hope Restoration & General Contracting
Columbus Design-Build, Kitchen & Bath Remodeling, Historic Renovations

 Hitech CADD Services
Industry: Building Design and Construction
Location: USA
The Objective
Develop a 3D model for retaining wall design plan meant to block the flood water from a nearby river
The Solution
Several elements as specified by client were incorporated to design a retaining wall and a detailed 3D model was developed.
Technology/Software Used
3Ds Max
An environmental consultant had to assess a site and provide a plan to the client for retaining wall design meant to block the flood water from a nearby river from entering the site. Some old hand drawn sketches of a retaining wall structure and a PPT with landscaping plans, was all that was provided. Improvising the basic design and preparing a well rendered 3D model, to facilitate the consultant to give final presentation of the design to the client, was the task.
Challenges
1. Client expected a design improvement based on a landscape PPT & some handmade designs developed in 2008.
2. Files were without any exact dimensions or additional inputs from the client
3. No plans, elevations and CAD files were given to support the team for further design revisions and 3D modeling
4. Client’s verbal explanations were to be used as a base to analyze and understand the requirements.
5. Numerous brainstorming sessions, repeated iterations and approvals.
6. Client was accessible only through email and conference call
Engineering Solution
Retaining the wall to stop flood water from a nearby river entering the area filling it with debris
1. Hi-Tech team deftly handled the communication, approvals and design development process.
2. Built a retaining wall to extend the useful area towards the flood plain of the river.
3. Retaining wall was designed as a 3 stepped structure with property (7 – 8 homes and a swimming pool) at the top.
4. Terraces with trees and shrubs were included. This design feature made the entire wall look like a natural retaining boulder covered with greenery.
5. Narrow walkways and stairs that led to the terrace were incorporated in the design
6. Subterranean garage under the flat ground surface of the property was also included as a part of the design
Benefits
1. In a short span of one month, the team managed to develop a fully fledged design and plan for the retention wall.
2. Vacant space was effectively utilized; the stepped wall not only stooped the flood water from entering the client’s property, but also created space for 7-8 homes.
3. The designed structure looked very much a part of the natural terrain, and in fact added to the beauty of the surround
 Windy City Painters
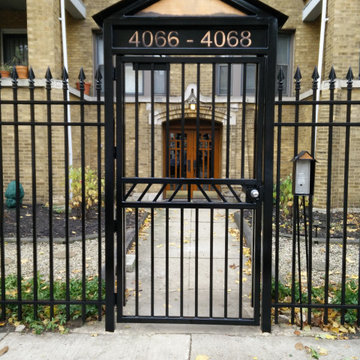
s your ornamental iron fence flaking rust onto the sidewalk every time Chicago wind kicks up? That is not a cosmetic problem - it is a sign that bare metal is exposed to moisture and the corrosion cycle is accelerating. Windy City Painters restores iron fencing on Chicago greystones, two-flats, Victorian brownstones, and courtyard buildings using professional-grade rust conversion and rust-inhibitive systems designed for the Midwest climate.
PROJECT OVERVIEW
Ornamental iron fence painting in Chicago is a multi-stage restoration process, not a simple brush-and-go job. Chicago properties - particularly the dense residential streetscapes of the North Side and Near West Side - feature decorative iron fencing that ranges from simple tubular picket to elaborate spear-top and scroll designs. When paint fails on iron, rust accelerates quickly. Windy City Painters evaluates each fence for structural rust-through, surface rust, and paint adhesion before recommending a scope of work.
MATERIALS AND PRODUCTS
Rust conversion: Ospho (phosphoric acid-based) or Corroseal (latex rust converter) depending on rust severity and surface porosity. Both chemically convert iron oxide into a stable compound that primer bonds to permanently rather than simply coating over active rust.
Primer: Rust-Oleum DTM (Direct to Metal) rust-inhibitive primer or Sherwin-Williams DTM Acrylic Coating primer, both formulated to penetrate weld seams, crevices, and pitted metal surfaces where brush application is essential.
Finish coat: Sherwin-Williams DTM Acrylic in satin or semi-gloss for UV resistance, color retention, and flexibility through freeze-thaw cycles. Two finish coats applied by brush for full coverage on ornamental profiles.
THE PROCESS
Step 1 - Mechanical Preparation: Wire wheel grinding with angle grinders removes loose rust and failing paint across flat rail surfaces. Needle gun descaling reaches weld joints, picket bases, and decorative scroll details where wire wheels cannot access. Windy City Painters inspects for rust-through after mechanical prep and flags any sections needing welding before painting proceeds.
Step 2 - Rust Conversion: Ospho or Corroseal is applied by brush to all remaining rust-affected surfaces. Ospho reacts with iron oxide over 24 hours, converting it to iron phosphate. Corroseal encapsulates and converts simultaneously. Both products create a chemically stable surface that dramatically improves primer adhesion on previously rusted iron fence sections.
Step 3 - Primer Application: Rust-Oleum DTM or Sherwin-Williams DTM rust-inhibitive primer is worked into every joint, crevice, and ornamental detail by brush - never sprayed alone on open ironwork where overspray and thin coverage risk undercutting. Full wet film thickness is verified before drying. Windy City Painters does not rush cure times between coats.
Step 4 - Finish Coats: Two coats of Sherwin-Williams DTM Acrylic topcoat are applied by brush for maximum film build on vertical pickets and horizontal rails. Color is matched to original or updated per homeowner preference. Semi-gloss finish resists dirt accumulation and makes future cleaning easier between repainting cycles.
CHICAGO-SPECIFIC CHALLENGES
Chicago presents iron fence painting conditions that milder climates do not. Road salt spray from city streets migrates onto fence bases through snowplow activity and foot traffic. Freeze-thaw cycling - sometimes occurring 30 or more times per winter - expands and contracts metal faster than paint can flex if film build is inadequate. High summer humidity slows cure times and risks blushing in topcoats applied too early in the morning. Windy City Painters schedules iron fence work during appropriate temperature and humidity windows and never applies coatings when rain is forecast within 24 hours.
WHAT TO EXPECT LONG-TERM
A properly prepped and primed iron fence in Chicago should hold a quality DTM finish for 5-8 years before needing significant maintenance. Annual inspection of base welds and picket bottoms - areas where water pools - catches early rust before it requires full mechanical prep again. Touch-up painting of isolated spots extends coating life significantly.
PRO TIPS
Tip 1: Never let a painter skip straight to topcoat on a rusty fence. Active rust under paint fails within one or two seasons. Ospho or Corroseal conversion is non-negotiable on Chicago iron.
Tip 2: Inspect fence picket bases at ground level every fall. That is where water collects, salt concentrates, and rust begins its worst work. Early touch-up costs far less than full restoration.
Tip 3: Request brush application on ornamental ironwork rather than spray-only. Brush work ensures wet paint is physically worked into every joint and crevice where rust originates.
Ready to restore your iron fence? Visit windypainters.com to schedule a free estimate with Windy City Painters.
Q: What does iron fence painting cost in Chicago? A: Iron fence painting in Chicago typically runs $8-$18 per linear foot. Rust severity, fence height, ornamental detail complexity, and whether welding repairs are needed all affect the final cost for professional iron fence restoration.
Q: How do you treat rust before painting an iron fence? A: Windy City Painters uses Ospho or Corroseal rust converters after mechanical prep. These products chemically neutralize iron oxide, creating a stable surface that rust-inhibitive primer bonds to permanently rather than painting over active corrosion.
Q: What primer is best for painting a rusty iron fence in Chicago? A: Rust-Oleum DTM and Sherwin-Williams DTM rust-inhibitive primers are our go-to products for iron fence painting in Chicago. Both are formulated for direct metal application and resist the moisture and freeze-thaw stress Chicago winters produce.
Q: How long does painted iron fencing last in Chicago? A: A professionally prepped and primed iron fence in Chicago holds a quality DTM finish for 5-8 years. Annual inspection of base welds and low points, with spot touch-up as needed, extends that service life considerably.
Q: Do I need a welder before painting my iron fence? A: If rust has eaten through fence rails or pickets structurally, Windy City Painters will identify those sections during prep and recommend welding before any primer or paint is applied. Painting over structurally failed metal is a waste of money.
Q: Can I paint an iron fence myself? A: DIY iron fence painting without proper rust conversion and DTM primer systems almost always fails within two seasons in Chicago. Professional prep, product selection, and application technique are why Windy City Painters results last 5-8 years.
Q: What neighborhoods does Windy City Painters serve for iron fence work? A: Windy City Painters serves Chicago North Side and Near West Side neighborhoods, working on greystones, two-flats, Victorian brownstones, courtyard buildings, and coach houses throughout the city.
 Windy City Painters
Transform Your Home with Expert Wallpaper Installation by Windy City Painters
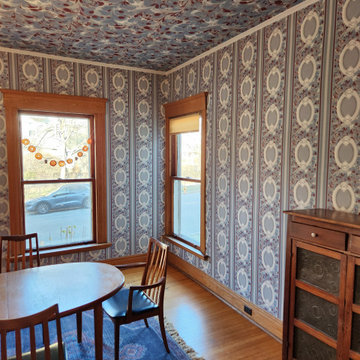
This dining room in Evanston, Illinois, recently underwent a stunning transformation, thanks to the team at Windy City Painters. As a trusted Chicago painter and wallpaper installer, we specialize in elevating spaces with expert craftsmanship and attention to detail. For this project, we installed bold, eclectic wallpaper on both the walls and ceiling—a design style that’s making a huge comeback in modern home décor.
The ceiling wallpaper, in particular, is the highlight of this room. This intricate pattern required careful planning and precise installation to achieve a seamless look. Ceiling wallpaper installation is one of the most challenging aspects of our work. Gravity, delicate materials, and complex patterns make it a task that only skilled professionals should tackle. Every seam, alignment, and adhesive application must be perfect, as even minor mistakes can be glaringly obvious on a ceiling. This is why hiring an experienced wallpaper installer is essential, especially when working with expensive, custom, or delicate wallpaper.
The process of wallpaper installation begins with careful surface preparation. Walls and ceilings need to be cleaned, repaired, and smoothed to ensure the wallpaper adheres properly. Next comes the meticulous measuring and cutting of wallpaper pieces, taking into account pattern repeats to ensure a flawless design flow. For ceilings, additional steps include precise alignment and support systems to keep the wallpaper in place as the adhesive sets. It’s a time-intensive process, but the results speak for themselves—creating a space that feels polished, cohesive, and unique.
Bold, busy patterns, like the one used in this dining room, are becoming increasingly popular. This eclectic style is perfect for homeowners looking to add personality and drama to their spaces. When paired with complementary furniture and décor, it creates a harmonious yet striking aesthetic. In this case, the rich blue tones, paired with natural wood accents and mid-century modern furniture, make the room feel both elegant and inviting.
At Windy City Painters, we pride ourselves on being a top Chicago painting contractor and wallpaper expert. Whether you’re looking to enhance your walls or tackle the challenge of ceiling wallpaper, our experienced team has you covered.
Ready to bring your vision to life? Contact us today to learn more about our wallpaper installation services and start transforming your space!
 C&N Decorative Concrete
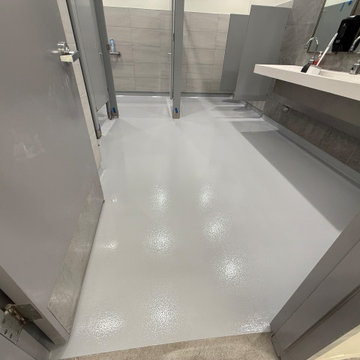
Project Showcase: Commercial Concrete Polishing & Sanitary Epoxy Restroom Restoration (Camarillo, CA)A detailed look at our commercial flooring restoration in Camarillo following a major plumbing leak and partial concrete slab replacement across the main corridor and public restrooms: Before — Raw Repoured Slab & Trench Patching: Following emergency water line repairs, new concrete sections were poured in both the main hallway and restrooms. Integrating new concrete into existing commercial finishes requires precise mechanical preparation and moisture control. Dustless Diamond Grinding & Mechanical Profiling: We eliminate acid washes and chemical etching entirely. Using commercial Husqvarna planetary diamond grinders connected directly to industrial HEPA dust extractors, we mechanically profiled the newly poured corridor patches and restroom slabs to achieve a clean, open concrete surface profile. Seamless Polished Concrete Corridor Tie-In: Through progressive diamond-tooling passes, we ground and polished the newly poured hallway sections to blend directly into the existing polished concrete slab—matching the aggregate exposure, clarity, and commercial sheen across the high-traffic walkway. Moisture-Block Epoxy Priming: Fresh concrete slabs retain high levels of internal moisture vapor. Rather than risking bond failure with rushed 1-day coatings, we primed the newly poured restroom slabs with an industrial moisture-block epoxy base coat engineered to deeply penetrate the concrete pores and withstand hydrostatic vapor pressure. Integral Sanitary Epoxy Cove Base: We hand-troweled a seamless vertical epoxy cove base around the entire perimeter of the restrooms, creating a continuous, watertight seal between the floor and tile walls with zero grout lines to trap moisture or bacteria. Slip-Resistant Commercial Finish: The restroom floors were finished with a heavy-duty commercial resinous system broadcast with a fine slip-resistant aggregate additive, providing reliable traction in wet environments while holding up to daily chemical sanitation. Contractor Specifications:C&N Decorative Concrete | CSLB #908395
25+ Years of Dedicated Trade CraftsmanshipServing Camarillo, Ventura, Oxnard, Thousand Oaks & Santa Barbara County

Sponsored
Sunbury, OH

J.Holderby - Renovations
Franklin County's Leading General Contractors - 2X Best of Houzz!
 Windy City Painters
Transform Your Home with Expert Wallpaper Installation by Windy City Painters
This dining room in Evanston, Illinois, recently underwent a stunning transformation, thanks to the team at Windy City Painters. As a trusted Chicago painter and wallpaper installer, we specialize in elevating spaces with expert craftsmanship and attention to detail. For this project, we installed bold, eclectic wallpaper on both the walls and ceiling—a design style that’s making a huge comeback in modern home décor.
The ceiling wallpaper, in particular, is the highlight of this room. This intricate pattern required careful planning and precise installation to achieve a seamless look. Ceiling wallpaper installation is one of the most challenging aspects of our work. Gravity, delicate materials, and complex patterns make it a task that only skilled professionals should tackle. Every seam, alignment, and adhesive application must be perfect, as even minor mistakes can be glaringly obvious on a ceiling. This is why hiring an experienced wallpaper installer is essential, especially when working with expensive, custom, or delicate wallpaper.
The process of wallpaper installation begins with careful surface preparation. Walls and ceilings need to be cleaned, repaired, and smoothed to ensure the wallpaper adheres properly. Next comes the meticulous measuring and cutting of wallpaper pieces, taking into account pattern repeats to ensure a flawless design flow. For ceilings, additional steps include precise alignment and support systems to keep the wallpaper in place as the adhesive sets. It’s a time-intensive process, but the results speak for themselves—creating a space that feels polished, cohesive, and unique.
Bold, busy patterns, like the one used in this dining room, are becoming increasingly popular. This eclectic style is perfect for homeowners looking to add personality and drama to their spaces. When paired with complementary furniture and décor, it creates a harmonious yet striking aesthetic. In this case, the rich blue tones, paired with natural wood accents and mid-century modern furniture, make the room feel both elegant and inviting.
At Windy City Painters, we pride ourselves on being a top Chicago painting contractor and wallpaper expert. Whether you’re looking to enhance your walls or tackle the challenge of ceiling wallpaper, our experienced team has you covered.
Ready to bring your vision to life? Contact us today to learn more about our wallpaper installation services and start transforming your space!
 Windy City Painters
Transform Your Home with Expert Wallpaper Installation by Windy City Painters
This dining room in Evanston, Illinois, recently underwent a stunning transformation, thanks to the team at Windy City Painters. As a trusted Chicago painter and wallpaper installer, we specialize in elevating spaces with expert craftsmanship and attention to detail. For this project, we installed bold, eclectic wallpaper on both the walls and ceiling—a design style that’s making a huge comeback in modern home décor.
The ceiling wallpaper, in particular, is the highlight of this room. This intricate pattern required careful planning and precise installation to achieve a seamless look. Ceiling wallpaper installation is one of the most challenging aspects of our work. Gravity, delicate materials, and complex patterns make it a task that only skilled professionals should tackle. Every seam, alignment, and adhesive application must be perfect, as even minor mistakes can be glaringly obvious on a ceiling. This is why hiring an experienced wallpaper installer is essential, especially when working with expensive, custom, or delicate wallpaper.
The process of wallpaper installation begins with careful surface preparation. Walls and ceilings need to be cleaned, repaired, and smoothed to ensure the wallpaper adheres properly. Next comes the meticulous measuring and cutting of wallpaper pieces, taking into account pattern repeats to ensure a flawless design flow. For ceilings, additional steps include precise alignment and support systems to keep the wallpaper in place as the adhesive sets. It’s a time-intensive process, but the results speak for themselves—creating a space that feels polished, cohesive, and unique.
Bold, busy patterns, like the one used in this dining room, are becoming increasingly popular. This eclectic style is perfect for homeowners looking to add personality and drama to their spaces. When paired with complementary furniture and décor, it creates a harmonious yet striking aesthetic. In this case, the rich blue tones, paired with natural wood accents and mid-century modern furniture, make the room feel both elegant and inviting.
At Windy City Painters, we pride ourselves on being a top Chicago painting contractor and wallpaper expert. Whether you’re looking to enhance your walls or tackle the challenge of ceiling wallpaper, our experienced team has you covered.
Ready to bring your vision to life? Contact us today to learn more about our wallpaper installation services and start transforming your space!
 Tile Doctor Ltd
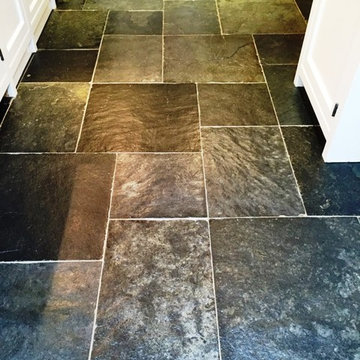
These photographs below are of a Slate Tiled Kitchen floor taken at a customer’s house in Henley-on-Thames which, as its name suggests, sits alongside the River Thames in Oxfordshire. My client’s Slate kitchen floor had recently been cleaned with unsuitable cleaning products which I suspect impacted the sealer leaving it looking dull. Sealers really to improve the look of a stone floor so unsurprisingly once the sealer had been damaged my client had been unable to find a cleaning product that could have any kind of positive effect on the tiles.
It’s fairly well known that many supermarket quality cleaners are only really designed for use on Ceramic or Porcelain tiled floors as they contain acids which strip away at sealers and acid sensitive stone floors, leaving the stone beneath vulnerable. So your select a cleaning product for your floor always read the small print on the back of the label and make sure you avoid anything that mentions not for use on acid sensitive stone; belter still Tile Doctor have a number of products for cleaning tiled floors including Neutral Cleaner and Stone Soap.
To clean the floor and remove any remaining sealer I first made a strong dilution of Tile Doctor Pro Clean which is a strong alkaline cleaner and then spread this over the floor, leaving it to dwell. This allows the cleaner to seep into the slate and get underneath, breakdown sealers and start to lift out ingrained dirt.
Following a dwelling period of roughly ten minutes, I agitated the floor periodically with a rotary machine fitted with a black scrubbing pad and scrubbed along the grout lines with a stiff grout brush. I then used a wet vacuum to extract the resultant slurry away and then followed up by rinsing the floor with clean water, and once again vacuumed up the residue.
Any stubborn areas were retreated until I was happy with the floor and then I left the floor to dry off completely overnight, in preparation for sealing the following day.
Upon my return to the house the following day, I ran some damp tests on different parts of the floor to check for any excess moisture which could potentially damage the performance of the sealer. Once I was satisfied that the floor was completely dry, I proceeded to seal the tiles using Tile Doctor Seal & Go. This will provide a robust surface seal for the future, along with an aesthetically pleasing low-sheen finish.
This sealer works particularly well on Slate tiles and, being a water-based sealant, additionally Seal & Go does not emit an unpleasant smell as it dries. Slate is quite a porous stone so I applied six coats of seal to provide long-lasting protection.
Barry Woodward
Oxfordshire Tile Doctor
99