
Search results for "Surveys included" in Home Design Ideas
 Ash and Line
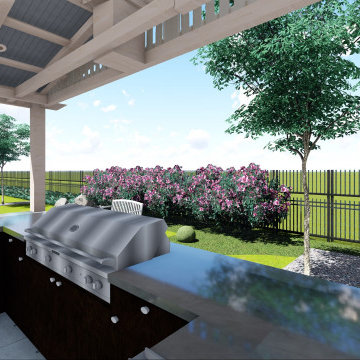
A dear client who resides in Mcallen-TX requested a Full Backyard Design including a pool, outdoor kitchen, firepit, edible garden, art, and a secluded area for quiet reading and privacy among other structures and hardscape.
We proceeded with the design process virtually due to his location being away from The Woodlands, TX. The client filled a questionnaire with specific questions regarding his site nature, style, and needs. He sent photos of the existing landscape, survey, and photos from the house interior that would help us match his modern style to his outdoor space.
We were very pleased to present our planting and construction drawings with 3D walk-thru video in a videoconference. All plans were sent to this client to start the building process at his own pace. He certainly loved the modern space we were able to create for him!
"You envision it, we create it" is our EZ MOTTO

 Ibarra Rosano Design Architects
Photographer: Bill Timmerman
Builder: Jillian Builders
Minimalist concrete floor and gray floor great room photo in Edmonton with white walls, a corner fireplace and a wood fireplace surround
Minimalist concrete floor and gray floor great room photo in Edmonton with white walls, a corner fireplace and a wood fireplace surround
 Houston Bath and Kitchen
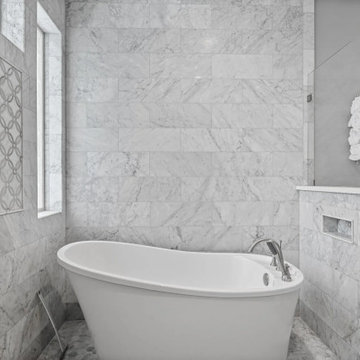
In a beautiful suburb on the north side of Houston, Texas, Joe and Kristen discovered their dream home—a property with a great lot, situated in a fantastic neighborhood with a thoughtfully designed floor plan. They had been drawn to the house for its charm and had admired the kitchen, which had been tastefully remodeled a few years earlier by a contractor who, despite doing excellent work, was no longer in business. However, upon moving in, they quickly realized that their master bathroom was woefully inadequate and in dire need of immediate repair.
Determined to turn their bathroom into a luxurious retreat, Joe and Kristen sought out Houston Bath & Kitchen, a reputable design-build firm renowned for their meticulous process and outstanding results. They were impressed from the outset with the efficiency and expertise. In just 90 minutes, their design team presented a complete concept plan and provided a detailed estimate—a promising start to what would become an inspiring collaboration.
Guided by Houston Bath & Kitchen's comprehensive approach, Joe and Kristen embarked on a thorough "design tour." The team expertly navigated them through the selection process, ensuring every choice aligned perfectly with their aesthetic preferences and practical needs. Together, they crafted a vision that included an oversized shower for two, creatively integrating a freestanding tub within the shower area—an innovative solution that maximized space and luxury.
As the project progressed, The Houston Bath & Kitchen production team conducted a thorough "trade walk," meticulously inspecting the jobsite to uncover potential complexities and ensure no detail was overlooked. This step was crucial in setting reliable expectations and eliminating surprises.
Detailing the scope of work was another pivotal phase, emphasizing transparency and clarity. Joe and Kristen felt reassured knowing exactly what to expect at each stage of the remodel. Houston Bath & Kitchen then moved into the "master planning phase," coordinating materials, surveys, and permits with precision. Trades were scheduled, and critical paths were identified—laying a solid foundation for a seamless execution.
Throughout the process, communication remained robust, and the meticulous planning ensured the project stayed on track both in terms of time and budget. One of the standout features of the design was the intricate tile work that adorned the walls and floors, fulfilling Joe and Kristen's desire for a design with variation and detail. Natural light was ingeniously incorporated through strategically placed windows and skylights, providing a serene ambiance without sacrificing privacy—a testament to Houston Bath & Kitchen's expertise in balancing functionality with aesthetics.
The final touch of luxury came in the form of a heated floor, adding warmth and comfort to the space—a detail that epitomized Houston Bath & Kitchen's commitment to fulfilling every customer priority.
Less than a year after the project was complete, Joe and Kristen made a decision to sell their home. Remarkably, the property went on the market and sold for $75,000 over asking price—a testament to the transformative impact of their newly remodeled master bathroom. While the exact influence of the bathroom on the bidding war remains speculative, it undoubtedly played a significant role in the home's appeal and ultimate sale price.
The success of their home sale not only underscored the value of their investment but also highlighted the expertise and dedication of Houston Bath & Kitchen in delivering a space that not only met but exceeded their expectations. Joe and Kristen stepped into their newly remodeled master bathroom with hearts full of joy. The space surpassed their dreams, reflecting their style and enhancing their daily lives—a sanctuary that would be cherished for years to come, thanks to Houston Bath & Kitchen's skillful guidance and commitment to excellence.
Find the right local pro for your project
 GYMO Architecture, Engineering, Land Surveying DPC
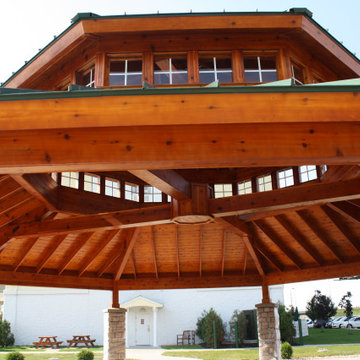
Designed as an outdoor amenity for a national hotel, this 40' wide, 25' high pavilion colaborates with site elements that include stone and wood bench seating, concrete pavers, a gas-fuel fire pit and pleasant landscape amterials.
 Costa Bella Builders
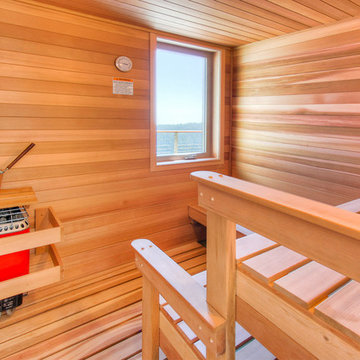
This sustainable project was completed on a private 80 acre view parcel in the hills above Corralitos, CA. The owners were drawn to us through the Green Building link on our website and after an initial meeting, hired us to manage the preliminary feasibility studies, site work, design and eventual construction.
With this type of project, we start at the beginning; making sure that development on the site is both possible and practical before we spend a lot of our client’s budget on plans that may not be suitable. After we determined that building on the property would be permitted by the Santa Cruz County Building and Planning Departments, we completed several feasibility steps that included:
•A geologic review
• Percolation test (for septic)
• Water well probability analysis
• Grading analysis
• Biologic review
• Site survey and topographic mapping
• Earthquake zone and archeological clearances
With these steps finished, we set up interviews with several local architects that we partner with to find the one that was most appealing to our client. The owners were integral to the process and agreed with our choice of Daniel Silvernail, Architect. He impressed the clients with his gracious nature and open attitude; welcoming feedback and the preferences they had throughout the design process. In addition to being very reasonably priced, Mr. Silvernail quickly gave his attention to the preliminary design plans. After client reviews and approval the full architectural and construction blueprints were finished. We had the complete ready-to-submit-for-permit documents in less than 10 weeks; this included structural engineering, energy calculations and Green Building ratings. We were all impressed by his professionalism throughout the design and building process.
 Tile Doctor Ltd
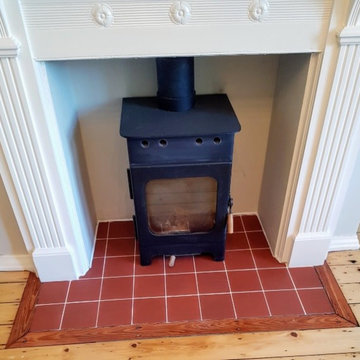
We received an inquiry from a client in Lindow End near Wilmslow Golf Club in the Cheshire stockbroker belt. They were restoring their home and were unhappy with the state of the Quarry tiled hearth under their log burning stove. We arranged a site visit to survey the tile and grout and provide a quote for restoring the appearance. The village is situated in what’s known as the ‘Cheshire Golden Triangle’ which is one of the most sought-after places to live in the UK after London. As a result, we often find ourselves in this area working on some very nice properties, so it wasn’t long before we were able to call in and survey the tiles.
As you can see from the pictures the hearth was quite dirty and the grouting had discoloured from years of use of the wood burner. The work here was a minor part of their restoration which had included significant building work. We agreed a price to carry out the work, which should only take a day and were able to return the following week.
Our first job was to cover the newly sanded and sealed wooden floors with dust sheets, so we didn’t mark them as we came in the front door to the lounge. We always try and make as little mess as possible and we are always as careful as possible.
We then sprayed Tile Doctor Pro-Clean on the fire hearth tiles. This is a multi-purpose tile and grout cleaner which would make light work of the dirty tiles. The product was left to soak into the Quarry tile and grout for about twenty minutes before being scrubbed in. The hearth was a small area, so this was done by hand and then washed down with clean water.
The dirty residue was removed using a wet vacuum then the tiles where wiped down with a clean micro fibre cloth. We then dried off the tiles using a little encouragement with a heat gun to speed up the drying process. Speed drying the tile and grout in this manor would allow us to complete the work in one visit.
Once the tiles and grout lines were dry it was clear that years of dirt and soiling had stained the grout, so although no much cleaner it was clear more work would be needed to give the grout a fresh and consistent appearance.
To address this issue with the grout we selected to apply a Sandstone Tile Doctor Grout Colourant. This is applied with a small brush and brushed it into the grout lines. It is quite a precise job but any colourant that goes onto the tiles is removed with a baby wipe before it dries. This process really transformed the look of the grout, the colourant also forms a barrier over the grout which will protect it going forward and make it easier to clean.
The Quarry tiles were then given a coat of Tile Doctor Colour Grow which is an impregnating colour enhancing sealer. This brings out the best in the quarry tiles and adds protection against future staining which will be needed given its location.
The client was very happy with the finish, in fact the hearth looked like it had been newly tiled, the impact of the recoloured grout was that striking. Sometimes the smallest jobs can be the most rewarding.
Andrew Robb
East Cheshire Tile Doctor
 Tile Doctor Ltd
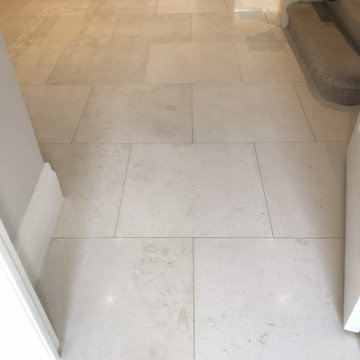
This client from Highgate in North London, N6 contacted us about their large honed Limestone tiled floor that was installed throughout the ground floor. It had been laid seven years prior and was now grubby and in need of a deep clean and seal including the grout which had turned black with dirt.
I visited the property to survey and assess what was required and provided the owner with a quotation for the renovation. The hallway pictured was in the worst condition, it was a busy house with young children and dogs and over the years the sealer had worn down leaving it vulnerable to ingrained dirt. Without a sealer to protect the stone it had become heavily soiled and lost its original polished appearance.
Happy with the quote we scheduled a date for the work to go ahead. The quote included deep cleaning and burnishing the stone to bring back the polish, grout cleaning and re-sealing the Limestone to protect it.
We arrived on the first day and prepared the area by taping up the skirting and woodwork to protect them from potential splashing. Next step was to burnish the floor using a set of Tile Doctor Diamond Burnishing Pads, specifically the 400, 800 and 1500 grit pads fitted to a rotary machine, these were used in sequence running each pad over the tiles several times with water to lubricate the process. The water turns into a fine slurry as pores in the stone are opened and the dirt is released, the slurry is rinsed off with more water and extracted using an industrial wet vacuum after each pad. The finer 800 and 1500-grit pads slowly close the pores and refine the appearance of the stone building up the polish in the process.
A strong dilution of Tile Doctor Pro-Clean was then applied to the grout lines, leaving it for a short while to soak in and then hand scrubbing with a grout brush. The dirty cleaning solution and were then removed from the floor with the wet vacuum.
This process was repeated across the different sections of the Limestone floor until I was satisfied with its appearance. Before leaving for the day, I rinsed the floor again using a buffing machine fitted with a brush fitted to give it a final clean. The floor was dried as much as possible using the wet vacuum and then allowed it to dry off fully overnight.
The following day the final 3000-grit pad in the four-pad set was applied to the floor to bring up the polish even further. The pad is applied dry with only a little water sprayed onto the tile. We call this process a “Spray Burnish” and as well as leaving the floor nice and dry ready for sealing it adds a nice subtle shine to the stone.
The floor was then sealed with two coats of Tile Doctor Colour Grow sealer. This is a colour intensifying impregnating sealer that works by occupying the pores in the stone so dirt cannot become ingrained there. It will provide durable protection and make the floor much easier to keep clean. It worked well on the pale Limestone and beautifully enhanced the colour and features in stone. Once complete the floor looked brand new again.
I left a complimentary bottle of Tile Doctor Stone Soap with the client and gave them some information about how best to maintain the floor. This product is pH neutral and cleans whilst maintaining the patina on the stone helping to keep the floor in great condition.
The client was delighted with the result and left us a great review.
“Andrew is excellent and gets on with the job and we got a fantastic result. Highly recommend. By Aaron S, Highgate, 15 March 2021”
Andrew Newstead
North London Tile Doctor

Sponsored
Delaware, OH

Buckeye Basements, Inc.
Central Ohio's Basement Finishing ExpertsBest Of Houzz '13-'21
 Tile Doctor Ltd
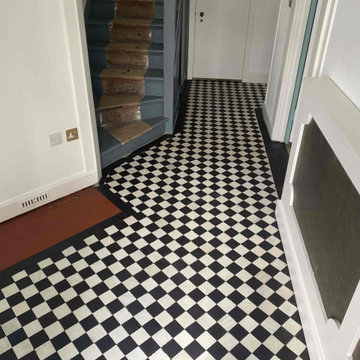
This client from North London had recently bought a property in Highgate N6 and during renovation had discovered an original Victorian tiled floor in the hallway. The floor was laid in a classic black and white diamond pattern but unfortunately a large section was missing and had been filled with concrete. Furthermore, most of the remaining floor had been covered in cement and glue.
I carried out a survey of the floor to determine the main issues and was then able to email over a quote later that day that included rebuilding the missing section of flooring. I suspect the floor had been excavated at some point in the past to install central heating and then rather than have the excavated section restored it was simply back filled and then levelled with a cement screed before finally gluing down a carpet on top.
Once the quote was accepted, I sourced replacement tiles from the Vintage Floor Tile company. Situated in Kent they are a reclamation yard that specialises in supplying original geometric and encaustic tiles including the major historical makers such as Minton and Craven Dunnill.
Armed with replacement tiles I started by removing the concrete that had been used to backfill the missing section and prepare a new surface for tiling with quick drying cement. When ready I was able to carefully build back the original pattern using the replacements. The tiles were secured with tile adhesive and once that had gone off, they were grouted.
The floor was left to set fully overnight and then the next day I was able to return and clean the whole floor using a strong dilution of Tile Doctor Remove and Go. As usual this was left to soak into the tiles for a good ten minutes before being scrubbed into the tiles using a black scrubbing pad. The Tile Doctor Remove and Go did a good job of cleaning the floor and the cleaning solution soon turned black with dirt during the scrubbing. The floor was rinsed with water and the soil extracted with a wet vacuum. After inspecting the floor any areas that needed further work were hand scrubbed and rinsed again until I was happy the floor was clean.
The last part of the cleaning process was to give the tiles an acid wash using Tile Doctor Acid Gel which further cleans the floor by removing old cement residue and grout haze. It also neutralises efflorescent salts in the tiles which are a common issue with floors of this age with no damp proof membrane. After another rinse and extraction, the floor was given a final rinse and then dried as much as possible using the wet vacuum.
I left the floor to dry out for a couple of days before returning to apply a protective sealer. Tile and Stone should be dry before sealing so I use a damp meter first to double check. All was well so to seal the tiles I proceeded to apply the first of what would be three coats of sealer. I used Tile Doctor Colour Grow for this, it works by impregnating the tile occupying the pores and thereby preventing dirt from becoming ingrained there. This product also enhances the black and white colour of the tiles and makes the floor much easier to clean.
Once done the floor was transformed and needless to say my customer was very pleased with the result. For the aftercare of Victorian Tiled floors, I recommend the use of a ph neural tile cleaner such as Tile Doctor Neutral Cleaner; most supermarket tile cleaners are simply too strong for use on sealed floors and can strip off the sealer prematurely.
Andrew Newstead
North London Tile Doctor
 Tile Doctor Ltd
During an inspection for alteration work, this customer from Cheshunt discovered what appeared to be an original encaustic tiled floor under the hallway carpet. Keen to work out what it was, and have it restored, I was asked to pop round and look.
I went over as requested to survey the hallway floor and confirm their suspicions. The carpet had been secured with gripper rods glued onto the floor and that came away easily enough. Underneath, the tiles had been covered with self-levelling cement which had to be carefully scraped away to reveal the tiles.
I ran a test to see if the cement leveller could be easily removed and using a combination of a scraper with Tile Doctor Pro-Clean, I was able to confirm the tiled floor was indeed salvageable. The house was Edwardian, and the tiles had been laid in a classic black and white geometric pattern typical of the period so I suspect the floor was indeed original.
I worked out a quote to restore the whole floor including the removal of the cement, deep cleaning and then sealing the tiles. Without removing all the cement, it would be difficult to price for replacing broken tiles, but I suspected there may be a few as its quite usual for a floor of this age. Keen to have the floor restored we were given the go-ahead and a date scheduled for the work to start.
The first step was to remove all the carpet and gripper rod so we could see the full extent of the self-levelling screed. Once done it was a case of carefully chipping and scraping away to break up the cement until the tiled floor had been fully revealed. Its slow and detailed work but quite rewarding when the tiled floor is finally revealed. The tiles had survived well under the carpet and cement but as suspected a few repairs and replacement would be needed.
With all the cement brushed away work moved onto cleaning which started with a strong dilution of Tile Doctor Pro-Clean applied to the floor and left to soak in for fifteen minutes the scrubbed in with a rotary machine fitted with a Black pad. A lot of soiling is generated from this which is rinsed off with water and extracted with a wet vacuum. The floor was then inspected and the process repeated where required.
The next step was to treat the tiles to an acid wash using Tile Doctor Grout Clean-up. This is applied as before and has several benefits including dissolving the remaining cement residue and neutralising the pH of the floor after the use of Tile Doctor Pro-Clean which is a strong alkaline.
The floor was then inspected and the broken tiles carefully removed so they could be replaced. This is delicate work as lifting a tile can sometimes upset its neighbour and before you know it the size of the work has tripled. Replacement tiles were then cut to fit the existing geometric pattern and secured into place with a rapid set adhesive and grouted in.
Once the replacement tile and grout had set, the floor was given a light clean using Tile Doctor Neutral Tile Cleaner and then left to dry out overnight.
The next day the tiles were sealed using a single coat of Tile Doctor Colour Grow and the followed up with give coats of Tile Doctor Seal & Go. Colour Grow is an impregnator that soaks into the pores of the tile protecting it from within and improving colour, where as Seal and Go adds a nice subtle sheen to the tiles. Both products are breathable which is an important feature with old floors that don’t have a damp proof membrane.
For aftercare I recommended Neutral Tile Cleaner which is a gentle but effective tile cleaning product that won’t damage the sealer.
Robert Voyce
Hertfordshire TIle Doctor
 Tile Doctor Ltd
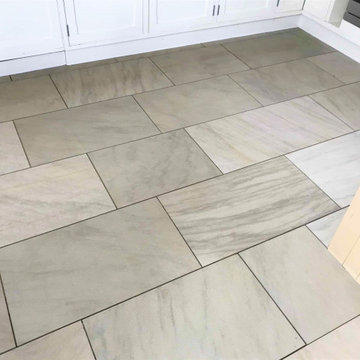
I received an enquiry from a property in Crowthorne to come and survey an unknown Flagstone Floor in a converted barn that was ready to be rented out. The owners where concerned the stone was letting the rest of the property down due to it being dirty and heavily stained, particularly around the kitchen and entrance areas. If your selling or renting out a property it really needs to look its best if you want to achieve a good price. Having spoken over the phone we agreed a date for me to pop over to complete a survey.
From further inspection I confirmed the stone was in fact a Sandstone, it was also clear that the sealer protecting the stone from ingrained dirt had worn away and was now allowing dirt and staining to ruin the appearance of the flagstones. It was a large floor so I measured up so I could work out the quantities of cleaning and sealing products needed and then walked the customer through the cleaning process. Later that day I sent over a detailed quotation which was accepted, and a date agreed for my return.
I should mention this work took place during the Covid restrictions, fortunately being a rental property, I was able to work in the property alone.
To deep clean the floor and remove the ingrained dirt and staining I used a strong dilution of Tile Doctor Pro-Clean. It is sprayed onto the floor and left to soak in for five minutes before agitating with a Black scrubbing pad fitted to a weighted buffing machine. The resultant slurry was then wet extracted away using a powerful high-pressure van mounted extracting system.
This action cleaned up most of the stone nicely however certain areas where heavily stained, particularly in the kitchen area where food and drink stains were more apparent. To tackle this, I applied a stronger cleaner/stripper product called Tile Doctor Remove and Go this time allowing ten minutes for it to soak in before scrubbing the surface with a very coarse 100-grit soft milling pad. This took quite a few attempts each time extracting the slurry away and then inspecting the floor to see if more work was needed.
Happy the stains have been removed, I then focused on renovating the surface Sandstone after the application of the coarse pad. This involves the application of several finer grit burnishing pads which close the pores and adds a subtle polish to the Sandstone. As I started with 100-grit pad it was necessary to gradually refine the surface with an incremental series of pads that included 200, 400 and finally 800-grit pads. Then to ensure a uniform finish across the floor I continued the 400 and 800 grit pads throughout the property. Water is used to lubricate the process and this turns into a fine slurry that is rinse extracted as before.
The cleaning process took up the whole of the first day and I am pleased to say the Sandstone floor looked very clean after I had finished.
The stone was then allowed dry off overnight with the aid of an industrial air mover and I returned later the next day to apply a new protective seal. In the meantime, my customer had been over to check out the floor and were over the moon with how it looked and wanted to keep the finish as natural as possible.
With this in mind, I applied Tile Doctor Ultra-Seal sealer to the Sandstone throughout, only two coats were needed. This is a premium sealer that is almost invisible and works by penetrating the stone thus preventing dirt from becoming ingrained. Once done the floor looked very clean and much brighter than before, it now had that wow factor which will help it attract a good yield in the rental market.
The trouble with rental properties of course is making sure the tenant uses the right product to maintain the floor and not a typical supermarket tile cleaner that are only designed for use on Ceramic and Porcelain tiles. In fact, these types of cleaning product can slowly strip the sealer off the floor so it’s always worth checking the label before purchasing. Fortunately Tile Doctor sells a product called Neutral Cleaner that is ideal for maintaining sealed stone floors, so I left them with a complimentary bottle and recommended they get some more to leave under the sink for the new tenant.
Dennis Buckland
Berkshire Tile Doctor
 Tile Doctor Ltd
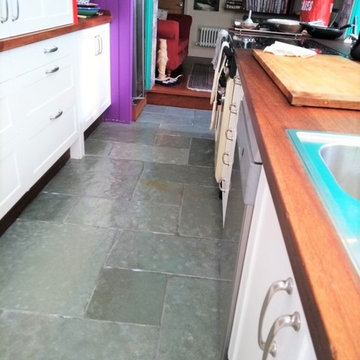
I recently helped a homeowner from my home town of Dursley who got in touch about her kitchen Flagstone floor. The problem revolved around an accident she had with raspberries which had stained the flagstones and the problem became compounded when a house hold clearing product was applied neat to clean up the mess. If you follow any of our Tile Doctor blogs, you will know that using strong household cleaning products can damage the sealer and, in this case, it had left white marks on the floor.
I called round to the property to survey the floor as was surprised to find out that the floor had been cleaned and sealed only four months prior by another company. I don’t like to comment on other people’s work, but I found the grout lines and flagstones were still badly ingrained with dirt, so it wasn’t a through job.
I completed by survey and demonstrated the process I would follow to resolve the issues on one of the flagstone tiles. She could not believe the difference I was able to make and booked me in straight away to restore the entire floor.
My first task was to protect the wooden kitchen units from splashing that can happen when cleaning the floor. Once that was done, I set about stripping the sealer from the floor and deep cleaning the tile and grout with a strong dilution of Tile Doctor Pro-Clean. Pro-Clean is a concentrated, multi-purpose high-alkaline cleaner, stripper and degreaser which is safe to use on all types of tile, stone and grout including natural stone.
Working in sections across the Kitchen and adjacent dining room I diluted one part Pro-Clean to two parts water and mopped it onto the flagstones and grout where I left it to soak in for roughly fifteen minutes. Then using a rotary floor buffer fitted with a black scrubbing pad I scrubbed the solution into the floor into the old sealer and trapped dirt came away turning the cleaning fluid black in the process. The soil was then rinsed off with water and then extracted with a powerful 3,000 watt wet and dry vacuum. This process was repeated until I was satisfied the floor was clean and I ran a stiff grout brush along the grout lines to ensure they also received a good scrub. After I was satisfied the section was clean it was rinsed thoroughly with water to neutralise the floor and remove any trace of product and then dried with the wet and dry vacuum.
The cleaning process took up the whole day, but the flagstones would need to be dry before sealing so after giving the owner an update I left the floor for two days, so it could dry out thoroughly.
On my return I tested the floor was dry in multiple places with a damp meter to ensure it was ready to be sealed. The readings showed that the wet and dry vacuum had done a good job in removing the moisture, so all was well. To seal I applied several coats of Tile Doctor Seal and Go allowing each coat to dry before applying the next however with such a large area to cover I was able to work in sections around the floor.
Seal and Go works really well on Flagstones and leaves a very appealing sheen finish, also being water based it doesn’t leave a smell as it dries.
The results were amazing, and the customer thanked me for making such a massive improvement on her floor. Before leaving I made sure to discuss after-care and to avoid the use of hash cleaning products.
Malcolm Crowther
Gloucester Tile Doctor
 FENSTERCRAFT UK LTD
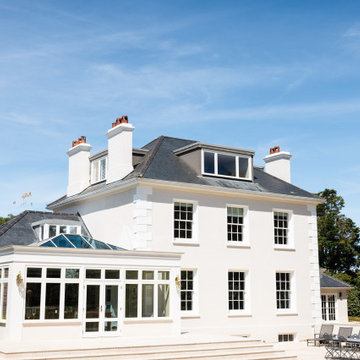
Engineered timber sashbox windows, casement windows, terrace doors factory finished in RAL9016 white, supplied fully finished including ironmongery and fitted by our experienced installers.
 Tile Doctor Ltd
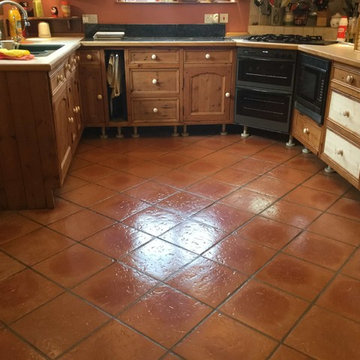
This Terracotta tiled floor was installed in the kitchen of a cottage in the small village of Maidford near Towcester. The tiles were not looking their best and the owner of the property realised it was time to do something about it and contacted Tile Doctor to have the floor stripped and resealed. Stripping and Sealing tile and stone floors is our bread and butter so I was more than happy to pop round and survey the floor which was approximately 9m2.
The grout had darkened with dirt and the previous tile sealer was failing so dirt was now getting ingrained in the Terracotta making it difficult to clean in places and leading to a patchy appearance. We discussed the work involved, my quote was accepted, and a date agreed for me to return and complete the work which would take two days, one to clean and one to seal.
After tidying up the Kitchen and removing the kickboards from underneath the kitchen units I set about working on cleaning and stripping the Terracotta floor of old sealers. To start I tested a small area with a strong dilution of Tile Doctor Wax Away. Wax was quite often used on Terracotta so I figured this product would be a good place to start. My suspicions were proved correct, and I found this to be the best product for removing the many layers of sealant on the floor. Wax Away is a new alkaline product by Tile Doctor and ideal for cleaning clay-based tiles such as Terracotta.
With my sights set on the rest of the floor Wax Away was scrubbed into the tile using a 17” rotary floor scrubbing machine and a black scrubbing pad running on a slow speed which helps to reduce splashing. This activity soon brought the dirt off the floor and the soiled cleaning solution was removed using a wet vacuum and the floor was rinsed down with clean water. The cleaning process was repeated a couple of times until I was happy with the floor, a stiff hand brush was then used along the grout lines with a dilution of Tile Doctor Pro-Clean to clean up the grout.
After rinsing and extracting the floor again the floor was inspected, and I noticed there were a few stubborn paint splashes on the tiles. I managed to remove these and these by spot treating the affected area with Tile Doctor Remove and Go and a steamer to lift the stain out of the clay tile. Once happy the floor was clean it was given a thorough rinse to neutralise it and remove any trace of cleaning products and then left it to dry.
I allowed the floor to dry for several days before returning to seal the Terracotta using numerous coats of Tile Doctor Seal and Go which is an ideal sealer for Terracotta and provides durable stain protection together with a low sheen finish. Terracotta is by its nature very porous and so it’s not unknown for it to take up to nine coats of sealer, which can take some time to apply as like paint you have to wait until it’s dry before it will take the next coat.
The customer was so impressed by the results I achieved in their kitchen they decided to go ahead and book me in to carry out this process throughout the whole of the ground floor which included lounge, study and hallway.
Phil Vissian
Northamptonshire Tile Doctor
 FENSTERCRAFT UK LTD
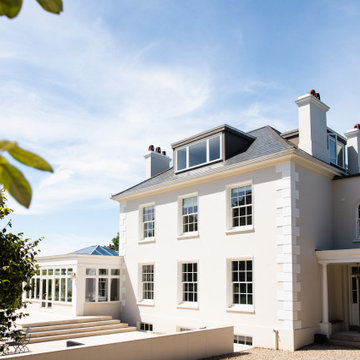
Engineered timber sashbox windows, casement windows, terrace doors factory finished in RAL9016 white, supplied fully finished including ironmongery and fitted by our experienced installers.
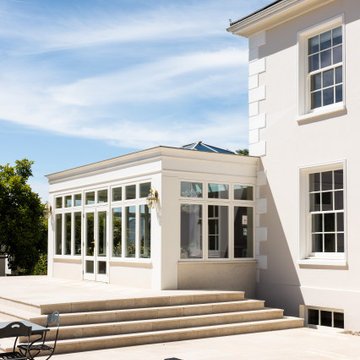 FENSTERCRAFT UK LTD
Engineered timber sashbox windows, casement windows, terrace doors factory finished in RAL9016 white, supplied fully finished including ironmongery and fitted by our experienced installers.
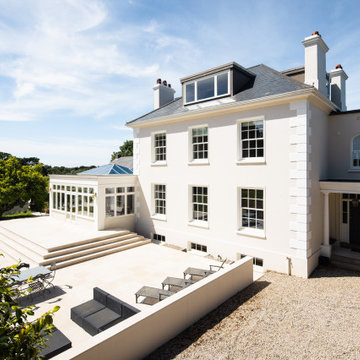 FENSTERCRAFT UK LTD
Engineered timber sashbox windows, casement windows, terrace doors factory finished in RAL9016 white, supplied fully finished including ironmongery and fitted by our experienced installers.
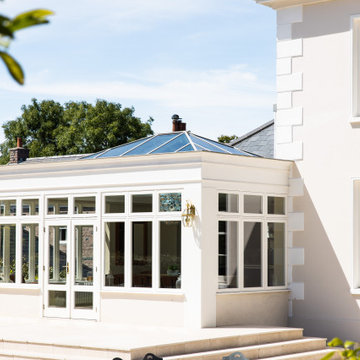 FENSTERCRAFT UK LTD
Engineered timber sashbox windows, casement windows, terrace doors factory finished in RAL9016 white, supplied fully finished including ironmongery and fitted by our experienced installers.
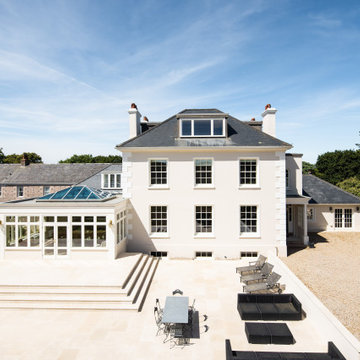 FENSTERCRAFT UK LTD
Engineered timber sashbox windows, casement windows, terrace doors factory finished in RAL9016 white, supplied fully finished including ironmongery and fitted by our experienced installers.
 Tile Doctor Ltd
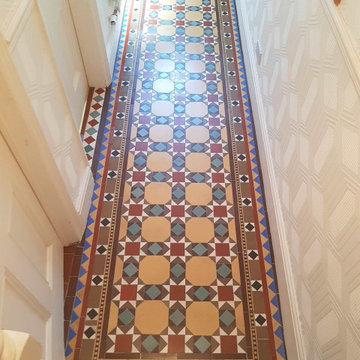
Recently we were asked to quote on restoring a Victorian tiled hallway floor in one of the large houses in the North Wales seaside resort of Rhos-on-Sea. It was a lovely period property that overlooked the sea and the floor a fine example of Victorian tiling and a real asset to the property.
Naturally, we have to take precautions when visiting properties these days, especially when surveying floors inside properties however we have amended our working practices to include more PPE and social distancing and so its not a problem.
On first impressions the floor looked to be in good order however it had some broken and loose tiles that needed replacing and then the floor given a good clean and seal. Fortunately, Victorian tiles are still popular, and you can find replacements, I also know that difficult to source tiles can often be found by asking other Tile Doctors many of whom have quite a collection. A quote was given for the work, which was accepted, and a date set to commence the work which would take three days.
Rhos-on-Sea is a very picturesque town situated between Llandudno and Colwyn Bay by passed by north wales main trunk road A55 leading to the main ferry port of Holyhead to Ireland. When you turn off the A55 into Rhos-on-Sea your transferred to a large seaside promenade with a wide walkway which is used by the towns many retired residents who appreciate the splendid coastal views.
The first job was to cut out and remove the damaged tiles then prepare the subbase with rapid set self-levelling compound to take the new tiles. Once this had set, I was able to cut and fit the replacements. There were a few areas that needed attention and so this work took up by most of the first day.
Once the sealer was dry, we were able to let the owner see the result who was really pleased and apparently has since received many compliments. For aftercare we recommend using Tile Doctor Neutral Cleaner which has a effective neutral pH formula that won’t prematurely erode the sealer with use like stronger products you find in supermarkets.
Andrew Robb
North Wales Tile Doctor
 FENSTERCRAFT UK LTD
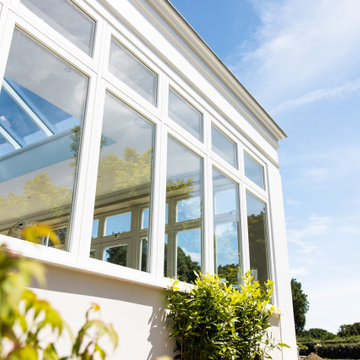
Engineered timber sashbox windows, casement windows, terrace doors factory finished in RAL9016 white, supplied fully finished including ironmongery and fitted by our experienced installers.
8