
Search results for "Suspect" in Home Design Ideas
 studio M MERGE
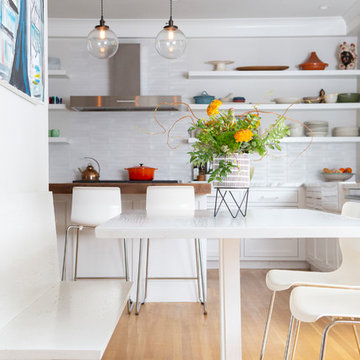
Transitional, modern/traditional. Open family kitchen with bright light. Heath tile. Italian marble. Indoor-Outdoor connection to garden.
Photography: Jennifer Love
 Luxury Kitchen & Bath
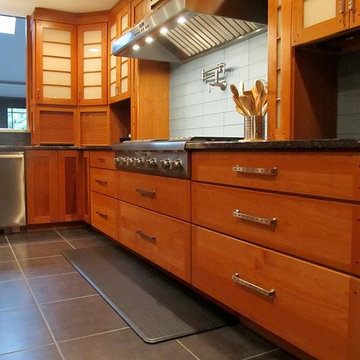
Mid-sized urban u-shaped porcelain tile and gray floor enclosed kitchen photo in New York with an undermount sink, flat-panel cabinets, medium tone wood cabinets, granite countertops, blue backsplash, glass tile backsplash, stainless steel appliances and an island
 Bella Vita Custom Homes & Remodeling
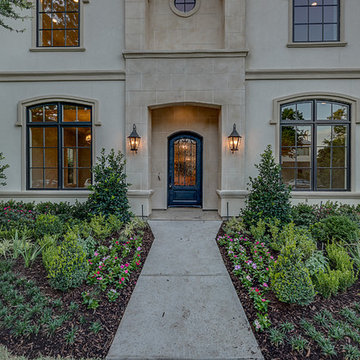
With the understated elegance seen from the front, who would suspect the avalanche of luxury beyond? Barrel vaulted entry more than 20 feet long leads to the heart of the home. Designed for entertaining, the central wet bar off the breakfast room has counter service to both family room and covered patio; elevator up to 3rd story media room. Located on nonpareil property in Highland Park, this Mediterranean home is the ultimate Bella Vita!
Find the right local pro for your project

 Epik Masonry & Concrete Inc.
Santa Barbara Sandstone Veneer
Large trendy beige two-story stone exterior home photo in Los Angeles
Large trendy beige two-story stone exterior home photo in Los Angeles
 Polaris Home Design
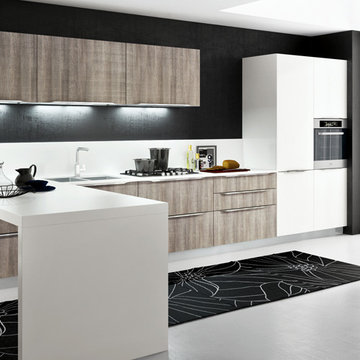
Inspiration for a mid-sized contemporary galley ceramic tile eat-in kitchen remodel in Los Angeles with a double-bowl sink, flat-panel cabinets, white cabinets, black backsplash, stainless steel appliances and an island
 Bella Vita Custom Homes & Remodeling
With the understated elegance seen from the front, who would suspect the avalanche of luxury beyond? Barrel vaulted entry more than 20 feet long leads to the heart of the home. Designed for entertaining, the central wet bar off the breakfast room has counter service to both family room and covered patio; elevator up to 3rd story media room. Located on nonpareil property in Highland Park, this Mediterranean home is the ultimate Bella Vita!
 Artisan Construction Inc.
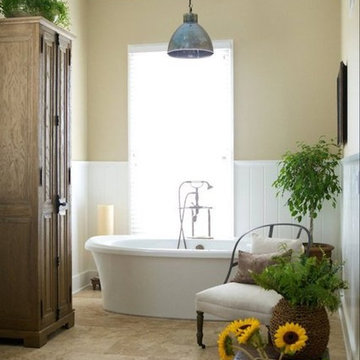
Inspiration for a mid-sized transitional master beige tile and marble tile porcelain tile freestanding bathtub remodel with furniture-like cabinets, medium tone wood cabinets, beige walls and a vessel sink
 Bella Vita Custom Homes & Remodeling
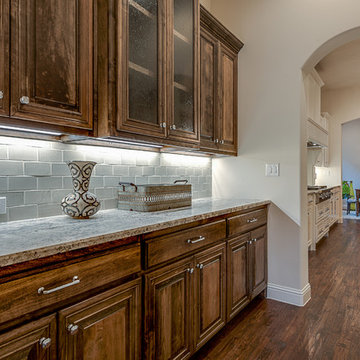
With the understated elegance seen from the front, who would suspect the avalanche of luxury beyond? Barrel vaulted entry more than 20 feet long leads to the heart of the home. Designed for entertaining, the central wet bar off the breakfast room has counter service to both family room and covered patio; elevator up to 3rd story media room. Located on nonpareil property in Highland Park, this Mediterranean home is the ultimate Bella Vita!



 Kathryn Scott
www.ellenmcdermott.com
Inspiration for a large transitional master medium tone wood floor bedroom remodel in New York with beige walls, a standard fireplace and a stone fireplace
Inspiration for a large transitional master medium tone wood floor bedroom remodel in New York with beige walls, a standard fireplace and a stone fireplace
 Simply Perfect
Many homeowners have their own ideas about how light or dark their home interiors should be. Some folks love nothing more than sunny, light-filled rooms. Other people adore their comforting, softly-lit spaces.
While light levels can be a matter of personal preference, lighting can also be a powerful tool for shaping the mood, emotional tone and usage of every room. In fact, lighting is just as important as furnishings.
Lighting Tips
1. Stay Warm
Cool light looks brighter to the eye and can seem more like daylight. It can also make your home feel like a hospital or grocery store, which is not what we’re going for. Warm light is softer and creates a more relaxed mood. That’s what you want in your home.
2. Yes, You Can
We’re big fans of can lighting. These in-ceiling lights draw zero attention to themselves while creating a foundation for excellent interior lighting. We add lamps for emphasis and mood in particular areas and put everything on a dimmer switch (see #3). This formula gives you maximum flexibility.
3. The Great Dimmer
What did people do before the dimmer switch was invented? We suspect they shielded their eyes or huddled together in the dark because there was nothing inbetween. We use dimmer switches everywhere except the bathroom. Controlling the level of every light in your home allows you to create the right mood for the moment every time.
4. Beam Me Up
We’re head over heels in love with this stunning raw wood beam wrapped with light bulbs on cords. Flip one dimmer switch and all the lights go on, at the exact intensity level you choose. The can lights in the ceiling gently illuminate the room, so this fabulous fixture can serve its true purpose—which is to create an irresistibly inviting space and a found-object, vintage vibe.
5. Open Bulb Policy
Many of our light fixtures feature exposed bulbs. Once upon a time, light bulbs might have been ugly, but clear Edison bulbs, showing the filaments within, are themselves works of art. In a chandelier with an open, orb structure, candelabra bulbs are reminiscent of candle flames. A small lamp with a square metal base and a single bulb takes the open concept one step further.
6. Double Up
Above a long dining table or bar, consider using multiple light fixtures. Especially with hanging light fixtures, we tend to think of putting just one in the middle. But lighting only the center of a long table would leave some of your dinner guests in the dark while others take the spotlight.
7. Reflections
Reflections off mirrors, glass and tile bring a secondary light source into play and add a soft, beautiful touch. Candles create particularly compelling reflections.
8. Looking Up
In high, open spaces, a light fixture can help balance the space, bringing the eye downward and helping make the area less cavernous and more inviting.
9. Looking Out
Lighting is also a safety issue. Make sure you can turn on the stair lights at the top and the bottom of the stairs. Incorporate the flexibility to light up the room you’re entering before you get there, so you aren’t stumbling around in the dark, trying to find the switch.
10. How Low Can You Go?
While low light may be flattering, people tend to err on the side of too little light, rather than too much. Turn up that dimmer a notch more than you would normally and you may like what you see. Having sufficient light is particularly important in areas such as basements, where there may be little to no natural light.
 Millar & Associates Construction
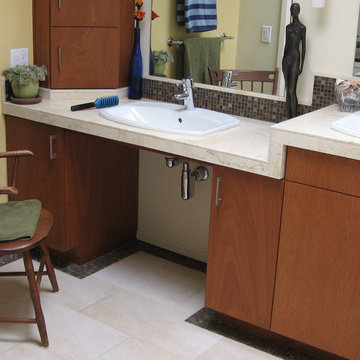
 The style is elegant, and one would never suspect that it's designed for accessibility. It just look beautiful. Photo by Bart Millar
Bathroom - mid-sized contemporary bathroom idea in Santa Barbara
Bathroom - mid-sized contemporary bathroom idea in Santa Barbara
 HouseHome
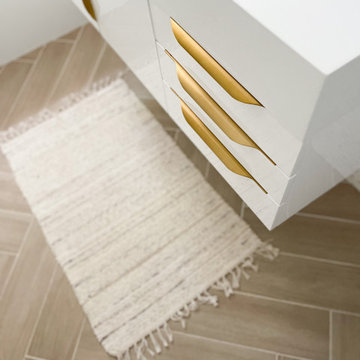
Although the Kids Bathroom was reduced in size by a few feet to add additional space in the Master Bathroom, you would never suspect it! Because of the new layout and design selections, it now feels even larger than before. We chose light colors for the walls, flooring, cabinetry, and tiles, as well as a large mirror to reflect more light. A custom linen closet with pull-out drawers and frosted glass elevates the design while remaining functional for this family. For a space created to work for a teenage boy, teen girl, and pre-teen girl, we showcase that you don’t need to sacrifice great design for functionality!
 Amy Renea
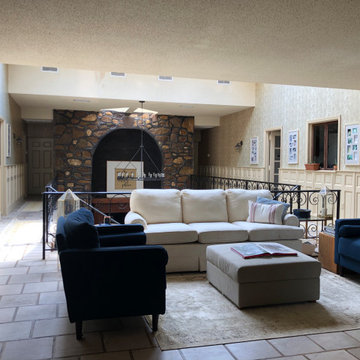
A cozy seating area sits above the courtyard. Marble floors and "wainscotting" from cut down doors were rescued from the Western National Bank and an old hotel tear down in York PA. Note the bank teller windows to the kitchen and office. Two more bank teller windows open from the bathrooms on the third level and look down into the courtyard. We suspect all the metal work is upcycled as well, but do not know the origin. The stonework is all from stones found in the creek directly on the property.
 HouseHome
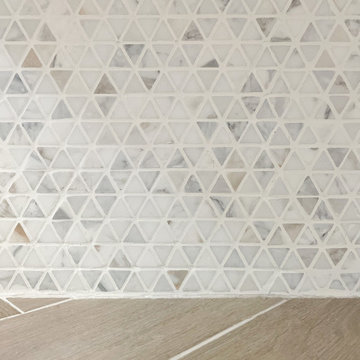
Although the Kids Bathroom was reduced in size by a few feet to add additional space in the Master Bathroom, you would never suspect it! Because of the new layout and design selections, it now feels even larger than before. We chose light colors for the walls, flooring, cabinetry, and tiles, as well as a large mirror to reflect more light. A custom linen closet with pull-out drawers and frosted glass elevates the design while remaining functional for this family. For a space created to work for a teenage boy, teen girl, and pre-teen girl, we showcase that you don’t need to sacrifice great design for functionality!
 Paradise Pools and Spas Inc.
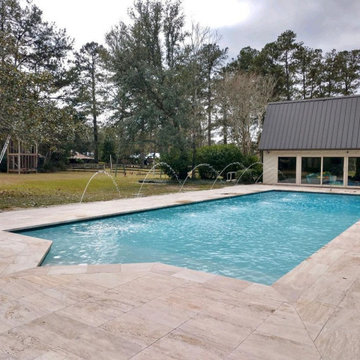
This pool just screams outdoor fun! Pool Fountains are such a valuable asset, they not only look cool but they also add some benefits. Pool Fountains cool the water through aeration. When the pool water is sprayed into the air, oxygen is introduced to all the tiny droplets. This cools them down. When they fall back into the pool, they bring that cooler temperature with them. Run a fountain long enough, and you can see a drop in temperature from 2 to 4 degrees. You know pool circulation is essential to distributing water chemicals, moving pool water through the filtration system, and preventing yucky things from growing in stagnant water. You may already suspect this from personal experience. But it’s documented that listening to water sounds has a stress-reducing effect for many people. Swimming is already one way to lower stress. Add a fountain to your pool, and increase that benefit even more. Pool fountains create some of that fun, and can possibly even keep a rainbow around for a little longer than one splash could. They’re just pretty. Pool fountains you install may not be masterpiece sculptures, but a fanned water spray is just as beautiful to watch.
 Bison Custom Cabinetry
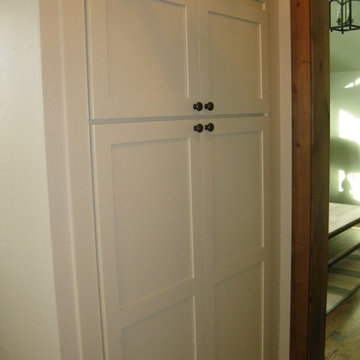
This custom laundry chute has adjoining linen storage. What a fabulous cabinet. Who would suspect from the outside how much function is inside?
Inspiration for a timeless laundry room remodel with shaker cabinets and beige cabinets
Inspiration for a timeless laundry room remodel with shaker cabinets and beige cabinets

 kmjee
kmjeePepper plants are a delightful addition to any garden, offering a vibrant burst of color and spice to your culinary creations. However, even experienced gardeners can encounter challenges when growing pepper plants. In this blog, we'll explore some common issues you might face and provide practical solutions to help your pepper plants thrive.
1. Slow or Stunted Growth
Issue: Slow or stunted growth in pepper plants can be discouraging, but there are specific steps you can take to address this issue effectively.
Solution:
a. Soil Health:
- Well-Draining Soil: Ensure your pepper plants are in well-draining soil to prevent waterlogged roots, which can inhibit growth.
- Organic Matter: Incorporate plenty of organic matter, such as compost or well-rotted manure, into the soil to improve its texture and nutrient content.
- pH Level: Test the soil pH and adjust it to the ideal range between 6.0 and 6.8 using lime or sulfur as needed.
b. Fertilization:
- Balanced Fertilizer: Use a balanced, slow-release fertilizer designed for vegetables to provide essential nutrients steadily throughout the growing season.
- Compost: Amend the soil with compost to enhance nutrient availability and soil structure. This can promote healthier growth.
c. Watering:
- Consistent Moisture: Maintain consistent soil moisture levels by watering your pepper plants regularly but avoid waterlogging. Aim for 1-2 inches of water per week, adjusting based on your local climate and weather conditions.
- Mulching: Apply mulch around the base of the plants to retain soil moisture and regulate temperature.
2. Yellowing Leaves
Issue: Yellowing leaves can be a sign of various underlying problems, but addressing them promptly can restore the vibrancy of your pepper plants.
Solution:
a. Nutrient Deficiencies:
- Balanced Fertilization: Use a well-balanced fertilizer that includes micronutrients to address nutrient deficiencies.
- Specific Nutrients: If you suspect a particular deficiency, such as magnesium, iron, or nitrogen, apply the appropriate nutrient supplement following package instructions.
b. Pest and Disease Control:
- Pest Inspection: Regularly inspect the leaves and stems for common pests like aphids and mites. Remove affected leaves and treat with organic pesticides if necessary.
- Disease Management: Look out for signs of diseases like bacterial leaf spot or fungal issues. Apply organic fungicides or bactericides as recommended.
3. Blossom Drop
Issue: When pepper plants drop their blossoms prematurely, it can hinder fruit development and lead to disappointment.
Solution:
a. Temperature Control:
- Stable Temperatures: Ensure your pepper plants are exposed to consistent temperatures between 70°F and 80°F (21°C to 27°C) during flowering. Avoid sudden temperature fluctuations by providing shelter or using row covers.
b. Pollination:
- Assist with Pollination: If growing peppers indoors or in a greenhouse, help with pollination by gently shaking the plants or using a small brush to transfer pollen between flowers. Outdoor pepper plants are usually pollinated by insects.
4. Wilting Plants
Issue: Wilting or drooping pepper plants can be a sign of various problems, but proper care can revive them.
Solution:
a. Watering:
- Consistent Moisture: Adjust your watering routine to keep the soil consistently moist but not waterlogged. Water early in the day to prevent fungal issues.
- Drainage: Ensure proper soil drainage by amending the soil or using raised beds to prevent waterlogged roots.
b. Pest Control:
- Pest Inspection: Examine the undersides of leaves for signs of pests like aphids, spider mites, or whiteflies. Treat infestations promptly with biological insecticides.
5. Curling Leaves
Issue: Curling or misshapen leaves indicate stress in pepper plants, which can be caused by various factors.
Solution:
a. Environmental Stress:
- Stable Conditions: Ensure your pepper plants are in an environment with stable humidity, temperature, and adequate air circulation. Avoid sudden changes in conditions.
- Proper Ventilation: Adequate air circulation can reduce humidity and prevent fungal issues.
b. Pest and Disease Management:
- Pest Inspection: Regularly inspect your plants for pests and diseases, addressing them promptly with organic remedies as needed.
6. Sunscald
Issue: Sunscald can lead to discolored, leathery patches on pepper fruits when exposed to intense sunlight.
Solution:
a. Shade Cloth:
- Sun Protection: Shield your pepper plants from harsh sunlight during the hottest part of the day using shade cloth or by planting them where they receive some filtered sunlight.
b. Pruning:
- Fruit Shading: Prune excess foliage to allow better fruit shading, reducing the risk of sunscald. Ensure that there's a balance between foliage and fruit.
7. Pepper Plant Pests and Diseases
Issue: Aphids, mites, whiteflies, and various diseases can affect pepper plants, but you can manage them effectively.
Solution:
a. Regular Inspection:
- Vigilant Monitoring: Regularly inspect your pepper plants for signs of pests or diseases, paying close attention to the undersides of leaves and stems.
b. Organic Remedies:
- Pest Control: Use organic remedies like neem oil, insecticidal soap, or diatomaceous earth for pest control.
- Disease Management: Apply organic fungicides or bactericides as recommended to manage diseases like powdery mildew or bacterial spot.
While growing pepper plants can present various challenges, these common issues are manageable with the right knowledge and care. Regular monitoring, proper soil preparation, and timely intervention can help you enjoy a bountiful harvest of vibrant, spicy peppers. Remember that gardening is a learning experience, and each challenge you face is an opportunity to improve your skills and enjoy the rewards of homegrown peppers in your favorite dishes.
 Tile Doctor Ltd
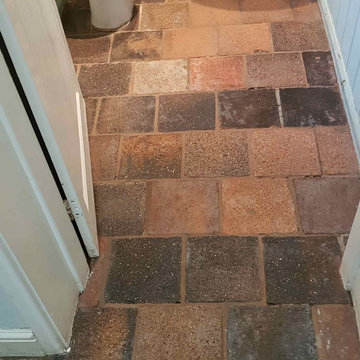
We were contacted by a client from Formby asking for advice on how to remove a thick layer of floor leveller from her Quarry tiled floor. I suspect at some point in the past a previous owner had decided to cover the tiles with lino and a cement-based levelling compound was applied to level the floor first. My client had tried to remove it herself but found it very hard going and after realising she had quite a project on her hands decided to call us instead and see if we could help with the restoration.
I worked out a quote for the client which would include removing the self-levelling compound, cleaning up the tiles and then sealing them to improve its appearance and protect it going forward. The quote was accepted, and a date agreed for the restoration to be completed which would take two days.
We have a variety of tools that we can use for removing cement but in this case, I decided to use an air operated pin gun. The head of the gun has long pins of different length which are fired at the floor gently chipping away at the floor compound, this made short work of breaking up the cement so it could be swept away. A lot easier than the method the client had previously tried.
With the floor clear of cement, it was given an acid wash with Tile Doctor Acid Gel scrubbed in with a buffing machine fitted with a black pad. The acidic formula cleans up the stone of old cement including fine particles of dust. Afterwards the gel was rinsed off the floor with water and extracted with a wet vacuum.
We let the floor dry out overnight and returned the next morning to apply the sealer. For the best results, the stone needs to be dry so before sealing I always take several moisture readings with a damp meter to make sure. The results were good so the first of what would be three coats of sealer were applied to the floor. I used Tile Doctor Colour Grow for sealing, it is an impregnating sealer that works by occupying the pores in the store thereby protecting it from within, it also brings out the colour in the stone.
Once done the floor looked great, the old self-levelling compound was gone and the rich colours in the tile had been restored. In fact is was only when finished did we realise these were in fact Baked Clay Quarry Tiles, minerals are added during manufacturing to give then colour, although 95% clay they are very tough like stone. The client was over the moon with the outcome, the floor had been restored to its’ former glory.
For aftercare I recommended the use of Tile Doctor Neutral Tile Cleaner to keep the floor in good condition. It is pH neutral so will ensure the newly applied sealer is not compromised and the floor will continue to look good for a long while to come.
Andrew Robb
Merseyside Tile Doctor

14