
Search results for "Topic covered" in Home Design Ideas
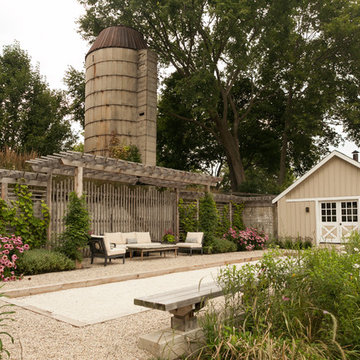
 Greenhaven Landscapes Inc.
Hear what our clients, Lisa & Rick, have to say about their project by clicking on the Facebook link and then the Videos tab.
Hannah Goering Photography
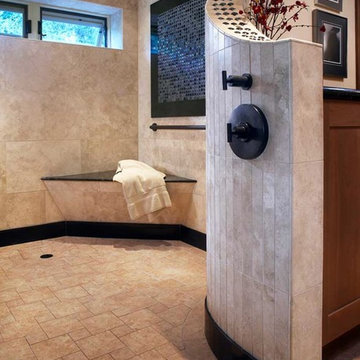
 Harrell Design + Build
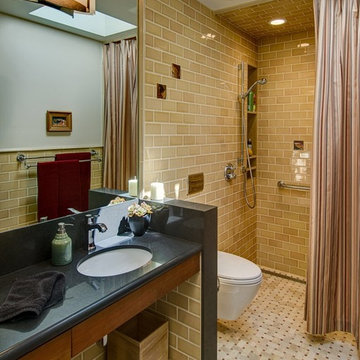
Aging gracefully...in your home. We asked Senior Designer, and Certified Aging in Place Specialist, Genie Nowicki about key ideas for bathroom design that include Aging/ Living in Place. (Universal Design)
Here are just a few of her suggestions!
1. Comfort Height Toilets (perhaps wall-hung).
2. Curb-less/walk-in showers
3. Hand-held shower heads on a bar for use at varying heights
4. Wall-hung sinks to allow seated use
5. Motion activated faucets
6. Grab Bars and Towel Bars at comfortable heights
7. Storage with easy access features, such as roll-outs.
8. Electrical outlets in drawers for convenience
9. Bidet accessories (“washlets”) on toilets for personal hygiene.
Or take a peek at our website page dedicated to this important and timely topic! ➡️ https://lnkd.in/ghRtcAr
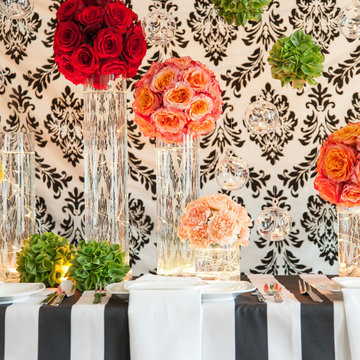
 Lights com
These micro LED strings lights are a versatile accessory with any decor. These copper wire LED string lights are fully submersible and a great option to an endless list of water based lighting projects.
Find the right local pro for your project
 Tommy Daspit Photographer
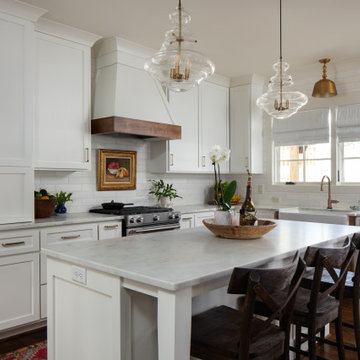
Open concept kitchen - mid-sized traditional l-shaped dark wood floor and brown floor open concept kitchen idea in Birmingham with a farmhouse sink, recessed-panel cabinets, white cabinets, marble countertops, white backsplash, ceramic backsplash, stainless steel appliances, an island and gray countertops

 Harrell Design + Build
Aging gracefully...in your home. We asked Senior Designer, and Certified Aging in Place Specialist, Genie Nowicki about key ideas for bathroom design that include Aging/ Living in Place. (Universal Design)
Here are just a few of her suggestions!
1. Comfort Height Toilets (perhaps wall-hung).
2. Curb-less/walk-in showers
3. Hand-held shower heads on a bar for use at varying heights
4. Wall-hung sinks to allow seated use
5. Motion activated faucets
6. Grab Bars and Towel Bars at comfortable heights
7. Storage with easy access features, such as roll-outs.
8. Electrical outlets in drawers for convenience
9. Bidet accessories (“washlets”) on toilets for personal hygiene.
Or take a peek at our website page dedicated to this important and timely topic! ➡️ https://lnkd.in/ghRtcAr
 Haus Interior Design
Photos by Stacy Zarin Goldberg
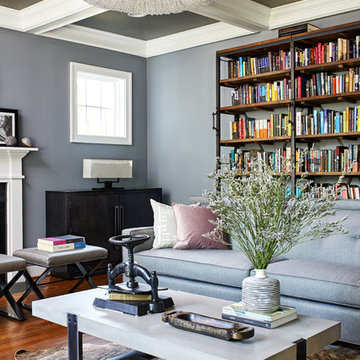
Example of a mid-sized transitional enclosed medium tone wood floor and brown floor living room library design in DC Metro with blue walls, a standard fireplace, a stone fireplace and no tv
Example of a mid-sized transitional enclosed medium tone wood floor and brown floor living room library design in DC Metro with blue walls, a standard fireplace, a stone fireplace and no tv


 Kalota Topical Inspirations
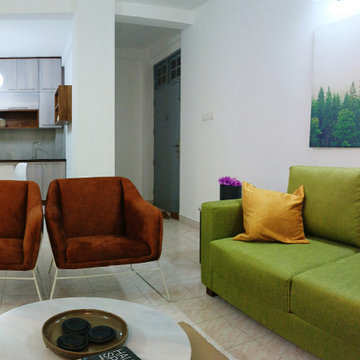
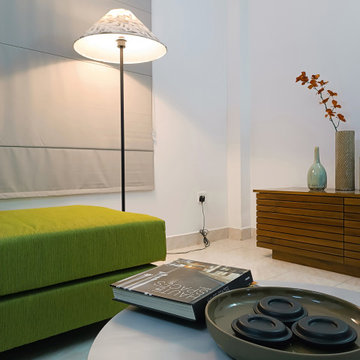
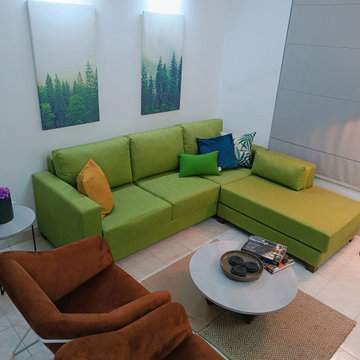
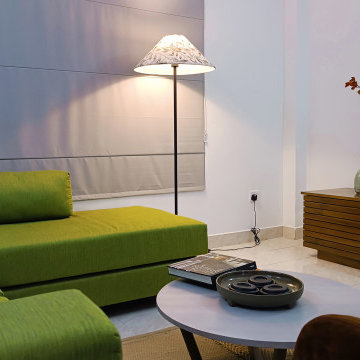
The task was to transform a timeworn two bedrooms unit at Edmonton government flats into a contemporary-style apartment. The building was constructed in 2000, and the client requested to modify the place with minimum structural changes. Therefore the whole renovation includes the least demolishes and reconstructions.
We removed the previous pantry that was broken at that time and redesigned it in a user-friendly manner. More space was given for the dining area by replacing the ‘u-shaped’ old pantry counter with a simple straight unit. We made sure to add extra storage space up to the height of the ceiling. The main construction challenge was to renovate the existing bathrooms. Kalota changed its appearance by carefully paying attention to waterproofing and adding new accessories and tiles. The living room was transformed into a more spacious seating area with modern furniture and the correct balance of lighting. We applied colors and wall textures to enhance the contemporary ambiance. The fabrications of the interior were completed under the supervision of Kalota. A special thank goes to the client for providing us with the necessary freedom to design and complete the project.
 Kalota Topical Inspirations
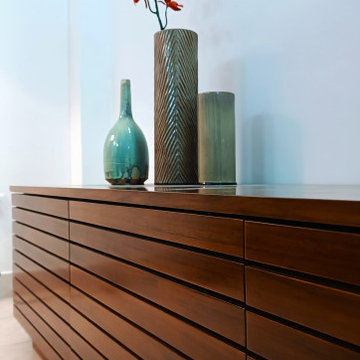
The task was to transform a timeworn two bedrooms unit at Edmonton government flats into a contemporary-style apartment. The building was constructed in 2000, and the client requested to modify the place with minimum structural changes. Therefore the whole renovation includes the least demolishes and reconstructions.
We removed the previous pantry that was broken at that time and redesigned it in a user-friendly manner. More space was given for the dining area by replacing the ‘u-shaped’ old pantry counter with a simple straight unit. We made sure to add extra storage space up to the height of the ceiling. The main construction challenge was to renovate the existing bathrooms. Kalota changed its appearance by carefully paying attention to waterproofing and adding new accessories and tiles. The living room was transformed into a more spacious seating area with modern furniture and the correct balance of lighting. We applied colors and wall textures to enhance the contemporary ambiance. The fabrications of the interior were completed under the supervision of Kalota. A special thank goes to the client for providing us with the necessary freedom to design and complete the project.
 Kalota Topical Inspirations
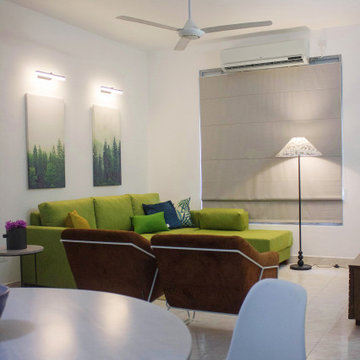
The task was to transform a timeworn two bedrooms unit at Edmonton government flats into a contemporary-style apartment. The building was constructed in 2000, and the client requested to modify the place with minimum structural changes. Therefore the whole renovation includes the least demolishes and reconstructions.
We removed the previous pantry that was broken at that time and redesigned it in a user-friendly manner. More space was given for the dining area by replacing the ‘u-shaped’ old pantry counter with a simple straight unit. We made sure to add extra storage space up to the height of the ceiling. The main construction challenge was to renovate the existing bathrooms. Kalota changed its appearance by carefully paying attention to waterproofing and adding new accessories and tiles. The living room was transformed into a more spacious seating area with modern furniture and the correct balance of lighting. We applied colors and wall textures to enhance the contemporary ambiance. The fabrications of the interior were completed under the supervision of Kalota. A special thank goes to the client for providing us with the necessary freedom to design and complete the project.
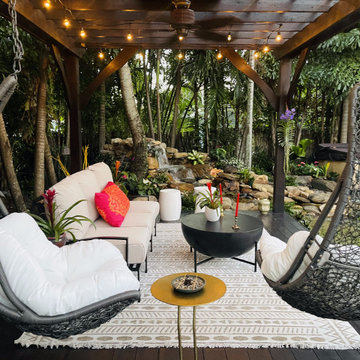
 Magic Garden Dreams
Balinese style water garden including a pond less waterfall and 18’ stream, crossed by a custom made wooden bridge and stone mosaic pathway. 12’ x 16’ Pergola custom built to enjoy the sound of the running water.
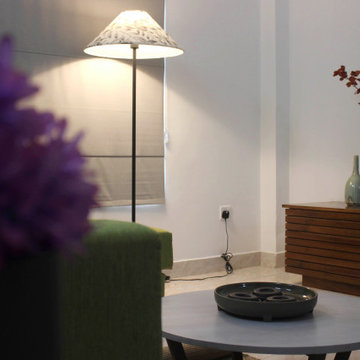 Kalota Topical Inspirations
The task was to transform a timeworn two bedrooms unit at Edmonton government flats into a contemporary-style apartment. The building was constructed in 2000, and the client requested to modify the place with minimum structural changes. Therefore the whole renovation includes the least demolishes and reconstructions.
We removed the previous pantry that was broken at that time and redesigned it in a user-friendly manner. More space was given for the dining area by replacing the ‘u-shaped’ old pantry counter with a simple straight unit. We made sure to add extra storage space up to the height of the ceiling. The main construction challenge was to renovate the existing bathrooms. Kalota changed its appearance by carefully paying attention to waterproofing and adding new accessories and tiles. The living room was transformed into a more spacious seating area with modern furniture and the correct balance of lighting. We applied colors and wall textures to enhance the contemporary ambiance. The fabrications of the interior were completed under the supervision of Kalota. A special thank goes to the client for providing us with the necessary freedom to design and complete the project.

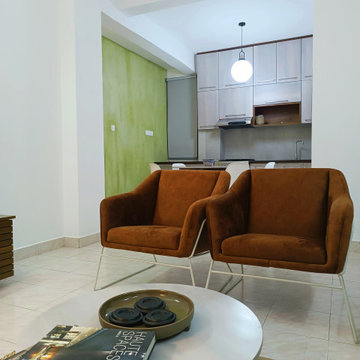 Kalota Topical Inspirations
The task was to transform a timeworn two bedrooms unit at Edmonton government flats into a contemporary-style apartment. The building was constructed in 2000, and the client requested to modify the place with minimum structural changes. Therefore the whole renovation includes the least demolishes and reconstructions.
We removed the previous pantry that was broken at that time and redesigned it in a user-friendly manner. More space was given for the dining area by replacing the ‘u-shaped’ old pantry counter with a simple straight unit. We made sure to add extra storage space up to the height of the ceiling. The main construction challenge was to renovate the existing bathrooms. Kalota changed its appearance by carefully paying attention to waterproofing and adding new accessories and tiles. The living room was transformed into a more spacious seating area with modern furniture and the correct balance of lighting. We applied colors and wall textures to enhance the contemporary ambiance. The fabrications of the interior were completed under the supervision of Kalota. A special thank goes to the client for providing us with the necessary freedom to design and complete the project.
 Kalota Topical Inspirations
The task was to transform a timeworn two bedrooms unit at Edmonton government flats into a contemporary-style apartment. The building was constructed in 2000, and the client requested to modify the place with minimum structural changes. Therefore the whole renovation includes the least demolishes and reconstructions.
We removed the previous pantry that was broken at that time and redesigned it in a user-friendly manner. More space was given for the dining area by replacing the ‘u-shaped’ old pantry counter with a simple straight unit. We made sure to add extra storage space up to the height of the ceiling. The main construction challenge was to renovate the existing bathrooms. Kalota changed its appearance by carefully paying attention to waterproofing and adding new accessories and tiles. The living room was transformed into a more spacious seating area with modern furniture and the correct balance of lighting. We applied colors and wall textures to enhance the contemporary ambiance. The fabrications of the interior were completed under the supervision of Kalota. A special thank goes to the client for providing us with the necessary freedom to design and complete the project.
 Kalota Topical Inspirations
The task was to transform a timeworn two bedrooms unit at Edmonton government flats into a contemporary-style apartment. The building was constructed in 2000, and the client requested to modify the place with minimum structural changes. Therefore the whole renovation includes the least demolishes and reconstructions.
We removed the previous pantry that was broken at that time and redesigned it in a user-friendly manner. More space was given for the dining area by replacing the ‘u-shaped’ old pantry counter with a simple straight unit. We made sure to add extra storage space up to the height of the ceiling. The main construction challenge was to renovate the existing bathrooms. Kalota changed its appearance by carefully paying attention to waterproofing and adding new accessories and tiles. The living room was transformed into a more spacious seating area with modern furniture and the correct balance of lighting. We applied colors and wall textures to enhance the contemporary ambiance. The fabrications of the interior were completed under the supervision of Kalota. A special thank goes to the client for providing us with the necessary freedom to design and complete the project.
 Kalota Topical Inspirations
The task was to transform a timeworn two bedrooms unit at Edmonton government flats into a contemporary-style apartment. The building was constructed in 2000, and the client requested to modify the place with minimum structural changes. Therefore the whole renovation includes the least demolishes and reconstructions.
We removed the previous pantry that was broken at that time and redesigned it in a user-friendly manner. More space was given for the dining area by replacing the ‘u-shaped’ old pantry counter with a simple straight unit. We made sure to add extra storage space up to the height of the ceiling. The main construction challenge was to renovate the existing bathrooms. Kalota changed its appearance by carefully paying attention to waterproofing and adding new accessories and tiles. The living room was transformed into a more spacious seating area with modern furniture and the correct balance of lighting. We applied colors and wall textures to enhance the contemporary ambiance. The fabrications of the interior were completed under the supervision of Kalota. A special thank goes to the client for providing us with the necessary freedom to design and complete the project.
Sponsored
Columbus, OH
Free consultation for landscape design!

Peabody Landscape Group
Franklin County's Reliable Landscape Design & Contracting
 Kalota Topical Inspirations
The task was to transform a timeworn two bedrooms unit at Edmonton government flats into a contemporary-style apartment. The building was constructed in 2000, and the client requested to modify the place with minimum structural changes. Therefore the whole renovation includes the least demolishes and reconstructions.
We removed the previous pantry that was broken at that time and redesigned it in a user-friendly manner. More space was given for the dining area by replacing the ‘u-shaped’ old pantry counter with a simple straight unit. We made sure to add extra storage space up to the height of the ceiling. The main construction challenge was to renovate the existing bathrooms. Kalota changed its appearance by carefully paying attention to waterproofing and adding new accessories and tiles. The living room was transformed into a more spacious seating area with modern furniture and the correct balance of lighting. We applied colors and wall textures to enhance the contemporary ambiance. The fabrications of the interior were completed under the supervision of Kalota. A special thank goes to the client for providing us with the necessary freedom to design and complete the project.
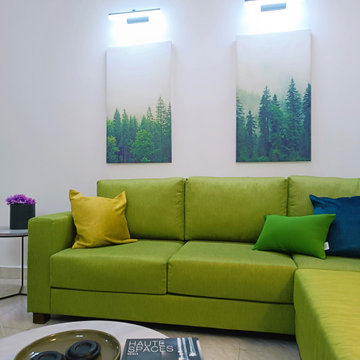 Kalota Topical Inspirations
The task was to transform a timeworn two bedrooms unit at Edmonton government flats into a contemporary-style apartment. The building was constructed in 2000, and the client requested to modify the place with minimum structural changes. Therefore the whole renovation includes the least demolishes and reconstructions.
We removed the previous pantry that was broken at that time and redesigned it in a user-friendly manner. More space was given for the dining area by replacing the ‘u-shaped’ old pantry counter with a simple straight unit. We made sure to add extra storage space up to the height of the ceiling. The main construction challenge was to renovate the existing bathrooms. Kalota changed its appearance by carefully paying attention to waterproofing and adding new accessories and tiles. The living room was transformed into a more spacious seating area with modern furniture and the correct balance of lighting. We applied colors and wall textures to enhance the contemporary ambiance. The fabrications of the interior were completed under the supervision of Kalota. A special thank goes to the client for providing us with the necessary freedom to design and complete the project.
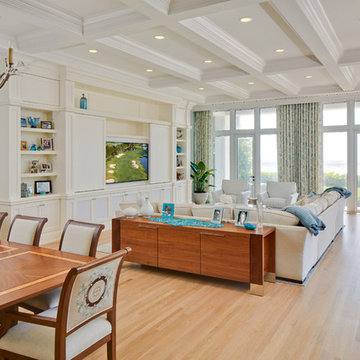
 W.A. Bentz Construction, Inc.
The Art of Turning a House into a Home
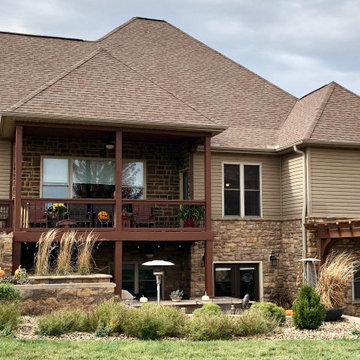
Remodeling or custom-creating elements of the home to suit the client’s taste is an art – one of which Bentz has delicately mastered. With careful attention to detail, W.A. Bentz Construction can steer any project in the right direction, from complete interior and exterior home renovations to deck or room additions.
Each member of the W.A. Bentz Construction team is licensed, insured and experienced at all facets of home renovations. They can advise on a variety of building topics such as: which projects are likely to increase the value of a home; whether or not a building permit is needed; and which design ideas work well for the space. They also take careful precautions throughout the building process to protect the home and ensure maximum security.
With over 35 years of experience plus access to a vast network of top subcontractors in the area, Bentz and his team flawless manage each project so that it’s completed on time, on budget, and to the client’s expectations.
4