
Search results for "Typically involves" in Home Design Ideas
 Mindy Khan
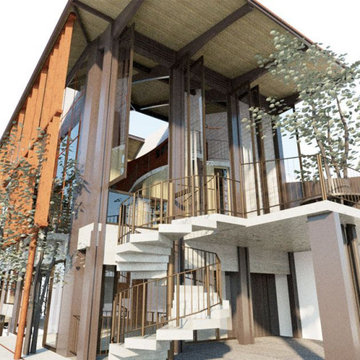
Let's face it: times are changing. We're living in an era where technology advances at a fast pace and its developments have a significant impact on the surroundings. The need for environmental solutions has become more urgent with each passing day.
While we live and adapt to our immediate environment, it doesn't mean that we have to settle with what's present, especially when our surrounding conditions are becoming detrimental to our wellbeing. This is the reason Singapore architects are looking into eco-friendly approaches when designing residential spaces.
Singapore architects are becoming more proactive in integrating eco-friendly principles in their residential projects. Below are some of the standout reasons why:
1. You get to practice energy efficiency.
In typical homes, electricity is powered by non-renewable sources. The continuous use of non-renewable energy increases carbon footprint and worsens air pollution, both of which negatively affect the environment.
However, there are alternative sources of energy that can be included in your home's architectural design. These include solar panels and wind turbines that produce electricity that can keep the house powered. These methods do not produce toxic compounds or carbon emissions; they are also renewable and do not incur recurring expenses.
2. Eco-friendly architecture brings you closer to a more "natural environment."
The emergence of urban landscapes has deprived today's generation of the opportunity to be one with nature. Individuals these days have to travel to the countryside to enjoy nature's beauty and all the amazing benefits it has to offer.
Fortunately, eco-friendly architecture provides a route where you can better appreciate many of the benefits nature offers. As a homeowner, you must enjoy a calm, clean, and fresh indoor environment.
Eco-friendly approaches to homes aim to provide this kind of atmosphere through the use of local materials, renewable energy sources, and incorporating nature's elements (such as sunlight and air ventilation) on the structural design.
3. You save money for maintenance and upkeep.
Eco-friendly architecture is known for its low maintenance costs. At first glance, you may find it expensive to build a "green home." However, since it makes use of renewable energy sources and local resources for upkeep, operational costs become much cheaper compared to living in a conventional home.
Also, green homes promote material efficiency. Apart from using local resources, eco-friendly construction involves building processes that generate as little waste as possible.
Recycled and reusable materials are preferred in building the home, while the architectural design follows construction techniques that use less energy, water, and raw materials.
4. You enjoy better health.
Living in a green home offers a lot of health benefits. For instance, eco-friendly architecture supports the use of natural materials and it discourages having plastic by-products in the building process.
At the same time, eco-friendly architectural designs look into utilising vertical space to boost freedom of movement and air circulation. These spatial strategies allow you to breathe better even while indoors and move around the house without feeling cramped.
Lastly, utilising vertical space offers more natural light to enter the home. Natural light is essential not just because it illuminates the house during the day, it also regulates the circadian rhythm, which dictates our body's waking and sleeping hours.
In a nutshell
Eco-friendly homes can help you save money and time, not to mention improve your health dramatically. Moreover, it can also help reduce your environmental footprint significantly. From improving air quality to helping regulate the effects of climate change, eco-friendly homes allow you to live a more sustainable lifestyle.
 Talon Construction Inc.
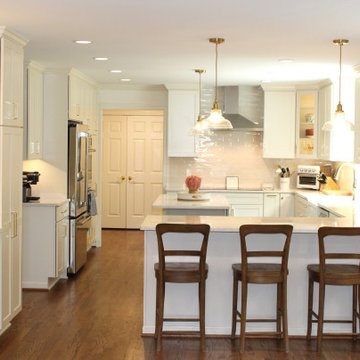
Finding a reputable contractor to design and build your kitchen remodel in Maryland with quality results involves several steps. Here are some general guidelines to help you find the right professional for your project:
1. Ask for Recommendations: Start by asking friends, family, neighbors, or colleagues who have recently completed kitchen remodels for recommendations. Personal referrals can be a valuable source of trustworthy contractors.
2. Check Online Reviews: Websites like Yelp, Angie's List, and Google Reviews can provide insights into the experiences of previous clients. Look for contractors with consistently positive feedback.
3. Check Credentials: Verify that the contractor has the necessary licenses and insurance to work in Maryland. You can typically check this information on your state's licensing board website.
4. Ask for References: Request references from the contractor and contact previous clients to inquire about their experiences. Visit some of their completed projects if possible.
5. Review Portfolios: Examine the contractor's portfolio of past kitchen remodels. Look for examples of work that match your style and preferences.
6. Check for Permits: Ensure that the contractor will handle any necessary permits and inspections for your remodel. Avoid contractors who suggest bypassing required permits, as this can lead to legal and safety issues.
7. Discuss Communication: Clear communication is crucial throughout the project. Discuss how the contractor will keep you updated on progress and address any concerns or changes during the remodel.
8. Get Everything in Writing: Never rely solely on verbal agreements. Ensure that all project details, warranties, and expectations are documented in a written contract.
9. Check for Red Flags: Be wary of contractors who pressure you into making quick decisions, lack a physical business address, or have a history of disputes or legal issues.
10. Trust Your Instincts: Choose a contractor you feel comfortable working with. Trust your instincts and select someone who listens to your ideas and concerns.
11. Visit Completed Projects: If possible, visit some of the contractors’ completed kitchen remodels to assess the quality of their work in person.
Once you've completed your due diligence and gathered all the necessary information, you'll be better equipped to make an informed decision about which contractor to hire for your kitchen remodel in Maryland. Remember that quality results often come from working with experienced, licensed professionals who prioritize clear communication and transparency throughout the project.
 Alair Homes South Tampa
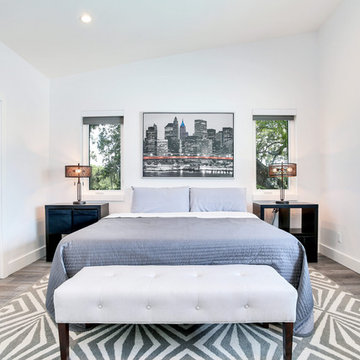
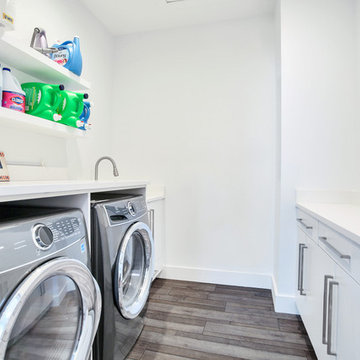
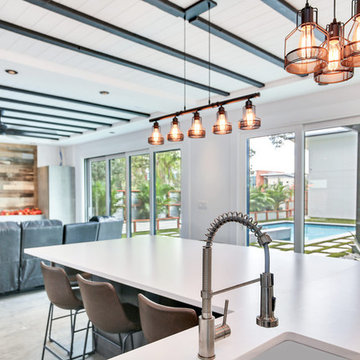
During the planning phase we undertook a fairly major Value Engineering of the design to ensure that the project would be completed within the clients budget. The client identified a ‘Fords Garage’ style that they wanted to incorporate. They wanted an open, industrial feel, however, we wanted to ensure that the property felt more like a welcoming, home environment; not a commercial space. A Fords Garage typically has exposed beams, ductwork, lighting, conduits, etc. But this extent of an Industrial style is not ‘homely’. So we incorporated tongue and groove ceilings with beams, concrete colored tiled floors, and industrial style lighting fixtures.
During construction the client designed the courtyard, which involved a large permit revision and we went through the full planning process to add that scope of work.
The finished project is a gorgeous blend of industrial and contemporary home style.
Find the right local pro for your project
 Tom Brzoskwinia
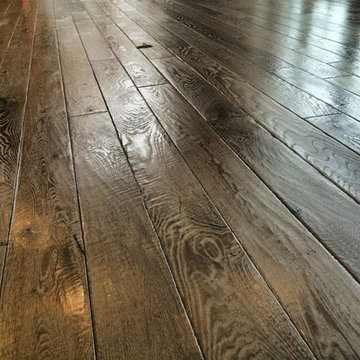
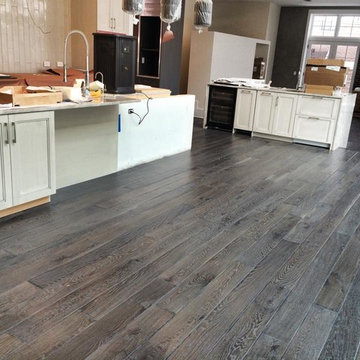
One of the most popular hardwood floor finishing which offers Tom & Peter Flooring is provided by WOCA. If you’ve decided that you want a natural looking wooden floor that is lacquer-free, then the likelihood is that you’ve chosen oil as your way of protecting your wood and making your floor look great at the same time. WOCA for wood flooring comes in various forms and is a great way of making sure that your wood is protected, but at the same time looks natural. A highly popular as well as effective way of treating wood floors, oils effectively penetrate into the wood and in some cases harden into the surface of the floor to stop damage and to maintain the wood in its optimum condition.
WOCA Oil finish hardwood flooring has taken the United States market by in 2014 and shows no signs of slowing down in 2016 and now. Here are some of the most common questions we have regarding this type of finish which we will I’m to answer in today’s my blog:
Is oil finish as durable as traditional factory urethane finishes with aluminum oxide?
When it comes to durability, oil finish flooring tackles the issue with a completely different method. The penetrating oil serves as protection from moisture and wear while allowing the user to feel the wood grains in their bare feet. If compared directly to factory finished aluminum oxide finish, the oil finish flooring will not perform as well to abrasion and impact. However, the beauty of this finish is the fact that it will camouflage any scratches which will inevitably accumulate over time.
Will this finish evaporate over time and will this be harmful for indoor air quality?
Another concern for oil finished floors its effect on indoor air quality. For on-site applications, some varieties suggest several coats which typically require the residents to be out of the home due to mild odors. However, there are factory finished UV-cured or single coat applications which lessen the downtime. Despite the odors produced during the drying process, oil finish floors rank amongst the lowest for VOC (volatile organic compound) emissions. Certain brands even boast true zero VOC. This fact alone makes oil finished floors one of the best options for green building solutions.
“WOCA products are certified by independent laboratories, the German Institute for Biological Building Materials, and are in accordance with DIN–Norm 53–160. WOCA WoodCare Denmark products meet or exceed the most stringent U.S. standards for volatile organic compounds.” –WOCA Oil Finish Manufacture
Does this type of finish require additional maintenance which I am not familiar with?
For weekly cleaning, oiled floors use a special cleaner which contains an oil and soap mixture. After a period of 12-18 months some oil may evaporate causing the wood grains to appear dry. An additional layer of oil can be reapplied to keep the floor looking fresh. Although oil finished floors require more involvement in periodic maintenance in high traffic areas, this maintenance can be done much easier than the equivalent of an onsite sand and refinish.
WOCA Master Color Oil contains pigment, which provides a single-step hardwood floor staining process. Laying down the stain and the finish in one step.
This product comes 14 different colors, from Black to Extra White, and you can mix them freely to create various color palettes that will meet the demands of any job.
Below are some pictures of the finished job…
 KSI Kitchen & Bath
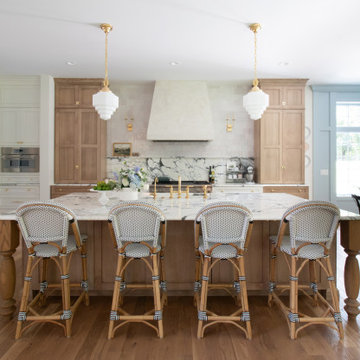
While KSI designers typically work directly with homeowners on their kitchen and bath design projects, we also love partnering with interior designers - and they love partnering with us! We make it easy for interior designers to create beautiful and functional spaces for their clients by offering our cabinetry knowledge and design expertise to compliment their skillset. When Interior Designer Shannon Lawrason came to KSI to select cabinetry for her new build home, I knew our collaboration would result in a truly breathtaking kitchen!
As a client and an Interior Designer, Shannon had a vision from the beginning: Timeless beauty with a touch of classic elements. Everything involved in the mixture of textures – hardware selection, tile selections, marble, cabinetry materials – was fundamental to the execution of the design intent.
 Vetter Architects
A tea pot, being a vessel, is defined by the space it contains, it is not the tea pot that is important, but the space.
Crispin Sartwell
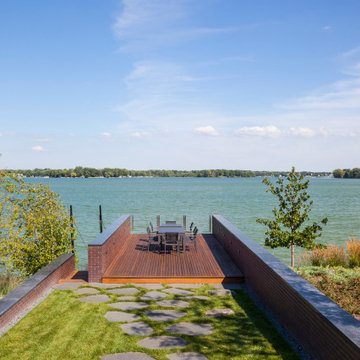
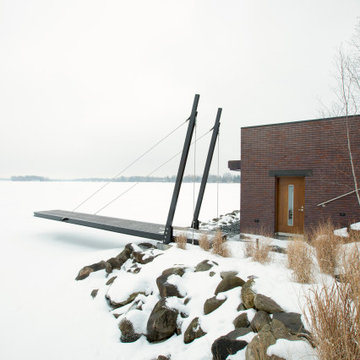
Located on a lake outside of Milwaukee, the Vessel House is the culmination of an intense 5 year collaboration with our client and multiple local craftsmen focused on the creation of a modern analogue to the Usonian Home.
As with most residential work, this home is a direct reflection of it’s owner, a highly educated art collector with a passion for music, fine furniture, and architecture. His interest in authenticity drove the material selections such as masonry, copper, and white oak, as well as the need for traditional methods of construction.
The initial diagram of the house involved a collection of embedded walls that emerge from the site and create spaces between them, which are covered with a series of floating rooves. The windows provide natural light on three sides of the house as a band of clerestories, transforming to a floor to ceiling ribbon of glass on the lakeside.
The Vessel House functions as a gallery for the owner’s art, motorcycles, Tiffany lamps, and vintage musical instruments – offering spaces to exhibit, store, and listen. These gallery nodes overlap with the typical house program of kitchen, dining, living, and bedroom, creating dynamic zones of transition and rooms that serve dual purposes allowing guests to relax in a museum setting.
Through it’s materiality, connection to nature, and open planning, the Vessel House continues many of the Usonian principles Wright advocated for.
Overview
Oconomowoc, WI
Completion Date
August 2015
Services
Architecture, Interior Design, Landscape Architecture
 Cure Design Group
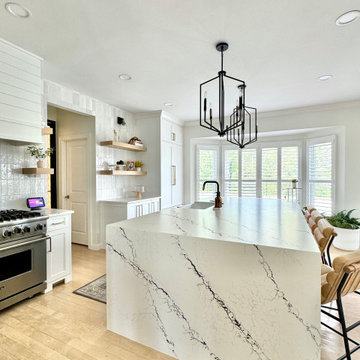
A stunning Kitchen remodel that totally transformed this home. Completely changing the previous layout with builder grade cherry cabinets, a typical peninsula island extending from the left perimeter wall, paired with the non functional, small footprint, this Kitchen needed a complete gut. Our team had an immediate vision. One that would involve a new layout including different appliance locations and extending full width of the perimeter walls left to right to maximize the space. We included a prep area, small hidden appliance garage for storage and the extra large island allowing for enough seating to eliminate a traditional table and chairs. The full counter to ceiling tile backsplash adds the perfect detail to the warm wood floating shelves that enhances the tall ceiling height along with a custom, floor to ceiling wine refrigerator with custom iron and glass door in the center to the space creating a new focal point with the waterfall edge island. The refreshing light and bright palette, luxurious finishes while leaning in to the contrast and warm modern feel.
 Vetter Architects
A tea pot, being a vessel, is defined by the space it contains, it is not the tea pot that is important, but the space.
Crispin Sartwell
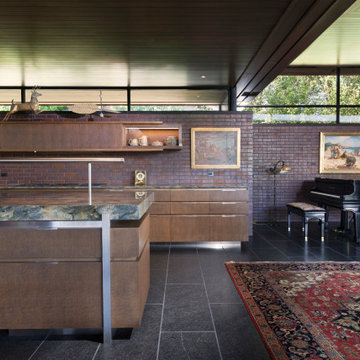
Located on a lake outside of Milwaukee, the Vessel House is the culmination of an intense 5 year collaboration with our client and multiple local craftsmen focused on the creation of a modern analogue to the Usonian Home.
As with most residential work, this home is a direct reflection of it’s owner, a highly educated art collector with a passion for music, fine furniture, and architecture. His interest in authenticity drove the material selections such as masonry, copper, and white oak, as well as the need for traditional methods of construction.
The initial diagram of the house involved a collection of embedded walls that emerge from the site and create spaces between them, which are covered with a series of floating rooves. The windows provide natural light on three sides of the house as a band of clerestories, transforming to a floor to ceiling ribbon of glass on the lakeside.
The Vessel House functions as a gallery for the owner’s art, motorcycles, Tiffany lamps, and vintage musical instruments – offering spaces to exhibit, store, and listen. These gallery nodes overlap with the typical house program of kitchen, dining, living, and bedroom, creating dynamic zones of transition and rooms that serve dual purposes allowing guests to relax in a museum setting.
Through it’s materiality, connection to nature, and open planning, the Vessel House continues many of the Usonian principles Wright advocated for.
Overview
Oconomowoc, WI
Completion Date
August 2015
Services
Architecture, Interior Design, Landscape Architecture
 Natural Stone Institute
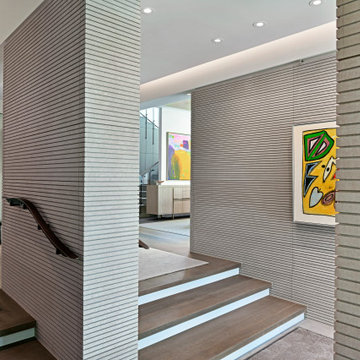
This private residence involved construction of a modern architectural style estate property in Highland Park, Texas. Dee Brown Inc’s role came into play late in the project, when corrections were needed to some specialty stonework.
The home’s center is formed around the main entry. The floorplan is largely open, but parallel core wall areas serve to define the foyer, kitchen, dining, and living areas. As key areas, the architect put special focus on materials selection for the core walls. It was decided that Indiana limestone would be the finish, and that the cladding panels would all have unique continuous horizontal grooves.
Material was received and installed by the original subcontractor. Upon seeing the completed work, it was evident to the architect and owner that grooves in the fabricated material were not consistent, and that the installation process had left numerous chips to the panels. It was at this point that the partially completed work was removed, and the second fabricator/installer was contacted.
Dee Brown Inc ordered the Indiana limestones slabs. There, special care was taken to hold tight tolerances to the horizontal grooves as well as to the typical cut-to-size aspects. Erection of these mechanically set panels was done very carefully. The result was a clean finished product with none of the tolerance and chipping issues of the original installation.
Dee Brown, Inc also created and installed special stone finishes at the adjacent half-bath. Semi-precious white onyx was transformed into a lavatory top/bowl assembly, water-closet wall cladding, and even tissue and towel holders.
 Gilley Kitchen + Bath
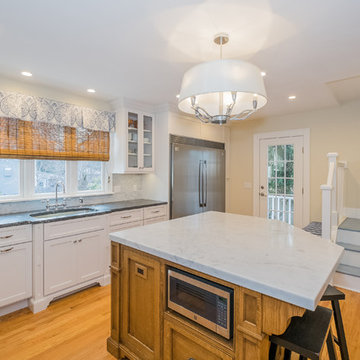
This project involved relocating a half-bath, adding an exterior door and landing and opening an existing stairway. The quarter-sawn White Oak island was designed and built to emulate furniture pieces typical to the vintage and quality of this majestic 1920's home.
Nathan Spotts- Photographer
 Gallery KBNY
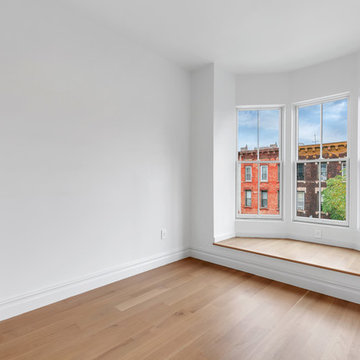
This brownstone renovation was a full gut project in every sense of the word. On top of installing new floors, a kitchen and bath renovation, and all the typical restoration and refinishing involved in a brownstone built in 1899, we also completely updated the exterior, constructed a balcony that was not originally there, and converted the space from a single-family home into an an owner’s triplex. A newly separated studio rental on the garden level offers the opportunity for supplemental income, an uncommon and welcome addition to a New York brownstone.
A TRANSITIONAL GEM
The result is a two-family brownstone that perfectly combines classic townhouse living with today’s modern needs, including SmartHome technology that we installed to control Bluetooth speakers, Nest thermostats, and the security system.
The overall aesthetic goal was to pay homage to the historical periods the brownstone has lived through in a cohesive way that is the hallmark of modern transitional style.
In the kitchen, white Shaker-style cabinetry, a subway tile backsplash, and marble rather than quartz countertops bring a classically upscale sensibility. To modernize the space further, we opened up the back wall to create floor-to-ceiling windows that are also doors, opening up into the newly built balcony.
TIMELY TOUCHES
This brownstone renovation included many quintessential elements, such as millwork like the ceiling medallions. We restored some and custom built others, perfectly recreating their original appearance.
The heated master bathroom is now serene, with a walk-in shower featuring a subtly modern linear drain. A herringbone Carrera marble tiled floor and marble slab sink complete the scene. In the powder room, we embraced a contemporary look by pairing dark hexagonal floors with light chevron tiles, accented with dramatic navy blue wallpaper. With its clear-cut 1920s-style, we selected the wall sconce to reference one of the brownstone’s earlier eras.
DESIGN DETAILS
Natural oak herringbone floors we installed throughout the entire home bring a modern yet warm touch. We restored the wood-burning marble fireplace, which is fully functioning. An elegant staircase with a custom-crafted black wooden banister and white balusters winds up and down alongside a real brick interior wall that we restored and refinished.
In this brownstone renovation, we were also able to create ceiling height, an unexpected yet aesthetically pleasing side benefit. When working on the joists and beams to level out the floors (a common issue in pre-war renovations) we added ceiling height in the main parlor floor by taking the second floor and raising the ceiling an entire foot. The end result is a main floor with stunning 9-foot ceilings.
SOME HIGHLIGHTS
- Solid natural oak herringbone floors throughout
- A fully restored, refinished, and functioning wood burning fireplace with a marble mantle
- Complete exterior renovation of the facade, cornices, windows, mouldings, and even the ironwork, including the railings leading up to the stoop and those facing the street
- A brand new central air and heating system with uniquely modern vents – look above the couch in the living room with the fuzzy rug and large painting
Considering a brownstone renovation? Contact us today! We specialize in brownstone renovations in New York as well as all pre-war apartments. When you work with a design-and-build firm like Gallery to renovate your brownstone, you get the full range of our expertise in working with all the finest details and pre-war architectural elements of these classic New York spaces. We also handle every step of the process, from filing permits and organizing schedules to sourcing custom pieces and building entirely new rooms (or even balconies). Call us for a free initial consultation when you’re ready.
 Alair Homes South Tampa
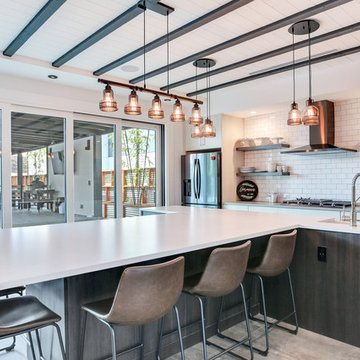
During the planning phase we undertook a fairly major Value Engineering of the design to ensure that the project would be completed within the clients budget. The client identified a ‘Fords Garage’ style that they wanted to incorporate. They wanted an open, industrial feel, however, we wanted to ensure that the property felt more like a welcoming, home environment; not a commercial space. A Fords Garage typically has exposed beams, ductwork, lighting, conduits, etc. But this extent of an Industrial style is not ‘homely’. So we incorporated tongue and groove ceilings with beams, concrete colored tiled floors, and industrial style lighting fixtures.
During construction the client designed the courtyard, which involved a large permit revision and we went through the full planning process to add that scope of work.
The finished project is a gorgeous blend of industrial and contemporary home style.
 Tom Brzoskwinia
One of the most popular hardwood floor finishing which offers Tom & Peter Flooring is provided by WOCA. If you’ve decided that you want a natural looking wooden floor that is lacquer-free, then the likelihood is that you’ve chosen oil as your way of protecting your wood and making your floor look great at the same time. WOCA for wood flooring comes in various forms and is a great way of making sure that your wood is protected, but at the same time looks natural. A highly popular as well as effective way of treating wood floors, oils effectively penetrate into the wood and in some cases harden into the surface of the floor to stop damage and to maintain the wood in its optimum condition.
WOCA Oil finish hardwood flooring has taken the United States market by in 2014 and shows no signs of slowing down in 2016 and now. Here are some of the most common questions we have regarding this type of finish which we will I’m to answer in today’s my blog:
Is oil finish as durable as traditional factory urethane finishes with aluminum oxide?
When it comes to durability, oil finish flooring tackles the issue with a completely different method. The penetrating oil serves as protection from moisture and wear while allowing the user to feel the wood grains in their bare feet. If compared directly to factory finished aluminum oxide finish, the oil finish flooring will not perform as well to abrasion and impact. However, the beauty of this finish is the fact that it will camouflage any scratches which will inevitably accumulate over time.
Will this finish evaporate over time and will this be harmful for indoor air quality?
Another concern for oil finished floors its effect on indoor air quality. For on-site applications, some varieties suggest several coats which typically require the residents to be out of the home due to mild odors. However, there are factory finished UV-cured or single coat applications which lessen the downtime. Despite the odors produced during the drying process, oil finish floors rank amongst the lowest for VOC (volatile organic compound) emissions. Certain brands even boast true zero VOC. This fact alone makes oil finished floors one of the best options for green building solutions.
“WOCA products are certified by independent laboratories, the German Institute for Biological Building Materials, and are in accordance with DIN–Norm 53–160. WOCA WoodCare Denmark products meet or exceed the most stringent U.S. standards for volatile organic compounds.” –WOCA Oil Finish Manufacture
Does this type of finish require additional maintenance which I am not familiar with?
For weekly cleaning, oiled floors use a special cleaner which contains an oil and soap mixture. After a period of 12-18 months some oil may evaporate causing the wood grains to appear dry. An additional layer of oil can be reapplied to keep the floor looking fresh. Although oil finished floors require more involvement in periodic maintenance in high traffic areas, this maintenance can be done much easier than the equivalent of an onsite sand and refinish.
WOCA Master Color Oil contains pigment, which provides a single-step hardwood floor staining process. Laying down the stain and the finish in one step.
This product comes 14 different colors, from Black to Extra White, and you can mix them freely to create various color palettes that will meet the demands of any job.
Below are some pictures of the finished job…

 John
JohnCoco coir is a versatile and sustainable growing medium that is gaining popularity among gardeners. Made from the fibrous husk of coconuts, it’s an eco-friendly alternative to peat moss and can greatly enhance the quality of your soil. In gardening, it is often utilized in systems like Coco Coir Hydroponic, where it helps create an efficient water and nutrient delivery system.
What is Coco Coir?
Coco coir is a natural fiber extracted from coconut husks. It has a neutral pH, excellent water retention, and is reusable, making it a favorite among gardeners who prefer organic and sustainable practices. It is available in different forms such as blocks, bricks, or loose coir, each requiring some preparation before use in gardening.
Benefits of Using Coco Coir in Gardening
Coco coir offers several advantages for gardening. Here are the benefits of using coco coir in gardening:
Holds up to 10 times its weight in water, ensuring plants have consistent moisture.
Promotes oxygen flow to plant roots, leading to healthier root systems.
Coco coir is a renewable and eco-friendly alternative to peat moss.
It can be washed, rehydrated, and reused, reducing waste.
Naturally pH neutral, making it suitable for various plants without major adjustments.
Enhances the texture and moisture retention of garden soil.
How to Prepare Coco Coir for Planting
Preparing coco coir for planting involves a few essential steps. First, you need to hydrate the coir block, as it typically comes in a compressed form. Place the block in a large container and add warm water, allowing the block to expand and absorb the water. Once fully expanded, the coir should be fluffed up by breaking it apart with your hands or a tool to ensure it becomes loose and airy. After the coir has been fluffed, it is important to drain any excess water, as overly wet coir can lead to root suffocation. Finally, since coco coir is inert and does not contain nutrients, it’s a good idea to add organic compost or liquid fertilizer to enrich the coir before planting.
Do You Need to Soak Coco Coir Before Planting?
Yes, soaking coco coir before planting is necessary. Since it comes in a compressed form, it needs to be broken down and hydrated for proper use. The soaking process allows the coir to expand and release the fibers, making it usable as a growing medium. After soaking, the coir should be fluffed to ensure the water is evenly distributed. Draining any excess water is crucial because overly wet coir may impede plant root health.
How to Prepare Coco Peat for Planting
Coco peat, a fine, powdery form of coco coir, is highly beneficial for seed starting and improving water retention in soil. To prepare coco peat, it first needs to be hydrated, similar to how you prepare coir blocks. Slowly add water to the peat in a container and allow it to absorb and fluff up. Once hydrated, coco peat can be used on its own or mixed with other growing media such as perlite or vermiculite for added aeration and drainage. It is advisable to check the pH level of your final mix, as coco peat generally has a neutral pH, but adjustments may be necessary depending on the plants being grown.
Can You Use Just Coco Coir for Plants?
Yes, coco coir can be used by itself to grow plants, especially in hydroponic systems or as a seed-starting medium. However, because coco coir does not naturally contain nutrients, you will need to provide regular fertilizer to support plant growth. This makes it particularly suitable for plants grown in controlled environments, such as hydroponics, where nutrient solutions can be carefully managed. In traditional soil-based gardening, mixing coco coir with other organic materials like compost is recommended to provide essential nutrients and improve the overall soil structure.
How to Use Coco Coir in Hydroponics
Coco coir is widely used in hydroponic systems due to its water retention and aeration properties. To use coco coir in hydroponics, it first needs to be soaked and hydrated, as discussed earlier. Once the coir is fully prepared, it can be placed in the hydroponic system. Since coco coir does not contain natural nutrients, you will need to supply a balanced nutrient solution tailored for hydroponic plants. Regular monitoring of water and nutrient levels is essential to prevent nutrient imbalances or root rot. One of the benefits of coco coir in hydroponics is its reusability. After completing a growing cycle, the coir can be washed, rehydrated, and used again in future plantings.
Using Coco Coir as a Soil Amendment
Coco coir is also an excellent soil amendment, as it improves the texture and moisture retention of garden soil. To use coco coir in this way, mix loose coir with your existing garden soil at a ratio of one part coco coir to two parts soil. This will help retain moisture without compacting the soil, improving both water drainage and root growth. For optimal results, you can also add organic compost to the mix, ensuring that the nutrient levels are sufficient for plant growth. Coco coir works particularly well in raised beds, where it helps maintain proper soil structure over time.
Advantages of Using Coco Coir Over Peat Moss
While peat moss has been traditionally used as a growing medium, coco coir offers several advantages over it. Coco coir is a renewable resource, as it is a byproduct of coconut processing, while peat moss is harvested from peat bogs that take centuries to regenerate. Coco coir is also more durable, as it can be reused multiple times without breaking down, while peat moss disintegrates after a single use. Another key benefit is its neutral pH, whereas peat moss is more acidic and may require balancing to meet the needs of specific plants.
Conclusion
Coco coir is a highly versatile and sustainable growing medium that benefits both novice and experienced gardeners alike. Whether you are using it for hydroponics, as a soil amendment, or as a standalone medium for growing plants, knowing how to properly prepare and use it is key to maximizing its benefits. By following the steps detailed above, you can improve water retention, aeration, and overall plant health in your garden, all while contributing to eco-friendly gardening practices.
 Alair Homes South Tampa
During the planning phase we undertook a fairly major Value Engineering of the design to ensure that the project would be completed within the clients budget. The client identified a ‘Fords Garage’ style that they wanted to incorporate. They wanted an open, industrial feel, however, we wanted to ensure that the property felt more like a welcoming, home environment; not a commercial space. A Fords Garage typically has exposed beams, ductwork, lighting, conduits, etc. But this extent of an Industrial style is not ‘homely’. So we incorporated tongue and groove ceilings with beams, concrete colored tiled floors, and industrial style lighting fixtures.
During construction the client designed the courtyard, which involved a large permit revision and we went through the full planning process to add that scope of work.
The finished project is a gorgeous blend of industrial and contemporary home style.
 Alair Homes South Tampa
During the planning phase we undertook a fairly major Value Engineering of the design to ensure that the project would be completed within the clients budget. The client identified a ‘Fords Garage’ style that they wanted to incorporate. They wanted an open, industrial feel, however, we wanted to ensure that the property felt more like a welcoming, home environment; not a commercial space. A Fords Garage typically has exposed beams, ductwork, lighting, conduits, etc. But this extent of an Industrial style is not ‘homely’. So we incorporated tongue and groove ceilings with beams, concrete colored tiled floors, and industrial style lighting fixtures.
During construction the client designed the courtyard, which involved a large permit revision and we went through the full planning process to add that scope of work.
The finished project is a gorgeous blend of industrial and contemporary home style.
 Vetter Architects
A tea pot, being a vessel, is defined by the space it contains, it is not the tea pot that is important, but the space.
Crispin Sartwell
Located on a lake outside of Milwaukee, the Vessel House is the culmination of an intense 5 year collaboration with our client and multiple local craftsmen focused on the creation of a modern analogue to the Usonian Home.
As with most residential work, this home is a direct reflection of it’s owner, a highly educated art collector with a passion for music, fine furniture, and architecture. His interest in authenticity drove the material selections such as masonry, copper, and white oak, as well as the need for traditional methods of construction.
The initial diagram of the house involved a collection of embedded walls that emerge from the site and create spaces between them, which are covered with a series of floating rooves. The windows provide natural light on three sides of the house as a band of clerestories, transforming to a floor to ceiling ribbon of glass on the lakeside.
The Vessel House functions as a gallery for the owner’s art, motorcycles, Tiffany lamps, and vintage musical instruments – offering spaces to exhibit, store, and listen. These gallery nodes overlap with the typical house program of kitchen, dining, living, and bedroom, creating dynamic zones of transition and rooms that serve dual purposes allowing guests to relax in a museum setting.
Through it’s materiality, connection to nature, and open planning, the Vessel House continues many of the Usonian principles Wright advocated for.
Overview
Oconomowoc, WI
Completion Date
August 2015
Services
Architecture, Interior Design, Landscape Architecture
 Alair Homes South Tampa
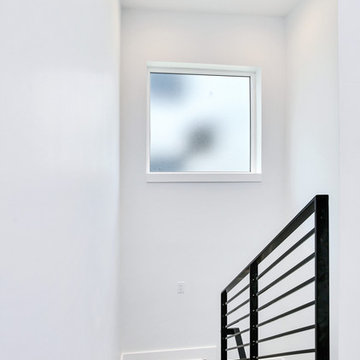
During the planning phase we undertook a fairly major Value Engineering of the design to ensure that the project would be completed within the clients budget. The client identified a ‘Fords Garage’ style that they wanted to incorporate. They wanted an open, industrial feel, however, we wanted to ensure that the property felt more like a welcoming, home environment; not a commercial space. A Fords Garage typically has exposed beams, ductwork, lighting, conduits, etc. But this extent of an Industrial style is not ‘homely’. So we incorporated tongue and groove ceilings with beams, concrete colored tiled floors, and industrial style lighting fixtures.
During construction the client designed the courtyard, which involved a large permit revision and we went through the full planning process to add that scope of work.
The finished project is a gorgeous blend of industrial and contemporary home style.
 Tom Brzoskwinia
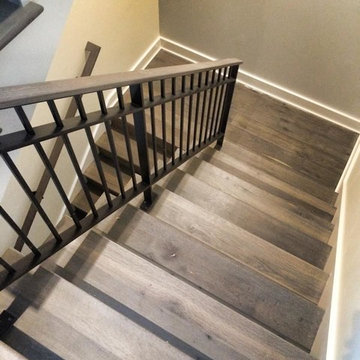
One of the most popular hardwood floor finishing which offers Tom & Peter Flooring is provided by WOCA. If you’ve decided that you want a natural looking wooden floor that is lacquer-free, then the likelihood is that you’ve chosen oil as your way of protecting your wood and making your floor look great at the same time. WOCA for wood flooring comes in various forms and is a great way of making sure that your wood is protected, but at the same time looks natural. A highly popular as well as effective way of treating wood floors, oils effectively penetrate into the wood and in some cases harden into the surface of the floor to stop damage and to maintain the wood in its optimum condition.
WOCA Oil finish hardwood flooring has taken the United States market by in 2014 and shows no signs of slowing down in 2016 and now. Here are some of the most common questions we have regarding this type of finish which we will I’m to answer in today’s my blog:
Is oil finish as durable as traditional factory urethane finishes with aluminum oxide?
When it comes to durability, oil finish flooring tackles the issue with a completely different method. The penetrating oil serves as protection from moisture and wear while allowing the user to feel the wood grains in their bare feet. If compared directly to factory finished aluminum oxide finish, the oil finish flooring will not perform as well to abrasion and impact. However, the beauty of this finish is the fact that it will camouflage any scratches which will inevitably accumulate over time.
Will this finish evaporate over time and will this be harmful for indoor air quality?
Another concern for oil finished floors its effect on indoor air quality. For on-site applications, some varieties suggest several coats which typically require the residents to be out of the home due to mild odors. However, there are factory finished UV-cured or single coat applications which lessen the downtime. Despite the odors produced during the drying process, oil finish floors rank amongst the lowest for VOC (volatile organic compound) emissions. Certain brands even boast true zero VOC. This fact alone makes oil finished floors one of the best options for green building solutions.
“WOCA products are certified by independent laboratories, the German Institute for Biological Building Materials, and are in accordance with DIN–Norm 53–160. WOCA WoodCare Denmark products meet or exceed the most stringent U.S. standards for volatile organic compounds.” –WOCA Oil Finish Manufacture
Does this type of finish require additional maintenance which I am not familiar with?
For weekly cleaning, oiled floors use a special cleaner which contains an oil and soap mixture. After a period of 12-18 months some oil may evaporate causing the wood grains to appear dry. An additional layer of oil can be reapplied to keep the floor looking fresh. Although oil finished floors require more involvement in periodic maintenance in high traffic areas, this maintenance can be done much easier than the equivalent of an onsite sand and refinish.
WOCA Master Color Oil contains pigment, which provides a single-step hardwood floor staining process. Laying down the stain and the finish in one step.
This product comes 14 different colors, from Black to Extra White, and you can mix them freely to create various color palettes that will meet the demands of any job.
Below are some pictures of the finished job…
 Talon Construction Inc.
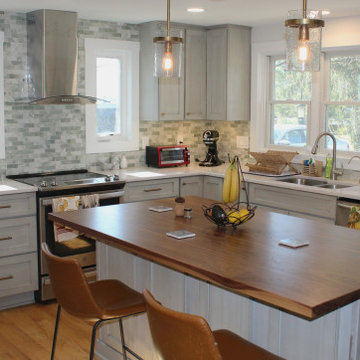
An open floor plan kitchen renovation essentially merges your kitchen area with another living space, typically the dining room or living room, creating a more spacious and interconnected feel.
Opening Up the Space and Removing walls:
This is the key step, taking down non-load-bearing walls that separate the kitchen from the living or dining area. You'll want to consult a structural engineer to ensure any remaining walls can support the weight of the house.
Considering beams or columns:
Depending on the layout and size of the opening, you might need exposed beams or support columns to maintain structural integrity. These can be incorporated into the design as a stylish feature.
Kitchen Repositioning and Functionality:
Rethinking the work triangle: The work triangle refers to the refrigerator, sink, and stove - the most used areas in a kitchen. In an open plan, you'll want to ensure these elements remain close together for an efficient workflow. This might involve rearranging cabinetry or appliances.
Creating a focal point: An island is a popular choice in open concept kitchens. It can house the sink, cooktop, provide additional storage and counter space, and even offer seating for guests to chat while you cook. Peninsula counters can also be used for a similar effect.
Unifying Design Elements: Use consistent flooring throughout the open area to create a cohesive flow. You can also extend the same color scheme or material accents (like backsplash tile) from the kitchen into the adjoining space.
Letting in Light: Maximize natural light by incorporating large windows or skylights. This will brighten the entire open area and make it feel even more spacious.
Storage Solutions: With an open plan, you might lose some wall space for cabinets. Consider built-in storage solutions like pantry cabinets or creative mudroom cabinetry to ensure you have enough storage for your kitchenware.
An open floor plan kitchen renovation can be a transformative project, creating a light-filled and social space in your home. By carefully planning the layout, incorporating design elements that unify the space, and addressing practical considerations with lighting and storage, you can achieve a beautiful and functional open concept kitchen.
13