
Search results for "Videos current" in Home Design Ideas

 Art Smart Painting & Remodeling
Inspiration for a large timeless master beige tile and ceramic tile ceramic tile alcove shower remodel in Dallas with raised-panel cabinets, white cabinets, beige walls, an undermount sink and solid surface countertops

 Kao's Pacific, Inc.
The Country, Diamond Bar. Transitional guest room with a dual black out and sheer shade. Silhouette a Deux. Black out roller shade is raised independently of the front shade for ultimate versatility! Drapes pick up elements of accent wallpaper to complete the transitional look.

 Gaile Guevara
| DETAILS | in concrete constructed condos it's very rare that we ever want to have to core new drain locations. For the Master Ensuite more and more when we do full renovations down to studs we are removing the terrible 5' tubs and tiny itty bitty 3x3' showers. For some reason the idea of luxury meant squeeze as much as you can so you have a long list of features when you go to market. More and more we are doing oversized his and hers showers. So when you have a drain that you are repurposing from previous plumbing fixtures and the drain isn't centred, it's pretty much magic to have the team surprise you after several site meetings and evaluations - we opted for the plumbers favourite to use Schluter linear tile over drains and have the oversized tile cut to fit and provide the necessary grout lines for a flush shower threshold. This might seem like nothing but is everything when we have the perfect tile layout be inline with the what we think is a centred drain. These are the kind of details that make my OCD sister inside so happy, we call it the centre flush drain happy dance. Kudos to @caisleydevelopments @4thdimensionconstruction with the help of @stonetilevancouver for finding a perfect subtle sand toned oversized porcelain. A large format tile in a shade and same tone value as our hardwood floor and one shade darker than our Baltic Birch flush panels for ease of cleaning and hiding dirt. When you want things clean I opt for showers with minimal detailing to be in shades darker than white. Cleaning becomes less treacherous. Also gone is this idea of ugly accent tile, we opt for uniform tile one material throughout a bathroom floor to ceiling and if possible all walls. Construction geekery 101 continues
Find the right local pro for your project

 Lodi Tile Works, Inc
Traditional tile shower with beige stone-look tile in a straight lay pattern on shower walls and tiled corner bench. Also, tiled shower floor with cut and tumbled flat beige pebbles, with a Schluter center drain. Included with a recessed niche tiled with beige stone look tile to match and a decorative liner using a stone mosaic, continuing around the shower walls.


 User
Photo Credit: N. Leonard
Large elegant enclosed dark wood floor and brown floor family room photo in New York with a standard fireplace, a wall-mounted tv and blue walls
Large elegant enclosed dark wood floor and brown floor family room photo in New York with a standard fireplace, a wall-mounted tv and blue walls

 Custom Surface Solutions
 (www.css-tile.com) - Owner Craig Thompson (512) 430-1215. This project shows the remodel of a small 1950's vintage home master bathroom. 8"" x 18" Calcutta gold marble tile was used on the shower walls and floor wall base and ceramic gray penny tile on the floor. Shower includes curbless pan / floor, dual shower boxes, frameless glass slider, trough duel fixture sink and chrome fixtures.
Sponsored
Columbus, OH

Structural Remodeling
Franklin County's Heavy Timber Specialists | Best of Houzz 2020!

 Satin & Slate
Here's a complete bathroom remodel done for a family in Long Beach. Though this bathroom may look like a simple small and compact bathroom, this room holds a lot of great features. The main attraction of this bathroom comes from the open shower that is accompanied by a accented black tile wall. This shower is also featured with a full length niche for shower accessories and a bench for extra support. The bathroom is enhanced more by the golden features that come from the knobs and faucet. This bathroom is the perfect master bathroom extension.


 Anything Wet Pools and Spas
This is an example of a mid-sized modern front yard stone water fountain landscape in Miami.
This is an example of a mid-sized modern front yard stone water fountain landscape in Miami.

 Bianchi Design
Kirk Bianchi created this resort like setting for a couple from Mexico City. They were looking for a contemporary twist on traditional themes, and Luis Barragán was the inspiration. The outer walls were painted a darker color to recede, while floating panels of color and varying heights provided sculptural interest and opportunities for lighting and shadow.


 Northshore Renovations
Inspiration for a transitional master gray tile and marble tile pebble tile floor and brown floor freestanding bathtub remodel in New Orleans with gray walls


 Rick Kelley Builders
Pictured here are toe niches to support your leg while shaving.
Large minimalist master gray tile and porcelain tile porcelain tile freestanding bathtub photo in Columbus with an undermount sink, shaker cabinets, dark wood cabinets, granite countertops, a two-piece toilet and gray walls
Large minimalist master gray tile and porcelain tile porcelain tile freestanding bathtub photo in Columbus with an undermount sink, shaker cabinets, dark wood cabinets, granite countertops, a two-piece toilet and gray walls


 REED BROTHERS design & build
, Todd W. Reed, Ron Reed, Hall County, Gainesville, Lake Lanier
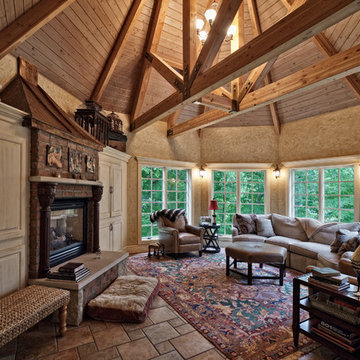
Inspiration for a rustic family room remodel in Atlanta
Inspiration for a rustic family room remodel in Atlanta

 RAJ Kitchen and Bath, LLC
**Check out the video of this transformation on our website**
This small kitchen was way too small for this 2 bedrooms, 2 bathrooms apartment. Not only was it a very small kitchen, but the physical location of it made it very difficult to make it any bigger. There wasn't much that could have been done without incurring astronomical cost, which would get little or no return on the investment. The client wanted a kitchen that can be optimized in its current location to add a ton of value for resale.
This was difficult to do, because there was no moving of any mechanical around in the kitchen and even if we wanted to, the management of the building would not allow. For those of you who live in condos, co-ops or apartment building, you know how difficult it is to rework these foot prints. When we showed up, we saw the problems, but we also saw a huge opportunity where we can achieve those goals in the small space. This was accomplished by making some key changes and to incorporate some new things that was not possible when this kitchen was built years ago.
The crucial part of the design that would drive the entire new layout, was selecting the only appliance; that was the Refrigerator. Once we nailed down that refrigerator, we then proceeded to design the kitchen around it. We moved it to the other side of the wall where the sink was so that we can tap into the water line from the sink plumbing. It was crucial that it stays exactly 24" deep, not an inch more because we had to keep the entry as open as possible. Also, it was going to be directly in front of another big storage unit - The pantry. It is not ideal in most cases, but we needed the rest of the space to ramp up the design and open feel towards the side where all of the activities would take place, which happend to be the dining room and the view.
Once all that was figured out, we re-positioned the sink, dishwasher and the range and proceeded to wrap the cabinets around the columns to integrate them into the space. Thirty- six inches cabinets height was used so that they can be installed higher towards the ceiling height to give more room rather than the standard 18" required height between the counter tops. This was done to make the room feel a lot bigger than it really was. Not to mention, we also didn't want the faucet to be buried under the cabinets so that was also a necessary design detail for the space.
We then lowered both knee walls so that the counter top can sit on top of them, by removing that stop point that would have otherwise defined the kitchen area. This allowed us to pick up that extra footprint into the room for added prep space and enabled us to create the illusion of a kitchen that is looking longer than it really is. Every inch mattered when designing this kitchen and we made a conscious decision to use every one of that inch.
White cabinets were selected to do just what white cabinets are design to do; make a small or dark room appear bigger, brighter and more open. In this kitchen, this was amplified the more because of the kitchen location. It was perfect! We knew we did justice to the space because while we were there taking some photos, a few potential buyers walked in and went straight for the kitchen! They said its design just to fit the apartment.
Pantry roll out shelving, Double recycle bin, fancy handles, LED lighting, Quartz counter top, beautiful backslash tiles and grey linen floors finished off the kitchen which looked over a beautiful view of the George Washington Bridge from the top of this lovely 4th floor apartment.
Credit to Masterpiece Tile and Marble (Annmarie on the selection of Tiles and countertop and Val on the Construction to complete this project).
Davor Kokic Photography
 RAJ Kitchen and Bath, LLC
**Check out the video of this transformation on our website**
This small kitchen was way too small for this 2 bedrooms, 2 bathrooms apartment. Not only was it a very small kitchen, but the physical location of it made it very difficult to make it any bigger. There wasn't much that could have been done without incurring astronomical cost, which would get little or no return on the investment. The client wanted a kitchen that can be optimized in its current location to add a ton of value for resale.
This was difficult to do, because there was no moving of any mechanical around in the kitchen and even if we wanted to, the management of the building would not allow. For those of you who live in condos, co-ops or apartment building, you know how difficult it is to rework these foot prints. When we showed up, we saw the problems, but we also saw a huge opportunity where we can achieve those goals in the small space. This was accomplished by making some key changes and to incorporate some new things that was not possible when this kitchen was built years ago.
The crucial part of the design that would drive the entire new layout, was selecting the only appliance; that was the Refrigerator. Once we nailed down that refrigerator, we then proceeded to design the kitchen around it. We moved it to the other side of the wall where the sink was so that we can tap into the water line from the sink plumbing. It was crucial that it stays exactly 24" deep, not an inch more because we had to keep the entry as open as possible. Also, it was going to be directly in front of another big storage unit - The pantry. It is not ideal in most cases, but we needed the rest of the space to ramp up the design and open feel towards the side where all of the activities would take place, which happend to be the dining room and the view.
Once all that was figured out, we re-positioned the sink, dishwasher and the range and proceeded to wrap the cabinets around the columns to integrate them into the space. Thirty- six inches cabinets height was used so that they can be installed higher towards the ceiling height to give more room rather than the standard 18" required height between the counter tops. This was done to make the room feel a lot bigger than it really was. Not to mention, we also didn't want the faucet to be buried under the cabinets so that was also a necessary design detail for the space.
We then lowered both knee walls so that the counter top can sit on top of them, by removing that stop point that would have otherwise defined the kitchen area. This allowed us to pick up that extra footprint into the room for added prep space and enabled us to create the illusion of a kitchen that is looking longer than it really is. Every inch mattered when designing this kitchen and we made a conscious decision to use every one of that inch.
White cabinets were selected to do just what white cabinets are design to do; make a small or dark room appear bigger, brighter and more open. In this kitchen, this was amplified the more because of the kitchen location. It was perfect! We knew we did justice to the space because while we were there taking some photos, a few potential buyers walked in and went straight for the kitchen! They said its design just to fit the apartment.
Pantry roll out shelving, Double recycle bin, fancy handles, LED lighting, Quartz counter top, beautiful backslash tiles and grey linen floors finished off the kitchen which looked over a beautiful view of the George Washington Bridge from the top of this lovely 4th floor apartment.
Credit to Masterpiece Tile and Marble (Annmarie on the selection of Tiles and countertop and Val on the Construction to complete this project).
Davor Kokic Photography
 User
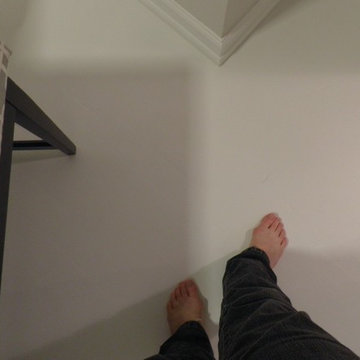
Floor primer: Zinsser Bullseye 1-2-3 latex
Floor paint: Valspar Porch and Floor Paint in white. Latex
Home design - mid-sized transitional master painted wood floor home design idea with gray walls and no fireplace
Home design - mid-sized transitional master painted wood floor home design idea with gray walls and no fireplace
10