Software
Houzz Logo Print
jaguwar

How to even out a tile tabletop while still keeping the tile.

14 years ago
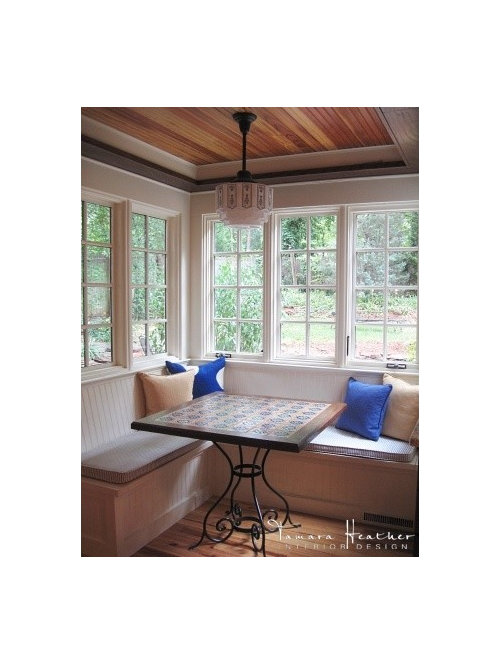
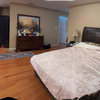
I have a tiled kitchen table rather similar to this one
Pecan Residence · More Info


It was a home job, and the tile is about 1/16in lower than the surrounding wood edge. At the time, I was grateful to even HAVE a table, as it was given to me when I couldn't afford to buy one. But that tile is cool to look at... and a pain to clean. Moreover, I'd like to be able to make bread again, and the table would be perfect as I like counter space. but you can't knead dough on an irregular surface.

In short, I'd like to keep the tiled look, but make the surface flat again. I originally thought of an acrylic sheet, but i wonder if I could do liquid acrylic or epoxy instead? Whatever I use needs to be food grade, thus my dilemma. I look forward to your suggestions and recommendations.

Comments (10)

  • 14 years ago
    I've done a lot of work with the two part epoxy resin but I don't know if it's food safe or not. Can you have a piece of finished-edged glass cut for the top? That would be better than acrylic, it doesn't scratch as easily.
  • 14 years ago
    I thought of glass, but I think it's more expensive, and KNOW it's heavier. This table top (which can be separated from the bottom, thank goodness, because it's big enough to seat six!) weighs a ton already. I'd hesitate to do glass because of that, if nothing else.

    Really, ideally, I would simply fill in the grout joints to a smooth finish without losing the look.
  • 14 years ago
    I didn't realize it's that big! Ok, yes glass would be heavy, but epoxy resins are heavy also, and they don't necessarily fare well in the heat. But it's certainly worth trying. Have you ever worked with these before? I can give you some tips if you need them.
  • 14 years ago
    Hmmm... I wasn't thinking of heat. I don't have any plans of ever putting anything hot (as in straight from the oven) on there. Any food brought to the table would either plattered or cool/cold anyway. How much heat can they stand?

    I've never worked with resins, no. I appreciate any and all guidance. Thanks Bobbi! :)
  • 14 years ago
    Actually I wasn't talking about a hot pot as much as hot air. It's extremely hot here where we live, and the resins get sticky because of it.

    I will get back to you in about 30 minutes with the tips, got to get hubby off to work!
  • 14 years ago
    Ok, sorry about that! These are just tips we've learned, not a substitute for the box instructions, ok?

    First, plan to dispose of everything the resin comes in contact with, including your clothes and shoes. Wear a disposable apron and gloves. You can wipe wet resin off, or scrape dried resin off your clothes but it will leave a stain.

    Cover EVERYTHING under the table top with layers of newspaper or plastic.

    The tools we found the most helpful are - a flexible Rubbermaid spatula; a 4-cup clear glass measuring cup with a pour spout; wooden stir sticks from Starbucks (yes, really!) but mixing a large quantity as you are a paint stirrer would be better; a small, craft-sized propane torch with an extra propane cartridge; a mixing bucket or large container and a garbage can near by to toss resin covered items in. You don't want to drip the stirrer across the floor, for example.

    Tape off ALL parts of the table you don't want the resin to touch. The thing is, when you are mixing the resin it seems really thick; when you pour the resin it's more like water!

    Accurately measure the two parts when adding them to the bucket. Unequal portions will not harden properly.

    Stir! Follow the time instructions on the bottle; set a timer for accuracy (like on your microwave or something) And don't rush the stirring process Rapid stirring will cause air bubbles, air bubbles are not your friend.

    When it's ready, start your pour from the center of the table. Pour slowly, you cannot imagine how fast this stuff spreads. Use the spatula to move the resin to the outer edges. Try your hardest to get smooth, even coverage; when the resin dries you will see every hill and valley.

    When the table top is completely covered and smooth, use the propane torch to pop the bubbles. You would think that the heat from the torch will smooth the resin, it doesn't.

    Allow proper drying time, I think it's 3 days, so if you have a garage that's the best place to allow it to dry undisturbed.

    This is a really fast process; it will take you more time to read these tips than to do the actually work!

    If you have any question, don't hesitate to ask, ok?
  • 14 years ago
    Sorry i tool so long getting back to you, and thank you for the tips, these are great! This requires fairly careful planning, I'll have to gather supplies.

    Define *hot weather*? If I work on it in the evening, when temps have finally been dipping below the 60s, do you think come mid-morning or early-afternoon it would have settled enough for hot temps (say 80-85 degrees) to be a problem?
  • 14 years ago
    Michelle, by hot weather I mean....it gets to be well over 110 degrees here in the summer, and even hotter in the garage where we store our projects. I doubt 80-85 will be a problem. I would advise working on it first thing in the morning when the light is really good, but if you need to work on it at night just make sure your lighting is plentiful. Have fun with it, I hope I didn't scare you!!!!
  • 14 years ago
    Whew! 110 is definitely HOT, personally *I* don't work under those conditions! LOL
    Right, good lighting to see bubbles, leveling, etc. Got it! You didn't scare me, I'm a little energized, I hope I can get to it sooner rather than later. Thanks again! :)
  • 14 years ago
    You are very welcome. And, 127 was the top temp this year! Good luck, and PLEASE show me a finished product! Can't wait!