Software
Houzz Logo Print
thetews

Question about kerdi system

18 years ago

I'd like to use the Schluter Kerdi system for my shower since I don't feel very comfortable about building my own shower pan, but I have a question about using it for a non-square shower.

The shower pan comes in 48"x48", 72"x72", and 32"x60". I am planning a shower about 36"x40". (I'd dearly love to have larger, but that's as big as I can go).

I know the Kerdi can be cut, and cutting down the 48" size to 36" square seems easy, just take 6" off each of the 4 sides. But can it be cut to a rectangle?

Won't cutting it into a rectangle cause the slope corners to not line up with the shower corner?

If I cut 6" off each of two opposing sides, and cut 4" off the other two sides, then the corner of the slope will wind up along a wall, not in a corner of the shower.

Am I missing something, or is this a case where Kerdi won't do?

Thanks,

Alice

Comments (20)

  • 18 years ago

    Hi Alice--I don't know anything about Schluter-Kerdi shower systems except what I've been reading on line for the past 3-4 hours. I've learned a lot from this thread http://ths.gardenweb.com/forums/load/bath/msg090943064553.html and also http://www.johnbridge.com/vbulletin/index.php?. Would you mind if I "piggyback" on this thread with you? I'm remodelling a small bath and I want to build my own shower pan, because like yours, it's v. small (31" x 47"). I also plan to use Kerdi to waterproof it, same as you. My question is, does one absolutely have to use a Kerdi drain? Let's hope Bill V. is out there, because he seems to be the Sage of Schluter as far as I can tell. Thanks, Alice, and if you would prefer (or it's preferable protocol-wise), I'll be happy to start a new thread. I'm sort of new at this.

  • 18 years ago

    Let's hope Bill V. is out there, because he seems to be the Sage of Schluter as far as I can tell

    Nahhh, that's John Bridge's title. Heck, he even wrote an e-book on it!! That would actually be my suggestion. Check out his book. It's very much worth the money. (I know, because I've got a copy!)

    Just a quick answer about cutting the foam pan, though-- the only problem, and it's not really a problem at all, is that the perimeter won't be perfectly level, but it won't be that far out of whack, either. Not to the point where it's noticeable, so it's not something I'd worry about. The whole point is to make sure the water follows gravity to the drain, and it doesn't matter if the corner of the slope goes to the corner of the shower, so long as it slopes enough to get rid of the water. You don't want to become a member of the squeegee brigade!!

    Here is a link that might be useful: John's Kerdi E-book

  • 18 years ago

    By the way-- Alice-- nice to see you over here on the "sane" side!! LOL

  • 18 years ago

    Hi Bill--I bought the book--will try to get through some of it tonight. So, what do you think about the drain? Absolutely necessary or can it be worked around? Thank you!

  • 18 years ago

    I built a Kerdi shower a few of years ago and made my own "mud" slope, as the the Kerdi pan didn't fit. It wasn't the easiest thing in the world, but it wasn't rocket science. My husband helped a bit with the mixing and pouring those heavy bags of cement and sand, but I did everything else myself.

  • 18 years ago

    Let me put it this way. If you really knew what you were doing, you could probably get away with using a clamping drain, although Schluter won't warranty it. That said, I DO know what I'm doing, and I do know how to get around it, but I'd still rather use the drain. It's part of the system, and I like the idea of having the warranty. One thing most people don't realise. The warranty is to cover the installer. If the installation goes south, the homeowner goes to the installer to make it right. But if I, as an installer know I did it right, I'm on the horn to Schluter to get their rep up here to check out their product. The best part is Schluter is one of the good guys. They'll stand behind their product, so long as it's properly installed.

    About the only pieces you can get away without using is the foam curb and pan tray.

  • 18 years ago

    One other thing about the use of their drain-- one of the advantages of using the Kerdi system over any of the other shower systems is that it's a topical system. Once the Kerdi is in place, the only things getting wet are the tile, the thinset, and the grout. End of story. Everything else stays dry, which translates into longevity. I know the drain is costly, but it's well worth the money.

  • 18 years ago

    Thanks again, o Second Sage of Schluter. I am attempting to correct a barely-started job which was interrupted when the original contractor injured himself on another job. I'm remodeling a v. small bathroom which originally had a really lovely, tasteful, suite of robin's egg blue acrylic shower stall, toilet and sink. The vanity was real fake marble on top of real fake wood. It's all been torn out, and the orig. contractor had built a shower stall and poured the pan which even to my eyes (I'm a chef, not a builder) looked pretty badly done. This is a second floor bath, so I took to the internets to see how to best waterproof it, and I'm sold on the Schluter stuff. I was just trying to avoid having to buy/install another drain and I should really know better. I'll order one today. Do you have any suggestions about what to look for in retrofitting the Kerdi drain after removing the current one? Thanks a million, and Alice, are
    you still out there??

  • 18 years ago

    I happen to have this picture that I was going to put on the other thread, but I'll pop it in here instead:

    {{gwi:1501035}}

    That cutoff wheel costs maybe $5, don't quite remember. Chuck it in a drill or even in a Dremel, insert it down the inside of your drain, and cut your two-part clamping drain off the waste line.

    Easy to do.

    Then figure out your elevation height for your Kerdi drain flange and use the appropriate material (ABS or PVC) and a coupler to connect the Kerdi Drain to your existing waste line.

    Remember, Kerdi drains come in PVC or ABS, so order the appropriate one and use the appropriate glue (again, PVC or ABS) to adhere it all together.

    Mongo

  • 18 years ago

    Thanks again, gorgeous ;). Ok. What we found out today is that our former contractor (hereafter called TFC) attached a PVC p-trap to our house's black pipe (ABS). My beloved husband just sawed the drain off with a hacksaw so that he could start tearing out the awful floor, which was not reinforced properly. (Lots o'squeaks) What would you suggest--replace the pvc p-trap or leave it alone and get a pvc Kerdi drain? I have a picture and I'll try to figure out how to post it. Thank you, mongo.

  • 18 years ago

    There is a hybrid ABS/PVC glue, and some use it to attach ABS directly to PVC.

    I never use it nor do I let in be used on any of the houses that I build. In my locale it's against code to glue PVC directly to ABS within the house.

    You can make the transition with something like a hubless coupler with stainless straps. But again, while I trust the hubless, I wouldn't want to bury it in a joist bay. Exposed in a basement waste system? Sure.

    Personally? I'd go all PVC or all ABS. So yeah, since you have ABS I recommend trashing the PVC trap. A new ABS one will set you back only a couple of dollars.

    Mongo

  • 18 years ago

    I just got back on line - had a very busy day.

    I'm really happy to see the responses and Martha I think it's great that you added on this this thread instead of starting another. This way our similar questions can be seen by the experts easily.

    I also have a robin's egg blue acrylic shower stall, blue toilet and blue (rusted) sink in a fake wood vanity. But my vanity top is laminate. I think I've got the most hideous bathroom ever and can't wait to redo it. We've been in this house 13+ years and this is the last major remodel. Every surface in the rest of the house is different now than when we bought it - well except for a few of the ceilings and even those have been painted.

    I'm glad to hear that it won't be a big deal to cut the Kerdi shower pan into a non square rectangle. And I'll go buy John Bridges' e-book. I think I knew about it before but I had forgotten.

    Thanks Bill and Mongo for answering our questions. You guys are the best!

    Alice

  • 18 years ago

    Many thanks, again, Mongo. That's exactly what TFC did--the hubless with the straps. I did my darndest to post a photo, but the forum instructions say that you can't post a photo in a follow-up? I couldn't figure it out.

    And thank you, Alice, for graciously sharing the thread. I love that we concurrently and coincidentally want to remodel hideous blue bathrooms. This house is also undergoing an every-room remodel, slowly and surely.

    I must ask, did you also have the kelly green bath suite? How about dirt brown? That's what we had. Kelly is gone, and after Robin, Dirt is next.

    Now if Mongo (or Bill) could explain posting photos on this forum, (to me, anyway) we could post our progress/problems photographically.

    I so appreciate all of you. I really think I can do this thing!

    Martha Nell

  • 18 years ago

    marthanell-- email it to me, and I'll post it.

  • 18 years ago

    Martha,

    To post, first you need to have your picture hosted somewhere on the web. A place like photobucket.com, for example.

    Once your photo is loaded on line, there will be a URL address generated for that photo. You can copy the address automatically by placing your mouse over the photo, right clicking, and left clicking on "copy image location".

    To get the photo in your gardenweb post, you need to write a bit of HTML code.

    In the body of your post, write <IMG SRC="paste photo url here"> then right click and paste the URL code for your photo where in place of the red text.

    Preview your message to see your pic, then post it.

    If your picture is really large, you can limit it's size. I'll often add "width=400" to my photos so that the image isn't so large that you have to scroll left and right to see all of it.

    <IMG SRC="paste photo url here" WIDTH=400>

    If you get the code wrong, you'll end up with the actual code showing in your posted text. If you get code correct but the photo's URL is wrong, then an small "broken link" icon will show in place of your photo.

    Hope this helps!

    Mongo

  • 18 years ago

    Oh, and if you're not supposed to post pictures in follow on postings, them I'm gonna get arrested for all the pictures I posted in this kerdi thread!

    Mongo

  • 18 years ago

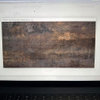
    Here are Marthanell's pictures:

    First time I've ever seen anyone use Kerdi for WALLPAPER!!

    :-)

  • 18 years ago

    Bill V., you are the best! Thanks for posting these pics. And Mongo, thanks for the explanation. I feel like an idiot, but I'm pretty used to that!
    I had to laugh at wallpaper comment-I didn't even see the resemblance betw. the Kerdi color and the lame attempt I made to brighten up what is my daughter's teeny tiny bathroom. Obviously, it's a sign that Kerdi is the way to go on the remodel.
    I've ordered the stuff and will continue with the floor tear out and reinforcement.
    Thank you for your advice, service and support!
    mn

  • 16 years ago

    I was searching some back articles on Kerdi and the Kerdi system from Schulter and thought we should update this thread to include another option. One that does not cost $10.00.

    Make sure you read and understand the Kerdi install before spending your money. Right here on this site is the "Best*" 'How To Kerdi' information online right now.

    * My opinion

    John Whipple

    Here is a link that might be useful: Better than a Kerdi E-Book

  • 6 years ago

    Would it be doable to trim a 48x48 pan down to a 38x40 center drain without effecting the slope?