Software
Houzz Logo Print
macybaby_gw

Cabinet progress pictures

15 years ago
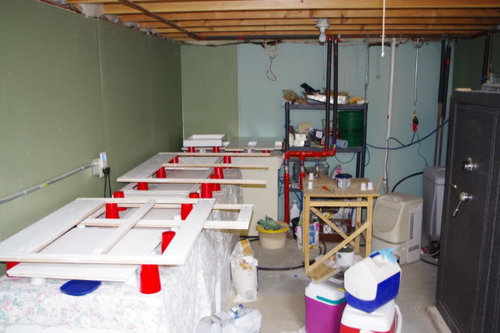
I finally feel like I've got less ahead of me to do than what is behind me that is done.

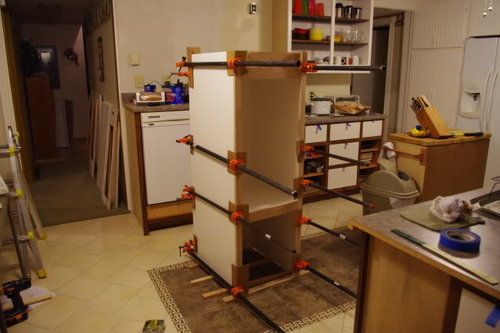
Seems like I've been on a marathon painting kick for about three weeks - most of the time my basement has looked like this.

With two different sized plastic cups, I have three layers drying at one time. Love that idea - got it from someone on this site and it has worked out great.

Yesterday I got my freezers uncovered and I think they'll stay that way for a while.

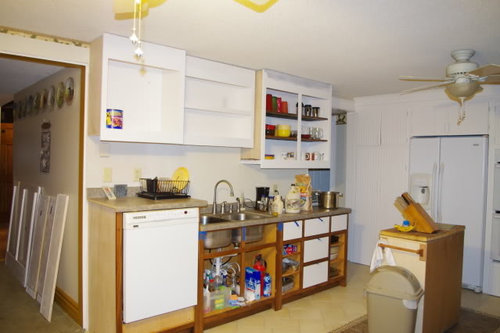
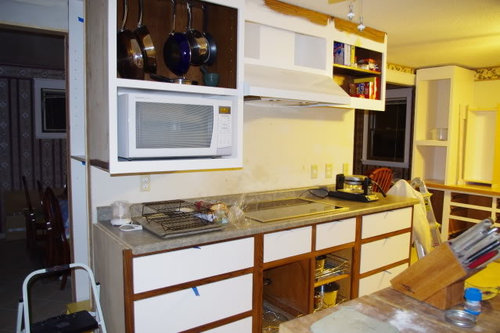
Over the last three weeks, I've painted the uppers that we were keeping, and DH and I made two new ones for over the sink/dishwasher. We got those installed yesterday.

Got the last of the drawer fronts put on too- the pulls are on order and I hope the show up soon. So far the blue tape is working OK.

I do plan on painting the lower frames - probably after the new counter-top is installed. The temporary one overhangs the faces so it's in the way.

We were suppose to get the new counter top on Friday, but the roads were too icy so we turned around and went back home - not fun when the trailer wants go sideways down the interstate. DH decided we'd pay the money and have someone else haul it home for us. I wanted to do that in the first place, but he figured we could do it, but after the failed attempt, he changed his mind.

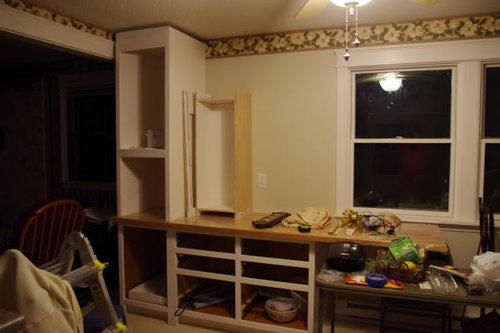
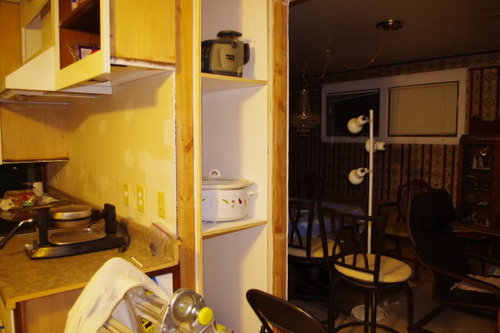
Here is a picture of the window seat wall. The counter-top will be cut so it does not extend in front of the windows. We needed to set it up to get the heights correct - and the back of the cabs as the wall is not plumb.

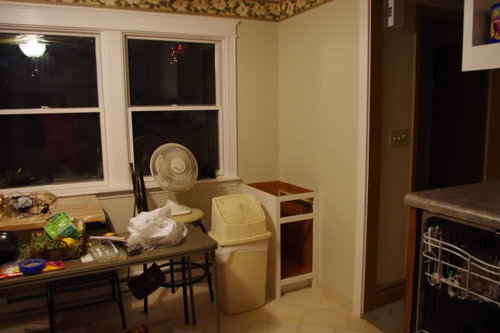
The upper next to the tall cab is for the other corner. We have to scribe the face for it first. Here is the small cab it goes over. This one is actually mounted to the wall.

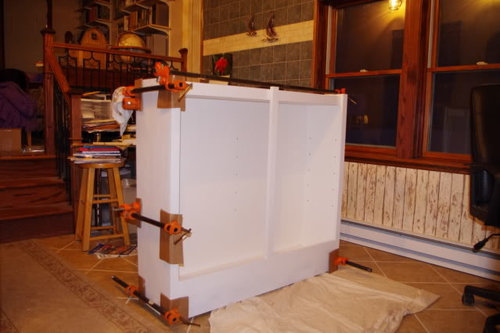
Here's a progress picture - the tall cabinet clamped and drying - figure that's about $300 worth of pipe clamps in use.

We could only glue up one at a time as that is all the clamps we have. Here is the baking center upper (it's upside down) that will go next to the tall cab.

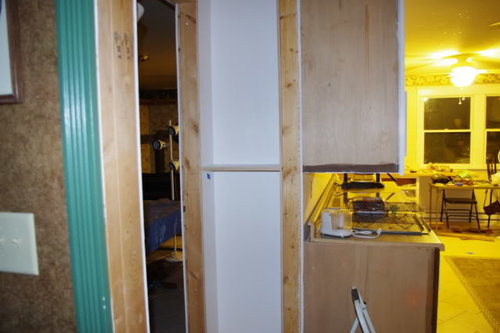
And a few more pictures - these are the closet ends - finally got the plywood installed. They'll have face frames to match the cabinets.

This one doesn't look like much - it faces the stairway. The lower part will be a locking cabinet and the upper will be open shelves.

Still have the island and window seat to make, and then lots of drawers/doors and trim work to do. But once we get those last two cabinets on the walls, the big stuff will be over (not counting the counter top and new sink).

BTW- the flash totally distorts the colors. The cabs are a creamy white that goes very well with the floors which are not near that yellow - it's not the stark contrast that shows up in some of the pictures.

Comments (13)

  • 15 years ago
    last modified: 11 years ago

    Wow! You have been working HARD, my dear! But the effort will pay off in a gorgeous new kitchen. You're getting soapstone, right? Good luck with delivery and your install. I can't wait to see the finished pics. I bet you can't either! ;) Now get back to work! ;)

  • 15 years ago
    last modified: 11 years ago

    It's really coming along. Everything looks great! Can't wait to see the counters on.

  • 15 years ago
    last modified: 11 years ago

    You're making great progress! I'm so glad you posted the update! I hope the weather improves and you can get your countertop delivered--can't wait to see it! Hang in there 'cause your kitchen is going to be great!

  • 15 years ago
    last modified: 11 years ago

    Wow. This is looking really good. I hope you can post updates as you go along. What counter are you using?

  • 15 years ago
    last modified: 11 years ago

    She's using soapston and I wish she would hurry up and get it in!! LOL! ;) Can you tell I wanna see??

  • 15 years ago
    last modified: 11 years ago

    Looks great so far! I love the raised dishwasher and the hanging skillets.

    Question about the dw - are you planning to protect the raised side of it, next to the sink, from splashing? I'm wondering what to do with mine - backsplash or countertop material, or wood?

  • 15 years ago
    last modified: 11 years ago

    YOu should be so proud of all your hard work. It's going to look amazing!

  • 15 years ago
    last modified: 11 years ago

    The paper cup idea is brilliant. I wish I'd have known about that when I painted mine. I know first-hand how much work it all is. It's looking great.

  • 15 years ago
    last modified: 11 years ago

    It's great to see in-progress DIY images. They really give a feeling of what this kind of project requires in human terms. I cheer for a DIY project and consider this a fabulous effort by two intrepid and visionary owners.

  • 15 years ago
    last modified: 11 years ago

    I have been where you are several times and at some point soon I'll be doing it again! I love your drive and and ingenuity. I never thought of cups. I've used ladders and boards, book stacks, and boxes so I will file that one away.

    I'm chuckling because the glue can't dry fast enough to keep up with you!

  • 15 years ago
    last modified: 11 years ago

    Lyvia - the dishwasher its in it's own cabinet, so there are walls on both sides.

    we are putting in a Domsjo sink and it butts right up the upright part of the DW cabinet (it is an apron front drop in sink). We'll treat the raised part like a corner and wrap the backsplash tile around. The bottom of the backsplash rests on the top edge of the sink, like it does on the back edge.

    We have to make some modifications to the face frame of the sink cabinet, but that's going to be rather simple. We have to move the DW cabinet over 5/8" and put in a filler strip to get the sink overlap to fit. (the fun part is that means taking the DW out)

    We've been using this temporary set up for about 9 months now, so I know that there is no problem with having the sink right up to the raised DW. After we got this all set up, DH decided he hated the new sink and gave in to my desire for an apron front.

    I'd hate the thought of what all our mid-stride changes would have cost if we had someone else doing the work. So far we only rebuilt two cabinest - those above the sink and DW. It would have been worse but we didn't have some built before I decided to go with the window seat/baking center instead of the big island.

  • 15 years ago
    last modified: 11 years ago

    That is incredible how handy you are and how much you are doing yourselves. I bet you will be bursting with pride when it is all done :)

  • 15 years ago
    last modified: 11 years ago

    So impressed by all of your work!! Glad that things are coming along and that you are seeing the light at the end of the tunnel:)

Sponsored
Hope Restoration & General Contracting
Average rating: 4.7 out of 5 stars35 Reviews
Columbus Design-Build, Kitchen & Bath Remodeling, Historic Renovations