Software
Houzz Logo Print
alb1k

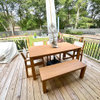
ipe deck progress - pics

19 years ago

new post - continued subject.

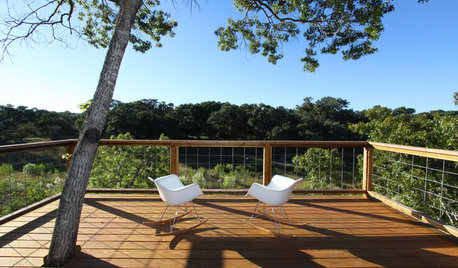
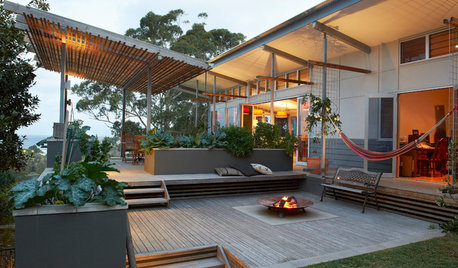
Here are some progress pictures to view.

{{!gwi}}

{{!gwi}}

{{!gwi}}

{{!gwi}}{{!gwi}}

Comments (17)

  • 19 years ago

    Looking Good Alb, dont forget the cross ventalation. J

  • 19 years ago

    Thanks, John. Are you speaking mostly to the steps? They are my concern, as the deck should have good ventilation. West Marine is having a Memorial Day sale, so I will probobly get some vents for the steps.

    Erik

  • 19 years ago

    Yess the steps,building them that way,that is building boxes and not cutting stair bucks, wont allow much air flow. Normaly I would put one on each side left and right.

    You do have some holes drilled that would work unless your going to run some more pipes thru them. I cant stress the cross ventalation enough you would not belive how ipe will react without it. J

  • 19 years ago

    I will put one on each end - good eye, those holes are to assist with ventilation

  • 19 years ago

    here is the almost latest, I put a second coat of TWP 501 on today which is not shown.{{!gwi}}{{!gwi}}{{!gwi}}{{!gwi}}{{!gwi}}

  • 19 years ago

    Erik,

    That is a very nice looking deck. THanks for posting all the photos.

    Where did you get the ipe? I am in los angeles...

  • 19 years ago

    Erik,
    You did good. If you ever move to Brooklyn, you got a job :-)

    The only problem I have with it is those SS buglehead screws. You shoulda used brown Headcote trimheads.

    It seems your pup likes it too. Now go out and have a cocktail on your beautiful deck.

    steve

  • 19 years ago

    Thank you both, I appreciate all opinions, but compliments are more fun. I got the ipe from Victory Building Products, I am in Los Angeles, and they are on the East Coast, but the transaction was smooth and although random lengths (8'-18'), almost every board was good. The 8's and 10's tended to be a little wilder grain and color. They were the best price I could find with a recommendation from this board.

    Although, those are #7 trimhead screws, the Headcotes would have been a good idea. I heard that fasteners can have an architectual quality when visible and lined up, so I'll just keep telling myself that :) The boards are 1x4, which I like, but that recent deck with alternating 4" and 6" boards is very nice.

  • 19 years ago

    Looking GooooooooD AlB my man, even the dawg likes it!! Same with me you want to go Contracting come on Down!!!

    I am wondering you did say twp 501 mabey you ment 516?

    Anyway go get em Bro!! Have a big bent elbow with the Cool One on that Project. John

  • 19 years ago

    I used 501 (cedartone) as it what was in stock with the only supplier around me, kind of like the screws, I went with what was easily available. The first coat faded quickly and the wood wanted more as it stopped beading water.

    If the second coat pales quickly, I will order 516, or drive to Arizona for 116.

    Thanks for the replies, when I get the built in barbeque done, I will post more, and those pipes coming out of the deck and the spot with no railings will make more sense.

    Thank you John, Steve, Ken and others for all of the help. This is a great site.

  • 19 years ago

    Those are #7 trimheads?...they look much bigger. Good screw placement...nice striaght lines. Almost makes the screws a design feature.

    steve

  • 19 years ago

    TWP cedartone natural has the least amount of uv in the line,the 516/116 is pretty high up there in solids the more little metal particles the more uv. They can all be mixed together so your overcoat will work fine.

    I have been using a mix of dark oak-two parts and cedartone-3 parts, it makes a nice brown color. J

  • 19 years ago

    John, thanks for the 500 series formula. I like nice brown. Here is an update.

    {{!gwi}}{{!gwi}}

  • 19 years ago

    Alb1k,

    Your deck has turned out great. Nice job. I am in the planning stages of my deck and I am also looking at putting an outdoor kitchen on it very similar to the size that you have here. I have been lurking over at the BBQ forum as well. If you don't mind me asking how much did your outdoor kitchen cost in materials? Did you do anything special with the deck. Any advice is appreciated.

    Thanks,

    Riles

  • 19 years ago

    Sweet. J

  • 19 years ago

    Riles,

    The BBQ forum is a great site. I don't mind you asking my costs, I will estimate them the best I can, but accounting is not my specialty.

    Ipe - 340 sq. feet + posts, skirt, railing and a fair amount of extra material for other projects - $3700 delivered.

    Frame and foundation, hardware - probably $1500.

    Stain, stainless screws, glue, caulk, new tools needed, maybe $750.

    27" Lynx Grill, Lynx infrared side burner, outdoor fridge, stainless trim, 2 access doors $4000.

    Gas line, sewer line, electrical, copper pipe, sink, hardibacker, concrete counter materials, garbage disposal - $1000.

    Probably another $1000 I can't account for.

    That's about $12,000. It doesn't include lighting, the faucet and most likely some other incidentals.

    I didn't do anything special to the deck other than build it so I was confident it would hold all the weight I could throw at it, and I lined the bottom of the grill island with galvanized sheet metal so no flare ups off the grill would hit the deck.

    I recommend getting your grill components before you build the island, the spec sheets and the real components tell a different story.

    I also framed the deck, then framed the island, so I could figure out where to bring the utilities in. That may not matter to you if you are using propane tank and no utilities.

    I am no expert, but I will share my experience on either forum if you have more questions or ideas to bounce.

    PS - thanks John!

  • 19 years ago

    Thanks alb! That is going to be one sweet outdoor entertainment area when you are finished.

    I'm sure I will have more questions when I get a little further down the road. Thanks for the info, and I have enjoyed tracking your progress. Can't wait to see the final pics!

    riles