Software
Houzz Logo Print
jj_house

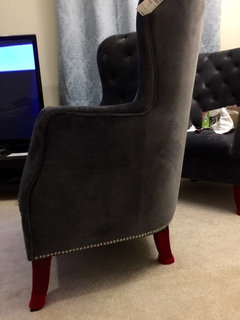
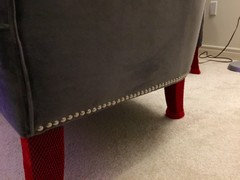
Adding nailheads to *almost perfect* arm chairs :)

11 years ago
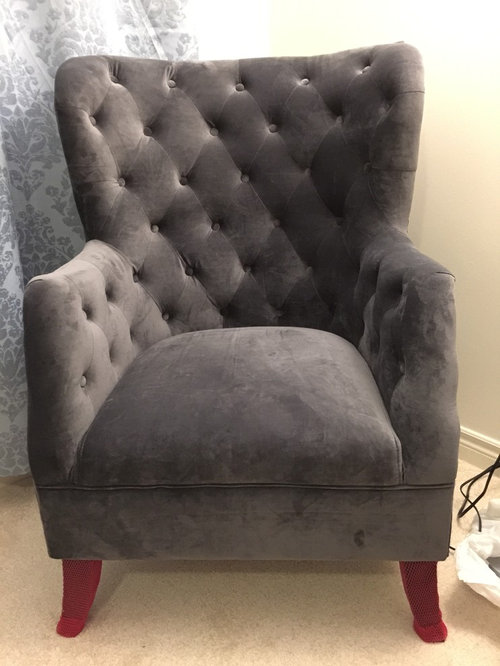
My first attempt at doing any modifications to any furniture. Maybe next time I'll tackle staining something.

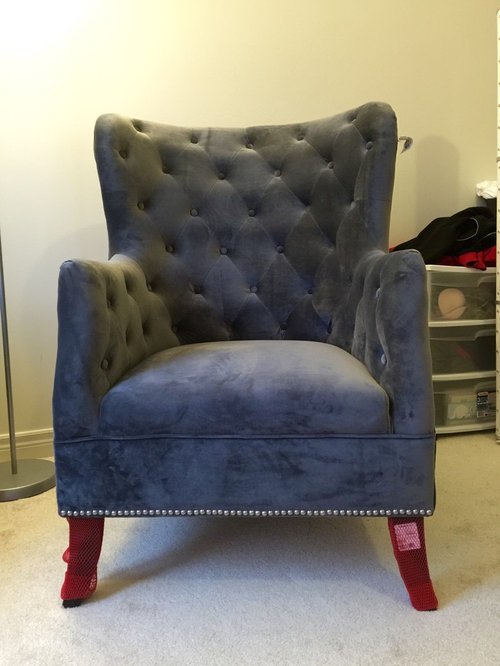
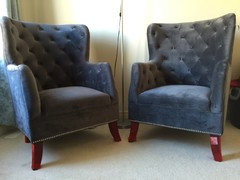
The pair of chairs that we bought were ALMOST perfect. They were grey, tufted and a cool velvet material, the only thing missing was the nailhead trim.

This project seemed easy enough that a noobie such as myself could tackle. However, let me warn those that are perfectionists, guaranteed you WILL be frustrated. I've learned a lot during this project, it's always a lot more difficult than first perceived, practice makes perfect and how much I really hate DIY.

All I purchased was nailheads (2000 for $75, was planning to do dining room chairs but might reconsider heh) and a nailhead stencil ($10), I guess I should have gotten a rubber mallet but I used a regular hammer. So far I've only done the surround for one chair, it took me about 3 hours, hopefully the second one will be much quicker.

Let me tell you even with the stencil, it was really difficult in keeping a straight line of nailheads. It got to the point where I was pulling them out more than I put in (due to my need for perfection). I finally gave in and just said screw it and hoped that none of my guests will look that close to notice that it's not straight :)

The images might be a bit dark since I did these are night and our bedroom has poor lighting.

The pair of chairs were a steal @ Winners (Canada) for $350 a piece.

Comments (52)

  • 11 years ago
    Yes nailheads offer that special extra oomph that makes a piece stand out! But I can see why it takes a professional to do the job right.

    I've looked at the nailhead trim but decided against it at first but after doing this I would advise others thinking about doing this project to go that route instead heh.
  • 11 years ago
    Well, you did a beautiful job. That would have driven me crazy--- akin to laying penny rounds on a floor, getting them straight. :)
  • 11 years ago
    Thank you. Hopefully people won't notice! I'm certainly not gonna tell anyone I added the nailhead trim so I can just blame it on the "no name" manufacturer. Heh

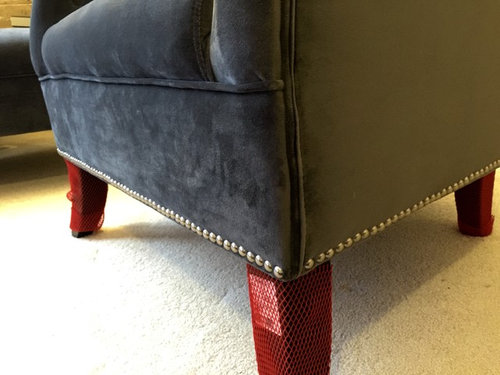
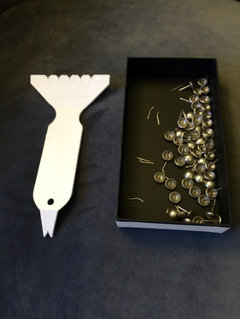
    Here's an image of all the nailheads I had to take out! And a few images of the side.
  • 11 years ago
    I just completed the other chair. Much better and quicker (completed within an hour). I can confidently say I can put nailhead trim with somewhat ease now.

    Maybe I'll tackle my 8x dining room chairs when they arrive! :)
  • 11 years ago
    Jason you perfected an already gorgeous chair. You inspire me to tackle a footstool I recovered awhile ago. It is screaming for that finishing touch. One question...tell me about the "red socks" on the legs. Protection from a misguided hammer ?
    JJ thanked omagnes
  • 11 years ago
    A footstool would be a great item to start on since it's smaller. Once you've finished that and have the confidence, you can move onto larger items.

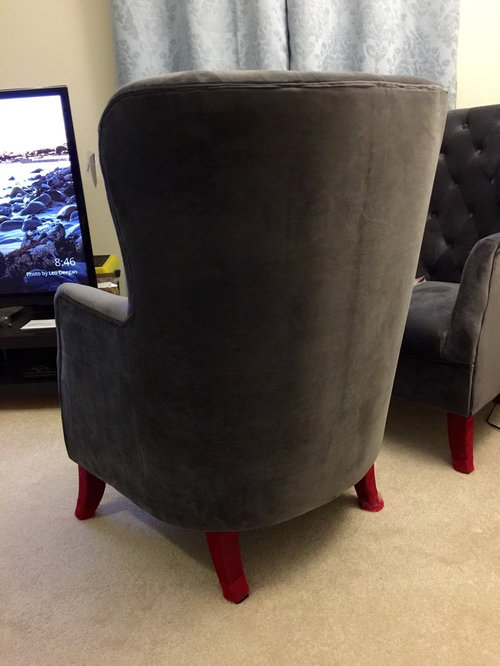
    The "red socks" are on for protection since moving it from the store to our rental home. We are waiting for our new build to be completed so these chairs will move one more time to its final destination, so I decided to keep the red socks on until then :)
  • 11 years ago
    U have done a GREAT job!.. where did u purchase those nail heads anyway?
    JJ thanked Mona
  • 11 years ago
    Yes-- you've done a really professional looking job here. And I hadn't even noticed the red socks. I had to go back and look; I never saw them, so taken was I by the perfectly placed nailheads! :) Those red socks paled in comparison.
    JJ thanked dbh
  • 11 years ago
    I love the red socks...makes her look like a rowdy ole gal! Great job on the nailhead trim. I totally would have cheated with the brass ribbon trim!
    JJ thanked losthorizonlisa
  • 11 years ago
    Beautiful! You nailed it in more ways than one.
    JJ thanked funny face
  • 11 years ago
    Thank you everyone for the kind words... I've accepted that it isnt perfect but it's tolerable! I'm glad I decided to do it and would suggest to anyone else to try it! :)

    Here are the nailheads I bought from aliexpress, $75 US for 2000 and they came within a week!
    http://www.aliexpress.com/snapshot/6451338744.html?orderId=65441438482321
  • 11 years ago
    Everything should have nailheads! Ok, maybe not "everything"...but I've always been enamored with this classic look. Congrats! It looks beautiful!
    JJ thanked Delora Dickey
  • 11 years ago
    Oh, red socks. I thought you had covered the legs with snake skin.
    JJ thanked johsmi
  • 11 years ago
    Nice job! I love the unusual shape of these chairs.
    JJ thanked diyer59
  • 11 years ago
    Thank you so much for posting this! I recently bought 8 identical dining room chairs and was thinking of adding some sort of nailhead trim to 2 of them (to be placed at the head of the table) to make them a little different. I too prefer the look of the individual nails as opposed to the trim option. Glad to hear it got better with more experience!

    Do you mind ellaborating on the stencil? I've never heard of that but I can imagine it helps with spacing! Thanks.
    JJ thanked shal1217
  • 11 years ago
    Very nice!
    JJ thanked Jolene
  • 11 years ago
    Somewhere a Boston Red Sox fan is inspired to new heights of fandom expression...
    JJ thanked Isaak Berg
  • 11 years ago
    Nice job! I recently tried my hand at adding nailhead trim for the first time (a set of 6 dining chairs) and it is NOT easy. It is, however, totally worth the effort. I tried using a stencil thing but it was kinda hit & miss (ha). I ended up using 3 or 4 different hammers/mallets to kinda mash the heads into a nice straight, even line.

    It was also a relatively effective way to let out some pent up aggression.

    Your chair looks beautiful, the nailheads really set off that lovely grey colored fabric.
    JJ thanked Coco Hall
  • 11 years ago
    We do tons of nail head trim and find that D.A.D.S. makes the best nails out there. I try to stay away from the stuff that comes in a strip because it doesn't look as professional when done. Also they make a nylon tipped hammer that is 5/8 in diameter that is perfect for nails. Check out some of our work at: https://www.facebook.com/KrumviedaUpholstery?pnref=lhc&rf=170239062989603
  • 11 years ago
    I guess I should have put all the resource links into the original post, this is the spacer I used, I bought it off ebay - Osborne 777 spacer

    http://www.ebay.com/sch/i.html?_from=R40&_trksid=p2054897.m570.l1313.TR0.TRC0.H0.Xosborne+777+spacer&_nkw=osborne+777+spacer&_sacat=0
  • 11 years ago
    last modified: 11 years ago
    @shal1217 I have 8 chairs on order that don't have nailheads unfortunately, just like these chairs, it was the right color, shape, height, tufted but no nailheads. So I might just go ahead and do one a month
  • 11 years ago
    It looks great!
    JJ thanked Linda Canham
  • 11 years ago
    I think you did a fantastic job! The great thing about a DYI is the sense of pride you feel when you've made something that was already beautiful look even better.
    JJ thanked kathylittman
  • 11 years ago
    One trick I read about- but have not tried- is to hold the nailhead with a needle nose pliers to tap it in place. Also, buy good quality nailheads not the fabric store kind.

    I think you did a great job Jason and it adds a nice touch to your chairs.
    JJ thanked corgimum
  • PRO
    11 years ago
    Great idea and so simple!
    JJ thanked User
  • 11 years ago
    last modified: 11 years ago
    Here are the chairs in daylight... I've straighten out some of the nails as well just be tapping it lightly into the direction I wanted.

    The wife is suggesting I add a second row (or box it in) at the top where the cushion meets the bottom box, not sure if I want to add that much bling to it.

    Sort of like this picture: https://static.squarespace.com/static/52fa414ee4b0a0539a45f3d4/533e2e50e4b0e2847b3749ba/533e2f8fe4b0e2847b37c696/1396584335207/1000w/
  • 11 years ago
    Nooooooooooooo! Perfect as is.
    JJ thanked corgimum
  • 11 years ago
    Those nail heads make a nice finish to those chairs. I like it!
    JJ thanked ajsalt
  • 11 years ago
    I love this look. You did a great job, and now that you are a nailhead expert, go after those dining room chairs. Very classy.
    JJ thanked Mary Reynolds
  • 11 years ago
    Take the cue from the protective socks and keep the red. Personally I would actually paint/stain the legs red - I think the red makes a nice statement. Good job on them.
    JJ thanked dgingera
  • PRO
    11 years ago
    Nice job. Looks good.
    JJ thanked Beyond Shades
  • 11 years ago
    I, too, thought the legs were painted red and loved the look. It's hilarious that Donovan Osbourne's baseball card has the same # as the guide tool :)
    JJ thanked dclostboy
  • 11 years ago
    Great.
    JJ thanked kitter
  • 11 years ago
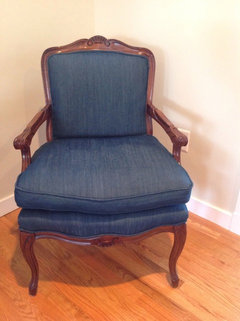
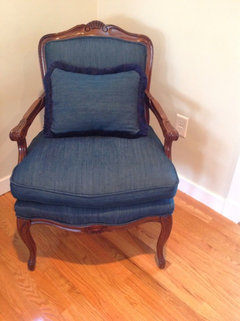
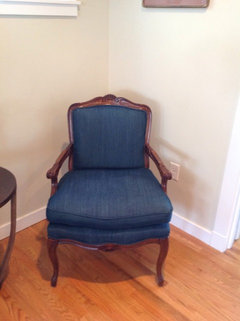
    Congrats, you did a great job. Nail heads are very time consuming so not surprised. Why do you think upholstered charge so much? It is extremely labor intensive! I have taken a few upholstery classes and really enjoy them. You might want to think about reupholstering in your spare time. I take classes through my town's adult ed program. I looked at Jason Krumvida's FB page ( he commented a few times in this post), and he has done some really great stuff including putting nail heads in a restaurant bar- check that out! I say no to a second line of nail heads- what you've done is classic. And the fabric you chose was fun! I am adding pictures of my last project- a chair I reupholstered using Denim fabric, an unexpected contrast to the chair and yes, I put socks on the legs to protect them while working on it in class. One with and without my little funky pillow cover I also made.
    JJ thanked kimgard33
  • 11 years ago
    Photo go cut off
  • 11 years ago
    Jason, NOOO don't change a thing i too love the red legs thought you did them on purpose! They match the color of the gorgeous fabric of the Ohh so comfortable looking chairs and i don't see very many chairs i say look comfortable! GREAT JOB! When i find the 12 chairs i need for my Dining Table i'll come looking for you! :))
    JJ thanked sandyr107
  • 11 years ago
    I would have put them all around the rectangular part of the bottom and up the arm. What you did does look nice.
    JJ thanked mrs_lisa_oliver
  • 11 years ago
    Thanks, Jason. I've thought of buying a decorative nail gun for the (too) many jobs I want to do but they are expensive and hard to find where I live. Instead, I bought Osborne tool you mentioned on Ebay. 2 for $10 plus shipping. Any more tips are welcome. The chairs look great. If you don't want to do two rows, why not do something on the back. Regardless, red socks and all, you did a very nice job.
    JJ thanked 1977
  • PRO
    11 years ago
    You can buy nail head strips from an upholstery supply house. Much easier than trying,to space out single nails.
    JJ thanked kathleen hansford interiors
  • 11 years ago
    Heh, we'll take off the red socks once we have them in the new build. We're going with a safe grey (and maybe boring) pallet, nothing bold like red :) Although once we start putting things together we'll see about repainting the legs sometime.

    I ultimately wanted to do the entire side/back surround (and none in the front) but there are a lot of curves near the top which caused concern so I ended up with the bottom row instead. I think this way dresses up the front nicely.

    Tips:

    1. Be very patient, dont rush it. Expect to be frustrated :)

    2. The flat part of the tool should line up with your edge. Eyeball the measurement from the edge to the tool and try to keep that consistent after every 5 nails.I put the spacer on flat against the chair, hammer in the first one to a point that it keeps the spacer from moving (maybe 80% into the chair) and then hammer the other 4 at 80% in. Once completed, I'd pull the spacer out, you'll take a bit of effort to wiggle it out and then finish each nail with one last hit. Then continue with the next 5.

    3. Hit the head straight on, the reason why you will get some heads out of place is if they're hit at an angle they will bend. Although once 100% into the chair and you noticed its a bit off, you can hammer the side of it to get it in line, ie if its above the rest of them, hit the topside of the nailhead downwards to move it slightly. If it's really out of line, then you'll have to pull it out and do it again.

    Hope this helps anyone interested in tackling this project on.
  • 11 years ago
    @kimgard33 I might look into it, I can see myself re-upholstering these chairs later down the road once the material has worn down, perhaps maybe a nice linen.

    You did a great job on your chairs, the blue denim looks cool!
  • 11 years ago
    Thanks Jason, much appreciated! You did a great job on your chairs! :)
    JJ thanked kimgard33
  • 11 years ago
    Those look incredible. I've always wondered about the difficulty to adding nailhead trim and now I know. It however is now on the list for when I want to add some pizazz to the back of our barstools.
    JJ thanked A&R bought a ranch
  • 11 years ago
    You did awesome! I love it
    JJ thanked Courtney Veiga
  • 11 years ago
    Awesome
    JJ thanked 1425
  • 11 years ago

    That is very impressive! Nice job.

    JJ thanked Glenn Street Staging
  • PRO
    10 years ago

    Good job!

    JJ thanked Nicola Interiors
  • 10 years ago
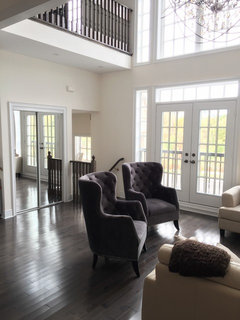
    It's been a while since I've updated this thread but here are the photos of the chairs in their final resting spot heh.

    The living room is still very bare with some old furniture that we will replace in the coming years and need to accessorize. I wish I could furnish the entire room all at once but we all know it gets pretty expensive :)

    Enjoy!
  • 10 years ago

    Love them!!

  • PRO
    10 years ago

    Still awesome, sans red socks lol.

Sponsored
Mary Shipley Interiors
Average rating: 4.8 out of 5 stars34 Reviews
Columbus OH Premier Interior Designer 10x Best of Houzz