Software
Houzz Logo Print
oyiwaanoela

Gap in Vinyl Plank Flooring

11 years ago

Hello Folks,

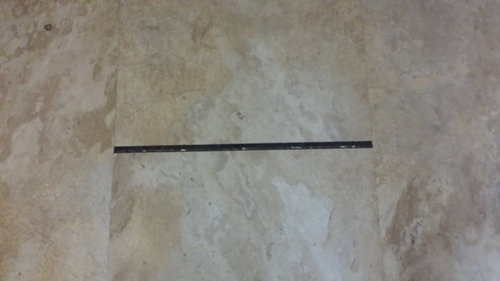
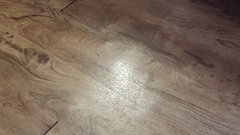
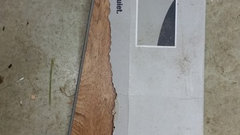
I installed my vinyl floor planks about 9 months ago in my kitchen, and it has held up well, despite the traffic. Recently however, we noticed a widening gap between 2 of the planks (see pictures below).


Note: these are not glued-down, but a lock-click systems.

Can this gap be fixed, without removing all the planks?

I will be very grateful for some pointers and assistance.


Thanks - Oyiwaa


Comments (27)

  • 11 years ago
    last modified: 11 years ago

    You may want to look on YouTube for some pointers. You will have to remove the row of planks. Remove whichever side is the shortest since just replacing one plank will have the same result as you have now and the planks have to be tight. Not sure if I explained that correct, but hopefully I did.

    Here's an example of replacement . Keep in mind this is for one plank replacement, you may not have to cut yours out.

    Plank replacement.

  • 11 years ago

    Did you find a solution to your gap? We will have this same product installed in a week or two.

  • 11 years ago

    From the image it looks like a fairly small gap. You can simply pour a waterproof epoxy resin into the gaps or using a grout, by simply smearing this on, and then painting it the same shade as the vinyl flooring. You can also use varnished wood cut pieces, which can be painted dark to finish the wood floor impact.


  • 11 years ago

    I used the colored caulk( that's sold in the tile department to match grout colors).


  • 11 years ago

    lego9lego, that's a good fix. Would you please consider posting photos of the flooring where you used caulk? Thank you.

  • PRO
    11 years ago

    In have worked with these style of planks since they came to market, we sell and install them, here is your best quick fix...Put on a shoe with a good soft rubber sole, put your spouse or children standing on the rows of planks next to the row with the gap, now jump forward on the tile or the row with gap, it should slide together just like it came apart. To secure it in place, check your the expansion at you wall point, This issue sounds like to much expansion was allowed or there was was enough pressure movement in this tile to push it back and create the gap. http://www.indianafloorsllc.com/default.aspx


  • PRO
    11 years ago

    Do not fill this gap with any filler unless you have exhausted all attempts to close the gap, the filler will discolor and turn black. There is no latex filler on the market in white that will not draw black dirt to it, even if it is kept clean it will draw black dirt in with a magnetic impulse generate buy the static electricity in the floor and environment, this "black dirt" is drawn to the latex in the caulking.

  • 10 years ago

    I'm curious how you fixed it. If you have extra pieces, Moduleo had a video on installation and replacement that didn't involve removing the entire strip.

  • 10 years ago
    last modified: 10 years ago

    Get a laminate installation kit, it comes with a pull bar. Take off the baseboards on both ends of the linear row with the gap and find which side has more shifted. Then shim the opposite side and use the pull bar and a hammer to knock the whole row back together.

  • PRO
    10 years ago

    Vith makes a good recommendation that works. Here is what I have done and it works like a charm:

    Vacuum out the debris from the gap.

    Purchase a "glass holder" or suction cup (two suction cups connected with a handle - Harbor Freight $6.99).

    Clean the plank and apply the suction cups an inch or two away from the gap (Remember - nothing sticks to dust). Securely attach the suction cups.

    Apply a small bead of vinyl seam sealer or tongue and groove wood adhesive to the exposed tongue.

    You may want to remove a piece of baseboard and insert a shim to hold to row in place and protect the expansion space provided for during installation.

    Gently tap the plank into place with a rubber mallet, being careful not to over tap and damage the locking mechanism or the wear layer.

    Wipe off the excess adhesive that will squeeze to the surface immediately with a damp cloth.

    * If the gap you are working on closes up and re-appears at the next joint, repeat the same process until the entire row is free of gaps.

    This is the most in-destructive way I have found to deal with the occasional gap in laminate and floating vinyl plank floors with locking systems. 100% success rate over 5 years (nearly 100 attempts of various laminates and vinyl floors).

    Do me a favor and keep this little trick to yourself. No caulk, no filler, no removing large portions of flooring - 30 minutes tops in most cases - you can do it.

    Keep in mind, this will not work if there is a fundamental flaw in the installation or the locking system is damaged - you would have to insert a new plank(s) before beginning this type of repair.

  • 10 years ago
    last modified: 10 years ago

    In the event you can't get the joint to close permanently, which is the ultimate solution when possible, this is specifically formulated for vinyl plank/tile and not only aesthetically repairs the gap, but also seals it from moisture & further damage www.vinylplankgapfiller.com

  • PRO
    9 years ago

    Was wondering why not just use an adhesive and glue the ends together during installation? I have seen this end separation on other LVP installs, and I think, with the required end gaps and because their is really nothing to keep the plank from shifting/sliding apart, the planks start separating under normal use.

  • 9 years ago

    I would think in the 2 years since the original post they would have fixed the issue.........

  • 9 years ago

    I like seeing these posts because it has taken me 2 years to finally choose a product to replace the flooring in our entire log cabin (1080 sq ft). There are not too many reviews and long time experience with LVP and LVT flooring for those thinking of using it.

    There are a few brands on the market now that don't click lock together and have a layer of fiberglass in the construction of the planks. This prevents it from contracting and expanding with temp. changes. So you install it tight against a wall or glue just the perimeter. I just finished installing some of it in our loft bedroom at the cabin. The edges fit together very tightly just by placing them that way and occasionally tapping the edges as you install. I am about to start pulling up old lino and prepping the main floor of the cabin to install the rest of it this summer. I am very pleased with the finished result of the loft bedroom and we are amazed at how quiet the floor is.


  • 9 years ago

    I agree with silken1 about continuing old threads. Our vinyl plnk floor was installed December 2014 and started gapping in several places this spring. At first it was only in the kitchen, between the fridge and the island. Now it is also gapping in the hallway near the pantry and back door.

    We have 2 possible causes: changes in uncontrolled humidity (no central A/C) and I can feel differences in floor level when I'm barefoot. I can see the humps and sags in the right light and just now used my level to prove there is about a 2mm difference across the area where the planks are separating.

    Is my only solution to replace it with continuous vinyl flooring, the kind that comes in a roll?

  • 9 years ago
    last modified: 9 years ago

    Kathleen Marineau, what brand of flooring did you use? Was it click lock floating floor? Are the humps in the sub floor or just in the vinyl planks?

  • 9 years ago

    silken1 a few photos might help. The house is a modular on top of a full basement, built in 1976. I suspect there may be some sagging in the subflooring, although we haven't located any problems with the exposed joists by looking up in the basement.


  • PRO
    9 years ago

    @Kathleen Marineau The lock system was not fully engaged at time of install. This is the biggest issue with gaps like this. A laminate has a quick fix...vinyl not so much. A laminate repair kit (Bulldog tool or "Unifix" tool will work with laminate...but vinyl has other properties that make it difficult to achieve using just a tool).

    The variation in subfloor (not a flat surface) will ENCOURAGE the lock system to "disengage" or let go. The floor then "walks itself" apart (every time you step on it it moves a snick more).

    The short edges give away the issue. If this were SOLELY to a wavy substrate the LONG edges would be letting go as well. But they seem fine. The SHORT edges indicate an install error at the time these were put into place.

    Short edges "feel" like they snap in nicely. So people forget to give them a good "tap tap" when installed. The long edges are bit more difficult to maneuver so they ALWAYS get a good "smack" from the installer. And that is the difference between short edges "letting go" and long edges letting go.

    I see this from time to time with cork floating flooring. Same issue. If the floor starts to disengage it is 99.999% the short edge. And the reason: Not enough force applied to the short edge when it was installed.

    With so many short edges that are disengaging, I suspect you will need a full "remove and reinstall". A single plank can be dealt with using a "tool". But with 5-6 in a single space...it requires a redo.

    It is possible you have multiple issues...the sag and the uncontrolled Relative Humidity have added to an initial install issue. You can fix the sag...and reinstall the same flooring or you can work with a sheet product.

  • 9 years ago

    For your gaps, I would do what I posted above, and to add to that I would put the clear floor adhesive (for vinyl) between so they dont come apart again.

    As far as imperfections, that is usually dependant on the floor under the vinyl. I have a few imperfections on my vinyl floor, not easily noticeable but I know they are there.

  • 7 years ago
    For small but noticeable gaps in my luxury vinyl plank flooring I successfully used Mohawk's "Fil-Stik," which I bought online. There are many colors available. It is essentially a wax product that looks like a crayon.

    I shaved pieces off the crayon, stuffed the gaps, softened the pieces down into the openings with a hairdryer thus filling the gaps. To finish, I scraped off crayon that over-filled the gaps with a knife and used the hairdryer and paper towel to wipe off any wax that bled onto the flooring.

    After it dries you might have to do a light second treatment if you see any cracks in the wax, which I did until I got the hang of it. Good luck!
  • 7 years ago

    Before & after photos for above post

  • 7 years ago

    Sure looks good. And I can see that a light color is the way to go. Otherwise it will still look like a gap, if filled with dark filler.

  • 6 years ago

    @Anne Davies a year later, how does the gap look with that filler? Thanks for posting the photos from last year.

  • 5 years ago

    Aftee reading all great comments, I was able to go to end of row and put a block of wood against plank and tap it with a rubber hammer. Obviously, this only works if you can get acces to end of row. It Worked 100 percent. Use block of wood to distribute the tapping pressure and not damage the plank. Also, as said by another poster, First make sure gap is clear of any debri.

  • 4 years ago

    How would you close a length wise gap? Found plank that lengthwise is open some. I am ready to install last 2 rows. Do I have to take them all out(about 8 rows in) or does tape & wood work length wise like it does butt joints?

  • 4 years ago

    I wuld pull it out and re-do as it is only 8 rows. You may have ongoing grief later if you leave the gap there or to a "fix". Better to do properly fix it now.