A few months ago I decided I wanted barn wood flooring. But I couldn't afford it. So I am putting this out there for anyone else who is trying to go through the process on their own but doesn't know how.
1. Find someone on Craigslist who tears down barns and buy the amount of wood you need in board feet (1 inch x 1 ft x 1 ft is a board foot. It is actually measure of volume for fair pricing on beams and such). There are a lot of different kinds out there so you may need to talk to a few people to make sure it will be the look you want. Make sure you get about 1.5 times as many board feet as you need square feet since you will lose some in the milling and there will be more waste than flooring you buy at the store. We got barn wood siding/sheeting in 1x6. Also ask if they are going to de-nail it. This is very important.
2. Call around and find a mill that will tongue and groove the flooring for you. If possible you may want to have it kiln dried first to kill any larvae, but you may not be able to find someone who will do this since the wood is so dry already and they are afraid of burning it. We chose to not have ours planed (where they skim cut off the top) because we wanted to control how much patina was left on it. I also had to call about 15-20 mills before I could find one that would work with me so you might want to start with this step---mills hate barn wood because sometimes there are nails left in it.
3. When you get the flooring home get your orbital sanders ready. We sanded for about 3 days straight. We did however meet a lot of our neighbors during the process since we were making so much noise :-) This will knock off dead stuff and dirt. When you are sanding make sure to get the edges really good. It is better to have a slightly rounded edge than one with splinters that will catch on your socks after the flooring is laid. We sanded with 80 grit first and then 120 grit. If you don't have an orbital sander you can get one at Home Depot for $40-50. Make sure to get one that takes 1/4 pieces of sand paper since you can buy whole pieces of sand paper and cut them into fourths using a box cutter knife. We didn't use a belt sander because we wanted to control the patina. Definitely sand each piece individually outside before laying the flooring in your house. You don't want all of the funky dust in your house if you use a orbital floor sander later (never use a drum sander on the floor---it will eat right through the patina). Wear a dust mask. The old dirt and grime is no joke.
4. You want to make sure any critters still lurking inside are dead. I read some pretty crazy stories online about powder post beetles emerging years after floors are laid. We bought BoraCare and followed the instructions, spraying both sides of the wood and the ends really well. Sticker the wood so that it dries thoroughly (buy a couple bundles of lathe at home depot and put these in-between each set of boards so that they dry). There is another brand Timbor that is cheaper but I read some study that showed it didn't penetrate quite as deep and is more for prevention than curing. Our wood showed serious signs of previous infestations so I wanted to cure it.
5. Since I was particularly worried about critters I also called a pest control service and had him bomb my garage with enough fumes for an entire house and he put this strip up that is activated by heat (and is not safe to breathe in) where we left the wood for a few weeks. (it was 105 degrees outside so it was still pretty warm even in my insulated garage)
6. Bring the wood inside the house onto the floor where you are going to put it and let it acclimate. Ours ended up sitting there for 6 weeks until we finally got started.
7. Lay the flooring according to the Wood Flooring Association Guidelines. We used 2 inch T cleats/nails by Porta-Nails that we bought on amazon since we have 3/4 inch chipboard over joists. We bought a flooring nailer from Home Depot on sale---it is not possible to rent in this case since laying the floor takes so long. We put the nails down every 5-6 inches, once on every floor joist and 2 in-between. Buy a LOT of nails. There are charts online that tell you how many you should buy depending on the square footage and width of your flooring. We have 1100 square feet, 5 inch wide flooring, and purchased 7,000 nails (we had a box left over). We bought 15 pound roofing paper and put down on the floor first, then just laid the flooring on top. You buy it in the roofing section of Home Depot not the flooring section---the guys in flooring will try to sell you this other stuff that isn't as good and costs just as much.
The joists are 16 inches apart on the floor--you find them by locating where the screws are in your sub-floor that way you know which direction the joists in your house run. Lay the floor perpendicular to this. It is important to get every joist with your nail gun since the 3/4 inch plywood doesn't really do too much to hold the floor down.
8. The barn wood will probably not be straight so it is definitely a two person job. Get the boards so close so that there is no gap. Use a piece of a 2x4 or something to protect the edge of your flooring as you use the hammer to get the boards closer. At times I sat on the floor and pushed on the edge of the board to hold it in place while my husband nailed when the board kept popping out. When you get close to the opposite wall and don't have room to hammer it, put a block of wood on the wall to protect it, and the edge of your flooring to protect it, and then take another piece of wood slightly larger than the gap to hammer it down and push the piece of flooring flush to the other piece. We had to get pretty creative at times.
Also, don't cut out all of the knots and bad spots. We use wood glue and clamps on the pieces that had cracked and split (again this is a slow process, we let the glue dry overnight) and were able to use almost all of the flooring. The pieces that aren't so great went into closets, while we carefully went through all of the wood to choose our showpieces for the living room.
Also, not every piece fits to the next so you may need to try several pieces to avoid big lips and such. Don't worry, they will all fit together in the end.
We worked 1-2 hours a night and more on the weekends and it took us 10 weeks.
9. The part that I struggled most on to find information was the finishing part. I didn't want waterlox because it takes 3 months to cure, and tung oil just didn't seem proper for flooring. I wanted something I could put down and not touch again until it was really time to do it all. But I wanted the look of waterlox because it is gorgeous. Some things on Houzz said 'custom stain and finish' when people asked which didn't help me. It was like they were trying to keep it a secret from us :-)
After tons of research, we used 1 very thick coat of Bona DTS and then 2 coats of Bona Mega Satin. Some flooring experts wrote on here that Bona is over-hyped and that's why it costs so much and Glitsa is better. Well Glitsa might be better but I couldn't buy that on Amazon for $65 a gallon...my local supplier quoted me at $180 a gallon for Glitsa and I couldn't find it anywhere else so I went with Bona. Amazon prime delivered in 48 hours.
For Bona DTS sealer it says each gallon covers 450-600 square feet of flooring. Since the barn wood was so dry though, 850 square feet drank 3.5 gallons in ONE coat. We were trying to not use so much but it just kept drinking it faster than we could put it down. We did not put the second coat of sealer like we planned because we ran out after 1 coat. Note: We were scared when we first put down the sealer since it made the wood look so dark. In fact we stopped after 1 room to make sure we didn't ruin our floors. But when it dried it still left all the character of each piece of wood.
For the Bona Mega the first coat used every drop of 2 gallons for 850 square feet. The second coat used 1 1/3 gallons which follows the recommended amount on the gallon.
I considered using Bona Traffic HD, but it cost twice as much and covered less square feet. Plus the barn wood already looks so rough it seemed silly to spend that much on urethane.
10. Wait 1 week to move all your stuff back. You will need at least a week to recover anyway :-)
This process took us 9 months. NINE months. If you can afford it definitely buy from one of those really cool reclaimed flooring companies online because it is worth every penny. But we couldn't afford it. We got 1500 board feet for a total of $3100, paid the mill $1500 for tongue and groove, $100 in sandpaper, $100 for nails, floor nailer and a 3 gallon air compressor for $250, 3 gallons of bora care $200, 5 gallons of bona DTS sealer and 5 gallons of BonaMega Satin $700, pest control $150, renting a trailer to get the wood and all the gas too $???....so for 1100 square feet about $6-7000. It was nice that we only needed $4500 up front and then the rest of the costs were spread out over time.
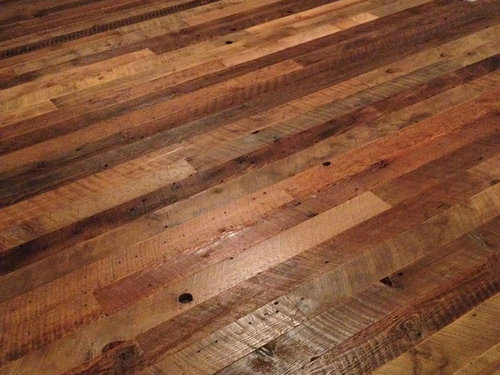
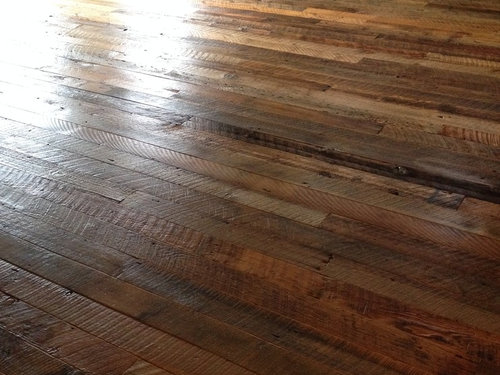
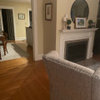
I know this was really long. I was just going to put the part about #9 but then thought the rest might be useful too. I got all of this information in bits and pieces here and there. These are the highlights. We might have done some things wrong but it turned out pretty good. This is the final product!
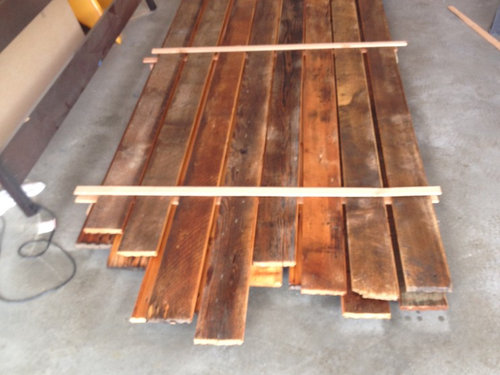
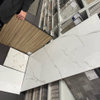
the wood is wet with bora-care here
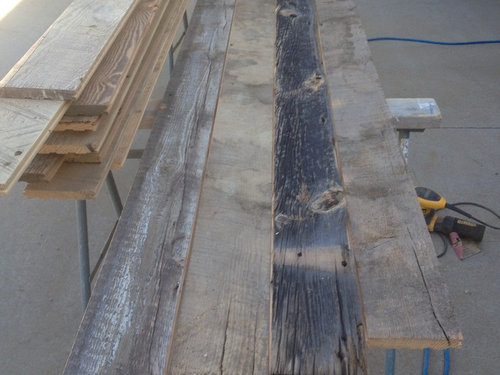
this is while we were sanding before doing anything to the wood


 PRO10 years agolast modified: 10 years ago
 9 years ago
 8 years ago








Cancork Floor Inc.