Software
Houzz Logo Print
ben3712

Outdated sun room to kitchen remodel

10 years ago

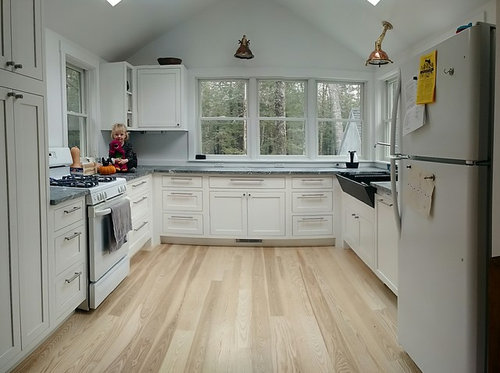
My wife and I converted our late 80's vintage sun room into an ultra light, bright, clean and open kitchen. It was 90% DIY (contracted out the sheetrock and insulation) and we are so happy with how it turned out, that we wanted to share!

Sunroom/Kitchen Remodel · More Info

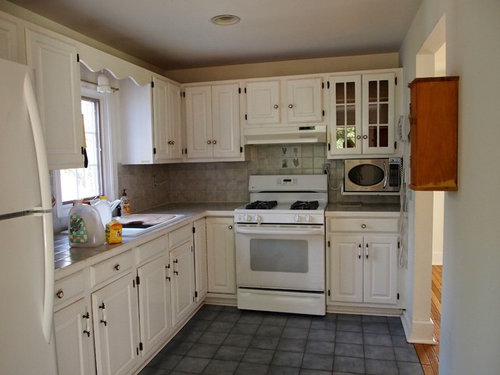
After two years of living in the home and doing several other renovations, we decided to pull the trigger and move our tiny outdated kitchen. L-shaped, it was cramped, small, the cabinets were falling apart, the tile countertop was in major need of replacing and had very little usable space.

We toyed with the idea of redoing the kitchen in the same place, but it still felt cramped, no matter the design. After almost 2 years or modeling alternative locations in SketchUp, we decided to move the kitchen into the outdated sun room.

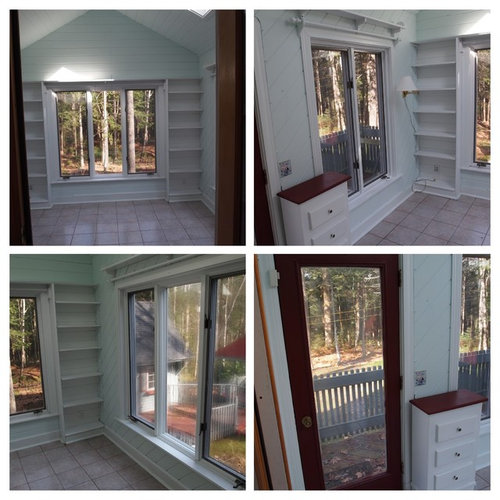
Here's the sunroom before we moved into the house. It was cold, drafty, and had an ant infestation. The tongue and groove was in rough shape, the shelves were poorly made, and the tile was cracked and the grout dirty. BUT, the space had SO much potential!

Sunroom/Kitchen Remodel · More Info

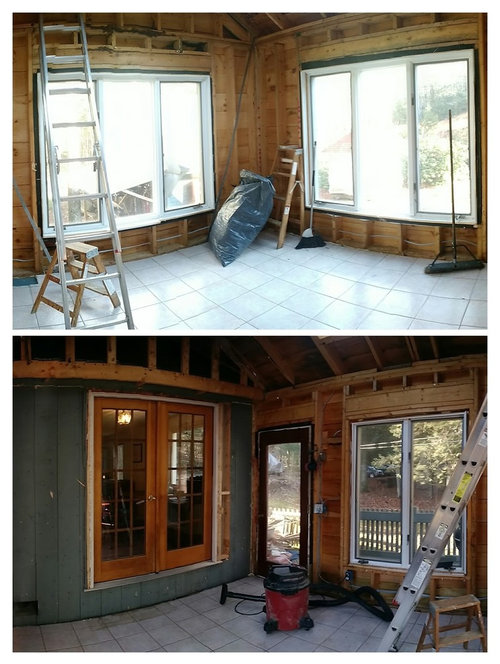
We had a rough idea of what the layout would be and worked with Hancock Lumber to finalize the design. Dan Hanley was super helpful and easy to work with. The design required us to completely tear off the interior walls (and replace the insulation while we were there), replace the three big casement windows, and frame in the door. Initially we planned to keep the tongue and groove ceiling.

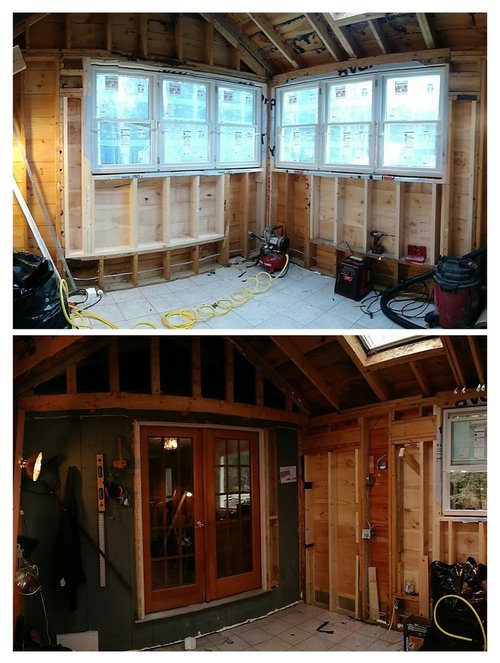
To start with, I removed all the T&G from the walls. Upon seeing the condition of the insulation, we decided to remove the ceiling as well. The removal and clean up took two days and was performed by myself and my wife.

Sunroom/Kitchen Remodel · More Info


Next I removed the old windows, the door, framed up for the new windows and framed in the door. This took a part of an evening and the next day. The next day, I helped my good friend Nick Kutch, a local builder, install the big double hungs and the small double hung.


Sunroom/Kitchen Remodel · More Info

What an immediate difference! The new panorama corner windows opened the room up so much. We were just so excited at this point!

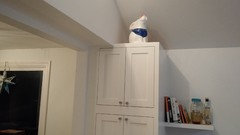
I had a day before the insulators came, so I took it to do some interior framing. I framed the space above the french doors into a cool built-in shelf. We had big plans for this shelf... which you will see in the pictures to come!

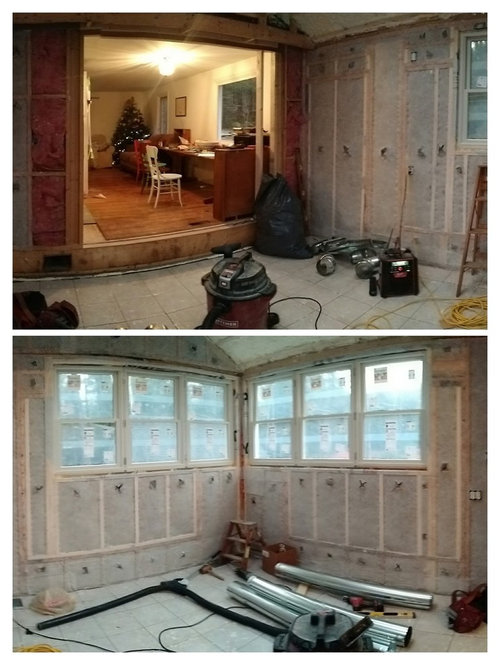
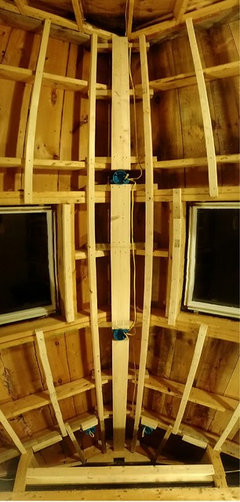
I removed the french door and opened up the opening as wide as possible and added 2x2 strapping in the inside of the 2x6 rafters. The strapping was done both so that we could maximize the spray foam thickness and to minimize the thermal bridging.

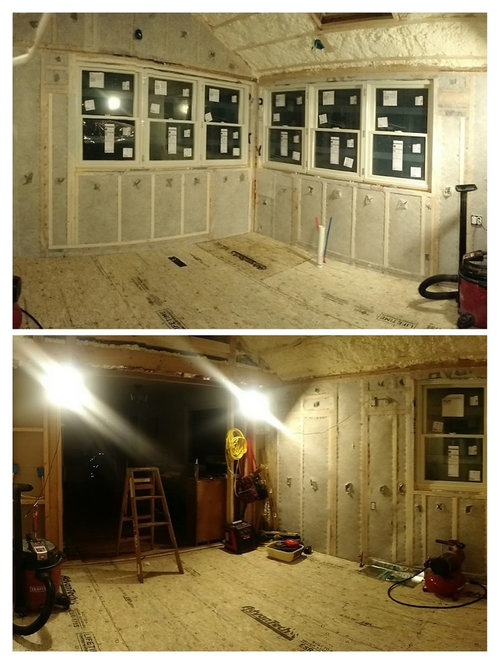
The next step was insulation. We wanted the room to be warm and inviting, so we chose to go with tight-packed cellulose in the walls and closed cell spray foam in the ceiling. We did the foam in the ceiling due to it being unvented, and to add some structural rigidity.

Sunroom/Kitchen Remodel · More Info

What an unbelievable change that made. What was once a drafty, chilly room with a odd echo was now a snug, cozy, and quiet space. We are super glad we went with the cellulose and foam. Really nice stuff.

Next on the to do list was to raise the floor. The sun room had been built sometime in the late 80's and had been constructed on top of an old deck. The deck was 13 5/8" lower than the main floor of the house. We felt this separated the room from the rest of the house and would ruin the flow into the kitchen. So, we decided to raise the floor up to the level of the rest of the house. The countertops are soapstone and very heavy, so we made the floor VERY robust.

Sunroom/Kitchen Remodel · More Info
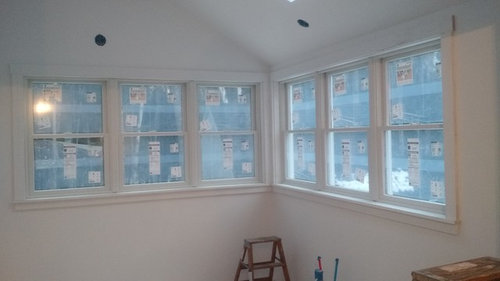
Next on the docket was sheetrock. Unexpectedly, Irving Starrett of Irv's Drywall was able to fit us in right before Christmas. It just took one night of working until midnight to make that work. ;-)

They did an incredible job and we were able to paint and put up the trim the day I returned from sea.

Sunroom/Kitchen Remodel · More Info

We ordered local Maine Ash hardwood flooring from A.E. Sampson and Son and it arrived three weeks ahead of schedule. Completely stoked, we installed in and finished it with Benjamin Moore water based poly in two days.

With the floor completed, I had to head back out to sea for 3 weeks. Upon return, Nick, our friend Jeff Kelley of JK Timberframes, and myself installed the cabinets. Over the next week and a half, I installed the M. Teixeira Fantasia soapstone (who were a dream to work with), lighting, hardware, finish plumbing, and did the touch up paint. We scheduled a big dinner party to keep the pressure on and we were able to pull it off with just the backsplash behind the sink left to install.

Long story short, it was an awesome time, we had a ton of cool people to work with and we are super happy about how it turned out.


Sunroom/Kitchen Remodel · More Info

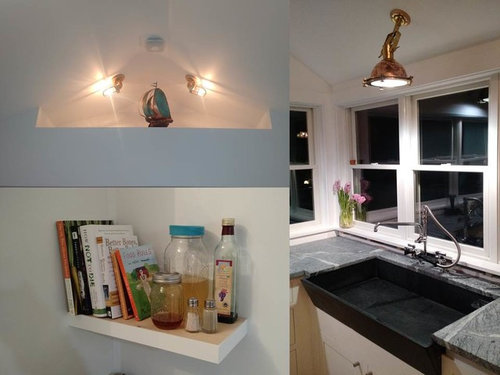
Here's a few of our favorite details, including the built-in shelf I mentioned above.

Please ask if you have any questions. I'm glad to answer or find the answer. :) Hope you enjoy!

Comments (44)

  • PRO
    10 years ago
    you did a great DIY job!

    Ben Hart thanked Skill Construction & Design, LLC
  • 10 years ago
    Beautiful job! I love seeing great work from DIYers!

    Ben Hart thanked Bev
  • PRO
    10 years ago
    Looks great. nice job!

    Ben Hart thanked Raegan Ford Interior Design
  • 10 years ago
    Wow, you did such an awsome job. I really love the flooring, windows & doors. What a welcoming space that you'll enjoy for so many years. And, thank you for breaking everything down. It's so helpful for people like us who plan on doing projects, although ours is not going to be as extensive.

    Ben Hart thanked tooky58
  • 10 years ago
    Thanks a bundle all! It sure was a ton of fun to design and build. Looking forward to our next remodel... the main floor.

  • 10 years ago
    It looks wonderful! Your kitchen story invert inspiring.

    Ben Hart thanked Celia Lin
  • 10 years ago
    Your story reads likea novel. Great job, one of the best diy! s I have seen. The picture with your daughter was spooky.....looked like The Shining.
    Ben Hart thanked wacokid
  • PRO
    10 years ago
    Great job! Love the flooring.
    Ben Hart thanked Drawer Essentials
  • PRO
    10 years ago
    Wow!! Great work it really turned out nice!! Great inspiration for DIY!! BeyondFurniture.net
    Ben Hart thanked Beyond Furniture
  • 10 years ago

    Really beautiful. But tell me (since I love all the juicy details) - what did you do with the old kitchen.

    Ben Hart thanked rachelsmdai
  • 10 years ago
    Thanks for asking @rachelsmdai, that's the big question right now! The answer is there are some BIG plans. :)

    We're regrouping after the big push for the kitchen and sketching out several ideas for the space in SketchUp. Right now the main floor is oddly divided, with lots of wasted space and a poor flow. The house is small (970 sq ft living space when we purchased, increased to 1250 with our renovations), so wasted space is a huge no-no.

    We plan to:

    • Bump the former kitchen into the wasted space of the bathroom that one time served as a powder room
    • Knock down the the walls on the right side of the picture of the old kitchen. The one in the foreground of the picture is actually the backside of a 7' x 27" hearth... except there is only a ventless stove. The actual chimney inside the hearth is used for the furnace exhaust and is only 16" x 20". So, we're going to get rid of the big block to flow and waste of space, and leave the chimney.
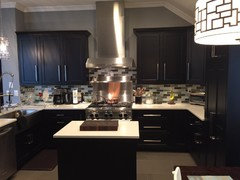
    • Clad the chimney, which is cinder block, in something likethis.
    • Open the staircase up and put a skylight in above it.
    • Make the stairs a single steel riser with wood treads.
    • Replace the front door with something with a single side light and a mostly glass door.

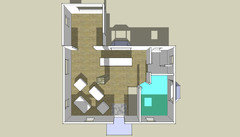
    That's it for the main floor. It will create an open floor plan, with lovely flow and light and the chimney will divide the area into a seating area and a dining area, both exceedingly informal. It will look something like this:

    When that is all done, then it will be on to the upstairs! A big shed dormer, an open, bright great room... tons of plans!

  • 10 years ago
    Oh, and we used all the old appliances in the new kitchen. They both worked great and just needed some good cleaning and replacement of a few cosmetic parts.

  • PRO
    10 years ago
    Wow, your hard work really paid off. The space looks fantastic!

    Ben Hart thanked Laura Lee Designs
  • PRO
    10 years ago

    Great remodel!

    Ben Hart thanked Kaplan Construction
  • PRO
    10 years ago

    Unbelievable job!

    Ben Hart thanked OTM Designs & Remodeling Inc.
  • 10 years ago

    Is the sink also soapstone? What are its measurements including depth?

    Ben Hart thanked goatlover
  • 10 years ago

    Thanks for the question, goatlover. The sink is Monson slate. We bought it used and refurbished it ourselves. The dimensions are 42" x 24 3/4" x 9" deep.

  • PRO
    10 years ago

    Looks amazing! Love the open space! Congratulations on your new kitchen! Thanks for sharing!

    Ben Hart thanked Stecki Construction
  • 10 years ago

    Love the transformation!

    Ben Hart thanked User
  • 10 years ago
    Spectacular change. Always love choice of inset cabinets so rare these days people just don't consider that style.

    Only thing I may have considered different is to have open shelves in the corner by the wonderful window.

    I think it would look more open and not give a better flow.
    Ben Hart thanked Idicula Samuel
  • 10 years ago
    I mean give a better flow. Here are my inset cabinets love them. People come over and love the clean lines and none of them know the inset style is contributing to that.
    Ben Hart thanked Idicula Samuel
  • 10 years ago

    Amazing!

    Ben Hart thanked roonvlik
  • PRO
    10 years ago

    WOW! Congrats on your new kitchen. I appreciate all the progress photos you shared and documenting your experience.

    Ben Hart thanked User
  • PRO
    10 years ago

    Very well done for DIY-er! Enjoy the new kitchen!

    Ben Hart thanked TBS Construction Inc.
  • 10 years ago
    last modified: 10 years ago

    isamuel71, thanks for the constructive criticism. I welcome opinions on how it could be improved. We had considered open shelves, for we agree, it would have made the flow better.

    But... that upper cabinet is where we store our drinkware. Unfortunately, wth two small kids, we are not in a position to display our drinkware in open shelving.

    We love the clean, uncluttered look, and that set of shelves would have decimated that. So, we chose to make the cabinet enclosed.

    In our house, function precedes form. So, in this instance, the closed cabinet won.

    Thanks a tons to all for the compliments!

  • 10 years ago
    Ben Hart totally agree with your view point and makes total sense. By the way that was mere suggestion and does not take away from the cabinets you chose instead of open shelves. I would give anything for those beautiful Windows.
    Ben Hart thanked Idicula Samuel
  • 10 years ago

    Hey thanks, isamuel71! :)

    The windows are our favorite feature... well, them and the sink... and counter tops... and floor... and inset doors and drawers... and lighting... and, ah forget it, we love the whole thing!

  • 10 years ago

    Love it!

  • 10 years ago

    I love it! You make it look easy because you seemed to work so fast. For me the smallest project can take all weekend. What is the strapping you mentioned? How are you liking the soapstone? I am considering soapstone in the future. And why did you choose inset cabinets? I never even heard of them until I started reading about remodels on Houzz.

    Ben Hart thanked Terri Henderson
  • PRO
    10 years ago

    Nicely done! Enjoy your new kitchen remodel.

    Ben Hart thanked M&R Custom Millwork Inc
  • 10 years ago
    Terri Henderson I will let Ben Hart respond as well to his reason for inset cabinets.

    My reasoning was purely for the nice clean look. Plus everything looks nice and flush no door sticking out and usually needs a bit more attention to details so end result is a better quality product or cabinet.
    Ben Hart thanked Idicula Samuel
  • 10 years ago

    I love what you did! My husband and I are in the throes of a full remodel with little kids as well, so I can fully relate to the added difficulty those wonderful little people can add, and how they influence design choices. You should consider posting this over in the Kitchens forum too. I think everyone there would appreciate your hard work!

    Ben Hart thanked girouxgh
  • 10 years ago

    Thank you so much, Terri Henderson! I have a little secret... yes, the work was DIY, but I may just have quite a bit of previous experience building. That experience - 3 years full time, 13 part time - definitely helps to make things go much more quickly.

    "Strapping" is any assortment of narrow dimensional lumber that is laid perpendicular to the studs, joists, or rafters to either add thickness to the wall, or to act as a nailer for a wall covering (siding or interior covering). In our case, we used it on our rafters to add thickness to the roof to increase the insulation.

    I chose inset cabinets because, to us, they perfectly captured our style: practical, functional, classic, and clean with a hint of modern. Inset cabinets, traditionally, were more difficult to make as the tolerances between the doors and drawers and the frame of the front are tight and look terrible if they are not correct. Thus, when done well, they had a reputation for quality. My favorite part of it was that they were not praised for being decorous and ostentatious, but instead praised for their exacting understated quality. Combine that cool piece of reputation with the clean, even look the fronts display and you have just exactly what we were looking for!

  • 10 years ago

    I can tell that you obviously have experience! Thanks for explaining the strapping and inset cabinets. My husband and I bought a house to fix up and are trying to do some work ourselves, but we are so slow. LoL... I look forward to following the rest of your projects. I am putting our projects into idea books on my page. So far I only have one project up. I should add the house. Maybe I could get some pointers. Good luck with the rest of your house!

    Ben Hart thanked Terri Henderson
  • 10 years ago
    last modified: 10 years ago

    girouxgh, thank you so much! Ya, doing it with kiddos has been a riot. Both of them want to help so much. It can be such a source of humor for us!

    Where is the Kitchens forum? Do you mean that I should post the pictures on the Kitchen Photos page?

  • PRO
    10 years ago

    Great narrative. I, also would have made open shelves or both glass doors in the corner. Cool sink. Is it from Sheldon Slate in Monson, Maine?

    Ben Hart thanked Rosenhaus Design Group, Inc.
  • 10 years ago

    Looks great!

    Ben Hart thanked jdcollects
  • PRO
    10 years ago

    Wow! Such a great job!

    Ben Hart thanked Raegan Ford Interior Design
  • 10 years ago
    last modified: 10 years ago

    Rosenhaus,

    Yes, the sink is Monson slate. Thanks for asking. Sheldon slate is a great company! I bought the sink used, emailed them with questions, and received detailed instructions in how to refurbish the sink on my own.

    Thanks for your insight on the glass doors and shelving. As I explained above, both options run counter to what we wanted for that corner. The shelves were our initial plan, but would have lead to a cluttered look with the drinkware we have (a crazy assortment due to having young children). The glass door, even opaque, would have created the same undesired effect, with a haphazard assortment of colors showing through the glass. Also, neither of us like glass doors. They are either too starkly modern, or reminiscent of a 1980s solid oak kitchen. We don't like either look, so solid door it was!

    As time passes, we may eventually opt to remove the corner cabinet, and go with open shelves. It just doesn't work for now. And, when experienced firsthand, the corner cabinets do not detract from the pleasant effect we were seeking. You're too distracted by the bright welcoming light and huge windows! :)

  • 10 years ago

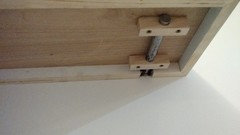
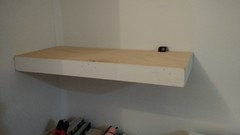
    By the way, the shelf that holds the books and cooking oils is a homemade floating shelf. The bracket is a shaft from an old furniture dolly I rebuilt and a some square tubing welded together. It's strong enough to hold about 50 lbs! I was really happy with how it turned out. :)

  • PRO
    10 years ago
    I think the little girl in the "after" photo is so cute!!
    Ben Hart thanked Ball&Paw Salvage
  • 10 years ago
    last modified: 10 years ago

    Kate, she sure is!!

  • PRO
    10 years ago

    Beautiful this looks great!

    Ben Hart thanked Addition Building & Design, Inc.