Software
Houzz Logo Print
chaparralgirl

building a strawberry planter box...

10 years ago

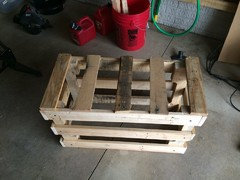
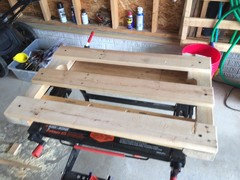
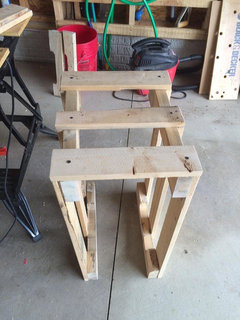
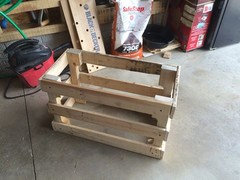
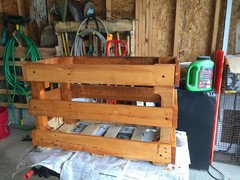
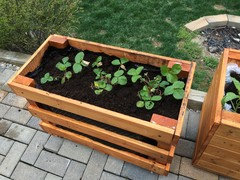
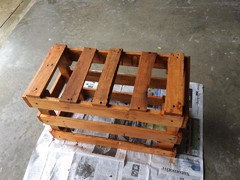
...and I need advice on how to build the bottom. This is a patio planter box that will go on wheels so I can move it around the patio as needed. Here's a photo of what I've built so far:

As you can see, there's no bottom. (That's partly because I ran out of wood...) I recently built a planter box for tomatoes and peppers, and I'm being told that I didn't put enough drainage in the bottom. (It's too late to fix that now, it's already filled with soil and plants.) I don't want to make the same mistake with my strawberry planter. Any suggestions on how to make the bottom so I have enough drainage? Solid bottom with holes? Slats like I have on the sides?

I plan to line the inside with landscaping fabric. Is this a good idea?

I was thinking about planting plants along the sides (for which I'd have to cut holes in the fabric along the sides) as well as on top. Is this a good idea?

Finally, the inside dimensions are 12.5" wide x 28" long x just a teeny bit over 17.5" tall. How many strawberry plants can I safely put in my planter box without overcrowding? I currently have 3 strawberry plants waiting to go into the planter once it's done.

Any advice is greatly appreciated.


chaparralgirl

Comments (18)

  • 10 years ago
    samsaraedu: It is pallet wood (heat-treated, not chemical-treated). I can share how I put it together if you like.

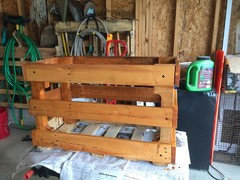
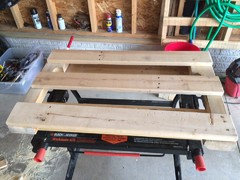
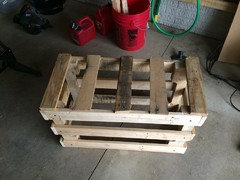
    Today I found some wood pieces that I put on the bottom, allowing enough room for drainage (and probably then some...)

    (Here the bottom pieces are just laid in place; I did ultimately screw them in.)

    I'm in the process of staining the whole thing now, and I'm finding it to be a huge pain in the butt, because so much of the wood surface on the inside is exposed. I should've stained the individual pieces BEFORE assembling the planter. And, since I'll be using landscaping fabric to line it, I'm staining the inside as well as the outside, just to protect the wood from rotting.

    When the whole project is complete, I'll post more pictures.


    chaparralgirl

  • 10 years ago
    I would love the instructions for it. If you don't post here you can PM me. Thanks

    I found a place that gives away pallets for free (sign says broken but 80% are not damaged at all) but not sure how treated, I wonder if they know.

    I've seen pallets with wheels on BHG or HGtv site used as a living fence and always wanted to try it, but seemed too big and unwieldy for me. This is much more manageable and I can see using it for loads of different plants.

    What variety of strawberries do you have? I had beds of Ozark & Honeoye and put in Eversweet & Pineberry last year. I'm going to start some Rainbow Treasure seeds this week, my family loves strawberries.

    chaparralgirl thanked samsaraedu
  • 10 years ago
    samsaraedu: I will post the steps with pictures as soon as the project is complete. If you want to see the pictures I have so far, you can look at my projects on my profile; I'm just not done with the whole thing yet, and I don't have any descriptions/instructions to go with the pictures.

    My observation is that heat-treated pallets will be stamped with "HT;" I'm not sure what chemical-treated pallets are stamped with. (I think a google search might yield some helpful tips. I found this.) I would recommend that, if you're not 100% sure, don't use that wood for growing food plants.

    I have 3 Bonnie Plants Allstar strawberries that I picked up at a local grocery store. I know nothing about how well they'll do, how big the berries will get, or how sweet they'll be. It was an impulse buy. Right now, I've got a few berries forming - mostly very small, but one larger one. They're still in their little pots, waiting for me to finish the planter.


    chaparralgirl

  • 10 years ago
    last modified: 10 years ago
    samsaraedu: Ok, here is how I put together the strawberry planter box, step by step.

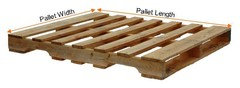
    ANATOMY OF A PALLET:

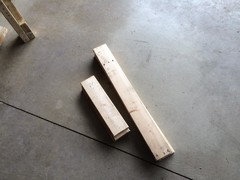
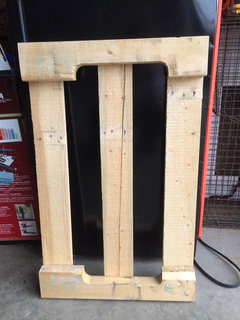
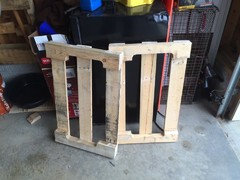
    A pallet will consist of 3 2x4s (the interior pieces) and a bunch of 1x4s (the top and bottom surfaces). You'll notice that the 2x4s on some pallets (like the one shown) have notches cut in them. I presume this is for forklifts to access them. To the best of my knowledge, these notches won't have any effect on your planter box.

    TO START:

    Start with a wooden pallet that has been HEAT-TREATED (not chemical-treated). I recommend prying it apart, rather than sawing through the nails. (My husband sawed through the nails for mine, which was faster and easier, but then that left me with pieces of nails embedded in the boards, and sometimes they were in inconvenient locations when it came time to cut the wood or drill through it.) Once you've got the pieces all pried apart, you can gently hammer the pointy end of the nails to drive the nails back through the board enough so you can pry the nails the rest of the way out with the hammer head.

    THE PIECES YOU NEED:

    You will want TWO (2) of the 2x4s and SIX (6) of the 1x4s.

    The 2x4s from the pallet I used measured just a little under 35.5". I just measured to roughly the halfway point and cut. This will leave you with FOUR 2x4 pieces.

    Next, you need to cut the 1x4s. The 1x4s I had were of varying lengths, so I measured them out to 42" and cut.

    Then I measured each 42" plank out to 14" and cut again.

    This left me with 1 piece at 14" and 1 piece at 24" (cut from one 42" plank).

    Cut all 6 1x4s this way, for a total of 6 14" pieces and 6 24" pieces.

    (...to be continued...)

  • 10 years ago
    last modified: 10 years ago
    (...continuing...)

    SANDING:

    I recommend that you sand each piece individually, before putting the planter box together. I found that sanding the whole thing once it was already put together was a little frustrating when trying to reach odd places.

    MAKING ONE SIDE OF THE PLANTER:

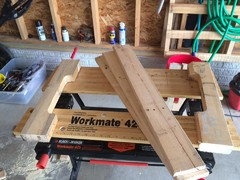
    You want TWO (2) of the 2x4 pieces and THREE (3) of the 24" 1x4 pieces.

    Here's how the pieces will go together:

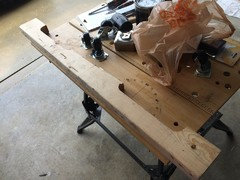
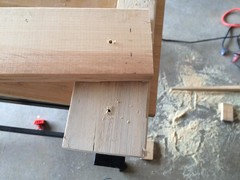
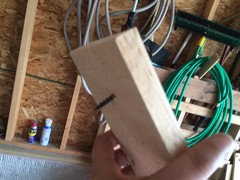
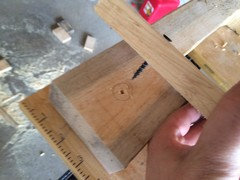
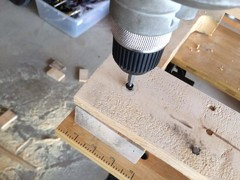
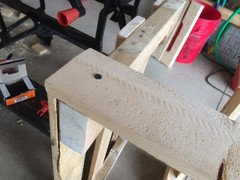
    Starting with either the top or bottom piece (not the middle piece), line up the corner of the 1x4 with the corner of the 2x4 so that they are more or less flush. (You may want to use a small vice to hold the pieces together.) Drill a pilot hole through both the 1x4 and the 2x4. (The picture below just shows that the hole went through both boards.) Now you'll screw the boards together.

    If you're not using a vice to hold the boards together, they're probably going to move such that the holes are no longer lined up. In this case, drill your screw through the 1x4 first,

    then insert the screw into the hole in the 2x4,

    and drill the screw in.

    Repeat these steps for the rest of the boards.

    I recommend doing the top and bottom pieces before attaching the middle piece. This just lets you get a better visualization of where to space the middle piece.

    Now you have one side of the planter box. (Here is the backside:)

    Now make another one.

    Now that you have both sides of the planter box complete, it's time to put the ends on.

    (...to be continued...)

  • 10 years ago
    (...continuing...)

    PUTTING ON THE ENDS:

    (This part is a little tricky, because you're trying to balance pieces and drill/screw them together. I don't have any special tips for how to do this part, other than try to balance the sides on their ends.)

    You will now need the 14" 1x4s.

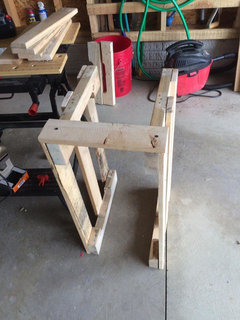
    Balance the assembled sides long-ways as shown, and place a 14" 1x4 across them.

    Match the corner of the 1x4 up with the corner of one of the sides so that they are more or less flush. Drill a pilot hole, then drive a screw into the pilot hole, securing the 1x4 to the side piece.

    Do this on the other side as well, securing the 1x4 to the other side piece. Now the sides can stand freely without falling over.

    Attach two more 1x4 pieces, making sure to secure the top and bottom pieces before securing the middle piece.

    Now flip the whole thing over and attach the remaining 3 1x4 pieces, making sure that the corners and edges are more or less flush.

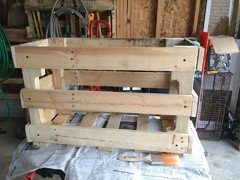
    Once the end pieces are in place, you'll have this:


    Next, we need to make the bottom.

    (...to be continued...)

  • 10 years ago
    (...continued...)

    MAKING THE BOTTOM:

    (I must apologize that this is a little out of order. I should've included cutting the bottom pieces in the beginning.)

    To make the bottom pieces, take TWO uncut 1x4s from your pallet stock, mark them out to 42", and cut. Then, mark each piece at 14" and again at 28", and cut. This will leave you with SIX (6) 14" pieces of 1x4.

    (I actually ran out of 1x4s when I was making mine, and had to find scrap pieces lying around. You'll notice in the pictures that my planter box only has 5 pieces on the bottom; I recommend 6, but if you want to leave one piece out, that's fine.)

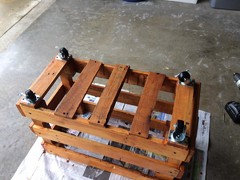
    Place the bottom pieces across the planter box as shown. I recommend setting the two end pieces directly on top of the 2x4s, rather than flush to the edge. This will become helpful when adding the casters later on. I did not measure out distance/spacing between each piece, I just eyeballed it. Drill pilot holes on each end of each piece, and drive screws in to secure them in place.

    I recommend at this point sanding down the exterior surfaces (if you haven't already) to get rid of any marks you've made on the wood when you sized to cut.

    Now you're ready to stain.


    STAINING:

    This part is a huge pain in the butt, because there are so many exposed areas, and because virtually all surfaces will come into contact with air, soil, and/or moisture. You're essentially staining the whole daggum thing. (I might actually have tried to stain the pieces individually before assembling the whole thing if I had thought about it.)

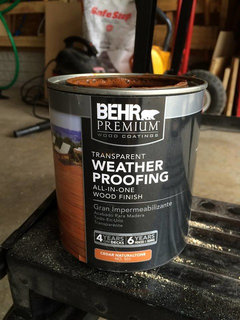
    I used Behr Premium Transparent Weather Proofing stain in Cedar Naturaltone (color no. 501), because it was recommended to me at Home Depot. You may want to chose something different if you like.

    Stain both the outside AND the inside, every visible surface.

    Let that dry. Be careful that you don't "paint" the newspaper to the box, or you'll be picking bits of newspaper off of your box later.

    Next, you'll put on the casters.

    (...to be continued...)

  • 10 years ago
    (...continuing...)

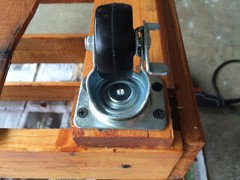
    ATTACHING THE CASTERS:

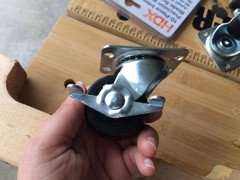
    I chose a caster with a rubber-ish wheel and a locking brake mechanism, that swivels.

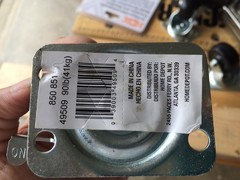
    Here's the label (I got these at Home Depot):

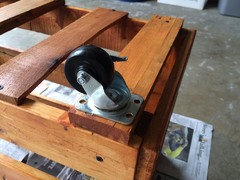
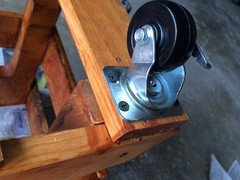
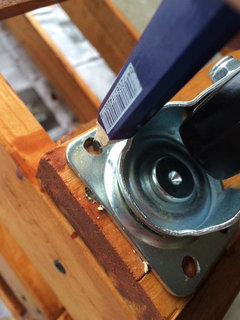
    Place the caster on the bottom side so that the caster plate is lined up with the 2x4 - not with the 1x4 plank that rests on top of the 2x4.

    (This photo is out of order, but it demonstrates what I mean by lining the caster plate up with the 2x4. This way, when you screw the caster plate into place, the screws will drive into the 2x4, not the air next to the 2x4.)

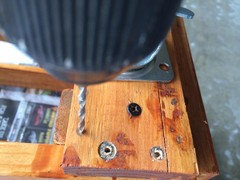
    Holding the caster in place, mark where you will drill your pilot holes.

    Then drill the pilot holes,

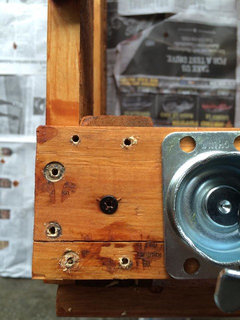
    (Ignore the two holes I drilled there at the bottom; I misaligned the caster initially, and was going to attach it wrong.)

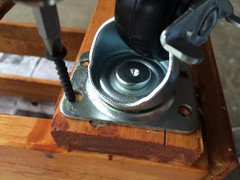
    then screw the caster plate into place.

    Now attach the other three casters in the same manner.

    The next step will be to line the planter with the landscaping fabric.

    (I actually have to head to work now, so I'll post the landscaping fabric part when I get home.)

    (...to be continued...)

  • 10 years ago
    Thanks for that so much for that.

    I'm going to check that place this weekend for the stamps on the pallets to see if I can do this. I saw some at a supermarket closer to me but they were pretty beat up and had a blue or green paint? stain? on the side so I'll just wait.


  • 10 years ago

    samsaraedu: I found this link about pallet safety that should prove quite useful. It suggests that the colored pallets are a no-no - here's a quote about them from the link: "You may find traces of formaldehyde and other resins used in the composite blocks. Also, there a lot of chances they have been used to transport chemicals." So, if you want to use those pallets, use them solely for decorative plants, not for food plants.

    chaparralgirl

  • 10 years ago

    (...continuing...)

    LANDSCAPING FABRIC:

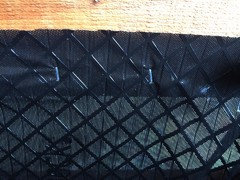
    I'm not entirely sure what the difference is between the various different types of landscaping fabrics. I went to Home Depot and all I found was weed block, so I used that.

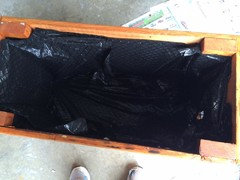
    I doubled up the fabric, as you suggested. I should've taken pictures of the actual process, but it was a little involved, and I was getting frustrated trying to staple the fabric in place, because the planter kept rolling around. (That being said, you might want to consider putting in the fabric BEFORE attaching the casters.) So, all I have are pictures of the fabric already in place.

    I recommend lining the edge of the fabric up about 1/2" to 1" below the top edge of the planter, and staple it in place.

    I know, it looks like I lined my planter with a black plastic trash bag.

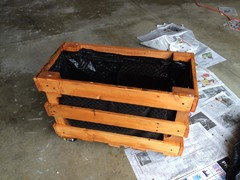
    Here is the final product:

    That should do it.

    THE END.

  • 10 years ago

    Tomorrow or over the weekend, I will be able to fill the planter with soil and then pot my strawberry plants. Once that's done, I'll post a pic or two of that.


    chaparralgirl

  • 10 years ago

    I really appreciate the info, this will be a great project.

    What texture does that weed block feel like? I bought some that was more like a fabric the first time but couldnt find it again and the next roll was more like something pressed together not woven, weird.

  • 10 years ago

    /samsaraedu: The weed block is plastic, like a plastic garbage bag.

  • 10 years ago

    Finally, here is my planter box with the strawberry plants.

  • 10 years ago

    That looks fantastic. It really came out looking like something they sell in the stores. I cant wait to build one.

    chaparralgirl thanked samsaraedu
  • 10 years ago

    Thanks, samsaraedu!