Software
Houzz Logo Print
mcbrayer0814

Wood countertop warping!

10 years ago

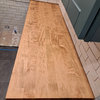
In desperate need of help. We had a black walnut countertop built for our kitchen island, the island has a small prep sink. We applied mineral oil and a polyacrylic to the top and placed on the island. I fear our mistake was not sealing the bottom. Any way several issues occurred and we never got around to actually attaching the top to the island and now it's warped, cupping? The other edges are bowing up from the middle. It is a very large, very heavy solid piece. We placed a dehumidifier under the top and placed plastic wrap all around but have not seen any change in almost 2 weeks. Our next thought is to attach one side with corner braces, place clamps on the other and slowly tighten the clamps over a period of time to 'straighten" the top. We will seal the bottom before we attach.

Any advice or tips would be greatly appreciated.

Comments (15)

  • 10 years ago

    You put poly acrylic on top of the wood treated with mineral oil?

  • 10 years ago

    Yes, we liked the look of the mineral oil but I was too scared to set anything on it so we added a sealer to actually use the top.

  • 10 years ago

    I am in agreement with how you finished the top and believe you are correct in suspecting failure to finish underside may be partly or completly cause of warp. The problem with your plan useing clamps and braces is that box doesn't have near the required resistance. Even if you were able to pull it flat it would likly warp again. I would build a router sled to level both sides,refinish and install as normal.

  • 10 years ago

    Klem- my husband may understand but what do you mean when you say "build a router shed"? Do we need to route grooves to the underside where it sits on island or something else?

  • 10 years ago

    I don't have a link explaining the use of a leveling sled but perhapps someone else does if they agree it is a solution. Router sled is within capabilities of the home woodworker. You can do something similar with a planner but that require's a huge commercial planner found only in professional shops.

  • 10 years ago

    Found a video on using the router to level. I don't think the husband would like to do that since we would be losing height to the counter. I will run the idea by him though. Thank you for the suggestion.


  • 10 years ago

    Yes, sorry meant thickness.was informed that we have a router sled already built. The top is 4 boards that were joined together by a cabinet maker. Edges finished and it's 38" x 63". We have a large assortment of tools including router, belt sander, table saw, bandsaw, miter saw and other smaller tools.

  • 10 years ago

    There really is no way to level that piece of wood other than taking off material. As a rule, wood moves as it has to, and trying to force it back as it was does not work. And now you know that all sides/surfaces have to be treated equally to minimize movement.

    The router sled is the fastest and most accurate method of leveling.

    mcbrayer0814 thanked User
  • 10 years ago

    My husband is calling the guy that built the counter for us to see if there is anything he can do before we break out the router. To be honest I think my husband is hoping he gets to use his router sled.


  • 10 years ago

    Well, post a video here of said router sled in action! It sounds interesting...

  • 10 years ago
    last modified: 10 years ago

    A router sled would be a huge amount of work on a top like this and thin it down too much. It would be easier (cheaper) to have the carpenter rip it into pieces, edge-joint them and re-glue it. I've had to do this in the past.

    You can try to flatten it with just clamps, I doubt it will turn out well.

    If it were mine: I'd pull it off, flip it over and rip an number of saw lines - 5 or 6 - evenly spaced across the under side. They would be 3/4 of the thickness of the top. I would not cut through the ends, but stop short by about half an inch. This should allow the top to flex back down. Your problem is moisture in the bottom has expanded the wood, and it's not going to go back to the way it was - so you need to remove a bit of it. It's on the underside, it will never show.

    After you make these cuts - make sure not to cut all the way through, just 3/4 of the way - you should be able to push the wood down and flatten it out. It will flex.

    Once done, I'd clamp and fasten one side down, then flatten it out and fasten it on the other.

    Best of luck to you.

    mcbrayer0814 thanked Troy Farwell
  • 10 years ago

    Troy- we are contemplating making the marks or having it ripped into smaller sections then joined together. We are waiting to hear back from the guy that originally made the top for us first.

  • 10 years ago
    Yes - that's wise. I hope it goes well for you
  • 10 years ago

    beware that if you flatten it now it may well warp the other direction when the humidity changes with the seasons. Sealing all sides will slow the movement but not stop it. I'd check the wood with a moisture meter to see where you are, and watch how it changes with the seasons (both the warp and the moisture content). It may be that it was made with wood that was not matched to the environment and that once it equilibrates to your house it will stop moving so much. If that's true then one of the flattening methods outlined will solve the problem. If it's a particularly reactive piece of wood it might not.

    If the piece was made with insufficiently dry wood and has now turned into a potato chip you may need to go back to your cabinetmaker for a replacement-- but that's going to be hard to prove.

    Cutting it, re jointing, and reassembly may be a sensible approach if your environmental conditions are relatively constant and you are sure the wood is fully equilibrated. Forcing it to lie flat is both hard to do and will result in cracks in the wood.