Software
Houzz Logo Print
pippiep

Roman shade: third time's the charm!

9 years ago
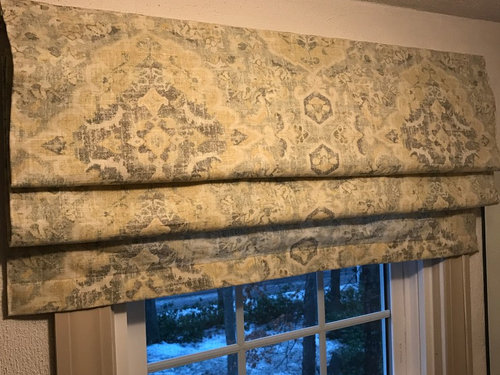
Novice sewer here... I use my sewing machine maybe once a year or less, just to hem pants or curtains. But the quotes I was getting for roman shades were just too high given that we need 11+.

I made my first two roman shades out of existing lined drapery panels, which were plain and ugly to begin with. They turned into plain and ugly roman shades, but I was able to use them to correct and improve my technique. I won't show pictures of those.

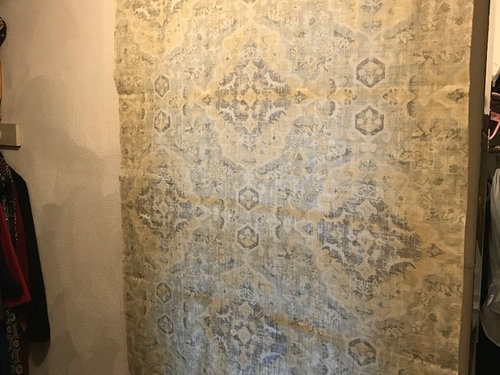
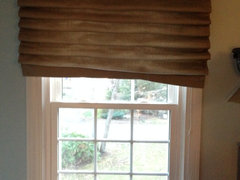
I found the same faded watercolor Country Curtains fabric that I loved (Covington Jaipur from onlinefabricstore.net), and made a roman shade for my walk-in closet window. It was easier to work from scratch and I finished it over 5 or 6 hours.

It came out shorter than planned for some reason. It's also 1/2" narrower than planned, though it's plenty wide. I'll have to make sure to add extra length in my measurements next time, and trim the top only once I know it's long enough.

I already bought fabric for the dining room and living room. I'm ready!

Comments (14)

  • 9 years ago

    I am so impressed. Way beyond my skill set!

    pippiep thanked cyn427 (z. 7, N. VA)
  • 9 years ago
    last modified: 9 years ago

    Looks good. I would think starting from scratch would be easier, especially once you understand the process and have made some adjustments. If either light or privact matter and you want a little extra length, you could add a ribbon band or something to close the gap at the bottom.

    I would like to tackle a similar project, but I really need the bottom up feature. Do you know if that is possible as a DIY?

    pippiep thanked lascatx
  • 9 years ago

    Great job! You are brave for tackling the task IMO. I could probably figure it out eventually with my rudimentary skills but have lost a lot of my former patience for sewing. Ditto the suggestion for adding a trim piece if you want to close the small gap for absolute privacy.

    pippiep thanked OutsidePlaying
  • 9 years ago

    "I made my first two roman shades out of existing lined drapery
    panels, which were plain and ugly to begin with. They turned into plain
    and ugly roman shades, but I was able to use them to correct and improve
    my technique. I won't show pictures of those."


    Rats! It's educational seeing the ways you should NOT make things.

    pippiep thanked User
  • 9 years ago

    lascatx -- I think I came across a tutorial for a top down/bottom up roman shade once, but I didn't save the link.

    lazy_gardens -- I don't mind sharing what went wrong! I forgot that I'd already posted the "ugly" shades before, in a help-me post. Anyway, here's what I noted during the whole process.

    These are the tutorials I used:

    I liked the look of the Sailrite roman shades, but decide to use the child-safe precautions in all the other videos. I bought the shroud tape and iron-on rib tape, and spaced the dowels 8" apart, tacking down the shroud tape at those points. The results were less than stellar... the shade looks like a hobbled shade (lots of folds throughout) as I'm raising it.

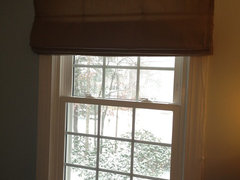
    It doesn't raise flat as shown in the Sailrite videos. I realized this is a result of the shroud tape. It bunches up immediately in ALL spots, especially the top, which makes every segment fold up at the same time. I have to manually pull down to flatten the top layers to get it to look the way I want. This is what it immediately looks like when I start to raise the shade:

    And this is what it looks like when I manually pull down the top parts to flatten the segments that aren't supposed to be raised yet:

    Super annoying.

    So, for my next test, I decided to do it the way it's described in the Sailrite video, with 12" spacing (actually 11.5") and rings sewn every other rib, and regular cord instead of shroud tape. I don't have very young children, so I'm not worried about child safety.

    The result is the shade in the original post, and I LOVE IT. I might make my next one with shorter segments, but still stitching the rings every other rib.

    I did do the tying method for the rings as shown in the first Scott Weaver video above. SO much faster than sewing!

  • 9 years ago
    last modified: 9 years ago

    Well the super annoying one still looks great when you adjust it. We are getting ready to redo a bathroom, then windows -- that gives me some time to look for tutorials and contemplate another project. I could have 12-17, depending on choices. That might be a bit much, but I only need one in each of two rooms and that could be a starting point. Thanks

    pippiep thanked lascatx
  • 9 years ago

    Beautiful! You are so talented, and patient.

    pippiep thanked amykath
  • 9 years ago

    I attempted to make roman shades a few years ago. Never again! Good for you that you got it done. Very nice.

    pippiep thanked Annette Holbrook(z7a)
  • 9 years ago

    The shroud tape shouldn't make them look hobbled. Maybe you're catching the cord when you sew it on?

  • 9 years ago

    I don't think I caught the cord. It definitely bunches up within all the segments at the same time. I wish I had set it up on a shelf or something before installing it, so I could analyze it better!

  • 9 years ago

    Maybe you had it strung wrong?

    I like the hobbled look (never knew it had a name) - but with your fabric you would need absolute perfection to make the foldover look good.

  • 9 years ago

    Very beautiful. I believe your fabric is the same as my living room summer curtains (which are now put away) that I purchased from Country Curtains. It's a very nice fabric and I like the subtle tones. You are so talented. I can barely sew a seam by hand.

    pippiep thanked ingrid_vc so. CA zone 9
  • 9 years ago

    I love your fabric choice. Very nice.

    pippiep thanked jaimeeap
Sponsored
Haus Studio
Average rating: 4.8 out of 5 stars28 Reviews
Franklin County's Preferred Custom Cabinetry & Design Studio