Software
Houzz Logo Print
alyssa_vache

Seed Start 1/26/17

9 years ago
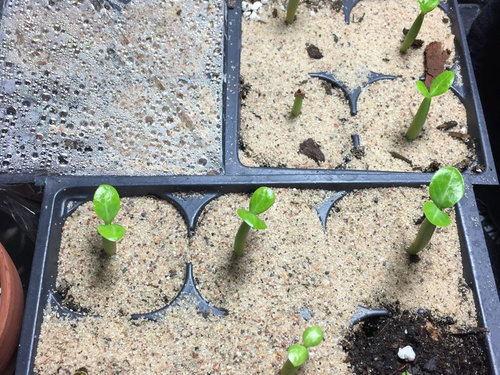
Hello everyone! I accidentally posted in the wrong thread, so I'm just going to start my own so i can keep track of my seedlings' progress. This is my first time starting seeds of any kind, not just adeniums (which i am also very new to).

Ms. LatinLady sent me 12 seeds she got from Mr Ko, and here is what came of it!

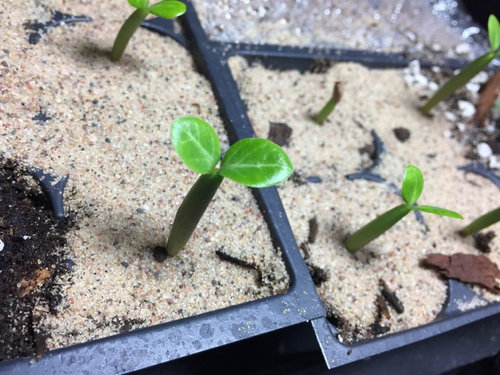
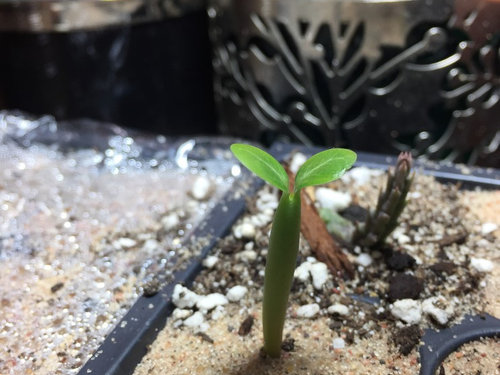
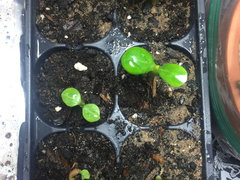
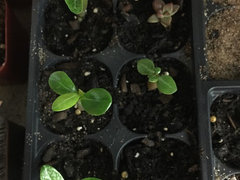
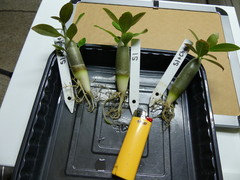
Day 3: the first seedlings appeared

Day 10: the last seedling appeared, and unfortunately one did not germinate at all. The seed itself seemed squishy and I decided to discard it.

Overall, I am very pleased with the result thus far. I have 11 seedlings out of 12, on heat mats under a grow light. I jerry-rigged a tiny greenhouse out of saran wrap for each of the cell blocks as well.

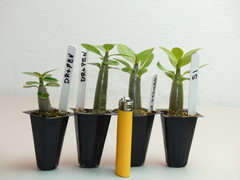
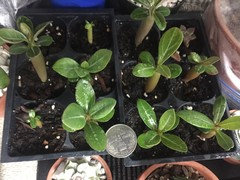
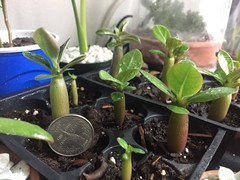
Photos from day 10:


The sand is a topdressing, by the way.

Comments (31)

  • 9 years ago

    Alyssa, nice looking seedlings. I would just watch closely w having a sand on top of the soil. It may be to fine. A grit would allow more air transfer and not hold the moisture too much at surface. Just keep watch of the bases of the seedlings. Could lead to issues of Collar rot.

    Not to scare you, just to make you aware.

    Rick

    Alyssa (Zone 6) thanked rcharles_gw (Canada)
  • 9 years ago
    last modified: 9 years ago

    You scared me, Rick! LOL. Alyssa, please scoop up the sand. It can get hot and damage the seedlings. None of us want damping off or collar rot.

    Congratulations on a fantastic first run at germinating adenium seeds. Good vibes your way for beautiful, healthy little trees.

    Maria Elena

    Alyssa (Zone 6) thanked Maria Elena (Caribbean - USDA Zone 13a)
  • 9 years ago

    Awesome, Alyssa! Aren't they the cutest thing ever?! I can't wait to plant mine in a couple of weeks! Keep up the good job!

    Alyssa (Zone 6) thanked Ann Le (8b) New Orleans La
  • 9 years ago

    That's exactly what I said! Be sure to keep us updated with your adorable adeniums too, when you plant them!

  • 9 years ago

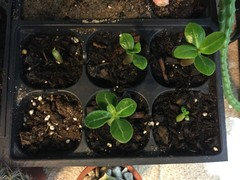
    here is an update!

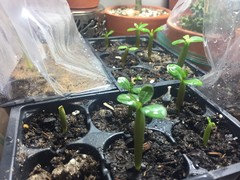
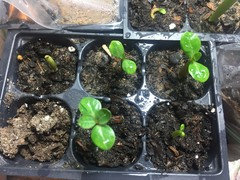
    not only do most have their first set of true leaves, but some are approaching 2 inches in height. These photos are from today, do they look like they're growing out nicely at about one month old?

    i also removed the sand topdressing, as suggested

  • 9 years ago

    They look gorgeous, Alyssa. You are a pro on your 1st adenium seed planting. Keep up the good work!

    These are mixed KO seeds. No two are alike, so you will note the difference in genetics from seedling to seedling.

    Enjoy the experience.

    Maria Elena


    Alyssa (Zone 6) thanked Maria Elena (Caribbean - USDA Zone 13a)
  • 9 years ago
    last modified: 9 years ago

    Congratulations Alyssa on your first batch, they look very good. I remember when I did my first one last year and was so excited about it :) Be careful though, it can be very addictive! Trust me, I got 489 of them now in my greenhouse. Hehe

    Great job. Keep us posted ;)

    Alyssa (Zone 6) thanked Stephane (Texas-8a)
  • 9 years ago

    Maria,

    Thank you! I'm already noticing subtle differences in height and thickness, growth rate, etc and I think it's so cool!

    Stephanie,

    489, wow!! I wish I had room for that many :)

  • 9 years ago
    last modified: 9 years ago

    Ha, ha, ha!! Stephane is right ... very addictive. I, for one, want one of everything! My fingers "itch" to plant something now & then.

    Well, Alyssa, at least you know each one of your seedlings is a different KO bloom. That's 11 different flowers you have there ... an entire garden of adeniums! Enjoy watching them grow and learning about this tree. You can view some of them under my profile => Ideabooks.

    At one month, I recommend carefully potting into individual small (2-3" containers. I find the small square yogurt cups perfect for seedlings until they reach 3 months. The yogurt cups are tall and allow room for downward root development. Be sure to punch lots of holes on the bottom. Also at 1 month, you should begin fertilizing weekly at 1/4 strength. I am currently alternating between Osmocote 14-14-14 and tomato food, which has a higher P ratio (center number N-P-K).

    After age 3 months, move them into 3-4" pots, then into tall 6-8" pots at 6 months. Tall pots allow for better downward root development. Otherwise, you'll get knarled, curled up roots, which may or may not be the look you want.

    By the time they become yearlings, some may develop very large roots, evident by a deformed pot (I use plastic pots until they bloom). These will have to be moved up to larger containers.

    I am currently working on repotting everything for the spring. Will take pictures of the root systems and will try to post on the weekend. Keep an eye out.

    Maria Elena

    Alyssa (Zone 6) thanked Maria Elena (Caribbean - USDA Zone 13a)
  • 9 years ago

    Hi Alyssa, you've done a great job with getting 11 out of 12 seeds to sprout. Coming from Australia, we grow most of our plants from seed. When my husband and I first started growing from seed, it was a big learning curve, with various results. We too had never grown anything from seed before, but it was always fun watching them grow and turn into little fatties and finally plants big enough to flower. In the end, you'll be able to say - I grew this. Good luck with your little babies and enjoy the experience.

    Rachel :)

    Alyssa (Zone 6) thanked User
  • 9 years ago

    Rachel,

    Thank you so much! My boyfriend and I are just coming into mass-growing in hopes of selling them in the summer. It's very exciting and fun to watch your little plants grow!

    Maria Elena,

    Would you recommend a regular potting mix like I have them in now or can I move to a gritty mix? I'm a little unsure as to when to make the change. Also, will they benefit from one or the other rather than alternating ferts? Can I use tomato only or will 20-20-20 be okay?

  • 9 years ago

    20-20-20 @ 1/4 strength will be fine. As for substrates, you'll have to experiment to see what works best for your specific region (Levittown, PA). I believe a gritty mix would be most suitable.

    Until you can put together the right recipe, add 50% perlite to the existing soil and about 1/4 part course construction sand. The result should be quick draining. You can always reuse this same substrate in your cactus once you move to the gritty mix.

    Maria Elena

    Alyssa (Zone 6) thanked Maria Elena (Caribbean - USDA Zone 13a)
  • 9 years ago

    Maria Elena,

    My older roses (all approx 6-8 months) are in various gritty mixes, 3-2-1 perlite/sand/bark with a little soil mixed in and 1-1-1 granigrit/turface/perlite, also with a pinch of soil mixed in. Mine are on heat mats under grow lights so they dry out quickly, but i'm still testing to see what is best. they're usually damp for a day and a half at most. I think i will get some small growers pots (i don't eat much Yoplait! haha) and mix up some grit. my local garden center has a soluble 20-20-20 for cheap, i'll pick it up this weekend and repot the largest of the seedlings. Thank you for your help!

  • 9 years ago

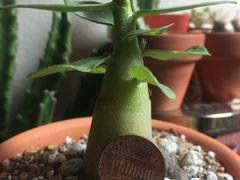
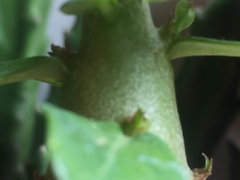
    New seedling!

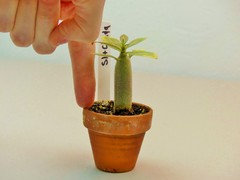
    Not one I grew from seed, but my first local nursery DR find! Penny for size.

    Branching? I hope!

    Anybody in the Philadelphia/Cherry Hill area, check out Primex Garden Supply. Awesome nursery and they even sell turface and granigrit ;)

  • 9 years ago

    Very nice Alyssa! If you don't mind me asking, how much did you buy it?

  • 9 years ago

    little thing was only $3.25!

  • 9 years ago

    wow, that's quite the bunch you have there! they all look so cute and chubby :)

    mine are currently under grow lights on heat mats, they're growing so quickly. hoping they fatten up too!

  • 9 years ago

    They will, just give them plenty of light !!! keep them wet and let dry for a very short period of time...do not put them in large pots, more room for roots less need for bigger caudex and keep them together as “if there is someone to still your food you better get fat faster” :) it works

    Alyssa (Zone 6) thanked Marcin ( Barbados )
  • 9 years ago

    Marcin,

    How do you manage to separate all of those Adeniums when it's transplant time?

    Rob

  • 9 years ago

    Hey Rob, yes it takes time, i do keep them together a bit longer then transplanting to single pods or larger containers. It looks like they grow better if planted together...I do have great conditions as I live in Barbados :)

  • 9 years ago

    Oooohh oh oh, Like Jericson Pastor. He's lucky enough to live in Hawaii, and tropical climates make all the difference.

    I think my Adeniums actually grow better during the Winter season under my elaborate lighting than they do outdoors; with our piddley 3-4 month growing season.

    What I would give to never see temps below 70 degrees again, not to mention the utility bills. lol


    Rob

  • 9 years ago

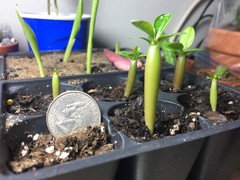
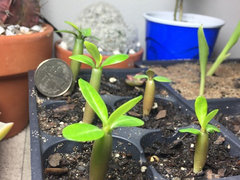
    Update!

    Its been 8 days since I last posted a picture, and I really can't believe how much some of them have grown!

    quarter for size. Largest is now about 2.5" tall, smallest lags behind at about 3/4" (poor little guy, front row all the way to the right in 3rd pic). I've fertilized only twice now, with a soluble 20-20-20 diluted to 1/4 strength. I've been lazy and haven't gotten around to repotting into individual pots, but I will in the very near future.

    Side note: notice the birds of paradise in the background! they've skyrocketed since my last post and i am very excited!

  • 9 years ago

    I wouldn't transplant yet, they can remain in those 1"x1" cells for at least another month. At this size; they still have a very small & delicate root system. If you put them in larger containers w/ more soil; which equals more moisture, there's a good chance of damping off.


    Rob

    Alyssa (Zone 6) thanked halocline
  • 9 years ago

    Rob, thanks for the advice! I've heard to repot and also not to repot, I guess I'm just going to let the seedlings tell me when they're ready lol!

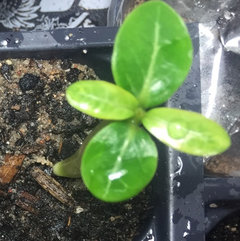
    I'm pretty impressed with this little guy though. Look at those little leaves in just one week!

  • 9 years ago

    You can see how mine have some good color to their stems/trunks, and they have their 3rd set of permanent leaves. Even at that point; there were only a few roots coming out of the bottom.


    You should be able to pull the plant out, and with it the entire soil mass intact when it's ready.

    Rob


    Alyssa (Zone 6) thanked halocline
  • 9 years ago

    Alyssa, so nice to see your enthusiasm.

    I agree with Rob .... From those cells, repot after they're about two months old. You should not begin fertilizing until they are a month old, which is about now, right. These are the same seeds Alma (eeyore oregon) has posted under "2017 KO seedlings."

    Happy growing! Spring is in the air!! A pair of finches made a real nest and laid tiny eggs inside one of my decorative (wrought iron) bird cages ... on a porch rack full of potted cactus. Imagine that!

    Maria Elena

    Alyssa (Zone 6) thanked Maria Elena (Caribbean - USDA Zone 13a)
  • 9 years ago
    last modified: 9 years ago

    Here's the KO growing & propagation page w/ links -

    Our seeds have been drying out for preventing from wetness during shipping in case they are ruined by mildew.
    When the customers receive the seeds, we suggest them must soak seeds in the water for 2-4 hours before sowing in order to increase the germination rate.
    After sowing, keep the soil wet for 10days until the sprouts appear.
    Please take care of the temperature, which will affect the germination rate directly. The suitable temperature is between 20-35 Celsius degree
    Before you prepare sowing, you have to notice forecast not to meet the rainy days or the cloudy days for the following 7days.
    Or it will affect the germination rate.

    Here below we recommend three links of full instructions on growing.

    http://www.adenium.com.tw/adeniumseeds/Seed%20Sowing.htm

    http://www.adenium.com.tw/cultivation_expeirence_english.htm

    http://www.adenium.com.tw/adeniumseeds/propagation.htm

    I don't follow these directions entirely, but there's some good info here.

    Rob

    Alyssa (Zone 6) thanked halocline
  • 9 years ago

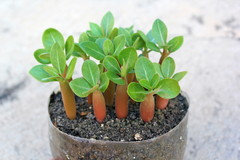
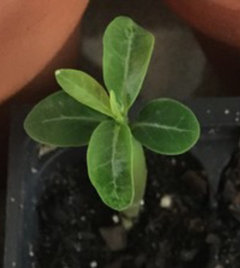
    Update, just about 2 months!

    Some of them are putting out their 5th and 6th true leaves, and the tallest are nearing 4"!

    its so exciting seeing the different genetics come into play, as some have flat, oval-shaped leaves and some have more curled, spear-shaped leaves. some are fattening (i try not to pick favorites, but they're just so adorable) while some are growing taller.

    i'm SUPER excited for spring and repotting the largest ones, however mother nature blanketed my area in a foot of snow this past tuesday, and temps plummeted and will stay low for the next 2 weeks. ugh!

  • 9 years ago
    last modified: 9 years ago

    Looking excellent, Alyssa. Really nice job!!

    Don't pick favorites until after they bloom next spring, and then only after the 2nd bloom. I know you have a nice variety there ... all different blooms ... an entire garden! Until then, just enjoy watching them grow and learning about this fabulous little tree.

    Enjoy!

    Maria Elena

    Alyssa (Zone 6) thanked Maria Elena (Caribbean - USDA Zone 13a)
  • 8 years ago

    Omgosh Maria..how can I buy an assortment of seed like that from you, is it possible? I can't find out how to mesg ppl still on here. My email is sarasgreenthumb@gmail.com, excellent thread thank you