Software
Houzz Logo Print
ben_shafer

Stucco Kitchen Backsplash Wall From Hell.

9 years ago
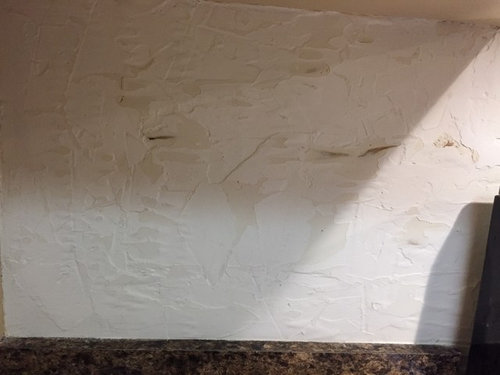
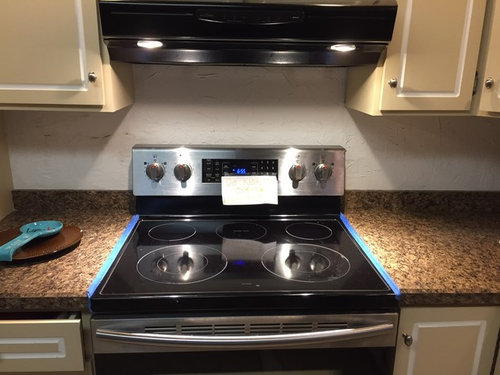
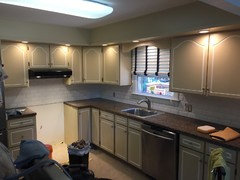
Our entire house used to have Stucco walls and we had to sand it all down by hand with a palm sander and hire professionals to skim coat all of our walls throughout the house. Now I want to tackle the kitchen which we haven't touched yet and of course it has Stucco walls including the backsplash area.


I tested sanding a little spot on the wall yesterday and removed one of the electrical outlet faceplates to see how it would go. To my surprise it seems like the wall is super thin and when I was using the palm sander to flatten the area it actually went through the wall which I assume is really thin sheetrock. I then used a scraper and hand sanded which worked much better but now I need to skim coat or replace the sheetrock altogether.

My goal is to get rid of the Stucco and install a tile backsplash.

So I guess my questions are:

  • Should I keep sanding and just skim coat the walls as flat as possible for the tile or should I install new sheetrock/tile backing board. I personally think it might be easier to install a new wall but it's probably harder than it sounds...
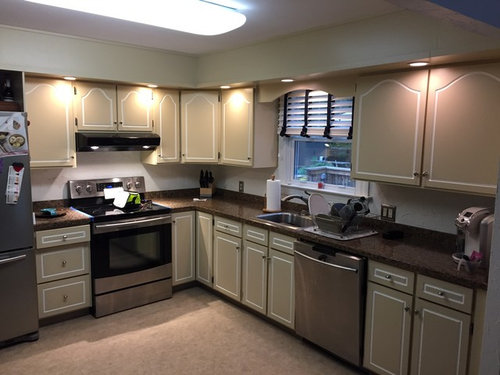
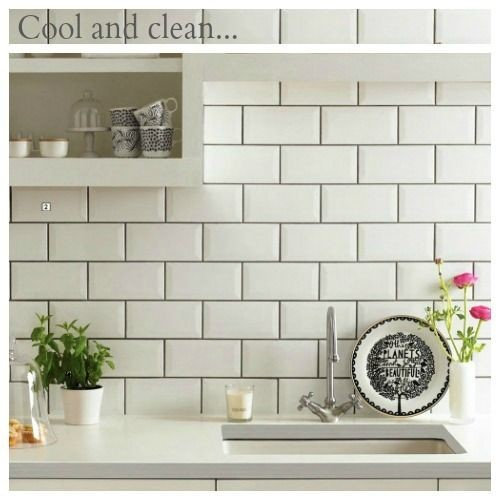
  • Would a beveled white subway tile with gray grout look ok? We will be painting the upper cabinets Alabaster and the lower cabinets will be a greenish gray. Was thinking of doing a slanted pattern like I have seen others do but, open to others opinions!
  • Should I remove the laminate backsplash that goes up the wall and just tile all the way down to the countertop?


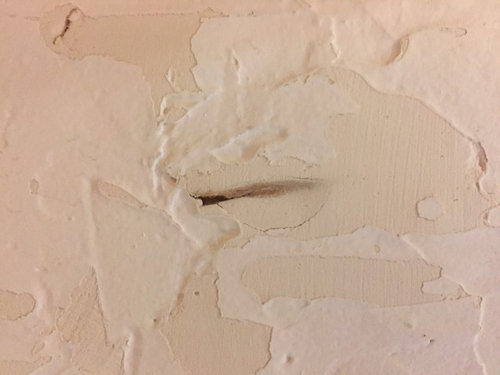
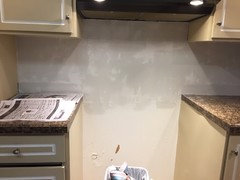
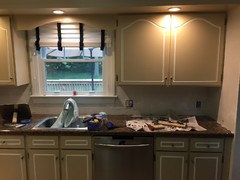
Here is the wall AFTER sanding down the best that I could. Brown marks are actually from the orbital sander which went through the wall -__-

Hole in the wall

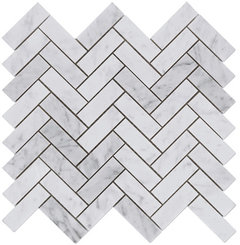
Here is the tile and grout combo that I was thinking of doing.

Comments (19)

  • 9 years ago

    To replace the sheet rock properly, you would need to remove the cabinets. Yes, you should remove the laminate back splash. Get your walls as smooth as possible with sanding and skim coat. They don't have to be perfect, just make sure none of the previous finish is loose. Paint with a good primer. Example: MAPEI Primer T Indoor Primer or check with your nearest hardware store. Then set your tile.

    Herringbone pattern requires quite a lot more cuts then laying the tile horizontally. If this is your first tile job, I wouldn't try it. Just make sure the grey grout will go with your greenish grey paint first. Do a sample piece. The last thing you want is to finish the grout and then realize it doesn't match. Personally, I would just match the grout to the tile.

  • 9 years ago

    Sounds good, I figured that we would need to remove the cabinets in order to replace it properly. I actually started skim coating this morning and so far so good. Just a little worried about removing the laminate backsplash because it looks like it might be glued to the countertop itself. Hard to tell, I will have to pry on it a little and see what happens.

  • 9 years ago

    You might just have to patch a little more after the backsplash!

  • 9 years ago
    Drywall is often cut out and replaced without removing cabinets. Our tile installer did it for our kitchen, and I see it often in renovation photos. That said, it sounds like patch and skim coat will work fine. You might want to remove the laminate backsplash before any more wall repair.

    I think herringbone would look nice in your kitchen. I like 2x6 or 2x8 tiles or mosaic sheets. Good luck!
  • PRO
    9 years ago

    I agree with simstress, take it out and go back with new. Don't sand, there are easier ways to do this.

  • 9 years ago
    We ended up taking down the laminate and also skim coated the walls with 2 coats so far. I think that's all we are going to do. Just need to let dry and sand down the high spots then we can begin tiling.

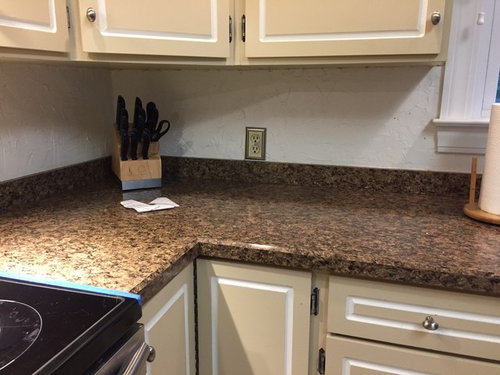
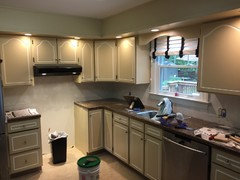
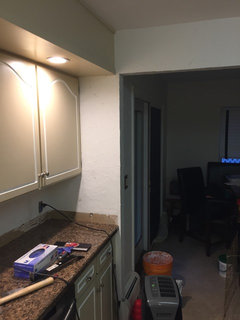
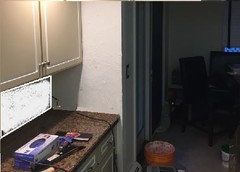
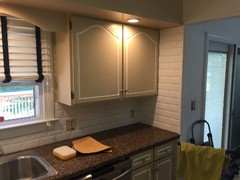
    One guest I have is where should I stop tiling in the corner? Should I stop underneath the cabinets or should I go up the wall and stop at the beam? (Last attached picture with the Keurig shows the area that I am talking about.)
  • 9 years ago
    last modified: 9 years ago

    I would go all the way up to the soffit wall. Most would probably go to the bottom of the overhead cabinets.

  • 9 years ago

    There was recently an article on Houzz entitled 'Where Should You Start and Stop Your Backsplash?' by Yanic Simard (https://www.houzz.com/magazine/where-to-start-and-stop-your-backsplash-stsetivw-vs~86843211). It contained a lot of good advice and should be helpful to you. Good luck - I love your kitchen cabinet doors.

    [[(https://www.houzz.com/magazine/where-to-start-and-stop-your-backsplash-stsetivw-vs~86843211)

    [
    [(https://www.houzz.com/magazine/where-to-start-and-stop-your-backsplash-stsetivw-vs~86843211)[[(https://www.houzz.com/magazine/where-to-start-and-stop-your-backsplash-stsetivw-vs~86843211)

  • 9 years ago

    most people just do the back wall. some swing it out and do the side wall, but still stop the tile at the cabinet bottom. if you go all the way up, you may have issues opening that cabinet door.

    since your drywall is so funky, I'd skim the best I could (maybe even do a little texture coating to hide the imperfections) and bring the tile out to the side. I would not go higher than the cabinet base if tile would impede the upper door. If it doesn't, then you could tile all the way up to the soffit. I think it's a personal choice. if the tile is nice and the design looks like it flows well, go ahead and tile.

  • 9 years ago
    last modified: 9 years ago

    Back splash, no side splash.

    Tile up to the top of the stove hood.

    Do not use dark grout, especially gray, with your warm counter top.

  • 9 years ago

    Please keep us updated.

  • 9 years ago
    last modified: 9 years ago

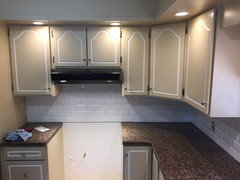
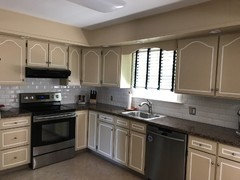
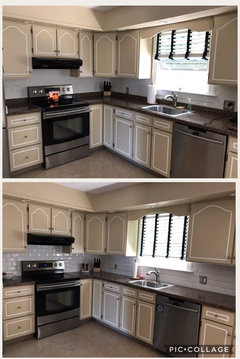
    Phew! Almost done! Just finished grouting and cleaning up. Once that's dry I can start caulking the corners. Not too bad for the first time tiling, definitely not as hard as anticipated. The tile going to the top of the wall looks great and we finished the edge with a few edging tiles (not sure the proper name for those, wife calls them "celery sticks" lol).
    The fusion pro grout was definitely not as hard as a lot of talk on the forums. Maybe it's more difficult for porous tiles but for smooth tiles it's super easy.
    The color of the cabinets look much better now and we don't hate them as much. Thinking of painting the underneath where the recessed lighting white.

  • 9 years ago

    That looks fantastic. I'm so glad you used white grout. Would love to see updates as you go along. Great job.

  • 9 years ago

    Nice backsplash choice! Painting the underside of the soffit sounds good. New faucet, new light fixture next? I like the shade on your window... Removing the valance would allow you to see the entire shade and modernize the space.

  • 9 years ago

    I think you are more talented than you give yourself credit for. Good job.

  • 9 years ago

    I agree with simstress the shade is nice. If you remove the valance it will really update the look. I had a similar one, we had to cut it out, but it was well worth the improvement.

  • 9 years ago
    Thanks for all the kind words. My wife was definitely a big part of this one, she does the measuring and I do the cutting and grouting lol.

    Definitely going to be getting rid of the florescent light fixture but not sure what we are going to replace it with. Was thinking a few recessed lights but possibly an actual light fixture of some sort.

    Going to redo the flooring at some point as well. We are going to tile but might get surprised with hardwood underneath the laminate. We redid the entire house and ripped out all the carpets and had the hardwood refinished but it was hard to tell if the Kitchen/dining room had hardwood or not. If there's hardwood we might just refinish them instead of tile but we will see.

    We still have to sand down the stucco walls on the dining room and skim coat/paint so that will definitely take some time.

    Here's some final pics of the tile after caulk. We used a sanded ceramic tile caulk but it's a tiny bit whiter than the actual tile, doesn't look bad though. Just have to grab some outlet spacers to bring out the outlets flush with the tile and add some new wall plates.
  • 9 years ago

    That is fantastic that you and your wife enjoy doing DIY together!