Software
Houzz Logo Print
biondanonima

Preparing to build a raised bed - help choosing material

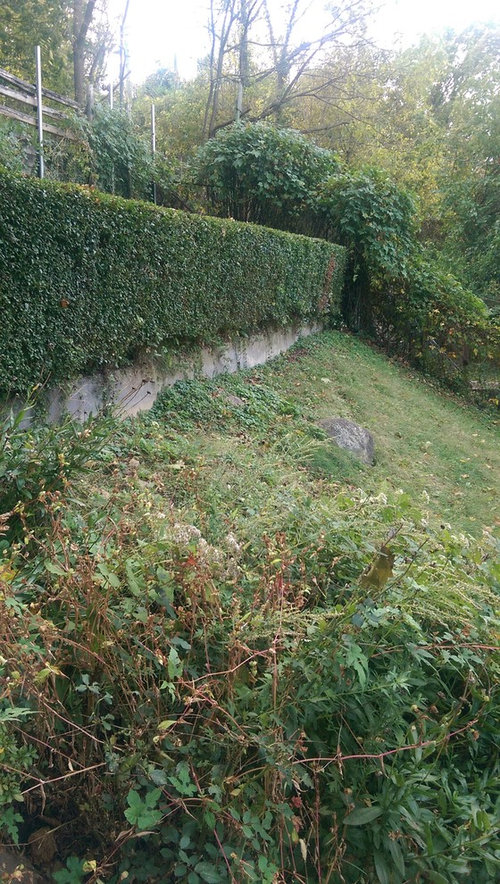
I'm not sure that this is the right forum for this question, but here goes! My backyard is mostly a steep slope, but there is a short (about 2'), poured concrete retaining wall near the top with a flat area behind it, which runs nearly the entire width of the backyard (37'). Some previous owner planted a privet hedge there, presumably to keep people from falling off the edge. Here's a photo:

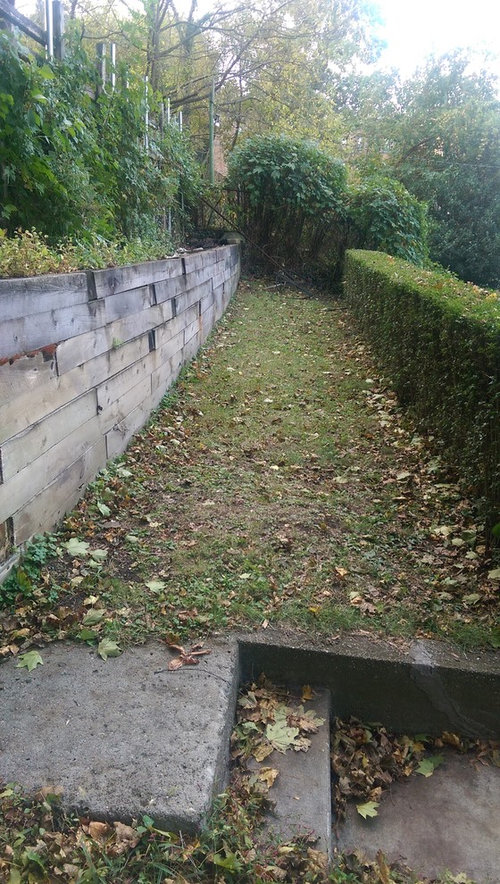
And here's what's behind the privet - it's about 7' from the wood boxes to the wall on the other side of the privet:

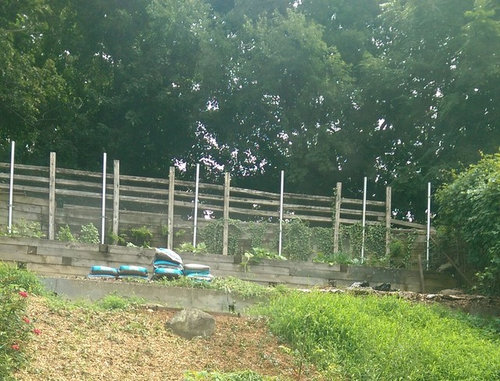
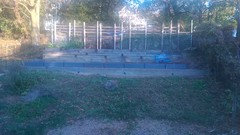
Here's what it looks like now that I have cut down and (hopefully) killed the privet hedge:

Anyway, that flat area is basically the only flat and full-sun area in the yard, so my plan is to build a raised bed there. The question is, out of what? The existing wall is about 8" thick, and my initial thought was to simply stack/construction adhesive two layers of cinder blocks directly on top of it, extending the short sides about 4' back toward the wood boxes, and then digging out a shallow trench for leveling the other long side. Cinder blocks aren't the most attractive choice, but given that the existing wall isn't especially beautiful I'm not sure choosing a more expensive/prettier building block will necessarily improve matters. However, I may ultimately plant shrubs/etc. that will hide the existing wall from view, in which case I may be kicking myself for not making the new wall as attractive as possible (the weeds on the right side of the photo that are currently hiding half the wall from view are only about 12-18" high, so it wouldn't really take much).

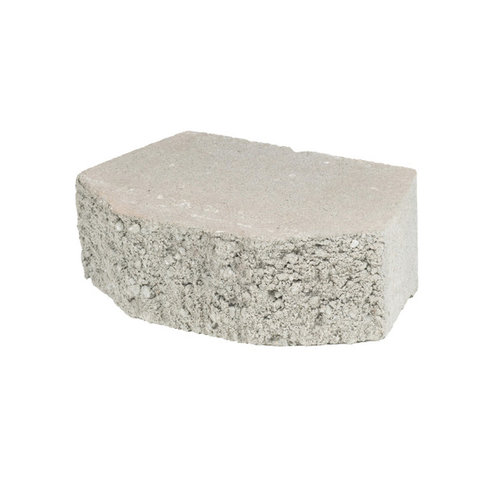
Cost is a factor, although we haven't set a hard and fast budget. I'd like to keep it under $1,000, I guess. I estimate that I will need about 130 cinder blocks to do two layers or a 16" tall bed - at $1.50 per, that's only around $200 - darn cheap! Pavestone or something more attractive is going to cost MUCH more - even something simple like this is $2 per block at Lowe's, and I would need 350 or so to create a wall the same height as a 2-layer cinderblock wall. Of course, ease of construction is also a factor and worth paying a bit more for.

If anyone has any ideas for me, please weigh in! Also, please let me know if you think we are insane to attempt this ourselves or if any other aspect of this plan seems like a recipe for disaster. Thanks in advance!


Comments (29)

  • 9 years ago

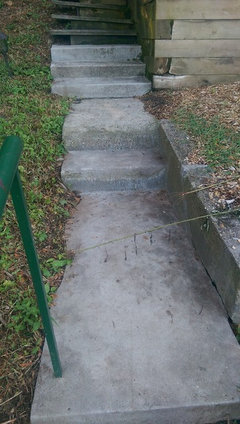
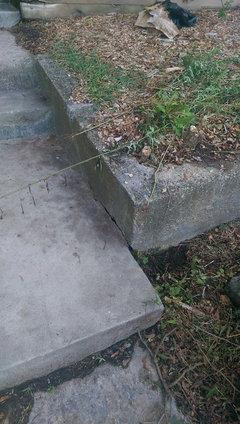
    Yardvaark, I have several reasons for wanting to raise it, the first being safety. As you can see, now that the privet is gone, there is nothing stopping anyone from walking to the edge and falling off the wall. Obviously, my DH and I know better than to do this, and once that area is dug/amended/defined as garden it is unlikely that anyone would walk through the bed to the edge, but it still concerns me a bit. The area in the first photo where the wall meets the stairs is especially dangerous - it is very tempting, even for someone who knows better (i.e. me) to step directly from the wall onto the lowest stair shown, which is a pretty big drop. The walls of the raised bed would create a barrier preventing this.

    The second reason is the privet roots. We cut down the hedge close to the ground and painted the stumps with Roundup back in April or May, and thus far we haven't had any resprouting. I am assuming that it is good and dead, but I don't especially want to go to the trouble of digging up ALL of the roots. By raising the bed, I think we can avoid a good deal of digging, and better control the quality of the soil that ends up in the bed (I was planning to order compost/soil by the yard to fill it).

    Finally, I think raising it a bit will make it much easier to garden, period! I have a feeling that even an extra foot of height would spare my back in a big way!

  • PRO
    9 years ago

    Why don't you scratch out a VERY SIMPLE sketch plan of how you'll arrange the raised portion? I'm having a hard time seeing how raising this area helps you in the ways you claim. The privet roots are a temporary condition so I wouldn't be spending a lot on something permanent to counteract them. A simple guard of some kind could either keep people from falling off or remind them of the edge. All the tools for gardening come in long-handle varieties. Much of gardening is done from the standing position. As one with a long standing bad back, my garden work is from standing or kneeling (usually on a throw rug that I cart around). Your proposed garden is very small so it doesn't seem to warrant all the construction effort for short term frustrations. If you were to create a foot ledge at the base of the existing concrete wall, so that you had access all along the garden, it would be as if half the garden space was raised while one was standing on that ledge.

    biondanonima (Zone 7a Hudson Valley) thanked Yardvaark
  • 9 years ago

    Actually, we have already created a foot ledge along the base of the existing concrete wall - if you look closely at the third photo in my first post, you can see a little bit of edging material and a couple of stakes behind that big rock. It's only about 2' wide, but it's definitely big enough to create access to the future bed from that side (so yes, as you note, it's already as if the bed is raised on that side).


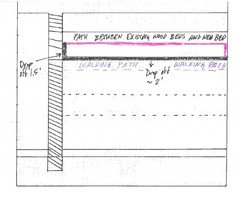
    Here's a rough aerial sketch of what I'm planning to do - the existing wall is in black, the new wall in pink. Obviously, the existing wall would gain a foot or so in height, and one would no longer be able to walk directly into the bed (or onto the existing wall) without a big step up.


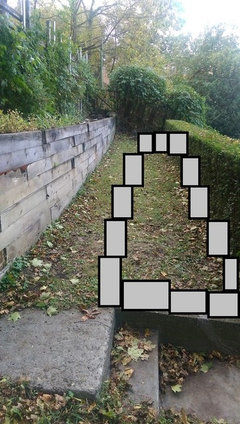
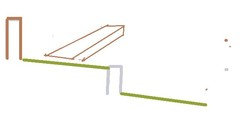
    And here's a really really bad Paint drawing:


    Anyway, as you noted, a guard or short fence would definitely help with the tripping hazard, especially on the end by the stairs. As far as the convenience/comfort factor of a raised bed vs. ground level, thus far all of my vegetable/produce gardening has been done in raised beds, and it has been a much more pleasant experience than what I've done on the ground. However, if I do raise this bed it won't be waist-chest high like my others anyway, so who knows. The grade of the flat area could be a problem, though - the "flat" area actually has a significant downward slope from the wood beds to the cement wall (I would need to measure this to find out exactly how significant, but I'm sure you can see it in the photos). Leveling it to be even with the existing wall would mean that the area left to walk on would be higher than the bed, or I'd have to level the entire area from the wall to the wood.

  • 9 years ago

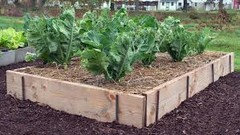
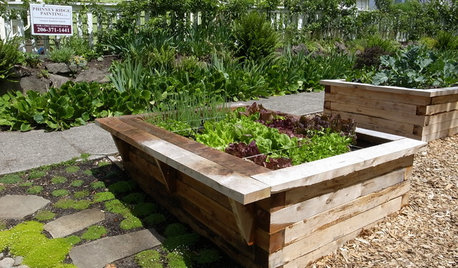
    A lot of people I know make this type of bed.

    You could do one of these just inside the lower wall and not have to attach anything.

    I plant my veg in the ground. I always thought raised beds were only for areas with heavy clay or rocky soil.

    biondanonima (Zone 7a Hudson Valley) thanked emmarene9
  • 9 years ago

    I went out and measured this morning - the flat area rises about 7" from the wall to the wood boxes, so about an inch per foot on the end by the stairs. For a 4' wide bed, that means we'd need to add 4" of height to the existing wall just to make it level with the ground on the other side. The rise is more pronounced on the far end by the fence, too. Leveling the whole area may work, but I don't know whether the wood boxes have a foundation row buried in the dirt, so I don't know how much we can excavate before we undermine them. We'll investigate that when we start digging.

  • PRO
    9 years ago

    Personally, I would be leery of adding anything, other than minimal decoration, to the existing wall. Most retaining walls, especially if they are made by a homeowner (and often by residential builders) are barely ready to accept the forces that will be applied to them. Here, you're proposing adding 2/3 again the height of the wall, and with the construction method of "construction adhesive," I think the potential for it to not work out well for you, is high. Adding a raised box, such as that suggested by Emmarene, would be a better solution. It could be undone much easier if trouble shows up down the road. I wouldn't create it with rebar stakes driven into the ground, or have long, unsupported spans of wood. It would be better to use 4x4 stakes every 2'.

    I think you need to add a railing/guard where the terrace meets the steps.

    (Per your "really bad Paint drawing" ... you probably want to use the line tool instead of the rectangle tool. White or any bright color would work.)

    biondanonima (Zone 7a Hudson Valley) thanked Yardvaark
  • 9 years ago

    Yardvaark, the question of whether or not the existing wall is capable of handling the weight of a foot or so of stone is one of my concerns, most definitely. However, from what I have read, vertical force is less of an issue than lateral force. Wouldn't adding boxes along the lines of what emmarene posted add to the lateral load (a "surcharge" load, if I'm understanding what I've read correctly) just as much or more than adding height to the wall itself and then backfilling?

  • PRO
    9 years ago
    last modified: 9 years ago

    True, the fact of adding soil, regardless of what contains it, adds lateral force to the wall. We could think of the soil as a slowly slumping glacier. So that's a concern all by itself. If the wall is pure vertical, in theory, more weight on top of the wall itself is no great concern, save for the footing and the soil that supports it. But once retaining walls begin the process of failing, developing the slightest tilt, weight and height of the wall will begin to play a huge part in how fast it destructs. If you were building the wall from scratch, you'd calculate its design partially based on its height. Here, there is no plan to beef up the supporting wall or the footing. Admittedly, we don't know of the wall's structure and abilities. Maybe it's already beefed up sufficiently to accept a greater height of heavy materials. But having seen so many walls over many years fail, and knowing that a large percentage of them were of inferior design to begin with, I just doubt it.

    My recommendation of the wood slab raised bed probably has as much or more to do with thinking about the potential clean up ... not because I think a raised planter is a great idea.

    biondanonima (Zone 7a Hudson Valley) thanked Yardvaark
  • 9 years ago

    Is there an easy/semi-easy way to determine the existing wall's structure and abilities? I can certainly take better photos/measurements and or dig down a bit to see how far underground it extends. The house was built in the 1890s and although I don't know if this wall is original to the house, it has stood the test of at least SOME time, judging by its appearance. Aside from a few cracks (mostly near drainage holes), it is in decent shape.

  • PRO
    9 years ago

    The first thing I would do is check the plumb with a level. If it's showing no signs of lean, at all, then it's holding its own for what it is, given that you know it has stood for some time. The other thing you could do is dig to expose its footing in order to assess its size and depth. One thing you won't be able to see, as it's internal, is if there is rebar that connects the wall to the footing. So in the end, it's going to be a gut assessment of its ability to endure, based on what can be seen.

    biondanonima (Zone 7a Hudson Valley) thanked Yardvaark
  • 9 years ago

    Perfect, I will check things out and report back!

  • 9 years ago

    Raised beds are usually four feet deep. For the record I was suggesting a wooden box completely independent of the concrete wall or the wooden wall. You said there is seven feet available. It would look like this.

  • 9 years ago

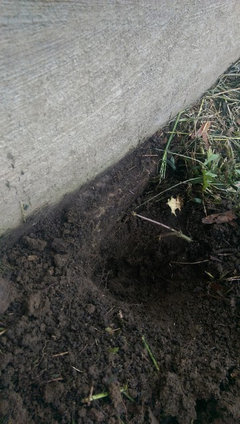
    I did some investigation this morning - here are the results! The wall is 8" thick above ground. I dug down and discovered that the 8" portion is 18" tall, at which point the wall becomes 1.5" thicker on the exposed side (not sure about the filled side). This thicker portion extends at least 6" underground (that was as far as I could dig with the spade I had in hand).

    The side segment is only 7" thick and extends 5' back into the hill. It also attaches to the poured concrete staircase on the north end. I can't tell if there is a matching side segment on the south end because that area hasn't been leveled, but when we start doing the serious digging I will find out.


    The wall is level from side to side but not from front to back. It is difficult for me to tell the degree of tilt, but the bubble on my level hovered around the 1/3 mark. It is leaning away from the dirt it is holding back.


  • 9 years ago

    Emmarene, thank you for your drawing. That is exactly what we will do if we determine that we can't add height to the wall. I was just hoping for something a bit more permanent.

  • PRO
    9 years ago

    You'd actually need to expose the footing enough to see its extent. If the "thickened" part of the wall IS the footing, I'd give up your quest to raise the wall height. A footing ought to be set at a lower elevation (buried deeper) ... and wider, protruding beyond the wall front and back surfaces by 6" or so.

    I'm not clear about your description of the wall level. I think you were saying it's length is level.

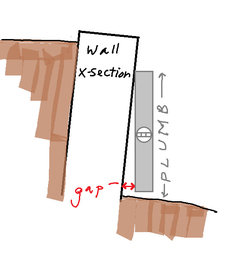
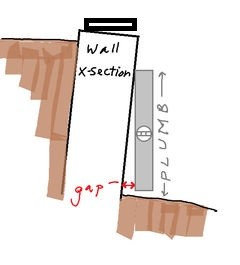
    I didn't get what you were saying about the face being plumb. In order to check it, you'd hold the plumb aligning with the face of the wall, with the bubble horizontal and perpendicular to the wall. At least one end (top or bottom) of the plumb will be touching the wall. Adjust such that the device reads perfectly plumb. If the wall face is leaning, there will be a gap at the top or bottom of the plumb. If the wall face is not leaning, there will be no gap at any point between it and the plumb as both will be in sync. If there is a gap, you'd measure it ... likely a fraction of an inch. The gap compared to the length of the plumb device (everyone will be calling it a "level") is the amount of lean. (For example, 1/4" per foot.) If the gap is at the bottom, the wall is leaning outward (bad) and if the gap is at the top, the wall is leaning inward (acceptable or good.) Maybe an illustration will make it clearer. If it ends up that the wall is leaning outward, even a little -- a ticking clock -- that would be another reason to give up the quest to extend its height.

    biondanonima (Zone 7a Hudson Valley) thanked Yardvaark
  • 9 years ago

    Yardvaark, thank you for that drawing - very helpful! Unfortunately my plumb is a piece of junk and can only be used horizontally. I'll pick up a better one the next time I'm at the store. Anyway, the measurement I took was actually of the top face of the wall, like the black rectangle below:

    That measurement showed that the top face of the wall was not completely horizontal, which I suppose doesn't necessarily mean that the wall itself is not completely vertical, but it is unlikely to be a good sign. I'll post results when I get a plumb that can be used vertically.

  • 9 years ago

    A 'vertical' plumb bob is little more than a large paper clip on a piece of thread or thin string. Gravity pulls the paper clip straight down, and the paper clip pulls the thread. If the wall is leaning out, the string can just hang over the edge.

    biondanonima (Zone 7a Hudson Valley) thanked mad_gallica (z5 Eastern NY)
  • 9 years ago

    Genius! I'm getting some string now!

  • 9 years ago
    last modified: 9 years ago

    Love the vertical plumb bob. According to mine, the wall leans in! Not sure why my horizontal level indicated that the top face was not fully horizontal/leaning downhill - it's a bit of a rough surface, so perhaps there were bumps messing up the reading. I will get a decent plumb and check the vertical face again, but hopefully gravity doesn't lie!

  • 9 years ago

    Got my hands on a decent plumb today and checked the wall! As it turns out, the vertical face of the wall is not completely flat, oddly enough. When I placed the bottom of plumb on the ground at the base of the wall, I was able to put the whole plumb (I think it's 9" long) against the face of the wall (and got a perfectly level reading). When I placed the plumb a few inches higher, the whole thing would not lie flat on the wall - the top half of wall leans back into the hill, away from the plumb. It seems weird to me that it would have been poured this way - perhaps the face of the wall has worn away somewhat on the top half only?

    Regardless, I am pleased to know that the wall is perfectly vertical at the base. I will dig down farther this weekend to see if I can uncover more of the footing, if more exists.

  • PRO
    9 years ago

    That's a positive reading. While it doesn't foreshadow gloom, it doesn't necessarily eliminate it as a possibility either, in light of your plans.

  • 9 years ago
    last modified: 9 years ago

    We shall see where this ends up. My husband, who will be providing much of the manual labor for this project, is not looking forward to carrying loads of stones or cinder blocks down the stairs - even if we can get them delivered to our driveway, we still have to move them down one flight. I do value his sciatic health, so we may end up going with a lighter-weight solution. : ) I'll report back when I start digging.

  • 9 years ago

    What Emmerene suggested. That's how I have done my raised beds. Light and easy. You never know if your wall will fall or not, so best not to load it up with heavy stuff. Get a railing! I would hate to think of either of you guys falling!

  • 9 years ago

    Just wanted to report back and thank everyone for their input. We ended up abandoning the cinder block idea in favor of lightweight, easy-to-install metal beds! Here's a photo of the completed project:


    Because the area was not actually level to begin with, the back sides of these beds are dug into the ground about 8". There is room on the far right to install one more, but that area is so heavily shaded by the neighbor's shrubs that I don't think vegetables will grow there. We'll probably dig it out and use the area for composting or perhaps plant something shade-loving.

    Installation was a bit of a chore, but on the bright side we dug out enough dirt in the leveling process to fill the beds, so no need to buy any! We also didn't add any weight to the wall's load, just redistributed what was there, so hopefully we haven't created any new problems with these beds.

    Thanks again to everyone for your suggestions and sage advice!

  • PRO
    9 years ago

    good luck with growing your veggies!

  • 9 years ago

    Glad you found a solution. In case anyone is curious where did you get the metal beds?

  • 9 years ago

    Thanks for the update! Looks like a lot of work and thought went into the project. Enjoy your new gardening possibilities! I always greatly appreciate it when folks report back how they executed their ideas. That is one of the most interesting parts of the post!

  • 9 years ago

    I bought these on Amazon, Outsunny is the brand. I found many brands of metal beds to choose from online, but very few that were 4' deep - most were only 3-3.5' deep. Since this is the only flat, sunny area I have, I wanted to maximize my space, so I really wanted the 4' of depth. These are 4x4, and they were among the most affordable ones I found, so it was a no brainer. I hope they hold up well to the elements!