Software
Houzz Logo Print
debz48

DIY Built-in using Ikea cabinets

8 years ago
Hi everyone,

In my basement, there is a little nook (about 80" wide by 19" deep) where our TV is and I am planning a DIY project to create some built-in cabinets to hold our entertainment consoles and create additional storage. I've been finding some inspiration online and I think we're going to use Ikea kitchen cabinets for this project. I'm hoping that some of you may have some experience with this type of project and can help me with some questions below.

Our plan is to use a couple wall cabinets with doors to fill this space. They will be placed along the floor with the TV mounted above them. The reason we're thinking wall cabinets is because they're narrower (just over 15" deep) and will fit into the nook, whereas the base cabinets (24") would stick out. The cabinet combination that we're looking at will fill abour 75" in width so we only have about 2.5" on each side to cover up using Ikea's covering panels. We're also planning to create a base for the cabinets to sit on and then we would add some trim to match our existing baseboards along the bottom.

The questions that are still nagging me are:

1) Do I still need to use an Ikea suspension rail to secure the cabinets if I'm securing them to a base?

2) Any idea what I could use for the top? Would an Ikea covering panel work? I've seen a few inspiration projects where they used a white laminate countertop, but I'm not sure how to secure it to the top of wall cabinets.

3) Any solutions on how to handle the cords. The TV will be mounted with the cords fished through the wall, but would I just cut a small hole in teh back of the cabinets for the other consoles?

Any other advice from those who have tried something like this?

On a side note, we also considered Ikea's besta system for these cabinets but the widest combination that would fit in the space would only be 70" and I think that 5" gap on each side might be too much.

Thank you!

Comments (7)

  • 8 years ago

    Check out www.thecabinetjoint.com - same idea RTA cabinets, but much higher quality and fully customizable. I bought them for my kitchen redo and the cabinets came in about half the price of custom at the Home Depot, plus I could get exactly what I needed to fit in the existing space. Might be easier if you need special sizes. I used IKEA for my closets and they’re super awesome too (but not really cheaper).

  • PRO
    8 years ago
    Ikea narrow base cabinets are just wall cabinets, or really they are all just cabinets that you decide a use for. No you don’t have to use the hanging rail, but you can and you may find it useful. You can also use the ikea legs as they have a built in leveling feature. If you prefer you can use a wood base you build yourself.

    Re the top, the ikea side panels are only 5/8” thick, so if you want a countertop look you will need one of their laminate tops which you can cut to width. Either way just screw them up from below.
  • 8 years ago
    No you don’t need a suspension rail if they are on a base. I would put in some screws into wall studs just to secure it.
    For the top why not get a piece of stone or composite quartz type of stone cut to fit. Most stone fabricators have all kinds of remnant pieces that they sell at discounted prices.
    For the cords just drill a hole into the back where you can pass the cables that come out of the wall cavity, and if you need to pass cables from one cabinet to the other just drill another hole into the sides of the cabinets near the back. You can even buy plastic grommets to insert into the hole if you want a nice clean look to the holes you drill...although really nobody is going to be seeing them anyway.
  • 8 years ago

    Thank you all! These are all great tips and are making me feel more confident that we can tackle this :)

  • 8 years ago
    last modified: 8 years ago

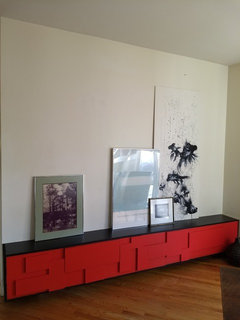
    I did something similar to what you are describing a week ago. I looked at Ikea bookcases but decided to go with just plain shelving instead. I wanted a cabinet that was about 12 inches deep, 20 inches tall, and 120 inches wide. I made a wood frame out of 2x2's and attached it to studs at the height I wanted the cabinet to be. The total project required 2 different widths of shelves. I used 12-inch wide shelves for the top, sides, and bottom. I used 15-inch shelves for the face. I hinged the top in 2 separate pieces. I then took my leftover shelves and cut them into random sized rectangles and squares and attached them to the face. Then I painted the face. The entire project cost me about $80. I would have preferred to have the cabinet open from the face instead of the top. I couldn't get the doors to align perfectly straight so I decided to have it open from the top instead.

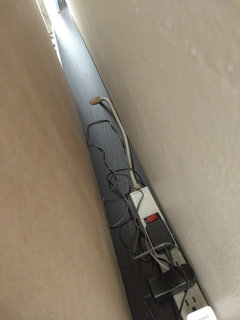
    As for the cords, I just drilled a 2" circle into the top of one of the panels to feed cords through.

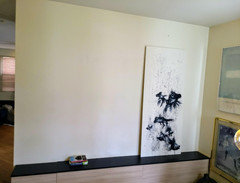
    This is what it looked like after I got all the shelves attached to the base

    This what it looks like after I added rectangles and squares to the face and then painted.

    Cords

  • 8 years ago
    Ilikefriday: I love what you created - looks amazing! Great job! Thank you for sharing.