Software
Houzz Logo Print
cwppwc

DIY Kitchen Remodel

7 years ago
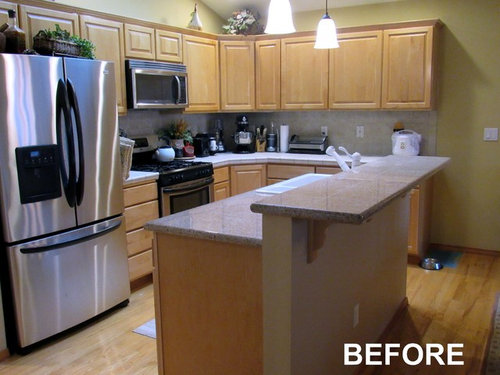
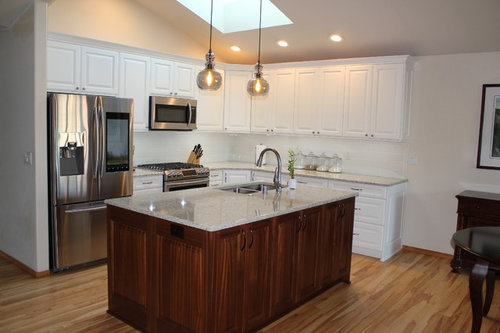
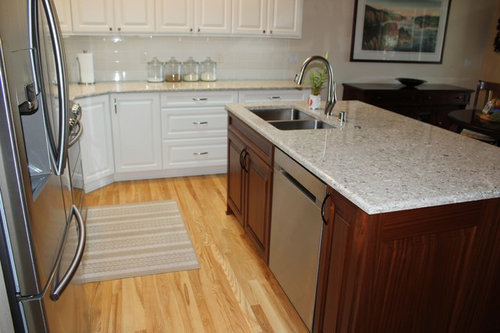
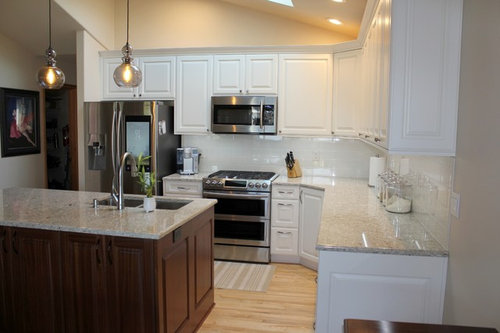
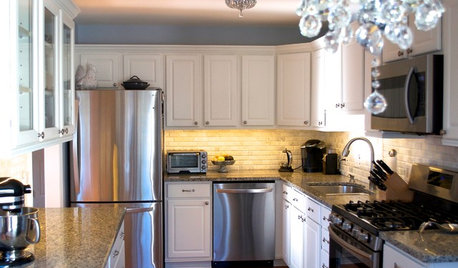
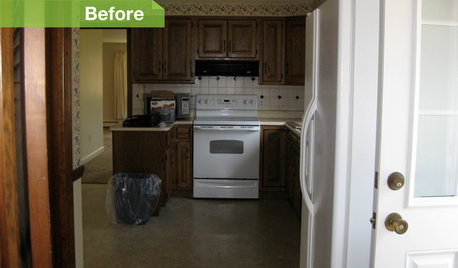
Recently retired, I've used small projects around the house to keep me occupied. So when my dear wife mentions she would like to update the kitchen someday, it was like waving a treat in front of our pug. I'm all over it! As an intermediate DIYer, I thought I could, with the help of a designer, order cabinets and install them myself. So with my budget in mind and kitchen measurements in hand, I head to my big orange box store for my appointment with the "designer". Her first question was "What's your budget?" Fair question but as soon as I told her, her demeanor completely changed. I reiterated I was doing the install myself and wanted USA manufactured cabinets made with a plywood box, no particle board. She immediately became very condescending to the point of being rude. I left vowing never to return. I turned to the internet and after a LOT of research, I found a manufacturer who not only sourced all materials from the USA but utilized a unique RTA construction that assisted in greater quality with the benefit of reduced cost. Their boxes are made from 3/4" Oregon plywood and they have a great selection of door styles and wood types. All hinges and drawers slides are soft close. What really had the most impact on the final product was the fact that they let you use a trial version of the software they use with their cabinets. We went through at least a half dozen iterations before settling on our layout. We then determined that we wanted off white cabinets on the two walls with sapele wood finished in tamarack for our island. We ordered the upgraded cabinets for my original budget planned and about $5,000 less than the inferior cabinets the box store attempted to sell me. There was about an eight week lead time which provided me with more than enough time to order every other item required before the cabinets arrived. To make this long story shorter, here are a few pictures of the before and after. I did all the demo and install, including backsplash, electrical and plumbing. The only item contracted out was the countertop. I would be happy to share the specifics of the project if there is any interest.


Comments (32)

  • 7 years ago

    Lovely, from another DIYer. :)

    MICHAEL HARTMAN thanked Hillside House
  • 7 years ago

    Wow!

    MICHAEL HARTMAN thanked cat_mom
  • 7 years ago

    You did a fantastic job! The cabinets look so much better going up to the ceiling. All the extra cabinetry must be so nice.

    MICHAEL HARTMAN thanked weezel
  • 7 years ago

    please post your sources, very well done!

    MICHAEL HARTMAN thanked silicon74
  • PRO
    7 years ago
    It is an improvement. I would have painted the island instead of using that wood or matched the wood to the flooring.
    MICHAEL HARTMAN thanked Flo Mangan
  • 7 years ago

    It looks great! I am in the process of DIYing my own budget kitchen remodel (everything except the counters) It has certainly taken longer than it would have if I had payed someone else to do it BUT I am truly amazed at how much I've been able to learn over these past few months! Enjoy your new kitchen!

    MICHAEL HARTMAN thanked eer2099
  • 7 years ago

    Gorgeous! I really love the wood on the island. So rich looking. Congrats on a job well done!

    MICHAEL HARTMAN thanked Patti
  • 7 years ago
    last modified: 7 years ago

    It looks so much bigger! Taking the island to one level made a huge difference. I like the contrast of the dark wood island against the floor and the perimeter cabinets. Would you mind sharing the cabinet company that you ordered from?

    MICHAEL HARTMAN thanked wilson853
  • 7 years ago

    Beautiful. Will you share your cabinet source?

    MICHAEL HARTMAN thanked emilyam819
  • 7 years ago

    Very nice! I love it.

    MICHAEL HARTMAN thanked Cadyren
  • 7 years ago
    last modified: 7 years ago

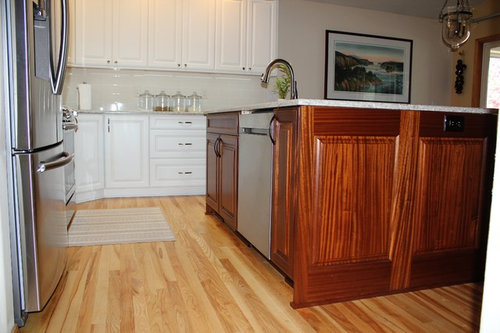
    Thank you all. The cabinet manufacturer is Barker Cabinets. https://www.barkercabinets.com/default.asp They were awesome for my project. Answered questions quickly, have a online user forum and responded quickly when there was a mistake in the way they cut one cabinet. I learned so much during this project. Our home is a medium high priced home for our area and I couldn't believe the absolute crap used for cabinetry. Mostly particle board with wood face and cheap slides. Shelving in the base cabinets had bowed over time. Literally one swing of a hammer and the cabinet boxes fell apart which was awesome for demo. I went with all drawers on the base wall cabinets except the corner lazy susan and and the mixer pop-up cabinet. On the island, I flattened and extended it with shelving cabinets on the dining side. The extra storage gave us a place to store all the appliances which had been on the counter.

    As for why we used the sapele and tamarack stain for the island, the kitchen is open to the breakfast area, butler's pantry and family room. All our furniture is a dark cherry or dark stain and we thought that besides loving the grain of the sapele, the island would flow easily with all the furniture we have. We wanted the island to look or feel more like another piece of furniture. This is our retirement home and we aren't going anywhere, hopefully for a long time.

  • 7 years ago
    last modified: 7 years ago

    Manufacturers utilized are: Barker Cabinets, MSI quartz countertop, Giorbello ceramic 4X12 beige subway tiles, Samsung appliances, Krause sink and Delta faucet. Total cost of the project was $23, 716.07 and included over $400 in samples which for me was money VERY well spent.


    As a side note, I really lucked out on the quartz countertop. The two local retailers of MSI quartz only sold by the slab making the countertop as much as the cabinets. Attending the Seattle Home Show, I found a retailer who sold MSI quartz by the square foot. They were much farther away from our home and even with a $400 trip charge, they were $1,200 cheaper than my "local" retailers. Lesson learned.


    Second side note: I made sure absolutely every one of cabinets, appliances and all hardware was onsite BEFORE beginning demo. I even planned the number of GRK fasteners I would need to attach the cabinets before starting. Made a world of difference with the installation.

  • 7 years ago
    Looks great! I like the contrast between the wood island and your light wood floors. That island looks much, much better than the original island. Very pretty kitchen, you should be proud... I’m quite sure your wife must be! My hubby and I also totally diy remolded our kitchen; it was a gut job and we changed many of the appliance locations so electric, plumbing, and gas had to be changed, but the only part we outsourced was the fabrication and installation of the granite counters. It sure isn’t an easy job, but if you’re patient and pay very close attention to details it is possible, and highly rewarding! (Even if it takes longer than hiring it out... LOL!)
    MICHAEL HARTMAN thanked skmom
  • 7 years ago
    last modified: 7 years ago

    It looks fantastic! Making the island one level was a game-changer for the entire kitchen. I disagree with Flo Mangan about the island color. Had you "painted the island instead of using that wood or matched the wood to the flooring" as she said, it would have looked like the thousands of other kitchens out there. Conforming to what everyone else is doing makes some people more comfortable. I am so glad you did that sapele wood for the island. It's great.

    MICHAEL HARTMAN thanked Shannon_WI
  • 7 years ago
    Will you marry me?
    MICHAEL HARTMAN thanked Laurie Tillett
  • 7 years ago
    The stained wood island is splendid!
    MICHAEL HARTMAN thanked Crystal Gomez
  • 7 years ago

    Wow. Fantastic! (Was this cabinet company around when we did our kitchen a dozen years ago?! Exactly what I wanted. Bookmarking their site.) I love how your island's colour ties in to the furniture in the next room. Your kitchen is beautiful and you must be so proud. Thanks for sharing.

    MICHAEL HARTMAN thanked tartanmeup
  • 7 years ago

    Beautiful! Well thought out design layout and details! Enjoy it!

    MICHAEL HARTMAN thanked Newhome2018
  • 7 years ago

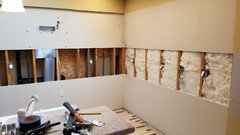
    Just a tip about removing the old backsplash when replacing cabinets. I watched YouTube videos showing people prying old backsplash tiles off the wall, usually taking part of the wall with it. Then using drywall compound to fill in the "divots". Labor and time intensive. What I found that was really fast for me and provided a new surface was to just cut through the tile/drywall above and below the backsplash. I was able to remove almost the whole section in one piece and then replace with new drywall. The whole process took less than two hours from removal to installing drywall then taping the seams. I had a perfectly flat foundation for my new 4X12 tile backsplash.


  • PRO
    7 years ago

    Nicely done! Your wife is a lucky woman!

    MICHAEL HARTMAN thanked Anglophilia
  • PRO
    7 years ago

    Love how the island contrasts the white cabinets, really adds a nice touch.

    MICHAEL HARTMAN thanked Designer Drains
  • 7 years ago

    Beautiful! Love the contrasting island too!

    MICHAEL HARTMAN thanked townlakecakes
  • 7 years ago

    Another tip: I used the EZ Level system for my base cabinets. It allows for millimeter adjustments to ensure your base cabinets are perfectly level which is so important when using granite, marble or quartz countertops. http://www.ez-level.com/?gclid=EAIaIQobChMIteqq5MLP3gIVF8RkCh0ajw-XEAAYASAAEgJ0D_D_BwE

  • PRO
    7 years ago

    Looks great!

    MICHAEL HARTMAN thanked OTM Designs & Remodeling Inc.
  • 7 years ago
    Nicely done and well presented, thank you for sharing.
    MICHAEL HARTMAN thanked Bette P
  • 7 years ago

    Thanks for sharing and the tips. The one about removing the backsplash is on target. I had my kitchen done earlier this year and that is exactly what the contractor did - cut it out instead of trying to remove each tile. We also moved the electrical boxes as they were at different levels which is very noticeable when the plates are added.


    Great job and love the two tones, more interesting and I like the comment on why you did it. It shows you really thought about it. Enjoy

    MICHAEL HARTMAN thanked Toni Hamlett
  • 7 years ago
    last modified: 7 years ago

    For those in western Washington, I used Granite & Marble Specialties located in Kent, Washington. https://www.granitemarblewa.com/ They sold me the MSI quartz countertop by the square foot rather than by the slab. I dealt with Millie Leung who was absolutely awesome from start to finish. Even though I am two hours from their facility, they only charged me a $400 trip charge. That included the gentleman who came and took the digital measurements AND the two gentlemen who later came to install the countertop. Millie knew I was concerned about seams and reassured me that their seams are virtually invisible but she would do her best to find a slab they could cut a single piece from for the back wall. Knowing the back wall counter was right at the length of a standard slab and knowing the counter has a 45 degree extension to the right side of the stove, I was expecting a seam. When the installers arrived, I was amazed to see them wheel in the one piece counter. They expertly wheeled the long counter around the island and lifted it into place without touching the base cabinets or island. It was NOT an easy task at all. At completion, I tipped both installers which caught them off-guard. Evidently they had never been recognized like that in the past. From what I observed, they were true artists at their craft.

    Even with the $400 trip charge, I save $1200 over my "local" MSI quartz countertop retailers as they only sold by the slab, not the square foot and they had miscellaneous charges for items like the edge I chose. This was just my experience with Granite & Marble Specialties but it was great from my perspective. Millie's email is: millie@granitemarblewa.com

  • PRO
    7 years ago

    Looks nice! Enjoy those new appliances!!!

    MICHAEL HARTMAN thanked PRM Custom Builders
  • PRO
    7 years ago

    Great job all around! Looks brighter and more inviting. That island is a great focal point and looks to be more functional with extra storage.

    MICHAEL HARTMAN thanked HomeDecorAZ
  • 7 years ago
    last modified: 7 years ago

    Thanks bikertoni. I was lucky in that the backsplash on both walls was 8 feet each. My backsplash was 18" high. I cut 3" above the backsplash and 3" below. (24") With a 4' X 8' piece of drywall, I cut it into two 2' X 8' pieces. After cutting out for the outlet boxes, it slide right into place and the seams are behind the upper and lower cabinets. Worked slick! The other benefit was that it allowed me to make a clean connection for my new under-cabinet lighting.

  • PRO
    7 years ago

    Brilliant! Nicely done Michael! I'm impressed! You have patience and skill obviously.

    MICHAEL HARTMAN thanked Flo Mangan