Software
Houzz Logo Print
williambrian_smith

HELP! Wonky Wall Tile Job

6 years ago
last modified: 6 years ago
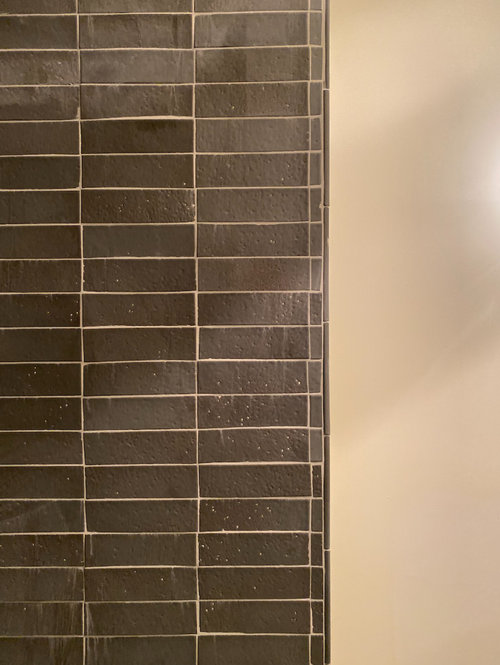
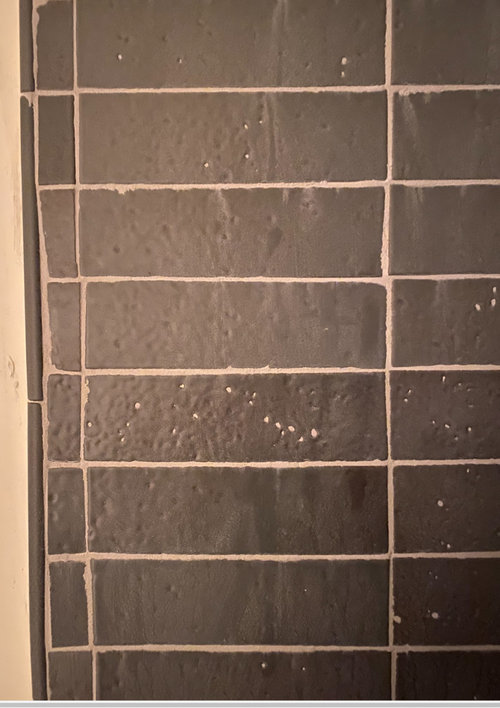
I recently went to check in on a shower tile job for an apartment renovation, and I'm quite baffled at the result. We weren't going for a rigorous perfect line up, and don't mind a slight shift here and there. But this just doesn't sit right with me.


The tile is glazed ceramic with slightly uneven edges and we wanted them installed stacked horizontally.

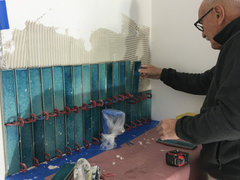
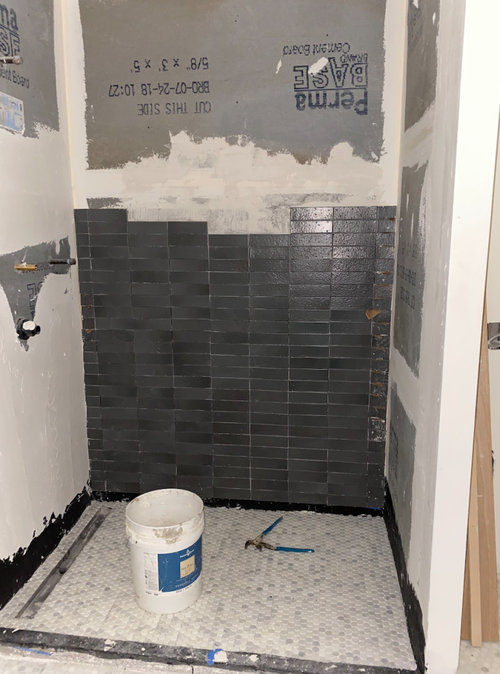
I'm attaching some photos of the installation process and result. The image with the guy on the ground with the laser and other process photos were (conveniently) not sent to me, but to the client only. Because I was traveling I only saw the finished result.

Can anyone help me out here? What went wrong? Suggestions on fixing (dye the grout dark so the lines aren't noticeable)? Rip it all out and re-do it? What questions/comments should I bring up to the contractor?

Thank you all for your help!


Comments (37)

  • PRO
    6 years ago

    For starters I never use ceramic tile at all , porcelain is the way to go . Wavy edged tile is not perfect so how did you expect a perfect tile job. Stacked pattern IMO is a contemporary look and needs to be done with perfect tiles.There are however some real misses in this tile job. No matter how wavy the tile they still need to line up next to each other which certainly did not happen in many spots . Of course the light grout shows every error for sure. His laser didn’t do him any good obviously. IMO it is a rip out job but I guess you will need to confer with your client.

    W. Brian Smith thanked Patricia Colwell Consulting
  • 6 years ago

    Imperfect tiles look imperfect. I think it would look good with dark grout, depending on the style of the house, but it doesn't really go with the selected floor. All that said, was the waterproofing done correctly?

    W. Brian Smith thanked jslazart
  • 6 years ago

    They look like nice handmade tiles. I like the variation. The contrast grout shows all flaws.

    Tiling on backer board if the walls aren't initially even will create problems...likely need an old school floated mud base with thicker grout lines and different pattern.

    An architect friend of mine redid his bathroom with similar style tiles/layout and the tile job came out similar to yours. He seems to like it.

    W. Brian Smith thanked mmilos
  • PRO
    6 years ago

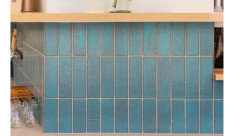
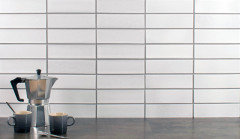
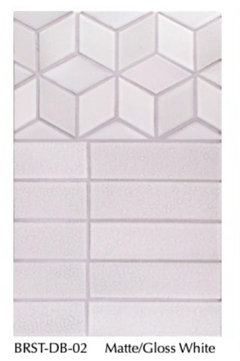
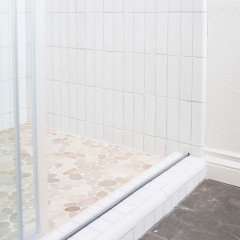
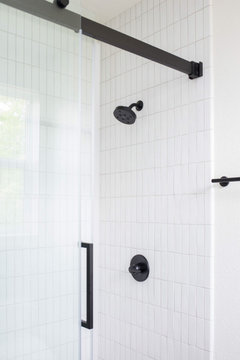
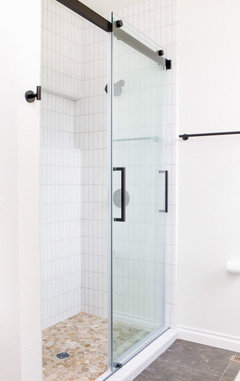
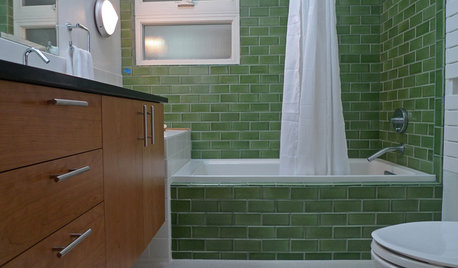
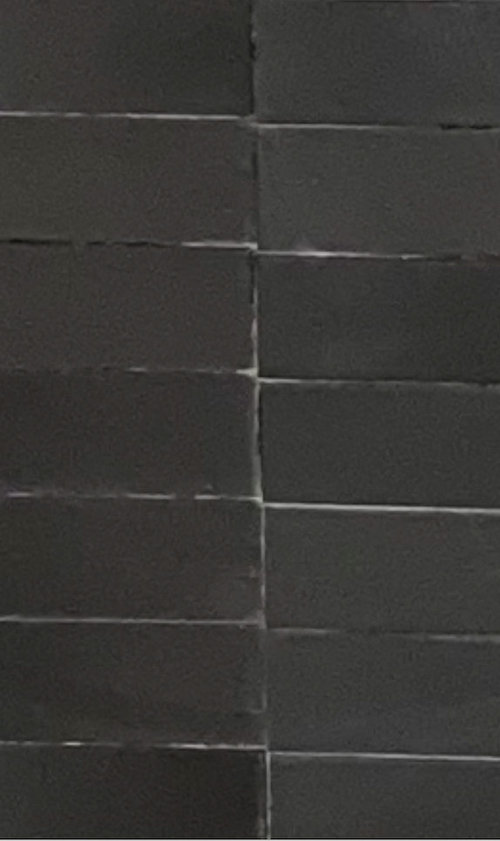
    @Patricia Colwell Consulting thank you for your comments! Don't expect a "perfect" job, but this looks more totally skewed than, say, having some slight variation, which is expected. I've seen it done before with pretty good results. And yes, that laser!!! haha. Attaching some images here with similar tile and more what we were going for. The image with the "matte white gloss" tile is from the vendor website from the same tile series. There's some slight shifting going on, which is perfectly fine and expected but what we got seems a little too far off...right?


  • 6 years ago
    last modified: 6 years ago
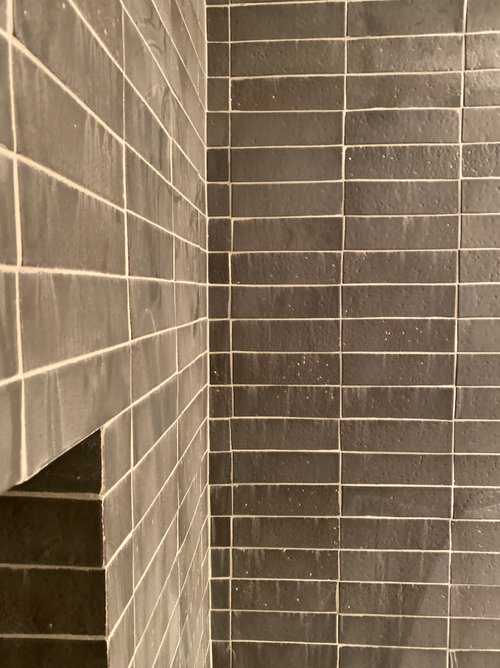
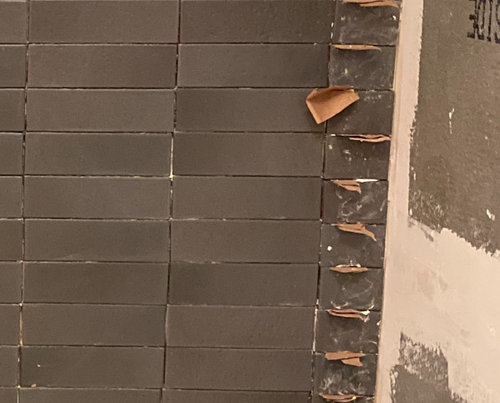
    I've heard of tile like this being very hard to install stacked, they are never all the same size. It takes a real professional who will take the time to sift through tiles to get this type of layout right with that type of tile. That being said, that is one of the most awful jobs i've seen on this site. It's trippy to look at! I'm thinking the white grout makes it even worse than it is. They used cardboard pieces for spacers in between? This is for sure a rip out and do over... I'd choose different tile too. It's beautiful but maybe in a brick or herringbone pattern for a kitchen backsplash instead.

    W. Brian Smith thanked itsourcasa
  • PRO
    6 years ago

    Hand made tiles demand a wider grout line between the pieces; no way to fix other than remove, and decide if the style of the tile works for the project.

    W. Brian Smith thanked Skippack Tile & Stone
  • PRO
    6 years ago

    The tiles are really nice but I agree with above - the grout line is too small to handle the variations in size and wave of the tile. I don't feel like folded pieces of paper are suitable as spacers.

    So sorry this happened.


    W. Brian Smith thanked Debbi Washburn
  • 6 years ago

    I see no waterproofing over your cement board tile backer? Your looking like a do over just for that.........................

    W. Brian Smith thanked millworkman
  • 6 years ago

    We did our own stacked tile in our kitchen backsplash. First time installing tile and it lined up perfectly. Big goof up he did was not using spacers. This is a mess. I can't see how so many pro tile installers can make such a mess of it. Tile isn't really that hard to install. We thought it was going to be a lot harder than it was. A little preplanning layout, spacers and a level line.

    W. Brian Smith thanked functionthenlook
  • 6 years ago
    last modified: 6 years ago
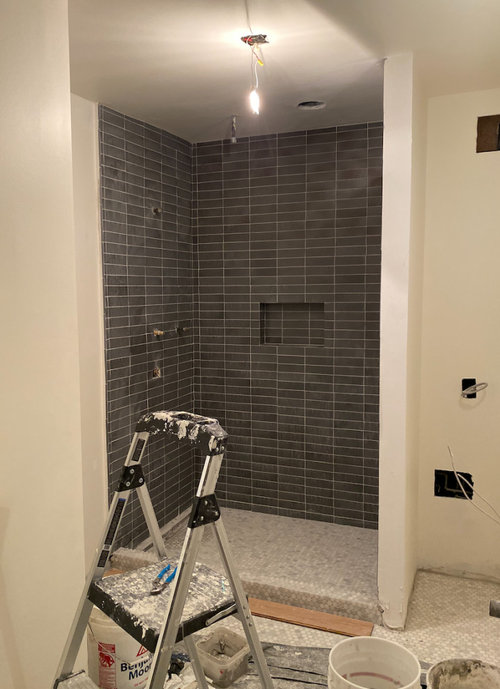
    You can’t use spacers when every tile is a different size. You’d get even spaces and a totally wandering all o er the place pattern, because they are irregular, as a desired feature. That’s what you get with handmade irregular tile. You get irregular everything. You needed much wider grout lines to disguise this more.

    Your technician, who is not a true tile contractor, has good instincts. He just doesn’t have the basic construction skills and experience. He probably did have the lowest bid.

    It’s all moot. The underneath isn’t done correctly. That too is attributable to hiring the cheap quote guy.

    https://www.ceramictilefoundation.org/homeowners-guide-to-hiring-qualified-tile-installer

    https://www.ceramictilefoundation.org/find-certified-tile-installers

    W. Brian Smith thanked User
  • 6 years ago

    Those tiles are too small and irregular to be installed in a stacked pattern. A running bond pattern with a 1/3 overlap would have disguised this jarring variation. If your installer were competent, he would have advised you to lay them differently. However, the fact that there seems to be no waterproofing membrane on the walls indicates that he is a hack. Unfortunately, your choice is to: 1) redo this now properly, or 2) wait until it inevitably fails and redo it.

    W. Brian Smith thanked kudzu9
  • 6 years ago

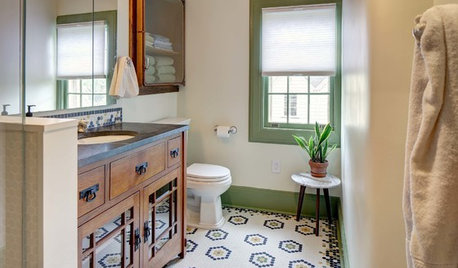
    Is that penny tile wrapped around the curb? Some nice materials here, and some questionable design decisions. Maybe the do-over is a blessing.

    W. Brian Smith thanked scottie mom
  • 6 years ago

    Permabase is made for showers. No membrane is needed.

    W. Brian Smith thanked functionthenlook
  • 6 years ago
    last modified: 6 years ago
    Direct copy from National Gypsum website: "PermaBase is highly moisture resistant".

    Note "resistant"...NOT "waterproof". It's a tear-out.

    W. Brian Smith thanked chiflipper
  • PRO
    6 years ago
    last modified: 6 years ago
    Permabase does not require a membrane to be placed on top of the material, based on the information on their site. It only calls for mortar in the seams, which these photos show. It is code approved for wet area installations. These posts advising people to rip out perfectly fine showers are getting out of hand.

    Wonky tile job is the result of wonky tile.

    Edited to add link to Permabase documentation: https://nationalgypsum.com/file/PBDIY.pdf

    W. Brian Smith thanked Kristin Petro Interiors, Inc.
  • 6 years ago

    It is not waterproof. Water passes thru it is essentially just a type of cement board. It still needs waterproofing unless you want rot.

    W. Brian Smith thanked millworkman
  • 6 years ago

    Permabase is not damaged by water itself, but like any other standard cement based backer board, it’s porous. It allows water to pass through it, and the board itself maintains it’s structural integrity. The wood stud and insulation behind it will be damaged by the water that passes through it.


    Permanase must be waterproofed in an additional separate step.


    “PermaBase is highly moisture resistant, and will not rot, disintegrate or swell when exposed to water.“


    https://nationalgypsum.com/products/Product.aspx?ProductID=2393

    W. Brian Smith thanked User
  • 6 years ago

    What went wrong?
    Could it have been discount tile, wrong materials, amateur installer, cardboard spacers, light grout, not enough light, no owner or supervisor on site? One or more of the above?

    W. Brian Smith thanked felizlady
  • PRO
    6 years ago

    Concerning the Permabase pdf documentation. This is just a general product description brochure and it does not cover everything. Further investigation of the building code is required to understand the limitations of these cement tile backerboards and when they require the additional protection of an applied waterproofing membrane.

    W. Brian Smith thanked The Kitchen Abode Ltd.
  • PRO
    6 years ago

    Here is an excerpt from a more detailed Permabase Document.


    "Water Barrier: While PermaBase® is unaffected by moisture, a water/air resistive barrier (WRB) must be installed to protect the cavity. The type and specific placement or location of the water barrier will vary based on local building codes and/or manufacturers' warranties. Consult the WRB manufacturer’s recommendations for specific installation guidelines. "


    W. Brian Smith thanked The Kitchen Abode Ltd.
  • 6 years ago

    They’re a very rustic tile. Beautiful but could have done with a wider grout line to accommodate the variations in the tile.

    W. Brian Smith thanked lilacblumen
  • 6 years ago

    When you redo this (and after you have vetted pro that knows correct install) I’d suggest looking at a grout to match the tile, Anatolia makes a quartz sill product called Marmilene that will provide a nice crisp frame to clean edge for glass shower door. And don’t be afraid to end tile farther out from shower so you don’t have that small strip at the edge. Sorry you are learning from the school of hard knocks.

    W. Brian Smith thanked thinkdesignlive
  • PRO
    6 years ago

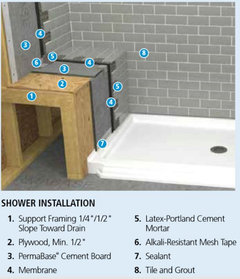
    Here is the Permabase assembly pic. Note Item #4 "Membrane".


    W. Brian Smith thanked The Kitchen Abode Ltd.
  • PRO
    6 years ago
    last modified: 6 years ago
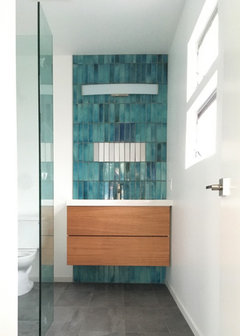
    Used a similar tile here, stacked, with handmade, irregular tile. The grout lines are as small as possible but had to be larger because of the hand-made imperfections. If you look close the grout line remains straight and at some points thicker since the tile may be smaller. However, the tiles itself never overlap or hang above/below the grout line...if that makes sense? The tiler was very skilled and said it was extremely hard for him since he's a perfectionist (thank God). Hope these images can be used against your tile job which *I think* was not done by a skilled professional:


    Overall, slight irregularities, which should be expected with handmade tile. However, your imperfections feel far from "slight." Hope the images help to build your case.

    W. Brian Smith thanked User
  • 6 years ago

    Glo... gorgeous work! Also, where is your shower door from?

  • PRO
    6 years ago

    From a local place called Aluma Glass. It's the "Novara Enclosure"

    W. Brian Smith thanked User
  • 6 years ago
    last modified: 6 years ago
    Ouch, OP! Your post pains me, but thanks so much for sharing--it added needed info into my memory bank. (I still have two bathrooms to tile in our remodel.)

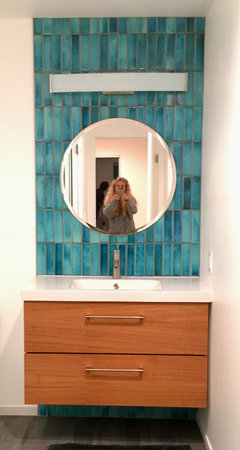
    FWIW, here's a feature wall in my kid's bath (his design) using handmade (irregular) ceramic tiles from Seneca. I watched our GC do the install. He worked quickly--finished this in about 90 minutes, which shocked me as it felt like it took him and his helper two weeks to tile our master bath using 12x24 rectified porcelain tiles!

    These Seneca tiles are supposedly 2 ¼" x 8" but there was a wide variation in size and I thought it might make our perfectionist-to-the-point-of-OCD GC completely nuts! As you can see, they hardly line up perfectly (varying heights/widths), but considering what he was working with, it was an impressive outcome. He's a big fan of these spacers!

    @User, just reread your comment above. What do you think?


    W. Brian Smith thanked Mittens Cat
  • 6 years ago

    @User, that's a fantastic job. I'm also wondering if the OP might ask the tile manufacturer for suggestions? Or at check out handmade tile powerhouses Heath, Fireclay, et al, to see samples of how it can be done? Like this: https://www.heathceramics.com/pages/bath-tile-installations#inspiration-collections/subtle-blues

    W. Brian Smith thanked Mittens Cat
  • PRO
    6 years ago
    last modified: 6 years ago
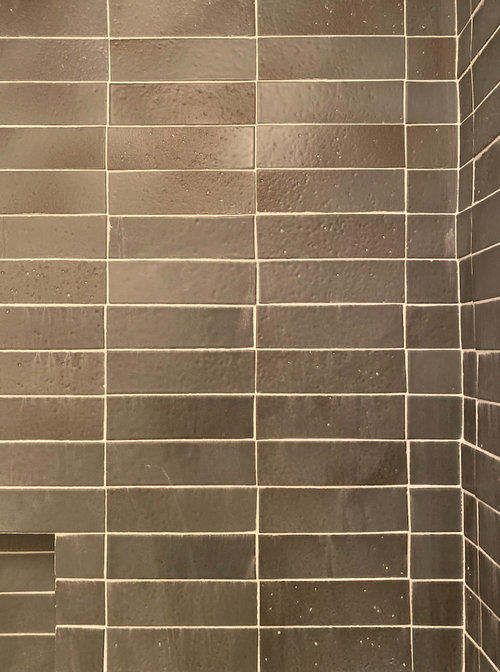
    Mittens Cat -Our projects are proof that it can be done and the design shouldn't have to change in order to accommodate a tiler's incompetence/lack of skill.

    W. Brian Smith thanked User
  • PRO
    6 years ago
    last modified: 6 years ago
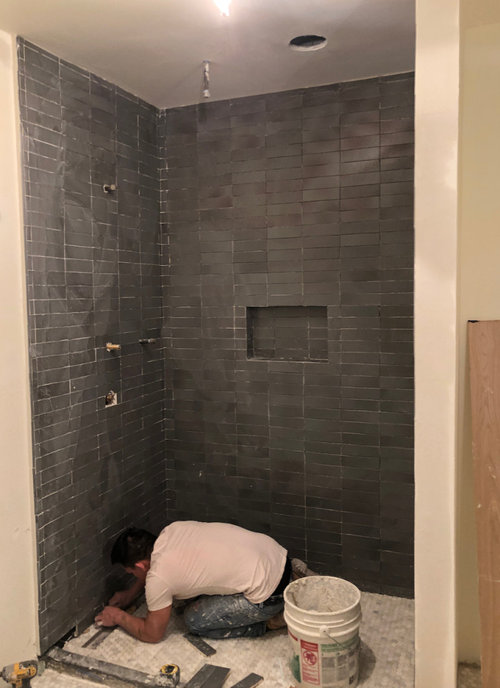
    @functionthenlook - You should reconsider providing advise about tile. Every comment you posted is completely incorrect. Tiling one backsplash to your expectations is not exactly considered trade knowledge.

    "Tile isn't really that hard to install" You must feel very confident with your vast experience.

    After 35 years I still come across projects with a high degree of difficulty and continue to learn everyday. Haven't used spacers in decades and they would not have helped on the OP's project. Wedges and a larger grout joint certainly would have.

    "Permabase is made for showers. No membrane is needed."

    ALL cement & fiber board require waterproofing as pointed out by others.

    W. Brian Smith please use caution on open forums. There have been some good links provided above. Always contact manufacturers for specific installation instructions.

    Your scenario. Wallboard does not have enough fasteners a 8" spacing is max. A wider grout joint is required for your selected tiles. The liquid waterproofing on the shower floor should have covered the walls also. That would be considered a bonded system. Depending on how the assembly was constructed beneath the shower floor tile could be another concern. If you have earlier progress photos they would be helpful.

    Good luck going forward

    W. Brian Smith thanked Creative Tile Eastern CT
  • 6 years ago
    last modified: 6 years ago
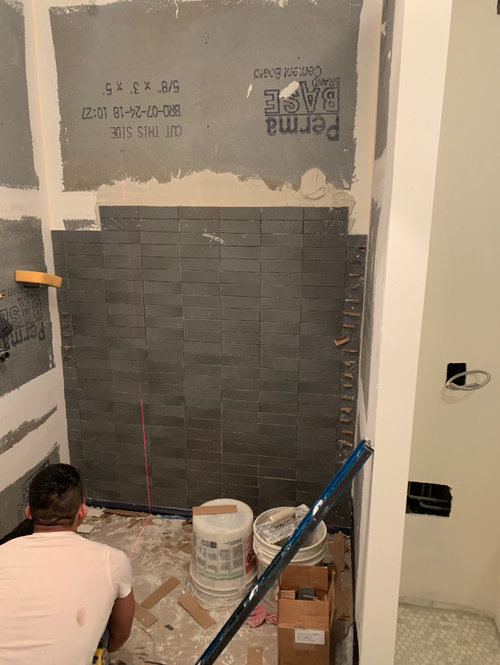
    Creative Tile Eastern CT

    Sorry, for the late reply, but we just returned from vacation yesterday,

    I stand corrected after further researching of permabase, I agree it should have a membrane. The sites are all over the place on this subject. Some say you don't need a membrane, some say the membrane should be placed between the studs and the permabase while others say the membrane should be placed between the permabase and the tile. My apologizes.

    I still stand by my comment that tiling isn't really that hard. I can't see how so many pros can mess it up so bad. With the knowledge and correct equipment it really isn't rocket science to install tile. No, my tile is not to "industry standard", it is better than "industry standard. I have seen many posts on this site of horrible pro tile jobs that meet " industry standards". It is fine if you like to guess-ta-mate or eye ball your grout lines, but I prefer straight and even grout lines that spacers give you. A bag of spacers is so cheap. We don't take short cuts or rush through a project. You don't need to be a hairdresser to know when you got a bad hair cut and you don't have to be a pro tiler to know when you got a bad tile job as the OP did.

    No, we are not pros nor do we want to make a living at home improvement, but we do have 44 years of experience of improving homes. We built our 2nd home. We subbed out the shell and except for the finish carpentry, flooring and HVAC we did the whole inside. Electrical, plumbing, insulation, drywall, painting, bathrooms , sewer lines, everything. It pasted and surpassed every inspection the first time. And when we sold the home the inspector commented on how well built the home was in his report. So, yes I do feel confidant in our vast experience. I am also proud to say if we are going to do a job we do it correctly and don't do short cuts to save time or money.

  • PRO
    6 years ago
    last modified: 6 years ago
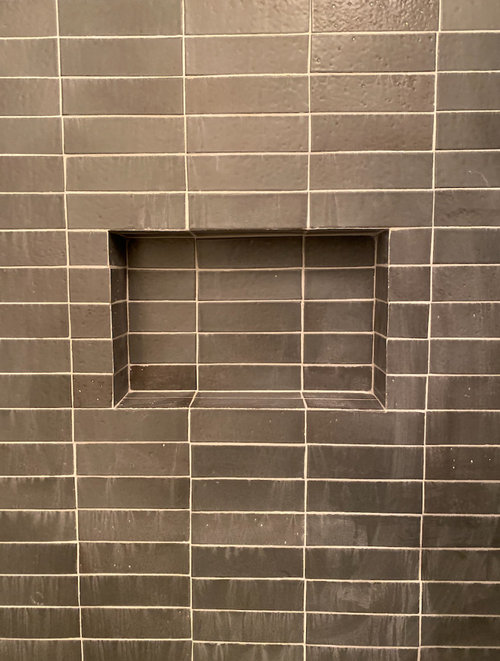
    "Big goof up he did was not using spacers." (original comment) Yet still defending.

    Looking at the niche photo. The three horizontal tiles at the bottom edge of niche clearly show the size variation and you think spacers would help. You have proven my point once again.

    Regarding cement board - Now that you realize CBU's require waterproofing you state. "The sites are all over the place on this subject." Actually there are multiple approved methods.

    " No, my tile is not to "industry standard", it is better than "industry standard." What can I say to that? I believe that statement speaks for itself:)

    I'll fully stand by my original comment.

  • 6 years ago

    thin grout line, over grouted in various areas causes it to look worse. Not much you can do now. No waterproofing as well has been stated.

  • 6 years ago

    Sorry, but that’s a total rip out, and I wouldn’t pay for it either.

  • 6 years ago

    I love that tile! Embrace the character (as long as installed correctly).

  • 3 years ago

    It's an imperfect mix of two styles. Stacked is a modern conceit that requires clean lines, the tile itself is more Boho, with a handmade look that is less exacting than modern standards. Only the most sophisticated of tile installers would have pointed out the potential problem in executing a blend of the two.