Software
Houzz Logo Print
amanda_breasbois_schulz

Help with subway tile backsplash

I may have to use the comments to add images.
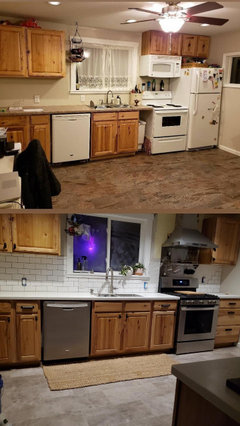
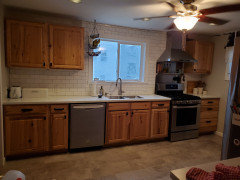
So, looking at other pictures here it feels like I'm the only one without a $25000+ budget but this is what I've got.
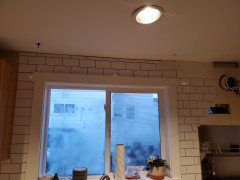
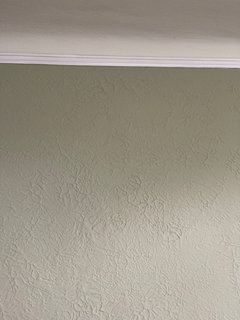
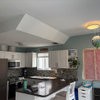
The drywall is uneven and the ceiling and wall joints aren't straight. I wouldn't venture to say nothing is straight in this place.
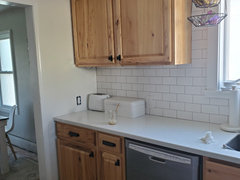
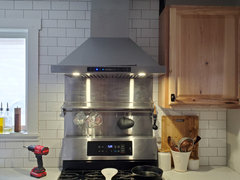
I found images on the web that showed tiles like this but now that I've done it stopping the stagger doesn't look right. Am I right?
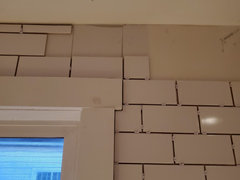
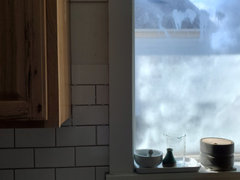
Also once I got to the other side I discovered the first row that extends across the top of the window trim won't match up with the rows running up the wall. I think my only solution is to trim the tops off so I can at least keep consistent grout lines. No?

Comments (23)

  • 5 years ago


  • 5 years ago


  • 5 years ago

    I'm no pro, but the sides look pretty good to me, the only part that looks a but funky is above the window? Did you do this yourself or did you hire someone to do it?

  • 5 years ago

    I think this is a case of you shouldn’t try to tile to the ceiling. It creates too many problems. Stop the tile at the cabinets.

  • 5 years ago

    First I want to express my admiration for the fact that you are doing this yourself. Next, I want to say that mmmm I am not sure that any extraordinary tile cutting has to be done. I am just going by the pictures because I didn't quite understand what you were saying in your post. But things look pretty straight as they are now.

  • 5 years ago

    What about removing the tiny top row and adding molding all around to disguise the unevenness? It would look really good, butted up against crown molding, and you add value to your home.

  • 5 years ago

    If molding is not what you want, grout and caulk will surely disguise any small unevenness.

  • 5 years ago

    Or how about this. Molding on top of your tile?

  • 5 years ago

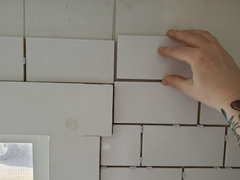
    Congrats on tackling this yourself. The "off" part is the stacked tile next to the window. It should continue in the brick pattern. In addition near the bottom of the cabinet on the left side, there is a strange cut, that should not be there.


  • 5 years ago

    No. I did not pay anyone to to this. Oir kitchen has been 100% DIY and we've never done any of this before. I've created this monster all on my own.

    This is my first time tiling anything.


    I plan to disguise the unevenness at the top with caulk and grout so it won't look so jacked at the ceiling. Unfortunately my ceilings aren't even a standard height to use crown molding im afraid would make them appear even shorter.


    I'll remove the weird cut tile ( I totally see that now and I'll continue on with the stagger up the side.


    As for the right side I can assure you it is at least a 1/2 inch off once the row that extends across the top of the window meets the row that extends up on that side. I will try to get a better image. On the right side I had to create a large gap between tiles to keep it somewhat uniform.


  • 5 years ago

    You can use a smaller picture rail at the top.

  • PRO
    5 years ago

    You're doing great! But you have to redo the left side, where you stacked full tiles to keep the correct pattern. That also means you'll need to cut the tiles in the row that is sitting on the window you to stay in the lines. And, above all select matching grout color :)

  • 5 years ago

    Rachel that ship had sailed. Its going up.the wall..I had stopped at the cabinets because I didn't want to remove our hood or make cuts around the hood and because i knew the ceilings were not plumb but my brother was all "go to the ceiling" and my husband was all " I'll do those cuts" and well.....here I am against my better judgement. The hood has been taken down and its tiled to the ceiling and I have no intention of going back now or dealing with the carnage behind the tile that removing them would cause.


  • 5 years ago


    Back at it.

  • 5 years ago

    Your tile job is better than the pros I hired. They didn’t bring spacers with them and I had them redo sections.

  • 5 years ago

    Part of the issue on the right side probably stems from not going from left, up around the window and then starting the right side. You may need to take the right side off as well. I don't see how this can be fudged. On the plus side, I have tile that extends to the ceiling around a window, and I can tell you, I rarely look up there. I look out the window. So perhaps if you fudge it, you won't notice it. Also, in our shower, where our ceilings are significantly uneven, and therefore the upper grout is too, with light grout you stop seeing that really quickly. Keep going!

    Amanda Breasbois-Schulz thanked simplechoices
  • 5 years ago

    The left side of the windows cannot be a stacked design. You must continue the same pattern as elsewhere. Do not change the joint line like your showing above the window on the right. If you can’t keep everything consistent rethink why you really need tile everywhere. Very hard with uneven surface.

  • 5 years ago

    What’s your grout color? If you go anything but light, it will show every mistake at the top.

  • 5 years ago
    last modified: 5 years ago

    Fixing the wall, if you remove tile, is not difficult. If you learned to tile, then you can figure that out as well. You’ve done a decent job thus far, but I would have just hired someone, due to the issues you could run into. It’s really not that expensive. If nothing else, I would plan the rest out before fully installing it.

    Amanda Breasbois-Schulz thanked Steph
  • 5 years ago


    I chose Alabaster for my wall paint. Not pictured here. I have to caulk yet and add the crown molding to the cabinets. The project cost me less than $200.

  • 5 years ago
    last modified: 5 years ago

    Hiring contractors in this area next to impossible. They are few and far between. I have a tile guy on call who lives a few states away but he helped me a lot.

  • 5 years ago

    It looks perfect @Amanda Breasbois-Schulz. Nicely done!