Software
Houzz Logo Print
am_flis

HELP! Poor tile installation & etc.

4 years ago
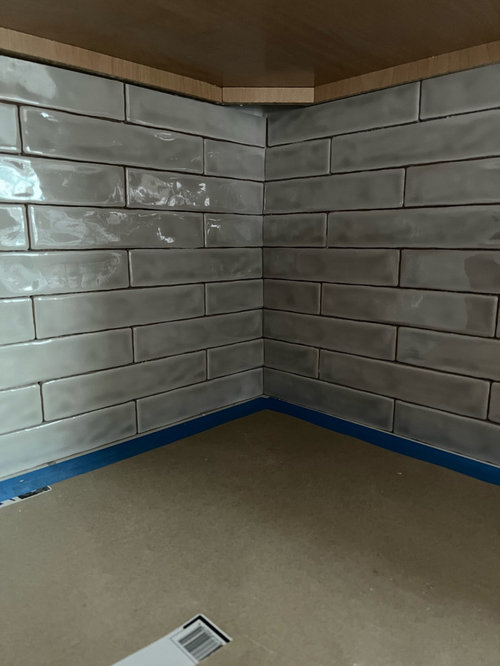
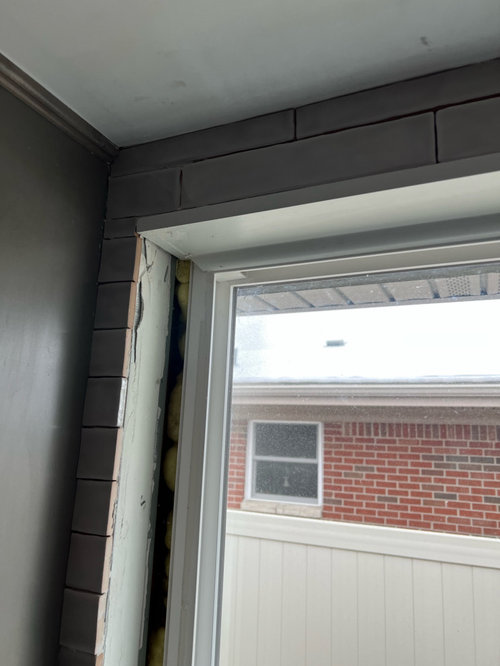
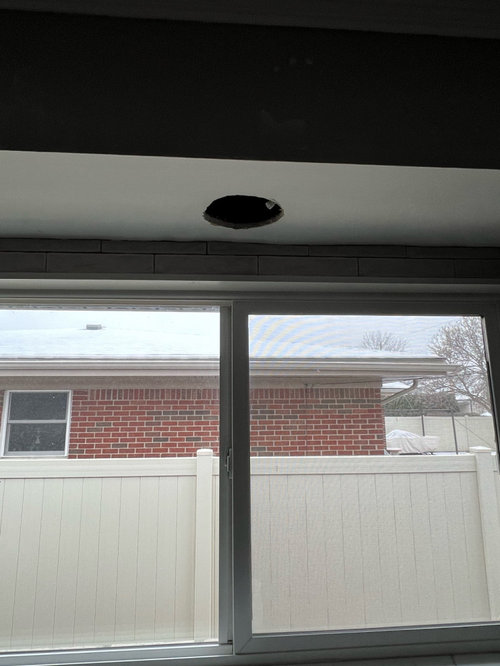
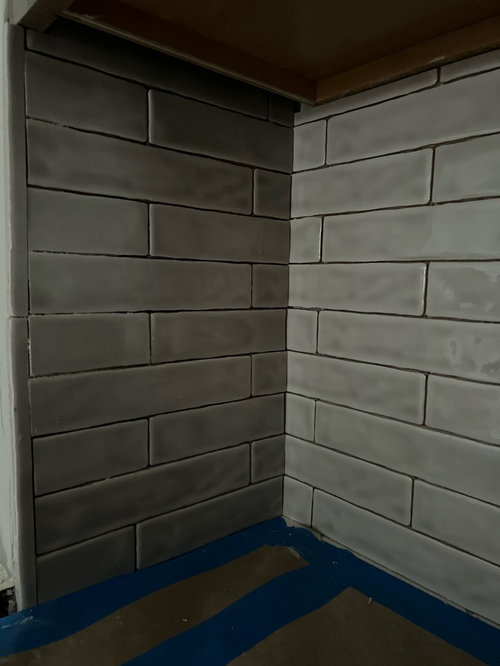
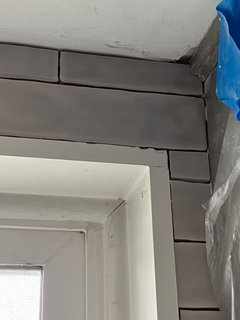
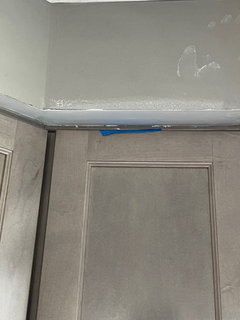
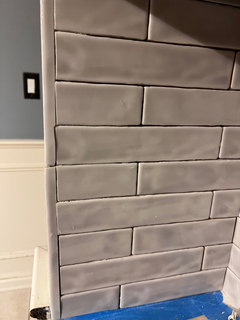
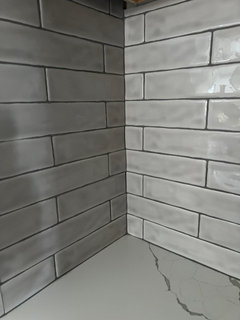
I thought this would be the best place to turn to and would great appreciate your advice. I’m very frustrated with the guy that’s working under the contractor. I was constantly pointing things out that needed to be fixed and he would always give me a hard time with a BS excuse why it can’t be installed a different way. I basically want to tell home to leave …. However I’ve been without a kitchen since June and it’s a week before Christmas this was all due to cabinets being delayed due to Covid. Just want this over with but I would like a decent job. In the pics you could see the corners are uneven & on top of the window the tile was purposely cut uneven to fit under the ceiling INSTEAD of sanding the ceiling. Im not sure what he was thinking?? I’m not sure what needs to happen before cabinet install, but the walls were NOT prepped from the old cabinets. The guy did some patching here and there and never sanded. There were still holes after the new cabinets went in. I want to scream!! Please help!!

Comments (16)

  • 4 years ago

    Here are a couple of more pics

  • 4 years ago

    More pics

  • 4 years ago

    I sympathize and see some good work here, but the mismatched joints - and especially the single tile next to the window that was ripped for an obviously undersized row - would drive me crazy. I once had a worse installation than this in a shower and made the installer tear it out and do it over. To your installer's credit, the corners look like they were "wrapped" reasonably well - it's just that some of the pieces should obviously have been cut to ensure the running bond pattern lined up, top to bottom.

    It's hard to say what the solution is without knowing the specific of your contract. I'd suggest first talking to your contractor, who should be responsible not only for the sub's work but also for making sure that any prep (e.g., the ceiling unevenness) was taken care of prior to installation. Good luck. I think that tile will be gorgeous once it's installed in a well-laid out pattern.

  • 4 years ago

    Thank you so much for your advice!

    The single tile next to window - the casing was originally removed to get the window sill out but he should have put it back before he tiled because now some of the tiles are too long and the casing won’t fit back. I will see what happens…

  • 4 years ago

    From what I can see in the photos, the odd size piece by the window is the most glaring error. Focus on addressing that first.


    What size and brand are your tiles? I am contemplating something similar.

    am_flis thanked julieste
  • 4 years ago

    I thought the same thing as Carrie B at first - that it was handmade tile - and I think that's correct, meaning that the edges and joints will not be perfectly consistent. However, the running bond joints in the last photo of the original post and the last photo of the first comment both show a couple of courses that are noticeably off. That's just sloppy - after the bottom course was installed, the installer should have lined up the courses above with the joints in that first course. I bet it's even more noticeable in person.

    am_flis thanked salex
  • 4 years ago

    Thank you all! It is more noticeable in person and unfortunately it is a sloppy job. I picked these tiles because they are wavy and multicolored. However, they are not installed very well. I’m sure there are worst jobs out there but this is pretty bad. I have to look at this every day and gets me so upset. Not sure what can be done with the hole in the corner next to window.

  • 4 years ago
    last modified: 4 years ago

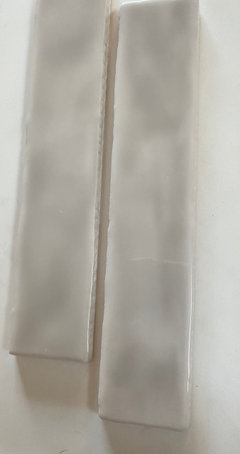
    This is what hand made style tile looks like when installed with a tight grout joint. You have unrealistic expectations. The install is fine. It is the tile choice itself that is creating your perception of ”sloppy”. The ine exception is the sliver by the window that was chosen in order to have a full tile in the more noticeable spot, instead of slivers in the more noticable spot. That should have been discussed, but wasnt necessarily a ”bad” choice choice, as it is in a non focal area, and was chosen to keep a more focal area looking better, without sliver cuts.

  • 4 years ago

    I‘d be ok with that tile job. The edges of the tile are so uneven there is no way to get a perfectly spaced look. i wonder if you would have been happier with straight edged tile? Tile installers are not responsible for rectifing crooked ceilings but you do need the hole in ceiling patched which should be no big deal for whoever did the drywall.


  • 4 years ago

    am_flis


    Can you give us the brand name and size of this tile please? I think that info may help others in the future who are contemplating this or very similar tile, especially considering the comments about it being a tile with an uneven edge.

  • 4 years ago

    I don't think the OP is concerned about the grout joints and edges not being perfect. The concerning part, as far as I can tell from the comments and just a couple of the photos, is that some rows don't line up with other rows - and that is a function of where the installer put each row rather than the uneven edge of these beautiful tiles. (Note that I have handmade tile for my backsplash, am not bothered by inconsistent edges - I think that's part of their beauty and uniqueness - but I don't have the misaligned rows that I see in two of these pics.)

  • 4 years ago
    last modified: 4 years ago

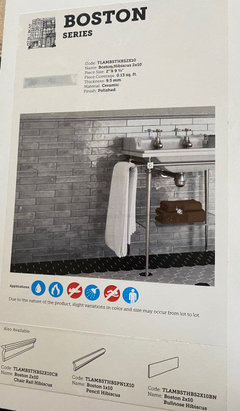
    I love this tile and here is the information:


    Boston Series Tile- Hibiscus

  • 4 years ago
    last modified: 4 years ago

    I'm not a professional, however, my concern was with the tile cuts and some of the uneven joints.

    Also, when going with this type of tile, will the corners look uneven like this or is there something that can be done so the final result won't look like this but an even straight line?


  • 4 years ago

    @am_flis, I think the corners actually look pretty good. Ideally the tile should look like it "wraps" the corner (i.e., the pieces on either side should together be about the length of a whole tile) - and the installer did that well.

    What bugs me is the seams or joints from row to row. On the bottom row, left of the corner, the vertical joint does not align with the joints above it. Same with the row that is 4th from the bottom on the right side. If these vertical misalignments continue in all rows as you move away from the corner, that would be pretty awful looking, IMO. In the product photo you shared in the previous comment, that bathroom wall appears to have joints that line up vertically, top to bottom, as they should.

  • 4 years ago

    @salex, Thank you for your insight!